Advertisement
Advertisement
Table of Contents

Related Manuals for Samsung SyncMaster 997MB Plus


Summary of Contents for Samsung SyncMaster 997MB Plus
- Page 1 SyncMaster 997MBplus Install drivers Install programs...
- Page 2 Notational Failure to follow directions noted by this symbol could result in bodily harm or damage to equipment. Prohibited Do not disassemble Do not touch Power When not used for extended periods of time, set your computer to a screen saver.
- Page 3 This may cause fire. Installation Put your monitor in a location with low humidity and a minimum of dust. Failure to do so may cause an electric shock or fire inside the monitor. Do not drop the monitor when moving it.
- Page 4 Install the monitor base in a showcase or shelf so that the end of the base does not project beyond the showcase or shelf. Dropping the product may cause damage to the product or personal injury. Do not place the product on an unstable or small surface area.
- Page 5 Clean When cleaning the monitor case or the surface of the CDT, wipe with a slightly moistened, soft fabric. Do not clean Flat monitor with water. Use a water-diluted mild detergent.
- Page 6 This may cause an electric shock or fire. Refer servicing to qualified service personnel. If your monitor does not operate normally - in particular, if there are any unusual sounds or smells coming from it - unplug it immediately and contact an authorized dealer or service This may cause an electric shock or fire.
- Page 7 Do not try to move the monitor by pulling only the wire or the signal cable. This may cause a breakdown, electric shock or fire due to damage to the cable. Do not move the monitor right or left by pulling only the wire or the signal cable.
- Page 8 Watching the monitor continuously at a too close angle may result in eyesight damage. To ease eye strain, take at least a five-minute break after every hour of using the monitor. Do not install the product on an unstable, uneven surface or a location prone to vibrations.
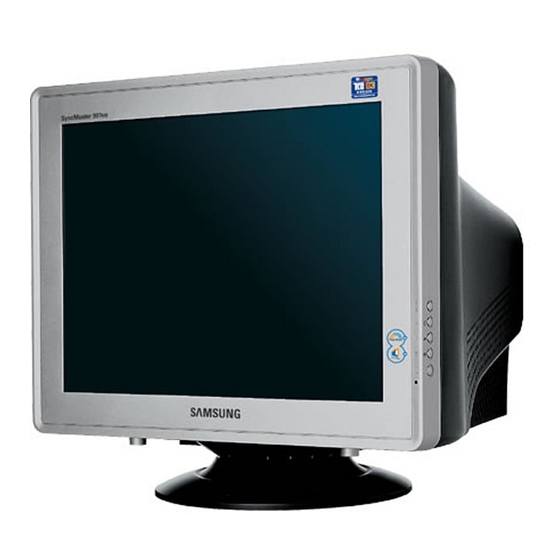
- Page 9 Please make sure the following items are included with your monitor. If any items are missing, Unpacking Monitor and Stand (Some models include a stand attached.) Manual Quick Setup Guide contact your dealer. User's Guide, Warranty Card Monitor Driver, (Not available in all...
- Page 10 Power indicator PowerSaver described in the manual for further information regarding power saving functions. For energy conservation, turn your monitor OFF when it is not needed, or when leaving it unattended for long periods. Signal Cable (Option) Opens the OSD menu. Also used to exit the OSD menu or return to the previous menu.
- Page 11 Rear General (The configuration at the back of the monitor may vary from product to product.) Power port Signal Cable BNC Connectors (Option) (The configuration at the back of the monitor may vary from product to product.) Power port General Connect the power cord for your monitor to the power port on the back of the monitor.
- Page 12 Connect the signal cable to the video port on your computer, video board, video card, or graphics card. Connect the power cord for your monitor to the power port on the back of the monitor. You can separate the base from the monitor.
- Page 13 General Connect the power cord for your monitor to the power port on the back of the monitor. Plug the power cord for the monitor into a nearby outlet. Connecting to a computer 2-1. Connect the signal cable to the 15-pin, D-sub connector on the back of your monitor.
- Page 14 Connect the power cord for your monitor to the power port on the back of the monitor. Plug the power cord for the monitor into a nearby outlet. Connecting to a computer 2-1. Connect the signal cable to the 15-pin, D-sub connector on the back of your monitor.
- Page 15 The base is detachable. Attaching and Removing the Base If your monitor was supplied with the base detached, attach the base as follows. Remove the twist-tie before attaching the base to the monitor.
- Page 16 2. Align the tabs on the base with the corresponding slots on the bottom of the monitor. 3. Press the base onto the monitor until the tabs are fully engaged in the slots. 4. Push the base toward the front of the monitor until the release latch clicks into the locked position.
- Page 17 4. If you can see following message window, then click the "Continue Anyway" button. Then click "OK" button. This monitor driver is under certified MS logo and this installation doesn't damage your system. The certified driver will be posted on Samsung Monitor homepage. http://www.samsung.com/.
- Page 18 3. Click " Display " icon and choose the " Settings " tab then click " Advanced.. ". 4. Click the " Properties " button on the " Monitor " tab and select " Driver " tab. 5. Click " Update Driver.. " and select " Install from a list or.. " then click " Next " button.
- Page 19 7. Click the " Browse " button then choose A:(D:\Driver) and choose your monitor model in the model list and click the " Next " button. 8. If you can see following message window, then click the " Continue Anyway " button. Then click "...
- Page 20 8. Click the " Open " button, then click " OK " button. 9. Choose your monitor model and click the " Next " button then click " Next " button. 10. Click the " Finish " button then the " Close " button.
- Page 21 Samsung Electronics in association with Korea Electronics & Telecommunications Research Institute (ETRI). This system is available only for Samsung monitors and makes the color of the images on the monitor the same as the printed or scanned images.
- Page 22 Opens the OSD menu. Also use to exit the OSD menu or return to the previous menu. These buttons allow you to highlight and adjust items in the menu. Use to select the OSD menu. MagicBright™ is a new feature providing optimum viewing environment depending on the contents of the image you are watching.
- Page 23 Brightness Menu When OSD is not on the screen, push the button to adjust brightness. MagicBright™ Menu Then push the MagicBright™ button again to circle through available MagicBright™ preconfigured modes. Highlight III Description Description...
- Page 24 Menu The Highlight Zone ensures the clear and sharp display of animated Highlight III multimedia or photo images by enhancing the brightness of a certain area on the screen. Select an icon that you want to know from the OSD menu to display a text or animation explanation of that icon.
- Page 25 The Degauss feature will remove color impurities caused by magnetic fields. Use the recall feature to reset these monitor settings to their original levels: Position, Size, Pincushion, Trapezoid, Parallelogram, Pinbalance, Rotation, H-Moire,and V-Moire. Note: If you have selected "YES", all settings listed above will be reset.
- Page 26 Use to adjust the monitor color setting.(Blue) Standard Red Green Blue (sRGB) is a defined default color space. If a monitor, printer and scanner are all calibrated to the sRGB color characteristics, then you can find color matching from each peripheral. When the monitor is in the sRGB mode, Brightness / Contrast / MagicBright™...
- Page 27 Follow these instructions to change the horizontal size of the monitor's entire display. Follow these instructions to change the vertical size of the monitor's entire display. Adjust the pincushion setting when the sides of the display are bowed in or bowed out.
- Page 28 This function is to adjust the sharpness of the Highlight Zone. You can see the frequency (user control mode) used by the user, the polarity of the operational signals, the default frequency (default mode) set when you buy the monitor and the resolution level.
-
Page 29: What Is Magictune
Monitor performance can vary due to the graphics card, host computer lighting conditions and other environmental factors. In order to get the best image on a monitor requires you to adjust it for your unique setting. Unfortunately, the manual controls available to tune the image often prove to be challenging. Proper adjustment (tuning) requires an easy to use program that goes through a step-by-step process to obtain the best overall picture quality. -
Page 30: Installation
Overview Installation OSD Mode Installation Insert the installation CD into the CD-ROM drive. Click the MagicTune™ installation file. Select installation Language, Click "Next". When the InstallationShield Wizard window appears, click "Next." Select "I agree to the terms of the license agreement" to accept the terms of use. Uninstall Troubleshooting... - Page 31 Choose a folder to install the MagicTune program. Click "Install." The "Installation Status" window appears.
-
Page 32: Installation Problems
Double-click the icon to start the program. Magictune execution icon may not appear depending on specification of computer system or monitor. If that happens, press F5 Key. Installation Problems The installation of MagicTune™ can be affected by such factors as the video card, motherboard and the network environment. - Page 33 Windows™ 98 SE Windows™ Me Windows™ 2000 Windows™ XP Home Edition Windows™ XP Professional It is recommended using MagicTune in Windows™ 2000 or later. Hardware 32MB Memory above 25MB Hard disk space above website * For more information, visit the MagicTune...
-
Page 34: Osd Mode
When selected, each tab displays a list of menus. For quick adjustment of the monitor settings, the OSD mode allows easy and convenient access to all tabs and sub-menu items. -
Page 35: Color Tab Definition
1. Text: For documentations or works involving heavy text. 2. Internet: For working with a mixture of images such as text and graphics. 3. Entertain: For watching motion pictures such as a DVD or VCD. Color Tab Definition Adjusts the "warmth" of the monitor background or image color. -
Page 36: Image Tab Definition
The tone of the color can be changed. 5000K - 6500K - 9300K Color Tone Reset Adjusts of the monitor image color. You can change the monitor color to your desired color. Color Control R- G - B sRGB Image Tab Definition... -
Page 37: Option Tab Definition
Geometry 1 Rotation Size Position Geometry 2 Pincushion Pinbalance Trapezoid Other Moire Degauss Sidepin Corner Top Pinbalance Corner Top Pinbalance Corner Bottom Adjusts the Position, Size and Rotation values. Geometry 1 Position Size Rotation Adjusts the Pincushion, Pinbalance, Trapezoid and Parallelogram values. Geometry 2 Pincushion Pinbalance... -
Page 38: Support Tab Definition
Help help installing or running MagicTune. The User Manual opens within a basic browser window. you can use the server to control the Client monitor. Asset ID (Server program should be installed to use this program as Client) User Name... - Page 39 User ID Server IP Department Location Version Displays the version of MagicTune. Shows the user ID that is register in PC. Write down the server IP . Write down the department. Write down the location.
- Page 40 Overview Installation OSD Mode Uninstall The MagicTune program can be removed only by using the "Add or Remove Programs" option of the Windows™ Control Panel. Perform the following steps remove MagicTune. Go to [Task Tray] ' [Start] ' [Settings] and select [Control Panel] in the menu. If the program runs on Windows™...
-
Page 41: Troubleshooting
Products from other manufacturers may cause errors. Only Samsung products are able to support this feature. An error may occur even when your monitor is manufactured by Samsung but is out of date. Check if your monitor is able to support MagicTune. - Page 42 Make sure to turn OFF Highlight before using MagicTune. Troubleshooting MagicTune may not work in case monitor is replaced or driver of graphic card is updated while MagicTune is operating. If so, please restart the system. Symptom...
- Page 43 MagicTune, FAQs (questions and answers) and software upgrades. website Visit the MagicTune and download the installation software for MagicTune MAC. the graphic card, visit our website to check the compatible graphic card list provided. http://www.samsung.com/monitor/magictune Download the latest program. The program can be downloaded http://www.samsung.com/monitor/magictune...
- Page 44 The Highlight Zone ensures the clear and sharp display of animated multimedia or photo images by enhancing the brightness of a certain area on the screen. Highlight Zone III features a combination of the circuitry and the program built on the proprietary technology of SEC.
- Page 45 Automatic detect 1. When the Highlight program is running, the monitor automatically detects the video-playing portion of your multimedia program and activates the Highlight Zone feature. No selection is necessary. Major multimedia programs: Windows Media Player, RealPlayer 8.0, video players on the broadcasters¡¯ websites, etc.
- Page 46 Manual detect In Manual Detect mode, you can either select a window or use the Drag function to create a Highlight Zone. 1. Selecting a window: Click the Highlight icon( Move the cursor onto the window of your choice and click once to Highlight the window. 2.
- Page 47 Exit Program 1. Exits the Highlight program. Automatic detect Manual detect Exit Program Auto Detect Picture Setting Full Screen Highlight Off Other Features...
- Page 48 Auto Detect 1. Allows user to disable Auto Detect when necessary. Once selected, this function saves the selection and keeps it in the memory regardless of exiting or restarting the program. When selected, a check mark (V) appears. Automatic detect Manual detect Exit Program Auto Detect...
- Page 49 Picture Setting 1. Can be selected only when the Highlight Zone function is on. When selected, a menu window appears which can be used to adjust Contrast and Sharpness within the Highlight Zone. After changing the setting, select OK to save the changes, or Cancel to return to the previous setting. Automatic detect Manual detect Exit Program...
- Page 50 Full Screen 1. Full Screen: Place the cursor on the Highlight icon( )on the Windows taskbar and right click your mouse once. Then select Full Screen from the menu. Automatic detect Manual detect Exit Program Auto Detect Picture Setting Full Screen Highlight Off Other Features...
- Page 51 Highlight Off 1. Cancels the selection of a Highlight Zone and reverts to the original screen. Automatic detect Manual detect Exit Program Auto Detect Picture Setting Full Screen Highlight Off Other Features...
- Page 52 Other Features The Highlight Zone function remembers the variables of the selected areas in Automatic and Manual Detect modes, respectively. 1. If the window selected as a Highlight Zone is moved or its size changed, the Highlight Zone changes accordingly. 2.
- Page 53 Adjust the maximum resolution and frequency that the monitor can handle properly. The monitor is in PowerSaver mode. Press any key on the keyboard to activate the monitor and restore the image on the screen. The signal from the video card exceeds the maximum resolution and frequency of the monitor.
- Page 54 (Refer to the Preset Timing Modes). Enter the OSD and perform a "Degauss". Keep the monitor away from any magnetic products. Adjust the frequency properly by referring to the video card manual and the Preset Timing Modes.
- Page 55 Visit the MagicTune™ website and download the installation software for MagicTune™ MAC. Check the following items if there is trouble with the monitor. 1. Check if the power cord and the video cables are properly connected to the computer. 2. Check if the computer beeps more than 3 times when booting.
- Page 56 Disconnect the power cord and then clean the monitor with a soft cloth, using either a cleaning solution or plain water. Do not leave any remains of the detergent nor scratch the case.
- Page 57 This box appears during normal operation if the video cable becomes disconnected or damaged. 4. Turn off your monitor and reconnect the video cable; then turn on both your computer and the monitor. If your monitor screen remains blank after using the previous procedure, check your video controller and computer system;...
- Page 58 A monitor recreates visual signals received from the computer. Therefore, if there is trouble with the computer or the video card, this can cause the monitor to become blank, have poor coloring, noise, unavailable video mode, etc. In this case, first check the source of the problem, and then contact a service center or your dealer.
- Page 59 General General Model Name SyncMaster 997MBplus Picture Tube Type 19"(48cm) DynaFlat (45.8cm viewable) Deflection angle 90 ° Dot Pitch 0.20mm (Horizontal) Screen type Aluminized tri-color phosphor dot trio with black matrix. Anti-doming invar shadow mask. Multi-layer coated with anti-static. Resolution Optimum resolution 1280 x 1024 @ 85Hz Maximum resolution...
- Page 60 This monitor has a built-in power management system called PowerSaver. This system saves energy by switching your monitor into a low-power mode when it has not been used for a certain amount of time. The monitor automatically returns to normal operation when you press a key on the keyboard. For energy conservation, turn your monitor OFF when it is not needed, or when leaving it unattended for long periods.
- Page 61 (kHz) VESA, 640 x 480 37.500 VESA, 1024 x 768 68.677 VESA, 1280 x 1024 91.146 Horizontal Frequency The time to scan one line connecting the right edge to the left edge of the screen horizontally is called Horizontal Cycle and the inverse number of the Horizontal Cycle is called Horizontal Frequency.
- Page 62 Service The address and phone number of the company can be changed without previous notice. AUSTRALIA : Samsung Electronics Australia Pty Ltd. Customer Response Centre 7 Parkview Drive, Homebush Bay NSW 2127 Tel : 1300 362 603 http://www.samsung.com.au/ BRAZIL : Samsung Eletronica da Amazonia Ltda.
- Page 63 Tel: 01-55-5747-5100 / 01-800-726-7864 Fax: 01-55-5747-5202 / 01-800-849-1743 RFC: SEM950215S98 http://www.samsung.com.mx/ IMPORTADO POR: SAMSUNG ELECTRONICS MÉXICO. S.A. DE C.V. Vía Lopez Portillo No. 6, Col. San Fco. Chilpan Tultitlán, Estado de México, C.P. 54940 Tel: 01-55-5747-5100 / 01-800-726-7864 EXPORTADO POR: Samsung Electronics CO.,LTD.
- Page 64 Tel. 214 148 114/100 Fax. 214 148 133/128 Free Line 800 220 120 http://www.samsung.pt/ SOUTH AFRICA : Samsung Electronics,5 Libertas Road, Somerset Office Park, Bryanston Ext 16. Po Box 70006, Bryanston,2021, South Africa Tel : 0027-11-549-1621 Fax : 0027-11-549-1629 http://www.samsung.co.za/...
- Page 65 Terms Dot Pitch The image on a monitor is composed of red, green and blue dots. The closer the dots, the higher the resolution. The distance between two dots of the same color is called the 'Dot Pitch'. Unit: mm...
- Page 66 Reproduction in any manner whatsoever without the written permission of Samsung Electronics Co., Ltd. is strictly forbidden. Samsung Electronics Co., Ltd. shall not be liable for errors contained herein or for incidental or consequential damages in connection with the furnishing, performance, or use of this material.