
Related Manuals for Rockford Fosgate Power 1051S


Summary of Contents for Rockford Fosgate Power 1051S
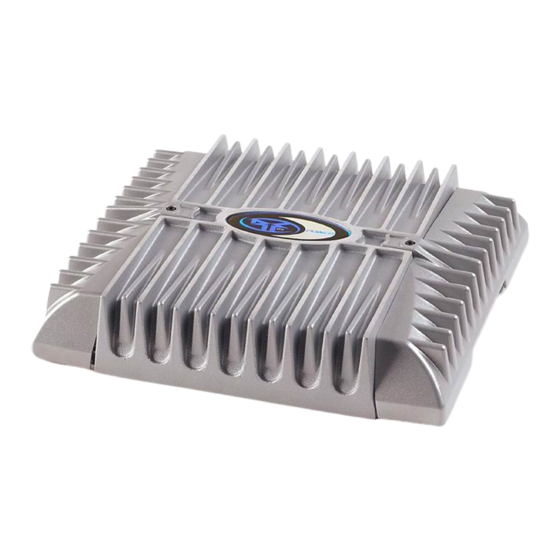
- Page 1 351S 451S 551S 851S 1051S 2-Channel Amplifiers Installation et fonctionnement Instalación y operación Einbau und Betrieb Installazione e funzionamento Installation & Operation...
-
Page 2: Table Of Contents
If, after reading your manual, you still have questions regarding this product, we recommend that you see your Rockford Fosgate dealer. If you need further assistance, you can call us direct at 1-800-669-9899. Be sure to have your serial number, model number and date of purchase available when you call. -
Page 3: Safety Instructions
Installation Section of this manual. Other information can be located by using the Table of Contents. We, at Rockford Fosgate, have worked very hard to make sure all the information in this manual is current. But, as we are constantly finding new ways to improve our product, this information is subject to change without notice. -
Page 4: Design Features
ESIGN EATURES Power Connection - All Models Models 351S, 451S, 551S and 851S Model 1051S 1. LED Power Indicator (Top of unit) – The LED illuminates when the unit is turned on. 2. REM Terminal – This spade terminal is used to remotely turn-on and turn-off the amplifier when +12V DC is applied. -
Page 5: Installation
11. Phase Warp (Model 1051S only) – The phase warp is a variable control used to adjust the phase of the output signal relative to the phase of the input signal. The phase warp is most noticeable when the system is playing a sine wave (test tone). When used with the proper test equipment, this feature can increase the relative SPL in a system. -
Page 6: Mounting Locations
Stock electrical systems which are in good condition should be able to handle the extra load of any Rockford Fosgate amplifier without problems, although battery and alternator life can be reduced slightly. To maximize the performance of your amplifier, we suggest the use of a heavy duty battery and an energy storage capacitor. - Page 7 4. Strip 1/2" from the battery end of the power cable and crimp a large ring terminal to the cable. Use the ring terminal to connect to the battery positive terminal. DO NOT install the fuse at this time. 5. Prepare the BLACK wire (Ground cable) for attachment to the amplifier by stripping 1/2" of insulation from the end of the wire.
-
Page 8: Using Passive Crossovers
NSTALLATION Bridged/Mono Wiring 2-Channel Wiring USING PASSIVE CROSSOVERS A passive crossover is a circuit that uses capacitors and/or coils and is placed on speaker leads between the amplifier and speaker. The crossover delegates a specific range of frequencies to the speaker for optimum driver performance. -
Page 9: Remote Punch Bass
Next, turn the amplifier gain setting until once again distortion is audible and then back it down until the distortion is inaudible. Rockford Fosgate source units do not distort, so the volume can be used at maximum setting. -
Page 10: Adjusting Crossover Frequency
PERATION ADJUSTING CROSSOVER FREQUENCY Placing the switch in the HP position sets the amplifier to the High Pass mode, enabling frequencies above the cut-off point to pass, adjustable between 50-250Hz. Placing the switch in the AP position sets the amplifier to the All Pass mode, preventing any crossover adjustment, allowing all frequencies to pass. -
Page 11: Troubleshooting
NOTE: If you are having problems after installation follow the Troubleshooting procedures below. Procedure 1: Check Amplifier for proper connections. Verify that POWER light is on. If POWER light is on skip to Step 2, if not continue. 1. Check in-line fuse on battery positive cable. Replace if necessary. 2. -
Page 12: Specifications
PECIFICATIONS MODEL- Power Continuous Power Rating (RMS) - Measured at 14.4 Battery Volts 4Ω Load Per Channel 90 Watts x 2 2Ω Load Per Channel 175 Watts x 2 4Ω Load Bridged (Mono) 350 Watts x 1 Dimensions: (with Endbell) Height 2.38"... -
Page 13: Limited Warranty Information
This warranty covers only the original purchaser of Rockford product purchased from an Authorized Rockford Fosgate Dealer in the United States. In order to receive service, the purchaser must provide Rockford with a copy of the receipt stating the customer name, dealer name, product purchased and date of purchase. -
Page 14: Introduction
Toutes nos félicitations pour avoir acheté la meilleure marque d'amplificateurs pour automobile. Chez Rockford Fosgate nous sommes des mordus de la reproduction musicale à son meilleur. C’est pourquoi nous sommes heureux que vous ayez choisi notre produit. Des années d’expertise en ingénierie, de savoir-faire et d’essais poussés nous ont permis de créer une vaste gamme de produits... -
Page 15: Consignes De Sécurité
Bienvenue à Rockford Fosgate ! Ce manuel vise à informer le propriétaire, le vendeur et l’installateur de l’appareil. Si vous désirez apprendre rapidement comment installer ce produit, consultez la section Installation du manuel. Reportez-vous à la Table des matières pour d’autres informations. Nous nous efforçons de faire en sorte que toutes les informations contenues dans ce manuel soient à... -
Page 16: Particularités Techniques
ARTICULARITÉS TECHNIQUES Connexion d'alimentation - Tous modèles confondus Modèles 351S, 451S, 551S et 851S Modèle 1051S Voyant d'alimentation à DEL 2. Borne REM – Cette cosse à fourche permet d'allumer et d'éteindre à distance l'amplificateur lorsqu'un courant de +12 V c.c. est envoyé. 3. -
Page 17: Installation
10. Bornes de haut-parleur – Les connecteurs robustes plaqués de platine des bornes (+ et -) acceptent des câbles de calibre 8 à 18 AWG. Ces connecteurs plaqués de platine sont à l'épreuve de la corrosion qui peut nuire au signal. 11. -
Page 18: Emplacements De Montage
NSTALLATION 10. Préparez la masse du châssis en grattant toute trace de peinture de la surface métallique afin d’assurer une bonne mise à la masse. Les connexions de masse doivent être aussi courtes que possible et toujours connectées à du métal soudé à la carrosserie ou au châssis du véhicule. EMPLACEMENTS DE MONTAGE Compartiment moteur Ne jamais monter cet appareil dans le compartiment moteur. - Page 19 Dénudez 1/2 po de l’extrémité de batterie du câble d’alimentation et sertissez une grosse cosse à anneau sur le câble. Connectez la cosse à la borne positive de la batterie. N’installez pas le fusible pour l'instant. Préparez le fil NOIR (câble de mise à la masse) qui devra être relié à l’ampli en dénudant 1/2 po de son extrémité.
-
Page 20: Utilisation De Filtres Passifs
NSTALLATION Câblage ponté/mono Amplificateur Source audio Câblage à 2 voies Amplificateur Source audio UTILISATION DE FILTRES PASSIFS Un filtre passif est un circuit utilisant des condensateurs ou bobines qui est placé sur les fils du haut- parleur, entre l’ampli et le haut-parleur. Le filtre délègue une gamme de fréquences spécifique au haut- parleur afin d’assurer une performance optimale de l’ampli. -
Page 21: Basses Punch À Télécommande
Augmentez ensuite le gain de l’ampli jusqu’à produire de nouveau une distorsion audible, puis baissez-le jusqu’à ce que la distorsion devienne inaudible. Les sources audio Rockford Fosgate ne produisent pas de distorsion, vous pouvez donc mettre le volume au maximum. -
Page 22: Réglage De La Fréquence Du Filtre Passif
ONCTIONNEMENT RÉGLAGE DE LA FRÉQUENCE DU FILTRE PASSIF Lorsque le sélecteur est en position HP, l'amplificateur est en mode passe-haut, ce qui laisse passer les fréquences situées au-dessus du point de coupure, réglable de 50 à 250 Hz. Lorsque le sélecteur est en position AP, l'amplificateur est en mode passe-tout, ce qui empêche tout filtrage et laisse passer toutes les fréquences. -
Page 23: Dépannage
REMARQUE : si vous éprouvez des difficultés après l’installation, appliquez les procédures de dépannage ci- dessous. Procédure 1 : Vérifiez que les connexions de l’ampli sont bien mises. Vérifiez que le voyant POWER est allumé. Si c’est le cas, passez à l’étape 2, sinon poursuivez. Vérifiez le fusible en ligne du câble positif de batterie. -
Page 24: Caractéristiques
ARACTÉRISTIQUES MODÈLE - Power 351S Puissance nominale en continu (RMS) - Mesurée à 14,4 V (batterie) Charge de 4Ω par voie 90 watts x 2 Charge de 2Ω par voie 175 watts x 2 Charge de 4Ω pontée (mono)350 watts x 1 Dimensions : (avec couvercle d'extrémité) Hauteur 6,05 cm... -
Page 25: Garantie Limitée
Rockford Corporation offre une garantie limitée sur les produits Rockford Fosgate selon les termes suivants : Durée de la garantie Sources audio, haut-parleurs, processeurs de signaux et amplificateurs PUNCH — 1 an Amplificateurs POWER — 2 ans Tout produit remis à neuf en usine — 90 jours (reçu obligatoire) Couverture Cette garantie s'applique uniquement aux produits Rockford Fosgate vendus à... -
Page 26: Introducción
¡Insista en ello! Después de todo, su nuevo sistema sólo merece lo mejor. Para darle el toque final a su nueva imagen Rockford Fosgate; pida sus accesorios Rockford, los cuales incluyen playeras, chaquetas, gorras y anteojos para sol. -
Page 27: Instrucciones De Seguridad
¡Bienvenidos a Rockford Fosgate! Este manual ha sido creado para proporcionarle información al dueño, vendedor y técnico de instalación. Para quienes desean información rápida sobre cómo instalar este producto, por favor vean la Sección Instalación de este manual. El resto de la información puede encontrarse usando el Índice de Materias. -
Page 28: Características Del Diseño
ARACTERÍSTICAS DEL ISEÑO Conexión de corriente - Todos los modelos Modelos 351S, 451S, 551S y 851S Modelo 1051S 1. Diodo electroluminescente indicador de corriente (Parte superior de la unidad) - El diodo electroluminescente se ilumina cuando la unidad está prendida. 2. -
Page 29: Instalación
10. Terminales de los altavoces - Los conectores del bloque terminal enchapados en platino y de alto rendimiento (+ y -) aceptarán tamaños de cable de 8 AWG a 18 AWG. Estos conectores enchapados en platino son inmunes a la corrosión que puede causar deterioro de la señal. 11. -
Page 30: Lugares De Montaje
PRECAUCIÓN: Si no se siente capaz de instalar el cableado de su nueva unidad, por favor consulte a su Distribuidor Autorizado Rockford Fosgate local sobre la instalación. PRECAUCIÓN: Antes de la instalación, desconecte el terminal negativo de la batería (-) para prevenir daño a la unidad, incendio o posibles lesiones. - Page 31 Pele 1/2 pulgada (1,3 cm) del cable para corriente del extremo de la batería y engarce a presión un anillo terminal grande al cable. Use el terminal del anillo para conectar al terminal positivo de la batería. No instale el fusible en este momento.
-
Page 32: Uso De X-Overs Pasivos (Transiciones Pasivas)
NSTALACIÓN Cableado mono/con puente Amplificador Unidad Fuente Cableado de 2 canales Amplificador Unidad Fuente USO DE X-OVERS PASIVOS (Transiciones Pasivas) Un X-over pasivo es un circuito que usa condensadores y/o bobinas, el cual se coloca en los conductores de los altavoces entre el amplificador y el altavoz. -
Page 33: Bajo Punch Remoto (Punch Bass)
Paso bajo de 6dB/octava Paso alto de 6dB/octava L = Paso bajo (Inductor) C = Paso alto (condensador) Para más información, consulte a su Distribuidor Autorizado de Rockford Fosgate. BAJO PUNCH REMOTO (Punch Bass) Montaje e instalación 1. Encuentre un lugar debajo del tablero o cerca del centro de la consola, el cual permita acceder fácilmente al remoto. -
Page 34: (Transición)
UNCIONAMIENTO AJUSTE DE LA FRECUENCIA X-OVER (Transición) Al colocar el interruptor en la posición HP se pone al amplificador en el modo de Paso Alto, permitiendo el paso de las frecuencias del punto de corte, ajustable entre 50-250Hz. Al colocar el interruptor en la posición AP, se pone el amplificador en la posición en el modo Todo Paso, lo cual impide cualquier ajuste de transición y permite que todas las frecuencias pasen. -
Page 35: Solución De Problemas
NOTA: Si tiene problemas después de la instalación, siga los procedimientos de solución de problemas descritos a continuación. Procedimiento 1: Verifique que el amplificador esté bien conectado. Verifique que la luz de ALIMENTACIÓN (POWER) esté encendida. Si la luz de ALIMENTACIÓN está encendida prosiga con el Procedimiento 2. -
Page 36: Especificaciones
SPECIFICACIONES MODELO- Potencia 351S Clasificación de corriente continua (Valor eficaz) - Medida a 14.4 voltios en la batería 4Ω Carga por canal 90 vatios x 2 2Ω Carga por canal 175 vatios x 2 4Ω carga con puente 350 vatios x 1 (Mono) Dimensiones: (con terminador) Altura... -
Page 37: Información Sobre La Garantía Limitada
Cualquier producto de fábrica restaurado—90 días (comprobante de compra requerido) Qué está cubierto Esta garantía se aplica solamente a los productos Rockford Fosgate vendidos a consumidores por Concesionarios Autorizados Rockford Fosgate en los Estados Unidos o sus posesiones. Los productos comprados por los consumidores en un Distribuidor Autorizado Rockford Fosgate de otro país están cubiertos solamente por el Distribuidor de dicho país y no por Rockford... - Page 38 RCA- und Lautsprecherkabeln zu Stromkabeln und Batterieadaptern. Bestehen Sie darauf! Schließlich verdient Ihr neues System nur das Beste. Um Ihrem neuen Rockford Fosgate Image den letzten Schliff zu geben, bestellen Sie Ihre Rockford Accessoires. Dazu gehört alles von T-Shirts und Jacken zu Kappen und Sonnenbrillen.
-
Page 39: Sicherheitshinweise
Informationen. Kurzgefasste Informationen zum Einbau dieses Produkts finden sich im Abschnitt „Einbau“ dieser Anleitung. Andere Informationen können Sie mithilfe des Inhaltsverzeichnisses auffinden. Wir bei Rockford Fosgate haben uns sehr darum bemüht, dass alle in dieser Anleitung enthaltenen Informationen auf dem neusten Stand sind. Da wir unsere Produkte jedoch ständig weiterentwickeln, können sich diese Informationen jedoch ohne Ankündigung ändern. -
Page 40: Designcharakteristiken
ESIGNCHARAKTERISTIKEN Stromanschluss - Alle Modelle Modelle 351S, 451S, 551S und 851S Modell 1051S Leuchtdiode zur Anzeige der Betriebsbereitschaft (Oberseite des Geräts) – Die Leuchtdiode leuchtet auf, wenn das Gerät angestellt ist. Fernbedienungsanschluss – Dieser spatenförmige Anschluss wird dazu benutzt, den Verstärker per Fernbedienung durch Anwendung von +12 V GS ein- und auszuschalten. -
Page 41: Einbau
Einstellungen vorzunehmen. VORSICHT: Wenn Sie beim Einbau des Geräts unsicher sind, lassen Sie es bitte von einem qualifizierten Rockford Fosgate Techniker einbauen. VORSICHT: Entfernen Sie vor dem Einbau den negativen Batteriepol, um Schäden am Gerät, Feuer bzw. mögliche Verletzungen zu vermeiden. -
Page 42: Befestigungsstellen
Kapazitäten hat, um die zusätzliche Belastung durch Ihre Stereoanlage zu verkraften. Gewöhnliche elektrische Systeme in gutem Zustand sollten in der Lage sein, die zusätzliche Belastung aller Verstärker von Rockford Fosgate problemlos zu verkraften. Jedoch kann die Lebensdauer von Batterie und Lichtmaschine geringfügig verringert werden. - Page 43 Vom Batterieende des Stromkabels 13 mm Isolierung abziehen und einen großen, ringförmigen Stecker zur Befestigung am positiven Batteriepol an das Kabel crimpen. Die Sicherung noch nicht anbringen. Das SCHWARZE Kabel (Erdungskabel) zur Befestigung am Verstärker durch Abziehen von 13 mm der Isolation am Kabelende vorbereiten.
-
Page 44: Verwendung Von Passiven Crossovern
INBAU Überbrückte bzw. Monoverkabelung Verstärker Source-Gerät Zweikanalverkabelung Verstärker Source-Gerät VERWENDUNG VON PASSIVEN CROSSOVERN Ein passives Crossover ist eine Schaltung, die Kondensatoren bzw. Spulen verwendet und auf den Lautsprecherkabeln zwischen Verstärker und Lautsprecher platziert ist. Das Crossover delegiert zur optimalen Verstärkerleistung einen spezifischen Frequenzbereich an den Lautsprecher. Ein Crossover-Netzwerk kann eine von drei Funktionen haben: Hochpass (Kondensatoren), Niedrigpass (Induktoren oder Spulen) und Bandpass (Kombination von Kondensator und Spule). -
Page 45: Punchbass-Fernbedienung
Dies erfordert bei den meisten Source-Geräten eine Zweidrittel-Einstellung. Als nächstes den Verstärker aufdehen, bis eine Verzerrung erneut hörbar wird, und ihn dann abdrehen, bis die Verzerrung nicht mehr hörbar ist. Rockford Fosgate Source-Geräte verzerren nicht. Daher kann die Lautstärke bis zum Maximum aufgedreht werden. -
Page 46: Crossover-Frequenz Einstellen
ETRIEB CROSSOVER-FREQUENZ EINSTELLEN Zur Wahl des Hochpassmodus den Schalter am Verstärker in die HP-Position bringen. Dadurch werden Frequenzen oberhalb des Grenzpunkts durchgelassen (kann zwischen 50 und 250 Hz eingestellt werden). Zur Wahl des Allpassmodus den Schalter am Verstärker in die AP-Position bringen. Dadurch wird eine Anpassung des Crossovers verhindert und alle Frequenzen werden durchgelassen. -
Page 47: Fehlerbeseitigung
HINWEIS: Falls Sie nach dem Einbau Probleme haben, befolgen Sie die nachfolgenden Verfahren zur Fehlerbeseitigung: Verfahren 1: Den Verstärker auf ordnungsgemäße Anschlüsse überprüfen. Prüfen, ob das POWER-Licht leuchtet. Wenn das POWER-Licht leuchtet, bei Schritt 2 weitermachen. Falls nicht, hier weiterlesen. Die Inline-Sicherung am positiven Batteriekabel prüfen. -
Page 48: Technische Daten
ECHNISCHE ATEN MODELL- Leistung 351S Kontinuierliche Nennleistung (Mittelwert) - Bei 14,4 Batterie-Volt gemessen 4 Ω-Belastung pro Kanal 90 Watt x 2 2 Ω-Belastung pro Kanal 175 Watt x 2 4 Ω-Belastung überbrückt 350 Watt x 1 (mono) Maße: (mit Läuferkappe) Höhe 6,6 cm Breite... -
Page 49: Informationen Zur Beschränkten Garantie
Alle werkseitig aufgearbeiteten Produkte – 90 Tage (Quittung erforderlich) Was gedeckt ist Diese Garantie erstreckt sich nur auf Rockford Fosgate Produkte, die von Rockford Fosgates Vertragshändlern an Verbraucher in den Vereinigten Staaten von Amerika oder deren Besitzungen verkauft wurden. Produkte, die von Rockford Fosgates Vertragshändlern an Verbraucher in einem anderen Land verkauft wurden, sind nur durch den Händler in dem betreffenden Land, nicht... -
Page 50: Introduzione
Per ottenere le massime prestazioni vi consigliamo di far installare il vostro nuovo prodotto Rockford Fosgate da un rivenditore autorizzato, in quanto noi forniamo un addestramento specializzato ai nostri tecnici attraverso il Rockford Fosgate Technical Training Institute (RTTI). -
Page 51: Istruzioni Di Sicurezza
Installazione di questo manuale. Altri ragguagli sono disponibili attraverso l’Indice. Alla Rockford Fosgate, abbiamo fatto di tutto per assicurarci che tutte le informazioni contenute in questo manuale fossero d’uso corrente. Pertanto, dato che siamo sempre alla ricerca di nuovi modi per migliorare i nostri prodotti, tali informazioni sono soggette a modifiche senza preavviso. -
Page 52: Caratteristiche Del Design
ARATTERISTICHE DEL ESIGN Collegamento alla tensione – Tutti i modelli Modelli 351S, 451S, 551S, e 851S Modello 1051S 1. Indicatore di potenza LED (Parte superiore dell'apparecchio) – Il LED s’illumina quando l’unità viene accesa. 2. Terminale REM – Questo capocorda a forcella viene usato per accendere e spegnere l’amplificatore a distanza quando viene applicata una corrente continua da +12V. -
Page 53: Installazione
ATTENZIONE: Se aveste dei dubbi circa l’installazione, rivolgetevi ad un tecnico qualificato Rockford Fosgate. ATTENZIONE: Prima dell’installazione, scollegate il terminale negativo (-) della batteria per evitare danni all’unità, pericoli d’incendio e/o potenziali lesioni personali. -
Page 54: Posizionamento
Rockford Fosgate senza alcun problema, sebbene la vita della batteria nonché quella dell’alternatore potrebbero ridursi leggermente. Per sfruttare al massimo le prestazioni del vostro amplificatore, vi consigliamo di utilizzare una batteria robusta ed un condensatore ad accumulazione di energia. - Page 55 Spelate via 1,27 cm dall’estremità batteria del cavo a tensione e raggrinzite un grosso terminale ad anello contro il cavo. Usate il terminale ad anello per effettuare un collegamento al terminale positivo della batteria. NON installate ancora il fusibile. Preparate il filo NERO (cavo della messa a terra) per poterlo attaccare all’amplificatore, spelando via 1,27 cm di isolante dall’estremità...
-
Page 56: Come Usare Le Frequenze Di Incrocio
NSTALLAZIONE Cablaggio in parallelo/monofonia Unità di fonte Cablaggio a due canali Unità di fonte COME USARE LE FREQUENZE DI INCROCIO PASSIVE Una frequenza di incrocio passiva è un circuito che utilizza condensatori e/o bobine ed è piazzata sui cavi degli altoparlanti tra l’amplificatore e l’altoparlante. -
Page 57: Toni Bassi Punch A Telecomando
In seguito, girate dinuovo la sintonizzazione di guadagno dell’amplificatore finché non diventi udibile la distorsione e poi riabbassatelo fino a farla scomparire. Nelle unità di fonte della Rockford Fosgate, il suono non è soggetto a distorsione e pertanto, il volume potrà essere alzato fino al massimo. -
Page 58: Regolazione Della Frequenza Di Incrocio
UNZIONAMENTO REGOLAZIONE DELLA FREQUENZA DI INCROCIO Spostando l’interruttore alla posizione HP si potrà regolare l’amplificatore sul modo di frequenza passa-alto, permettendo alle frequenze al di sopra della frequenza di taglio di passare. Regolabile tra i 50 e i 250Hz. Spostando l’interruttore alla posizione AP si potrà regolare l’amplificatore sul modo di frequenza passa-tutto, impedendo qualsiasi regolazione della frequenza di incrocio e permettendo a tutte le frequenze di passare. -
Page 59: Individuazione/Riparazione Guasti
NOTA: Se incontraste dei problemi dopo l’installazione, seguite le procedure per la localizzazione e la riparazione dei guasti elencate di sotto. Procedura 1: Controllate che l’amplificatore abbia i collegamenti adeguati. Controllate che la spia dell’ACCENSIONE sia accesa. Se la spia di ACCENSIONE è accesa, passate al numero 2. -
Page 60: Specifiche
PECIFICHE MODELLO - Power 351S Potenza continua a regime (RMS) – Misurata a 14,4 volt da batteria Carico da 4Ω per canale 90 Watts x 2 Carico da 2Ω per canale 175 Watts x 2 Carico da 4Ω in parallelo 350 Watts x 1 (monofonia) Dimensioni: (con cappuccio terminale) Altezza... -
Page 61: Limitata
Prodotti rimessi a nuovo dalla fabbrica — 90 giorni (è necessaria la ricevuta) Ciò che è coperto dalla garanzia Questa garanzia è solamente applicabile ai prodotti della Rockford Fosgate venduti a clienti da parte di rivenditori autorizzati della Rockford Fosgate negli USA o nei suoi possedimenti. Prodotti acquistati da clienti presso un rivenditore autorizzato della Rockford Fosgate in paesi esteri saranno coperti solamente dal distributore di quel paese e non dalla Rockford Corporation. - Page 62 Italiano...
- Page 63 NOTA...
- Page 64 02/03 B.M. MAN-4362-B Rockford Fosgate Rockford Corporation 546 South Rockford Drive Tempe, Arizona 85281 U.S.A. In U.S.A., (480) 967-3565 In Europe, Fax (49) 8503-934014 In Japan, Fax (81) 559-79-1265 www.rockfordfosgate.com Printed in U.S.A...