Rimage Producer 7100 Setup And Installation Manual
Rimage producer 7100: installation guide
Hide thumbs
Also See for Producer 7100:
- User manual (120 pages) ,
- Reference manual (3 pages) ,
- Specifications (1 page)
Table of Contents
Advertisement
Available languages
Available languages
Quick Links
™
Rimage Producer III
and Producer IIIN
Setup and Installation Guide
Before you begin:
This document describes how to set up your Producer III product. Products in
the Producer III family include the Producer 7100, Producer 7100N, Producer
8100, and Producer 8100N.
The term 'Producer III' is used throughout this document to refer to the
Producer 7100, Producer 7100N, Producer 8100, or Producer 8100N.
1
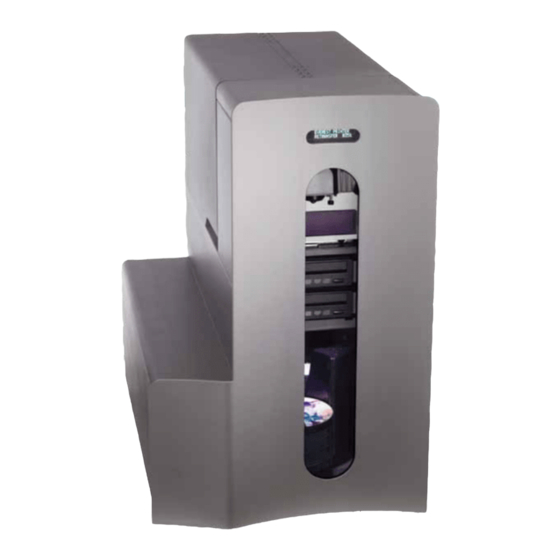
Prepare the Producer III
Important! Keep all packaging materials.
a. On the Producer III, open
the front door.
b. Cut the plastic tie wrap
from the lift arm.
Caution! Do not cut
the belt or cable!
c. If you have a Producer
8100 or 8100N, remove
the tape from the disc
feed tray.
d. Remove the shipping
foam inserted above the
carousel.
e. Close the front door.
2000559_B
™
2
Set up your printer (Everest)
a. Unpack the Everest printer. Refer to the
b. Prepare your Everest printer.
c. Place the printer on
d. Connect the printer cable from the
e. Connect the USB cable from the
f. Connect the power cord from the
Tie Wrap
3
Connect the Producer III cables (7100N, 8100N)
a. Connect the
Foam
Important! Keep all packaging materials.
label on the Everest printer box.
i. Press the two side cover latches.
ii. Lower the side cover.
iii. Open latches 1, 2, and 3 as indicated by
the arrows.
Latch 1
iv. Remove the plastic packing pieces
from inside the printer.
v. Install the print ribbon and retransfer
ribbon. Refer to the instruction label on
the side cover, or to the Everest User
Guide available at www.rimage.com/
support.html. Navigate: Printer Family >
Support - Everest > Documents tab.
Plastic Packing Pieces
Printer Plate
the Producer III so
that the plastic printer
feet slide into the slots
on the printer plate.
Slots
Producer III to the printer.
Producer III to the printer.
Producer III to the printer.
power cord
from the
Producer III
to the power
outlet.
Note: Connecting a network cable is necessary only if you plan to submit
orders over a network.
2
Set up your printer (Prism)
Important! Keep all packaging materials.
a. Unpack the Prism printer.
Refer to the label on the
Prism printer box.
b. Place the printer on the
Latch 2
Latch 3
Rimage Producer III so that
OR
the plastic printer feet slide
into the slots on the printer
plate.
c. Connect the USB
cable from the
Producer III to the
printer.
d. Connect the
printer cable from
the Producer III to
the printer.
Note: The parallel port is not used.
3
Connect the Producer III cables (7100, 8100)
a. Connect the
OR
b. Connect a
power cord
network
from the
cable from the
Producer III
Producer III
to the power
to a network
outlet.
connection.
Note: The 7100 has 2 FireWire cables, and the 8100 has 4 FireWire
cables.
Printer
Plate
Slots
e. Connect the power
cord from the
Producer III to the
printer.
f. Press the Prism
printer power
switch to the On
position.
b. Connect the USB cable
from the Producer III to
the external control center.
c. Connect the FireWire
cables (Qty. 2 or 4) from
the Producer III to the
external control center.
Copyright © 2007 Rimage Corporation
Advertisement
Table of Contents

Related Manuals for Rimage Producer 7100


Summary of Contents for Rimage Producer 7100
- Page 1 Before you begin: This document describes how to set up your Producer III product. Products in the Producer III family include the Producer 7100, Producer 7100N, Producer 8100, and Producer 8100N. The term ‘Producer III’ is used throughout this document to refer to the Producer 7100, Producer 7100N, Producer 8100, or Producer 8100N.
-
Page 2: Align The Printer
Hardware Wizard to install the printer. The system is ready for use. Align the printer For instructions on how to align your printer, refer to the Rimage Producer III and Producer IIIN User Guide included with your product. Change the computer name (7100N, 8100N only) a. - Page 3 In diesem Dokument wird die Einrichtung Ihres Producer III-Produktes beschrieben. Zur Producer III-Produktfamilie gehören Producer 7100, Producer 7100N, Producer 8100 und Producer 8100N. Die in diesem Dokument verwendete Bezeichnung „Producer III“ bezieht sich auf Producer 7100, Producer 7100N, Producer 8100 oder Producer 8100N. Producer III vorbereiten ...
-
Page 4: Weitere Informationen
Anweisungen des Assistenten zum Installieren neuer Hardware. Ausrichten des Druckers Informationen zum Ausrichten des Druckers finden Sie im Rimage Producer III and Producer IIIN User Guide (Rimage Producer III und Producer IIIN Benutzerhandbuch), der im Lieferumfang Ihres Produkts enthalten ist. - Page 5 Ce document décrit la procédure de configuration de votre produit Producer III. La famille de produits Producer III comprend les Producer 7100, Producer 7100N, Producer 8100 et Producer 8100N. Le terme « Producer III » est utilisé tout au long de ce document pour désigner les chargeurs automatiques Producer 7100, 7100N,...
-
Page 6: Alignement De L'imprimante
Producer III via une connexion à distance. Activez le logiciel Rimage Vous avez 30 jours pour activer votre logiciel Rimage. Tant que vous n'aurez pas activé le logiciel, vous y serez invité à chaque fois que vous l'utiliserez. - Page 7 Antes de comenzar: Este documento describe cómo configurar su producto Producer III. Los productos de la familia Producer III incluyen el Producer 7100, el Producer 7100N, el Producer 8100 y el Producer 8100N. El término “Producer III” se utiliza en este documento para referirse al Producer 7100, al Producer 7100N, al Producer 8100 o al Producer 8100N.
-
Page 8: Información Adicional
Alinee la impresora Para obtener información sobre la alineación de la impresora, consulte la Rimage Producer III and Producer IIIN User Guide (Guía del usuario de Producer III y Producer IIIN) incluida con su producto. Cambie el nombre del equipo (únicamente 7100N, 8100N) a. - Page 9 Rimage Producer III および Producer IIIN ™ セッ トアップおよびインス トール ガイ ド はじめる前に 本ガイドでは、 Producer III 製品をセッ トアップする方法を説明します。 Producer III ファミリーの製品には、 Producer 7100、 Producer 7100N、 Producer 8100、 および Producer 8100N があります。 本ガイドでは、 「 Producer III」 という用語は、 Producer 7100、 Producer 7100N、 Producer 8100、 または Producer 8100N を示します。 Producer III の準備 重要! 梱包材はすべて保管してください。 a. Producer III の前面ドアを 開きます。...
- Page 10 注: 組み込みのシステムをドメインに追加する場合、 「WORKGROUP」 は入力せず、 『 Rimage Advanced Setup Guide』 を参照してください。 4. [OK] を選択します。 vii. を選択します。 c. Producer III を再起動します。 注: 次回、 リモート デスク トップ接続を経由してこの Producer III にアクセ スするときは、 必ず新しいコンピュータ名を使用してください。 Rimage ソフ トウ ェアのアクテ ィベーシ ョン Rimage ソフトウェアは 30 日間利用できます。 その間にアクティベーシ ョンしてください。 ソフトウェアのアクティベーションが行われるまで、 Rimage ソフトウェアを使用するたびに注意画面が表示されます。 テストと確認 ディスクを3枚作成するテストを行い、 システムが正しく動作していること を確認します。 詳細情報 ネッ トワークを経由した Producer III へのオーダーの送信については、 『Advanced Setup Guide』 を参照してく ださい。 『 Advanced Setup Guideは、...
- Page 11 Prima di iniziare: Questo documento descrive le modalità di configurazione del prodotto della serie Producer III. I prodotti della famiglia del Producer III includono il Producer 7100, il Producer 7100N, il Producer 8100, e il Producer 8100N. Il termine "Producer III" viene utilizzato in tutto il documento in riferimento al Producer 7100, al Producer 7100N, al Producer 8100, oppure al Producer 8100N.
-
Page 12: Allineare La Stampante
Allineare la stampante Per informazioni relative all’allineamento della stampante, fare riferimento alla Rimage Producer III and Producer IIIN User Guide (Guida per l’utente di Producer III e Producer IIIN di Rimage) inclusa con il prodotto. Modifica del nome del computer (solo 7100N, 8100N) a.