
Related Manuals for Norelco 8170XL


Summary of Contents for Norelco 8170XL
- Page 1 8170XLDFU-01_31_05Norelco.qxd 2/11/05 3:56 PM Page 1 (Zwart plate) 8170XL 8170XLCC Rechargeable Tripleheader ® Cordless/Cord Razor...
- Page 2 8170XLDFU-01_31_05Norelco.qxd 2/11/05 3:56 PM Page 2 (Zwart plate)
- Page 3 8170XLDFU-01_31_05Norelco.qxd 2/11/05 3:56 PM Page 3 (Zwart plate) ENGLISH 4 ESPAÑOL 26...
-
Page 4: Important Safety Instructions
2. Use this razor for its intended household use as described in this manual. Do not use attachments not recommended by Philips Electronics North America Corporation. 3. Never operate this razor/charging stand if it has a damaged cord or charging plug, if it is not working properly, if it has been dropped or damaged, or dropped into water while plugged in. - Page 5 8170XLDFU-01_31_05Norelco.qxd 4. Keep the razor, charging stand, cord and charging plug away from heated surfaces. 5. Never drop or insert any object into any opening. 6. Do not charge or plug in razor/charging stand outdoors or operate where aerosol (spray) products are being used or where oxygen is being administered.
- Page 6 Send dated sales slip, your complete name and address as indicated below, and the razor, prepaid to: Norelco Consumer Products Company A Division of Philips Electronics North America Corporation 450 North Medinah Rd, Dock 16 Roselle, IL 60172-2329 Please allow 4-6 weeks for delivery of check. (Please Print)
-
Page 7: Table Of Contents
8170XLDFU-01_31_05Norelco.qxd 2/11/05 3:56 PM Page 7 (Zwart plate) ENGLISH Table of Contents Features...8-9 5 LED Battery Level Indicators ...10-11 Before First Use...11 Charging ...11-13 Recharging...13 Quick Charge...13 Put It To The Test & Shaving Tips ...14 How To Shave With An Electric Razor...14-15 Trimming...16 Cleaning...16-21... -
Page 8: Features
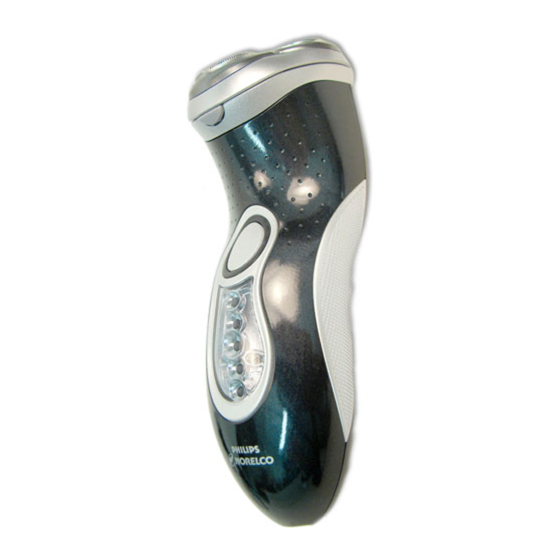
8170XLDFU-01_31_05Norelco.qxd ENGLISH Features Speed-XL Shaving Heads Razor Head Assembly Protective Razor Head Cap Individually Floating Heads Razor Head Release Button • Hair Chamber captures shaven hair Electronic ON/OFF Button 5 LED Charge Indicators • Indicates the amount of charge remaining in batteries Cleaning Indicator Light Replacement Head... - Page 9 8170XLDFU-01_31_05Norelco.qxd How the Unique Shaving System Makes Close Comfortable: Groove channels beard closer to cutting system 2/11/05 3:56 PM Page 9 ENGLISH Spring-Release Trimmer Automatic Worldwide Voltage100V to 240V AC Cleaning Brush Storage/Travel Pouch Charging Stand (Model 8170XLCC only) Rechargeable - Initial 4 hour full charge for up to 55 minutes of...
-
Page 10: Led Battery Level Indicators
8170XLDFU-01_31_05Norelco.qxd ENGLISH 5 LED Battery Level Indicators The meter provides the following information: ◗ LED Battery Charge Meter The Lights on the display indicate approximately how much power is left in the batteries. ◗ Charging Indicator When you charge razor, the bottom light on the display blinks red. -
Page 11: Before First Use
8170XLDFU-01_31_05Norelco.qxd ◗ Low Battery Indicator When the battery is running low, the bottom light on the display lights up red. When you turn the razor OFF, the bottom light will blink a few times. Before first use ◗ Charge the razor before you start using it (see ‘Charging’). - Page 12 ◗ See separate Jet Clean & Charge instruction book for complete charging and cleaning instructions. Model 8170XL Only ◗ Do not leave the razor continuously plugged into outlet charging as it would reduce life of batteries. Remove the plug from outlet as soon as the razor is fully charged.
-
Page 13: Recharging
8170XLDFU-01_31_05Norelco.qxd First time charging and recharging after non-use for 1 month or more requires a full 4 hours. A fully charged razor has a cordless shaving time of up to 55 minutes. When batteries are fully charged, all the “lights” in the display will light up green. -
Page 14: Put It To The Test & Shaving Tips
8170XLDFU-01_31_05Norelco.qxd ENGLISH Put It To The Test & Shaving Tips ◗ 21 Day Trial and Conversion Process. It is a fact that your skin and beard need time to adjust to a new shaving system. ◗ Use your new razor exclusively for 3 weeks to fully enjoy the closeness of a Norelco shave. - Page 15 8170XLDFU-01_31_05Norelco.qxd ◗ When you turn the razor on or off, all lights will light up and then the remaining battery capacity will be shown for a few seconds. Stretch your skin with your free hand so blades can lift and cut whiskers. Gently press razor to skin so the floating heads can follow the contours of your face.
-
Page 16: Trimming
8170XLDFU-01_31_05Norelco.qxd ENGLISH Trimming To groom sideburns and moustache: Turn razor ON. Push down spring-release trimmer switch. The trimmer can be activated while the razor is running. Hold trimmer as shown and move in downward strokes with gentle pressure. Close trimmer by pressing trimmer down. Turn razor OFF. - Page 17 8170XLDFU-01_31_05Norelco.qxd may dent or damage precision-made slotted combs. ◗ Do not use razor if combs are damaged or broken. Facial injury may occur. ◗ Unplug the charging stand. The charging stand may be wiped clean using a damp cloth. The light above faucet symbol will start blinking after each shave to remind you that the razor needs to be cleaned (except when the bottom light burns red).
- Page 18 8170XLDFU-01_31_05Norelco.qxd ENGLISH Press the Razor Head Release Button, flip open the Razor Head Assembly. Clean inside razor heads and hair chamber by running under hot water. Clean outside of Razor Head Assembly by running under hot water. Close the Razor Head Assembly and shake off excess water.
- Page 19 8170XLDFU-01_31_05Norelco.qxd Jet Cleaning: Model 8170XLCC ◗ See separate Jet Clean & Charge instruction book for complete charging and cleaning instructions. Once A Month: Razor Heads Do not mix up the cutters and combs as the shaving performance may be adversely affected for several weeks before optimal shaving performance is restored.
- Page 20 8170XLDFU-01_31_05Norelco.qxd ENGLISH Separate the cutter from the comb and rinse clean under hot water. Do not clean more than one cutter and comb at a time, since they are all matching sets. If you accidentally interchange the cutters and combs, it could take several weeks before optimal shaving performance is restored.
- Page 21 8170XLDFU-01_31_05Norelco.qxd Once A Month: Razor Heads For optimum performance, razor cutters and combs should be cleaned in a degreasing liquid (e.g. Norelco Razor Cleaner, model RC1776, or rubbing alcohol) and lubricated with Norelco Razor Lubricant, model AL80, or one drop of mineral oil (in the center of the head).
-
Page 22: Storage
8170XLDFU-01_31_05Norelco.qxd ENGLISH Storage ◗ Model 8170XLCC only:The razor can be placed in the charging stand for safe storage. If storing razor in stand, remove the plug from outlet. ◗ Be sure razor is turned off. Remove cord from outlet and razor or charging stand (Model 8170XLCC) before storing in a safe, dry location where it will not be crushed, banged, or subject to damage. -
Page 23: Accessories
◗ Razor Cleaner RC1776 - Norelco Razor Cleaner. ◗ Cleaning Solution HQ200 - Norelco/Philips Cleaning Solution for use with model 8170XLCC. ◗ Razor Lubricant AL80 - Norelco Razor Lubricant. ◗ Car Cord Adaptor Cable HQ8010 - Charges razor from a 12V battery in your car, truck, van, boat or camper. - Page 24 8170XLDFU-01_31_05Norelco.qxd 2/11/05 3:56 PM Page 24 (Zwart plate) ENGLISH...
-
Page 25: Warranty
Damage occurring during shipment is not covered by this warranty. NOTE: No other warranty, written or oral, is authorized by Philips Electronics North America Corporation. This warranty gives you specific legal rights, and you may also have other rights which vary from state to state. -
Page 26: Spanish
2. Utilice esta afeitadora para el uso doméstico para el cual está destinada, tal como se describe en este manual. No utilice accesorios no recomendados por Philips Electronics North America Corporation. 2/11/05... - Page 27 8170XLDFU-01_31_05Norelco.qxd 3. No utilice nunca esta afeitadora o soporte de carga si la clavija o el cable cargador de red están deteriorados, si no funciona adecuadamente, si se ha caido o deteriorado, o si se ha caido al agua mientras estaba enchufada. Lleve la afeitadora un Servicio de Asistencia Técnica de Norelco para ser examinada y reparada.
- Page 28 Envíe el tíquet de compra con la fecha, su nombre y dirección completos tal como se indica más adelante, junto con la afeitadora a portes pagados a: Norelco Consumer Products Company A Division of Philips Electronics North America Corporation 450 North Medinah Rd, Dock 16 Roselle, IL 60172-2329 Por favor, espere entre 4 y 6 semanas a recibir el cheque.
- Page 29 8170XLDFU-01_31_05Norelco.qxd Indice de Contenidos Características ........30-31 5 LED Indicador De Carga .
-
Page 30: Características
8170XLDFU-01_31_05Norelco.qxd ESPAÑOL Características Speed-XL Afeitado Cabezal Montaje del Cabezal de la Afeitadora Cubierta protectora del Cabezal de la Afeitadora Conjuntos Cortantes que flotan individualmente Botón de apertura del Cabezal de la Afeitadora • La Cámara del Pelo recoge el pelo afeitado Botón electrónico de encendido/apagado 5 LED Indicator... - Page 31 8170XLDFU-01_31_05Norelco.qxd El Sistema de Afeitado de Norelco "Levanta y Corta" proporciona un confortable apurado: El surco dirige la barba más cerca del sistema de corte 2/11/05 3:56 PM Page 31 ESPAÑOL Resorte-lanzan Cortapatillas Adaptación automática a cualquier voltaje de 100V a 240V CA Cepillo de limpieza Bolsa Soporte para guardarla...
-
Page 32: Led Indicador De Carga
8170XLDFU-01_31_05Norelco.qxd ESPAÑOL 5 LED Indicador De Batería El medidor proporciona la siguiente información: ◗ LED Medidor de Carga de la Batería Las luces de la pantalla indica, aproximadamente, cuánto carga queda en las baterías. ◗ Indicador de Carga Cuando cargue la afeitadora, la luz inferior de la pantalla se parpadeará... -
Page 33: Antes Del Primer Uso
8170XLDFU-01_31_05Norelco.qxd - Cuando todas las luces se queman verde, la batería es el 100% cargado. - Cuando la luz inferior se quema verde, el 20% de la capacidad de la batería se deja. ◗ Indicador de Baterías Bajas Si las baterías están bajas, la luz inferior de la pantalla se tornará... -
Page 34: Carga
◗ Véase separar Jet Clean & Charge libro de instruccion para lleno carga y limpieza instrucciones. Tipo 8170XL Sólo ◗ No deje la afeitadora tapó continuamente en el enchufe carga pues reduciría la vida de baterías. Quite el enchufe del enchufe tan pronto como la afeitadora se cargue completamente. - Page 35 8170XLDFU-01_31_05Norelco.qxd Conecte la cuerda directamente con la afeitadora; conecte el enchufe de carga en cualquier 100V con el enchufe de la CA 240V. Utilice solamente el enchufe de carga proporcionado. Cuando cargue la afeitadora, la luz inferior de la pantalla parpadeará roja. Después algunas minutos, se tornará...
-
Page 36: Recarga
8170XLDFU-01_31_05Norelco.qxd ESPAÑOL Recarga La primera carga requiere 4 horas. Después de la carga inicial, la recarga requiere aproximadamente 1 hora. Regarguela solo cuando la luz inferior se torne rojo. Cuando la afeitadora este completamente cargada, desconecte el enchufe de carga del enchufe. -
Page 37: Cómo Afeitarse Con Una
8170XLDFU-01_31_05Norelco.qxd completamente del apurado de un afeitado Norelco. ◗ Al principio puede que no obtenga un afeitado tan apurado como esperaba, o incluso es posible que su cara se irrite ligeramente. Esto es normal, ya que su barba y su piel necesitarán tiempo para adaptarse. - Page 38 8170XLDFU-01_31_05Norelco.qxd ESPAÑOL ◗ Cuando ponga la afeitadora marcha o apague, todos los pilotos se iluminarán y se mostrará durante unos segundos la carga disponible en la batería. Con su mano libre estírese la piel para que los conjuntos cortantes puedan levantar y cortar la barba.
-
Page 39: Cortapatillas
8170XLDFU-01_31_05Norelco.qxd Cortapatillas Para recortar las patillas y el bigote: Ponga la afeitadora en marcha. Empuje abajo resorte-lanzan el interruptor del condensador de ajuste. El cortapatillas puede ponerse en marcha mientras la afeitadora está en funcionamiento. Sostenga el cortapatillas como se indica y haga pasadas hacia abajo con una suave presión. - Page 40 8170XLDFU-01_31_05Norelco.qxd ESPAÑOL ◗ No aplique presión sobre los cabezales. No toque los cabezales con objetos duros ya que podría hundir las ranuras o dañar su precisión. ◗ No utilice la afeitadora si los cabezales están dañados o rotos. Éstos podrían provocar lesiones faciales.
- Page 41 8170XLDFU-01_31_05Norelco.qxd ◗ Mientras que aclara conjuntos cortantes, el agua puede gotear fuera de la base de la afeitadora. Esto es una ocurrencia normal. Antes de limpiarla, apague siempre la afeitadora, desenchúfela de la red y quite el cable de la afeitadora o el soporte de carga (tipo 8170XLCC sólo).
- Page 42 8170XLDFU-01_31_05Norelco.qxd ESPAÑOL NOTA: No limpie o seque los conjuntos cortantes con una toalla o servilleta de papel. Esto puede dañar los conjuntos cortantes. También puede limpiar sin agua la cámara de pelo usando el cepillo que se suministra. Jet Cleaning: Tipo 8170XLCC ◗...
- Page 43 8170XLDFU-01_31_05Norelco.qxd Gire la rueda en sentido antihorario (1) y quite el marco de retención (2). Quite y limpie sólo un conjunto cortante cada vez. Separe la cuchilla del protector y límpielos bajo el agua caliente del grifo. No limpie más de una cuchilla y un protector a la vez, ya que forman juego.
- Page 44 8170XLDFU-01_31_05Norelco.qxd ESPAÑOL Repita el proceso con los otros dos juegos de conjuntos cortantes. Vuelva a poner el marco. Presione hacia abajo (1) y gire la rueda en sentido horario (2) hasta que quede fijada en su lugar. Vuelva a poner el Bloque del Cabezal Afeitador en la afeitadora.
-
Page 45: Almacenamiento
8170XLDFU-01_31_05Norelco.qxd Después de cado uso: Cortapatillas Apague la afeitadora. Empuje abajo resorte-lanzan el interruptor del condensador de ajuste. Limpie el cortapatillas con el cepillo. Lubrique el cortapatillas con Norelco Razor Lubricant (tipo AL80) o con una gota de aceite mineral cada 6 meses. Condensador de ajuste cercano presionando el condensador de ajuste abajo. -
Page 46: Asistencia
8170XLDFU-01_31_05Norelco.qxd ESPAÑOL ◗ No envuelva la cuerda alrededor de la afeitadora o del soporte de carga (tipo 8170XLCC) al almacenar. ◗ Almacene la cuerda en una localización segura en donde no será cortada ni sera dañada. ◗ No mantenga la afeitadora o el soporte de carga (tipo 8170XLCC) tapado permanentemente en el enchufe. -
Page 47: Accesorios
◗ Limpiador para la afeitadora RC1776 - Limpiador para Afeitadora Norelco. ◗ Solución de la limpieza HQ200 - Norelco/Philips Solución de la limpieza para el uso con tipo 8170XLCC. ◗ Lubricante para la afeitadora AL80 - Lubricante para Afeitadora Norelco. - Page 48 Philips Electronics North America Corporation garantiza cada nuevo producto Norelco Modelo 8170XL/CC (excepto cuchillas y protectores) contra defectos de los materiales o de fabricación durante un período de dos años desde la fecha de compra, y está de acuerdo en reparar o sustituir sin cargo cualquier producto defectuoso.