
Related Manuals for Panasonic A200


Summary of Contents for Panasonic A200
- Page 1 Operating Instructions Part 1 Digital Cellular Phone Mobile Phone Before operating this handset, please read these instructions (parts 1 and 2) completely. Charge battery before operation.
-
Page 2: Table Of Contents
Contents Appearance... 1 Part Names ...1 Keys and Symbols ...2 Icons ...3 Getting Started ... 4 Battery and SIM ...4 Basic Operation... 7 Switching On/Off ...7 Mobile lock On/Off ...8 Making a Call ...9 Incoming call ...12 In-call operations...13 Text Entry...20 Exploring the Menus... -
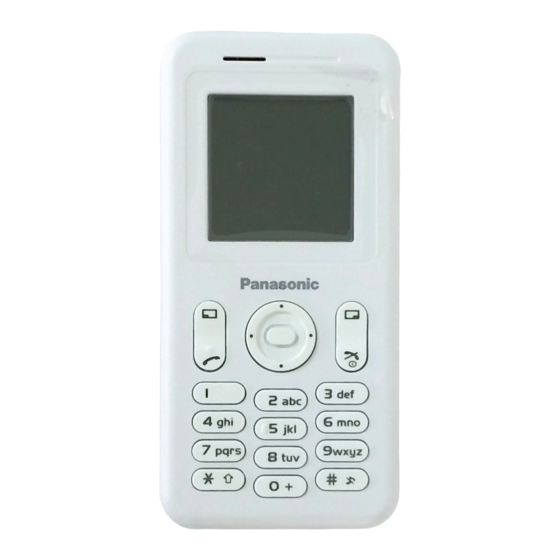
Page 3: Appearance
Appearance Part Names <Front View> Earpiece Display Centre key Left soft key Send key Asterisk/Shift key <Back View> Battery cover Charging connector Personal Handsfree Connector Right soft key Navigation key Power/End key Hash/Quiet key Microphone Appearance... -
Page 4: Keys And Symbols
Keys and Symbols Keys Centre key: Press in the centre of the Navigation key to select or enter the menu options. < In idle screen: Press to enter the main menu. Press and hold to enter the Mobile lock menu. Navigation key: Move the cursor in each directions. -
Page 5: Icons
Icons Status Icons The status icons are displayed depending on the currently activated functions. Idle screen Left soft key selection area – – – Indicates Battery level Green On non-home network – Roaming ( Received new messages Media Folder is full Alarms are set Call diverts are enabled Voicemail is enabled... -
Page 6: Getting Started
Getting Started Battery and SIM Before opening the battery cover, ensure that the phone is switched off and the charger is disconnected from the phone. Battery Removing the battery 1. Push down the tab on the bottom edge of the cover (N) 2. -
Page 7: Charging The Battery
Charging the battery It is recommended to charge the battery for a minimum of 4 hours before the first use. Ensure the battery is correctly in place before connecting the charger. Connecting the plug 1. Insert the plug arrow side up 2. -
Page 8: Removing The Sim
Attaching the SIM 1. Remove the battery cover and the battery (see “Removing the battery” on page 4) 2. Insert the SIM into the SIM holder 3. Replace the battery and the battery cover Note: Ensure the gold contacts on the SIM and the phone body are facing each other. -
Page 9: Basic Operation
Basic Operation Switching On/Off Switching On 1. Press and hold D (Power/End) for 2 to 3 seconds 2. The start-up animation will start 3. Customisable Greeting will be displayed for 2 seconds (see “Greeting” on page 28) 4. The display will remain in idle screen Switching Off Press and hold D (Power/End) for 2 to 3 seconds Basic Operation... -
Page 10: Mobile Lock On/Off
Mobile lock On/Off You can lock your phone to avoid accidental or intentional misuse of it. Key guard Key guard is used to prevent any keys from being accidentally pressed. In idle screen 1. Press and hold < (Menu) 2. Press < (On) 3. -
Page 11: Making A Call
Making a Call Before making a call, ensure that the phone is switched on, the signal strength meter shows network coverage is available in the current area, and the battery has sufficient charge. While on a call, the duration will be displayed and auto-reset every 4 hours. Entering numbers You need to have the area code and the phone number before you call. -
Page 12: Recent Calls
Recent calls Making a call from Recent calls list You can select phone numbers from Last call, Answered call or Unanswered call. There can be stored up to 50 recent numbers each in the Last call and the Answered call lists, and up to 20 in the Unanswered call list. -
Page 13: International Calls
International calls You need to have the destination country/region code, area code and the phone number before you make an international call. In idle screen 1. Press and hold # until “+” is displayed. 2. Enter the country/region code with # – , 3. -
Page 14: Incoming Call
Service dial Your Service Provider may have programmed some special phone numbers into your SIM. You may not modify these numbers. In idle screen 1. Press 1 or 5 to display Contacts list 2. 4 move to the required Service dial number From idle screen 1. -
Page 15: In-Call Operations
Rejecting While the phone is ringing, press D (Power/End) to reject the call. The number of the unanswered calls will be displayed. Press < (View) to see unanswered call information. Auto answer If Auto Answer is enabled, and the Personal Handsfree kit is connected, calls can be answered without pressing any keys. - Page 16 Messages While on a call, you can send an SMS message as well as create or check an SMS or MMS message. While on a call 1. Press < (Menu) 2. 4 move to Messages 3. Press < (Select) (see “Messages” on page 61) Handsfree If Handsfree is activated, you can use the phone handsfree access to the phone without putting the earpiece to the ear.
-
Page 17: Hold And Answer
Call waiting F If Call waiting is on, you can receive another call or you can make a Multi-party call. Hold and answer You can place a current connection on hold and answer a new call. While on a call 1. -
Page 18: Second Call
Rejecting a new call You can reject a new call while you are on a call. While on a call 1. You hear an incoming call and the Caller’s ID is displayed 2. Press @ (Reject) Second call You can make another call while on a call. -
Page 19: Ending One Connection
Swapping call You can swap between 2 connections. While on the second call 1. Press @ (Resume) 2. The second call will be placed on hold and you will be returned to the first call 3. Press @ (Hold) 4. The first call will be placed on hold and you will be returned to the second call Ending one connection... - Page 20 Multi-party call (Conference) F You can have up to 5 calls on a Multi-party call. You cannot have more than one Multi-party call at a time. Making a Multi-party call While on 2 calls, with 1 call on hold 1. Press < (Menu) 2.
-
Page 21: Dtmf Tones
Ending a call in a Multi- party call You can end a call in a Multi-party call one by one. While on a Multi-party call 1. Press < (Menu) 2. 4 move to Hang up 3. Press < (Select) 4. 4 move to the required phone number 5. -
Page 22: Text Entry
Text Entry You can use alphanumeric characters to enter text. Press the appropriate key several times until a required character is displayed. If you need to use the same key for different characters, enter the first character and wait 1 second. To enter text, you can press and hold # –... -
Page 23: Text Mode
Text mode You can change the text entry mode by pressing A ( Press " once as a Shift key. The next entered character will be a capital letter. Press " twice as a Caps Lock key. You can enter all capitals. Normal Shift Caps Lock... -
Page 24: Exploring The Menus
Exploring the Menus My Phone Profiles ... 24 Sounds ... 25 Display ... 28 Language ... 30 Auto answer ... 30 Shortcut key ... 31 Phone settings ... 32 Defaults ... 38 Browser Starting the Browser...53 Bookmarks ... 55 Settings ... 58 Calendar Viewing the Calendar... -
Page 25: My Phone
My Phone Profiles Sounds page 25 Display Language Auto answer Shortcut Phone settings Defaults Activating a profile ...24 Editing a profile ...24 page 24 Returning to the default setting...25 Renaming a Profile ...25 Volume...25 Ringtone ...26 Message tone ...26 Key tone ...26 Warning tone ...27 Alerts...27 Wallpaper...28... -
Page 26: Profiles
Profiles You can switch between 4 different profiles, each with a distinct combination of Volume, Ringtone, Message tone, Key tone, Warning tone and Alerts. From My Phone menu Press < (Select) The following profiles are available: Normal Suitable for everyday settings Ringtone for formal occasions Quiet (Press and hold ! see “Hash key”... -
Page 27: Sounds
Returning to the default setting From Profiles menu 1. 4 move to the required profile 2. Press < (Select) 3. 4 move to Defaults 4. Press < (Select) Renaming a Profile From Profiles menu 1. 4 move to the required profile except Normal 2. -
Page 28: Ringtone
Ringtone You can select a Ringtone from the preinstalled selection or from My Sounds. From Sounds menu 1. 4 move to Ringtone 2. Press < (Select) 3. 4 move to Preinstalled or My Sounds 4. Press < (Select) 5. 4 move to the required sound and sample sound will be played 6. -
Page 29: Warning Tone
Warning tone The Warning tone indicates a low battery. From Sounds menu 1. 4 move to Warning tone 2. Press < (Select) 3. 4 move to On or Off 4. Press < (Select) Alerts You can set the phone how the Alert indicates. From Sounds menu 1. -
Page 30: Display
Display Wallpaper You can change the Wallpaper by selecting a preinstalled image or from My Pictures. From Display menu 1. Press < (Select) 2. 4 move to Preinstalled or My Pictures 3. Press < (Select) 4. 4 move to the required image as wallpaper 5. -
Page 31: Operator Notice F
Operator notice Operator notice is a feature which reminds you of how to operate selected features after you leave the display idle for few minutes. From Display menu 1. 4 move to Operator notice 2. Press < (Select) 3. 4 move to On or Off 4. -
Page 32: Language
Language You can change the display language of the phone. If you select Automatic, the handset will select the SIM default language ( From My Phone menu 1. 4 move to Language 2. Press < (Select) 3. 4 move to the required language or Automatic 4. -
Page 33: Shortcut Key
Shortcut key You can assign two selected functions to the Right soft key and activate them by a Short press (press once) or a Long press (press and hold). From My Phone menu 1. 4 move to Shortcut key 2. Press < (Select) 3. -
Page 34: Phone Settings
Phone settings You can customise each phone setting. From My Phone menu 1. 4 move to Phone settings 2. Press < (Select) 3. 4 move to the required settings 4. Press < (Select) Call services From Phone settings menu 1. 4 move to Call services 2. -
Page 35: Show My Number
Service charges You can control the cost of calls by setting the limit on the cost of calls and charge units of call time. From Call services menu 1. 4 move to Service charges 2. Press < (Select) 3. 4 move to the required item to set 4. -
Page 36: Call Diverts F
Call diverts F You can divert calls by setting the condition according to the type of calls. From Phone settings menu 1. 4 move to Call diverts 2. Press < (Select) 3. 4 move to the required type of calls or Cancel 4. -
Page 37: Security
Security You can limit access to protect your phone, SIM, calls, information and data. You must enable the PIN before changing the code. Phone lock You can lock your phone, and you will be prompted to enter your unlock code when you switch on the phone with a different SIM inserted. -
Page 38: Call Bar
Changing the Unlock code From Phone lock menu 1. 4 move to Change code 2. Press < (Select) 3. Enter old unlock code 4. Press < (OK) 5. Enter new unlock code 6. Press < (OK) 7. Enter new unlock code to verify 8. - Page 39 You can protect your SIM against unauthorised use. Once you enable the PIN, you will be prompted to enter the PIN code each time you switch on the phone. You must enable the PIN before changing the PIN code, and you must enter the PIN code to unable the PIN.
-
Page 40: Defaults
Fixed dial The Fixed dial feature allows you to limit your outgoing calls to a certain set of numbers saved in FDN (Fixed Dial Numbers), which is located in your SIM. When this function is on, only FDN can be dialled, and any attempt to call other numbers will fail. -
Page 41: Contacts
Contacts Contacts list Create Groups Memory status numbers Voicemail Hot key dial Contacts You can store phone numbers in two locations: the SIM Contacts list and the Phone Contacts list. Note: See “Text Entry” on page 20 for information on entering text. Viewing the Contacts list ... -
Page 42: Contacts List
Contacts list You can browse the SIM Contacts list and the Phone Contacts list individually, or both Contacts list together. Viewing the Contacts list From Contacts menu 1. Press < (Select) 2. 4 move to the required entry Press the numeric key which contains the first letter of the required name Located in Phone Contacts list Located in SIM Contacts list... -
Page 43: Editing The Contacts List
Editing the Contacts list From Contacts list menu 1. 4 move to the required entry Press the numeric key which contains the first letter of the required name 2. Press < (Menu) 3. 4 move to Edit 4. Press < (Select) 5. -
Page 44: Sending Messages From The Contacts List
Sending messages from the Contacts list You can send messages via the Contacts list (see “Messages” on page 61). From Contacts list menu 1. 4 move to the required entry Press the numeric key which contains the first letter of the required name 2. -
Page 45: Create
Create SIM Contacts list: You can store Name, Tel number and Location No. Phone Contacts list: You can store Name, 3 Tel numbers, 2 E-mail addresses, Ringtone type, Group, Hot key dial, Note and Location No. Creating a new entry From Contacts menu 1. - Page 46 From Contacts list menu 1. 4 move to [New entry] 2. Press < (Select) 3. 4 move to SIM or Phone 4. Press < (Select) 5. 4 move to the required item 6. Press < (Edit) 7. Edit the entry item 8.
-
Page 47: Groups
Groups You can categorise entries of Contacts list into 10 groups. You can name and select a particular ringtone for each group to identify incoming calls. This function is available with Phone Contacts list only. Viewing the Group From Contacts menu 1. -
Page 48: Memory Status
Memory status Memory status shows how many locations are available in each Contacts list. You can copy entries of the SIM Contacts list to the Phone Contacts list and vice versa. From Contacts menu 1. 4 move to Memory status 2. -
Page 49: My Numbers
My numbers You can store and view your information such as your names and phone numbers in your SIM. Viewing My numbers From Contacts menu 1. 4 move to My numbers 2. Press < (Select) 3. 4 move to Line 1 or Line 2 4. -
Page 50: Voicemail
Voicemail You can store the phone number to your Voicemail and make a call to check if you have Voicemail. Viewing Voicemail From Contacts menu 1. 4 move to Voicemail 2. Press < (Select) 3. Press < (Menu) 4. 4 move to View 5. -
Page 51: Hot Key Dial
Hot key dial You can quickly dial the numbers which are assigned to each numeric key $ – , (see “Hot key dial” on page 11). This function is available with Phone Contacts list only. Assigning Hot keys While editing the Contacts list entry 1. -
Page 52: Games
Games Games Games There are two preinstalled games in your phone. Playing a game From Games menu 1. 4 move to the required game 2. Press < (Select) 3. Press < (Select) Viewing Help for a game From Games menu 1. -
Page 53: Wall Breaker
Wall Breaker Move a board to deflect a ball towards rows of various coloured bricks. Some of the bricks release power up items, such as board extension, ball reduce, gun and more. But be careful: there are some items that work in the opposite way. The next level is achieved by removing all the bricks. - Page 54 Move Box Arrange all the boxes into designated places. You can only push the boxes and only one at a time. So be careful not to push them into corners. Key operation 1 / % Move up 5 / + Move down 7 / ' Move left...
-
Page 55: Browser
Browser Starting the Browser Bookmarks Settings You can access Internet services supported by the network, such as news, weather reports and sport ( Starting the Browser From Browser menu 1. Press < (Select) 2. The WAP browser will start to connect to the network To exit the browser, press D. -
Page 56: Using The Browser
Using the Browser While browsing the homepage 1. Press A (Menu) or C (Send) 2. 4 move to Browser Menu To exit the browser, select Done Press D (Power/End) or @ ( ). 3. Press < ( Menu Back Return to the previous page. Go To URL Enter URL and jump to the homepage. -
Page 57: Bookmarks
Bookmarks Once you store your favourite page or a frequently accessed page as a bookmark, you can jump to the page quickly. This eliminates the need to enter the URL every time. You can also assign hot keys to jump to particular pages. There are 2 types of bookmarks, one is in Browser and the other is off-line Bookmarks. -
Page 58: Managing Off-Line Bookmarks
Managing Bookmarks in Browser While viewing Bookmarks 1. 4 move to the required bookmark 2. Press A (Menu) 3. 4 move to the required function 4. Press < ( The following functions are available: Details Display and edit the bookmark information. Delete Delete the bookmark. - Page 59 Managing Bookmarks in off-line Bookmarks From Browser menu 1. 4 move to Bookmarks 2. Press < (Select) 3. 4 move to the required bookmark 4. Press < (Menu) 5. 4 move to the required function 6. Press < (Select) The following functions are available: Select Jump to the selected bookmark site.
-
Page 60: Settings
Settings Before accessing the Internet services, you need to set up a subscription with your network operator or Internet Service Provider (ISP) to enable the relevant configuration information. If you have any trouble with your network settings, please contact your network service provider. -
Page 61: Editing Gprs Connection
Editing GPRS Connection From Connection menu 1. 4 move to GPRS 2. Press < (Select) 3. Press < (Select) to Edit • Login name, Password, GPRS APN, Authentication Editing CSD Connection From Connection menu 1. 4 move to CSD 2. Press < (Select) 3. -
Page 62: Key Guard
Key guard You can set the Key guard on to avoid pressing any key by mistake (see “Mobile lock On/Off” on page 8). In idle screen 1. Press < (Menu) 2. Press < (Key guard) 3. Press < (OK) To release Key guard 1. -
Page 63: Messages
Messages Settings page 61 Create page 65 Inbox and page 66 Outbox Chat page 67 User page 67 messages Cell page 68 Broadcast Your phone has various messaging features, including SMS/EMS and MMS. You need to customise the settings of Messages and Network before you start. SMS/EMS –... -
Page 64: Mms Settings
MMS settings Server list You can configure up to 5 server profiles. From Settings menu 1. Press < (Select) 2. Press < (Select) 3. 4 move to the required network 4. Press < (Select) 5. 4 move to Activate or Edit 6. -
Page 65: Sms/Ems Settings
Other settings for MMS Signature You can set a signature to add to your message. You can select On or Off to add the reply text to the Reply text messages. Receive setting You can select, accept or reject anonymous messages. Auto reception You can select On, Off or Interactive. -
Page 66: Receiving Messages
Receiving messages When one or more messages arrive, New Message(s)! dialogue and the message indicator ( ) will appear in the screen together with a message tone (see “Message tone” on page 26). Note: Please be sure to keep enough free memory for new messages. When the phone memory is full, display. -
Page 67: Create
Create From Messages menu 1. Press < (Select) 2. 4 move to MMS or SMS/EMS 3. Press < (Select) 4. Enter message (see “Text Entry” on page 20) 5. Press < (Menu) The following functions are available: When you are ready to send a message, select OK. Add slide Add new slide after the last slide. -
Page 68: Inbox And Outbox
When you are ready to send a message, you need to edit the following items: Enter receiver’s phone number for SMS/EMS, phone number or email address for MMS. Send carbon copied message to other receivers. Send carbon copied message to other receivers and hide that Bcc: information. -
Page 69: Chat Sms
Chat SMS The Chat SMS feature enables you to read sent and received messages on one screen while in the chat mode with another party. From Messages menu 1. 4 move to Chat SMS 2. Press < (Select) 3. 4 move to Start chat To check the history, select History and press <... -
Page 70: Cell Broadcast
Cell Broadcast You can receive your favourite information regularly from your service provider. From Messages menu 1. 4 move to Cell Broadcast 2. Press < (Select) Receiving Cell Broadcast messages From Cell Broadcast menu 1. 4 move to Receive 2. Press < (Select) 3. -
Page 71: Languages
• Road reports (Local) • Taxis • Weather • District • Network information • Operator services • Directory enquiries (National) • Directory enquiries (International) • Customer care (National) • Customer care (International) Adding a new topic From Cell Broadcast menu 1. -
Page 72: Calendar
Calendar Viewing the Calendar You can organise your calendar to remind you of a personal event, such as a holiday period or birthday. You need to set the clock, day and time before entering anything in the calendar. Viewing the Calendar In idle screen 1. -
Page 73: Creating A Reminder
Creating a reminder On Calendar 1. 0 move to the required date 2. Press < (OK) 3. Set HOUR with # – , 4 to set HOUR 4. 2 move to MINUTE 5. Set MINUTE with # – , 4 to set MINUTE 6. - Page 74 Deleting a reminder On Calendar 1. Press A (List) 2. Press A (Del.) 3. Press < (Yes) to delete Press @ (No) not to delete Calendar...
-
Page 75: My Media
My Media Pictures Animations Sounds You can store your various multimedia files in different types of folders. Note: Changing SIM does not affect the contents of stored data. My Pictures You can store and manage the picture files. Picture files are displayed as thumbnails. Move the cursor with 0. -
Page 76: My Animations
My Animations You can store and manage the animation files. Animation files are displayed as thumbnails. Move the cursor with 0. From My Media menu 1. 4 move to My Animations 2. Press < (Select) 3. 0 move to the required animation 4. -
Page 77: My Sounds
My Sounds You can store sound files and manage them. From My Media menu 1. 4 move to My Sounds 2. Press < (Select) 3. 4 move to the required sound Sound files are played automatically. 4. Press < (Play) to play again Press A (Menu) 5. -
Page 78: Applications
Applications Games Alarms Sound recorder Clock Auto power on Auto power off Calculator Melody composer Your phone contains a number of preinstalled applications. Applications page 77 Setting the Alarms ... 77 page 77 page 78 Time & date ... 78 page 78 Format ... -
Page 79: Games
Games See “Games” on page 50. Alarms You can set 3 sets of alarms to sound or vibrate when the set time is reached. Note: If the phone is switched off at the alarm set time, the phone will switch on automatically and the alarm will sound. -
Page 80: Sound Recorder
Sound recorder You can record and make a sound file. From Applications menu 1. 4 move to Sound recorder 2. Press < (Select) to start recording 3. Press @ ( ) to stop recording Clock You can set the time and date, and select from various types of clock formats. Time &... -
Page 81: Auto Power On
Format From Clock menu 1. 4 move to Format 2. Press < (Select) 3. 4 move to the required format 4. Press < (Select) Auto power on You can set Auto power on and automatically switch on the phone at the set time. Note: Even if the phone is switched off at the set Auto power on time, the phone will switch on automatically. -
Page 82: Auto Power Off
Auto power off You can set Auto power off and automatically switch off the phone at the set time. From Applications menu 1. 4 move to Auto power off 2. Press < (Select) 3. # – , or 4 to change HOUR setting 4. -
Page 83: Currency Rate
Conversion You can convert from/to a home currency using a currency rate. On Calculator 1. Enter a number with # – , (maximum 8 digits) 2. Press A (Menu) 3. 4 move to Conversion 4. Press < (Select) Calculated amount is displayed. Currency rate You can set currency rate to convert to/from a particular currency. -
Page 84: Melody Composer
Melody composer You can compose your own melody and store it as a sound file. From Applications menu 1. 4 move to Melody composer 2. Press < (Select) Composing a melody You can play a melody while composing. From Melody composer menu 1. -
Page 85: Accessory Options
Accessory Options Fast Travel Charger Carry a lightweight portable charger wherever you go to ensure you always have the power to talk. Each charger type is only available in the country/region of use. EB-CAX500EU EB-CAX500UK Battery Double your talk time by having a spare battery. EB-BSX500 Accessory Options... -
Page 86: Data Cable
Personal Handsfree Talk and move while keeping your hands free by EB-EMD35 using this accessory. Just place the earpiece in your ear and the adaptor in the side of the handset – and talk! Data Cable Connect your phone to a PC so you can transfer data EB-USX500 between them. -
Page 87: Troubleshooting
Troubleshooting Should any problem persist, contact your dealer. Problem Phone will not switch The network you are Extremely short using and the condition battery life for a new of the battery can affect battery. battery life. Short battery life for The battery has worn an old battery. - Page 88 Problem Calls cannot be made. Calls cannot be made from Fixed Dial Store. Calls cannot be received. Emergency calls cannot be made. Phone numbers cannot be recalled from Contacts. Troubleshooting Cause The phone is locked. Outgoing calls are barred. The phone is not registered to a network.
-
Page 89: Important Error Messages
Important Error Messages The message area is full. Your messages cannot be Capacity full! stored until some of the currently stored messages are deleted. The selected feature is either not supported by the Function SIM or is not available with the current subscription – unavailable contact your Service Provider. - Page 90 The network has detected an authentication failure Unregistered SIM because your SIM is not registered with that network – contact your Service Provider. Important Error Messages...
-
Page 91: Glossary Of Terms
Glossary of Terms Access Point Name. Directs the user to the gateway or the required service. Challenge Handshake Authentication Protocol. A security CHAP feature in the GPRS network. Copies selected text from short text message without Copy removing it from the original message. Circuit Switched Data. - Page 92 Personal Identification Number used for SIM security. Supplied by your Service Provider. If the PIN is entered incorrectly 3 times, the PIN will be blocked. Personal Identification Number used to control the Fixed Dial Store and Call Charge metering. Supplied by your PIN2 Service Provider.
-
Page 93: Personal Settings
Personal Settings Use the table below to record your GSM/GPRS WAP settings. Item WAP setting Primary IP Primary port Secondary IP Secondary port Timer Homepage Connections GPRS Login name Password GPRS APN Authentication Login name Password Phone number Call type Transfer rate Hint None/PAP... -
Page 94: Index
Index Accessory Options ...83 Active line ...32 Alarms ... 3 Alerts ...27 All calls, Call services ...32 Answered call, Recent calls ...10 Answering, Incoming call ...12 APN ...89 GPRS APN ...59 Appearance Phone body ...1 Applications ... 22 Asterisk key ... 1 Authentication, GPRS ...59 Auto answer ... - Page 95 Earpiece ...1 E-mail address, Contacts list ...44 Emergency calls ...9 EMS ... 63 Create from Contacts list ...42 Settings ...63 End key ... 1 Ending a call ...9 Error Messages ...87 Fast Travel Charger (EB-CAX500xx) ...83 Fixed dial ...38 Flashing ...3 Games ...22 Glossary of Terms ...89 GPRS ...
- Page 96 Settings ... 61 Microphone ... 1 MMS ... 89 Create from Contacts list ... 42 MMS settings ... 62 Server list ... 62 Mobile lock ... 8 Multi-party call ... 18 My Animations ... 74 My Contacts ... 49 My Media ...22 My numbers ...
- Page 97 Server name, MMS ...62 Service charges ...33 Service dial ... 12 Service Provider ...90 Settings Alarms ...77 Browser ...58 EMS ...63 Messages ...61 MMS ...62 Phone settings ...32 Restore MMS settings ...63 SMS ...63 Shift key ... 1 Short press ...31 Shortcut key ...31 Show my number ...33 Signature, MMS ...63...
-
Page 98: Note
Note Note... - Page 99 Note Note...
- Page 100 Note Note...
- Page 101 All screen images in this manual are simulated. Some phone colours may not be available in every country. Panasonic Mobile & Automotive Systems Czech s.r.o. Printed in Czech Republic Pardubice, Czech Republic...