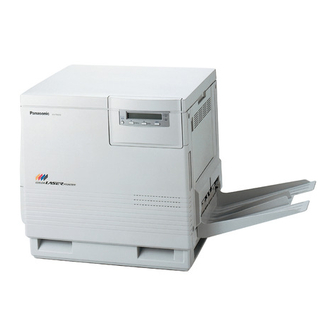
Panasonic KX-P8410 Operating Instructions Manual
Color laser printer
Hide thumbs
Also See for KX-P8410:
- Specifications (2 pages) ,
- Operating instructions manual (137 pages) ,
- Operating instructions manual (165 pages)
Table of Contents
Advertisement
Quick Links
Advertisement
Table of Contents

Related Manuals for Panasonic KX-P8410


Summary of Contents for Panasonic KX-P8410
-
Page 1: Operating Instructions
Operating Instructions KX-P8410 Model No. Please carefully read the Operating Instructions before operating. Keep this CD-ROM in the protective case. Do not expose the CD-ROM to direct sunlight or extreme heat and do not scratch or smudge the surface of the... - Page 2 BMicrosoft, Windows and Windows NT are registered trademarks of Microsoft Corporation in the United States and/or other countries. BPentium is a registered trademark of Intel Corporation. BAdaptec and EZ-SCSI are trademarks of Adaptec, Inc. BCentronics is a trademark of Centronics Data Computer Corporation. BAdobe and Acrobat are trademarks of Adobe Systems Incorporated.
- Page 3 MODEL NO. KX-P8410 NAME OF RESELLER As an Energy Star Partner, Panasonic has determined that this product meets the Energy Star guidelines for energy efficiency. (The international Energy Star The operating instructions are subject to change without notice. © KYUSHU MATSUSHITA ELECTRIC CO., LTD. 1997 SERIAL NO.
-
Page 4: End-User License Agreement
CONDITIONS. If you do not agree to these terms and conditions, return the unopened packet and the other components of the Panasonic product to the place of purchase and your money will be refunded. No refunds will be given for the products that have an opened packet or missing components. - Page 5 Automated 24-hour support via Fax back Electronic bulletin board World Wide Web Technical & Driver Support Technical Support Calls Helpful Phone Numbers CALL 1-800-742-8086 ask for COLOR CALL 1-800-222-0584 CALL 1-800-833-9626 CALL 1-888-744-2424 CALL 1-888-744-2424 CALL 1-800-222-0584 CALL 1-201-863-7845 http://www.panasonic.com/alive...
-
Page 6: Table Of Contents
Printer Panel Overview ......Setting Up the Printer ....... - Page 7 Printer Status Dialog Box ........
-
Page 8: For Your Safety
Ozone Release BMake sure that the printer is installed in a well ventilated room so as not to increase density of ozone in the air. Since ozone is heavier than air, it is recommended that air at floor level be ventilated. - Page 9 For Your Safety Moving the Unit The printer weighs approximately 47.9 kg {105.5 lbs.}. It must be handled by two people. Turn the power off and remove the power cord when handling the unit.
- Page 10 For Your Safety Caution Labels DANGER: CAUTION: Invisible laser radiation Invisible laser radiation when open and interlock when open and defeated. interlocks defeated. AVOID DIRECT AVOID EXPOSURE EXPOSURE TO BEAM. TO BEAM. PELIGRO: VARNING: Cuando se abre y se Osynlig laser- invalida el bloqueo, se strålning när denna producen radiaciones...
-
Page 11: For Users In Australia
FOR YOUR SAFETY PLEASE READ THE FOLLOWING TEXT CAREFULLY This printer is supplied with a moulded three pin mains plug each for your safety and convenience. A 13 amp fuse is fitted in this plug. Should the fuse need to be replaced please ensure that the replacement fuse has a rating of 13 amps and that it is approved by ASTA or BSI to BS 1362. -
Page 12: Cautions
BAreas of poor ventilation BAreas of high dust or chemical fume concentration (solvent etc.) BLiquids near the equipment Not genuine toner BAny toner other than genuine Panasonic toner. It may damage the printer. -
Page 13: Static Electricity Damage
BThe interface connectors : SCSI, parallel and optional network BElectrical components, connectors inside the printer and any components on the optional board (RAM Expansion Board or Ethernet Card) -
Page 14: Chapter 1 Features
Before You Start Features The KX-P8410 Color Laser Printer provides fast, high-quality color printing on plain paper, plus the ease of operation and high performance you expect from a laser printer. Some of its features include: High quality Resolution High speed... -
Page 15: System Requirements
System Requirements To operate the KX-P8410 effectively, see the following. CPU: Operating System: RAM: Free disk space: Virtual memory: Display: Drive: Microsoft Windows operating system Version 3.1 (hereafter Windows 3.1) Microsoft Windows 95 operating system (hereafter Windows 95) Microsoft Windows NT Workstation operating system, and Microsoft Windows NT Server network operating system Version 4.0... -
Page 16: Minimum Space Requirements
Before You Start Minimum Space Requirements 45 cm (17.7 ) Multi-Purpose Tray Opening Space Power Source BThe voltage level of the power source must not vary more than 10% from the BDo not use an extension cord. BDo not use a line conditioner, transient suppressor or surge protector as it may Left 60 cm (23.6 ) Front cover opening space... -
Page 17: Unpacking
1. Printer (Color imaging unit, Fuser unit, Paper tray and Output tray are included.) 2. Toner cartridges (black, cyan, magenta, and yellow) 3. Power cord 4. KX-P8410 CD-ROM (includes Driver & Utility and Operating Manual) 5. Color Calibration Card 6. Setup manual... -
Page 18: Part Names
Front side view Front door P. 21) Rear side view P. 38) AC inlet Parallel interface P. 34, 36) connector Printer panel P. 19) Right side door P. 23, 121) Output tray Media tray Fuser P. 111, 116) Imaging unit P. -
Page 19: Printer Panel Overview
BPressing this button exits the Menu mode. I I /CANCEL button BPressing this button for 2 or more seconds cancels the data in the printer. BWhen the printer is in the Menu mode, pressing this button: Displays the previous menu, item or selection. - Page 20 BBlinking: user correctable error, such as media jam, open door, or a missing replaceable component (e.g. Toner) has occurred. READY indicator (green) BON: the printer is ready for operation. BBlinking: the printer is warming up or in the Menu mode. BBlinking fast: the printer is printing.
-
Page 21: Setting Up The Printer
Setup Setting Up the Printer Preparing the Imaging Unit Open the front door. Turn the upper green lever clockwise until it stops and the arrows are aligned. (This tightens the internal belts to ready the unit for printing.) Close the front door. -
Page 22: Setting Up The Output Tray
Setup Setting Up the Output Tray Remove the adhesive tape that holds the output tray against the printer. Lower the tray to the operating position. -
Page 23: Installing The Toner Cartridges
Installing the Toner Cartridges Note: B The toner cartridges that are shipped with the printer are starter cartridges. They are installed in exactly the same manner as the optional cartridges; the only difference is that the starter cartridges have less toner. (The page life expectancy is 3,000 pages, which is based on a 5% image area.) - Page 24 Setup Insert the toner cartridge in the appropriately labeled slot. From top to bottom, the order of the color toner cartridges is BLACK, CYAN, MAGENTA, YELLOW. Repeat steps 1, 2 and 4 for each toner cartridge. When you have installed all the toner cartridges, go to step 6. Close the right side door.
-
Page 25: Loading Media
B If you have the 2nd Cassette Feeder installed: If you wish to use the automatic cassette-switching feature (a large print job, for example), make sure that all trays in the printer are the same media type and size. The transparency tray should only be inserted in the upper or middle tray slots. - Page 26 B Be careful not to leave fingerprints on the media, which can result in a smudged print. B Reusing media that has been fed through the printer once (for example, after jams) can reduce the life of the consumables and paper path components.
- Page 27 Place the media in the tray under the hooks. The height of media should not exceed the limit mark on the tray, or it may cause a jam. Notes: B Load media with the print side down. Most media has instructions recommending the side to be printed first.
-
Page 28: Margins And Print Area
You may need to adjust the page margins in the application software to match the print area. The following table and illustrations show the page sizes, the largest print areas, and the margins for the media sizes supported on this printer. Letter Legal... -
Page 29: Loading Media In The Multi-Purpose Tray
You should not expect the same print quality and reliability that you get with one- sided printing. For details, refer to Setting media thickness switch Because the printer accommodates various media weights from the multi-purpose tray, media thickness can be manually selected for the most reliable paper-picking. Follow these steps: Open the left side door (#). - Page 30 For detailed information on media, refer to Loading Paper, Transparency B Reusing media that has been fed through the printer (for example, after jams) can reduce the life of the consumables and paper path components. B When printing legal size using the multi-purpose tray, backside marking may occur.
- Page 31 The height of media should not exceed the limit mark on the left guide, or it may cause a media jam. Adjust the media guides to the media size. Use the printer driver to select the multi-purpose tray. Setup...
-
Page 32: Loading Labels
Insert the envelope with the short end entering the printer first and the printing side facing up. The edge where the stamp is located enters the printer last. Use the printer driver to select Envelope in the Paper size menu and the Paper source menu. Loading Labels Set the media thickness switch Adjust the media guides to the width of the label sheets. -
Page 33: Connecting The Printer To A Computer
Setup Connecting the Printer to a Computer Only one PC can be directly connected to your printer. -
Page 34: Using A Parallel Interface Cable
B The actual connector on the computer may differ depending on the manufacturer of the computer. B If the cable is connected to the PC via a printer buffer or selector, the printer may not print. Connect the power cord to the printer’s AC inlet and to an AC outlet. -
Page 35: Using A Scsi Cable
Using a SCSI Cable Note for Terminator setting: B The printer must be the last device in the chain. The terminator setting of all other devices in the chain must be off. Make sure the computer, printer and the other connected peripheral devices are turned off. - Page 36 Setup Make sure the terminator switch (#4) of the printer is set to ON (default setting). Connect the power cord to the printer’s AC inlet and to an AC outlet.
- Page 37 In most cases, there is no need to change the default settings. However, if you have other peripheral devices connected in a SCSI chain, check if their ID numbers conflict with that of the printer. Be sure to choose an unassigned ID number.
-
Page 38: Power On
Power On Note: Turn ON the printer, then the computer. # The READY indicator on the printer starts flashing and “Initializing” is displayed on the printer LCD panel. $ After approximately 3.5 minutes, the printer’s READY indicator is illuminated and “Ready” is displayed on the printer LCD panel. -
Page 39: Printing A Test Page From The Printer Panel
Printing a Test Page From the Printer Panel The test page provides general information on printer settings and configuration. Make sure the printer is ready and paper is loaded. Use the following procedure to print a test page. Press the MENU/EXIT button to enter the Menu Mode. -
Page 40: Installing The Kx-P8410 Software
BStatus Display for Windows 3.1, Windows 95 or Windows NT 4.0 Note: B If you are using Windows 3.1, disable or uninstall any application software’s printer status to prevent conflicts with the KX-P8410 Status Display for Windows 3.1. B When reinstalling the KX-P8410 software, do it immediately after restarting Windows. -
Page 41: Installing The Printer Driver And Utilities For Windows 3.1
Installing the Printer Driver and Utilities for Windows 3.1 Start Windows 3.1. Quit all applications. Insert the KX-P8410 CD-ROM into your computer’s CD-ROM drive. Click File from the Program Manager, then click Run..Click Browse and select your CD-ROM drive from the [Drives:] box. -
Page 42: Installing The Printer Driver And Utilities For Windows 95
Click Next> . The Run Installation Program window is displayed. Click Finish . Wait until the Panasonic KX-P8410 Utilities Welcome window is displayed. Follow the instructions on the screen to complete the installation. After installation, restart your system. B During installation, when “Setup is adding icon to the Printer folder. Please wait several minutes”... -
Page 43: Using Plug And Play
OK . Click OK . The Select SETUP.EXE window is displayed. Click OK . Select SETUP.EXE included on the KX-P8410 CD- ROM in your CD-ROM drive and then click Open . Wait until the Panasonic KX-P8410 Utilities Welcome windows is displayed. -
Page 44: Using Add Printer
B The above “Using Add Printer” procedure installs only the printer driver. It does not install the Status Display program. B After installing the printer driver, it will take several minutes for the printer to register and display in Printers Folder. -
Page 45: Installing The Printer Driver And Utilities For Windows Nt 4.0
The Add/Remove Program Properties window is displayed. Click Install . The Install Program From Floppy Disk or CD-ROM window is displayed. Insert the KX-P8410 CD-ROM into CD-ROM drive. Click Next> . The Run Installation Program window is displayed. Click Finish . - Page 46 Follow the instructions on the screen to complete the installation. BTo connect the printer to a SCSI port, the SCSI port needs to be installed. Refer to the Ports tab of the Panasonic KX-P8410 Properties window P. 88 to 91).
- Page 47 B When printing through the SCSI port, the access speed between other connected SCSI devices is diminished. B To connect the KX-P8410 to your SCSI port, a SCSI driver and ASPI Manager must be installed. Refer to your SCSI board manual.
- Page 48 Open Winnt40, Disk2, then select Monitor.inf file. Click Open . The Installing Print Monitor is displayed. Click OK . The Printer Ports window is displayed. Click New Port..The Port Name window is displayed. Type the port name (for example; KXP8410GDI), then click OK .
- Page 49 Using the Printer in a Network Environment For the server computer: To share the printer with other clients on the network, perform the following steps after installing the printer driver. Double click the My Computer icon. Double click the Printer icon.
- Page 50 Click Start , move the pointer to Settings and click Printers. Double click the Add Printer icon. Select Network printer server. Click Next> . Select the Panasonic KX-P8410 printer in the Shared Printers box. Click OK and follow the instructions on the screen. Click Finish .
- Page 51 Click Browse..Select the KX-P8410 printer. Click OK . Click Next> . If the server does not have the Printer Driver for Windows 95, click Have Disk..The Install From Disk window is displayed. Click Browse..Insert the KX-P8410 CD-ROM into CD-ROM drive.
- Page 52 Setup Removing the Printer Driver Click Start , move the pointer to Settings and click Printers. Select Panasonic KX-P8410. Click File menu, then click Delete. Click Yes .
-
Page 53: Removing The Kx-P8410 Software
Click Start , move the pointer to Programs, then to KX-P8410 Utilities. Click Uninstall . Click Yes . Follow the instructions on the screen. Note: B For removing the Panasonic KX-P8410 icon in the Printer Folder, refer to Help in Windows 95 / Windows NT 4.0. Setup... -
Page 54: Installing Panasonic Font Manager
Setup Installing Panasonic Font Manager The Panasonic Font Manager is included in the KX-P8410 CD-ROM. To install the above application, perform the following steps. For Windows 3.1 users: Start Windows 3.1. Quit all applications. Insert the KX-P8410 CD-ROM into your computer CD-ROM drive. - Page 55 Follow the instructions on the screen to complete the installation. Note: BWhen you insert CD-ROM into your drive, application installer may start automatically. In this case, quit the Panasonic quick installer and use the application installer. For information on how to use the applications, refer to their manuals.
-
Page 56: Setting The Color Density
Setup Setting the Color Density The printer panel provides an interface to adjust the density of the toner applied to the media. This feature compensates for the changes in density that can occur as environmental conditions changes, toner cartridges or the imaging unit age. - Page 57 The current density setting for each color is indicated by the line enclosure on the Color Calibration Page as shown in the following example. The factory default setting for each color density is 0. Color Calibration Page (Example): Setup Current color density settings...
- Page 58 Setup Compare the current color density settings on the Color Calibration Page with the color density samples on the Color Calibration Card to see if they match. Place the Color Calibration Page on at least 2 sheets of clean white paper in a well-lighted area.
- Page 59 If you wish to adjust the density for all colors simultaneously, perform the following, then go to step 5. # Repeat instructions # through % of step 1 on Color Calibration Calibration Offset $ Press the ENTER button. Calibration Offset 0* (-5 to 5) % Press the F/I button to darken/lighten all the colors.
- Page 60 Setup Notes: If you wish to adjust the density for each color independently, perform the following, then go to step 5. # Repeat instructions # through % of step 1 on $ Press the F button. Color Calibration CYAN % Press the ENTER button. CYAN 0* (-10 to 10) &...
-
Page 61: Menu Mode
Before you attempt to change any settings, check the factory default settings in the following table. For details on changing the settings, refer to Outline for Operation Once you have changed the printer panel settings, they are automatically saved as user default settings even if the power is turned off. -
Page 62: Outline For Menus
Network * Maintenance Test Page Prints the Configuration Page and Maintenance Page. Configuration Page Prints general information on printer settings and configuration. Maintenance Page Prints each color (Cyan, Magenta, Yellow or Black) halftone to check for print quality. Color Calibration Adjusts the toner density for each color independently or all colors. -
Page 63: System Setting
Data Timeout With the Data Timeout set to ON, the printer automatically returns to Ready status if the printer does not receive any data from a computer within the time period set in this selection (30 to 240 seconds). Network Sets the addresses used in TCP / IP Protocol. -
Page 64: Outline For Operation
Press the ENTER button to activate your selection and advance to the next item in the same menu that you selected in step 2. BIf you have selected Maintenance Page in step 4, the printer will exit the Menu mode after printing a maintenance page in the selected color. - Page 65 Using the Printer If you wish to set more items in the same menu, repeat steps 4 to 7 above. BTo exit the Menu mode at any stage, press the MENU/EXIT button. BTo change the setting of an item of a different menu, first exit the Menu...
-
Page 66: Displaying The Panasonic Kx-P8410 Window
Using the Printer Displaying the Panasonic KX-P8410 Window The KX-P8410 window can be displayed from Windows ( application Note: 68). B Available option tabs and operation buttons displayed through Windows 95 are different from those displayed through Windows 3.1. Choosing Printer Properties Under Windows: For Windows 95 Click Start , select Settings, then click Printers. - Page 67 Double-click Main icon and Control Panel icon, then double-click Printers icon. The Printers window is displayed. Select Panasonic KX-P8410 on LPT1 The Panasonic KX-P8410 window is displayed. The port name (LPT1) may vary depending on the connection of your printer. Using the Printer , then click Setup .
-
Page 68: From An Application
The WordPad window is displayed. Click the File menu, then click Print..The Print window is displayed. Select Panasonic KX-P8410 in the Name : box. Click Properties . The Panasonic KX-P8410 window is displayed. Click a tab to view the features. -
Page 69: Details Tab
# Print to the following port Select the port where the parallel interface cable is connected. When you are using the SCSI interface cable, select the KX-P8410GDI (KX-P8410 on SCSI). For the functions of other buttons, refer to the Help menu in the Windows. -
Page 70: Paper Tab
Using the Printer Paper Tab & # Paper size Selects a different paper size. Letter, A4, Legal or Envelope can be selected. $ Orientation Selects Portrait (vertical) or Landscape (horizontal). Portrait % Output order Specifies whether the document prints face up or face down in the output tray. -
Page 71: Paper Source
Selects media by choosing the location (trays) or the type of media. BAuto [Plain Paper]: Prints on paper loaded in a paper tray. The printer picks paper from the paper tray that loaded with the media size you selected in an application software. -
Page 72: Quality Tab
Using the Printer Quality Tab # Print style Select a type which is the closest to your document to print for optimal quality. BBlack Text: Prints the document in black and white the quickest. Select this for black and white text files. - Page 73 This selection is effective only when Color Graphics or Color Photo is selected. Most appropriate Dithering mode may be automatically selected according to the print style, print quality and printer memory you have selected. Notes: BWhen Color Graphics is selected in the Print Style, Dithering mode is available for all print quality selections.
-
Page 74: Option Tab
For the adjustment, refer to Using the Hyper-Tetra Adjustment BUse image color matching (ICM) The printer assigns the best color possible to represent the original color accurately by selecting different rendering intents (Saturation, Contrast or Colormetric). Click on this check box, then click the Rendering intent button. - Page 75 Clicking on this check box allows you to print a mirror image of the document. & About button Displays the window that contains the program version and copyright information. ' Restore Defaults button Resets the Option tab’s settings to the default settings. Using the Printer P. 72 Quality Tab) is selected. 102).
-
Page 76: Memory Tab
Using the Printer Memory Tab # Printer memory Selects the amount of memory installed in the printer. If the amount of memory in the printer does not match this setting, a MEMORY OVERFLOW message might be displayed. To determine how much memory is installed in the printer, print out the Test page As the printer memory increases, printing throughput improves. - Page 77 Gray Scale or the Color Photo print style is selected and the Standard (600 dpi) is selected. BUse printer memory to make print performance better Sends the data to the printer with the standard level of compression to improve throughput. BUse printer memory to make print quality better Sends the data to the printer with the lower level of compression or without compression to improve the print quality.
-
Page 78: Displaying The Panasonic Kx-P8410 Default Document Properties Window (For Windows Nt 4.0)
Using the Printer Displaying the Panasonic KX-P8410 Default Document Properties Window (for Windows NT 4.0) The KX-P8410 Default Document Properties window can be displayed from Printers under Windows ( see A below) or from an application see B on page 79). - Page 79 The WordPad window is displayed. Click the File menu, then click Print..The Print window is displayed. Select Panasonic KX-P8410 in the Name : box. Click Properties . The Panasonic KX-P8410 Document Properties window is displayed. Click a tab to view the features.
-
Page 80: Page Setup Tab
Using the Printer Page Setup Tab & # Paper Size Selects a different paper size. Letter, A4, Legal or Envelope #10 can be selected. -
Page 81: Copy Count
Selects media by choosing the location (trays) or the type of media. BAuto [Plain Paper]: Prints on paper loaded in a paper tray. The printer picks paper from the paper tray that is loaded with the media size you selected in the application software. -
Page 82: Advanced Tab
Using the Printer Two categories (Paper/Output and Document Options) for document settings are available. To display the items of a category, click on that category. As for the features of each items (Paper Size, Orientation, Paper Source, Copy Count), refer to Page Setup Tab Clicking on an item displays its selections in the lower box. -
Page 83: Document Options
BColor Photo: Prints the document in color. Select this for photo images such as a photo from a CD. BPresentation: Prints the document in color. Select this for presentation printing. (Presentation provides a clearer tone than Color Graphics.) Using the Printer... -
Page 84: Print Quality
This selection is effective only when Color Graphics or Color Photo is selected. Most appropriate Dithering mode may be automatically selected according to the print style, print quality and printer memory you have selected. BWhen Color Graphics is selected in the Print Style, Dithering mode is available for all print quality selections. - Page 85 Specifies the format in which the printing information is stored on your disk for printing. Generally, metafile spooling set to Enabled frees up your program faster than Disabled. Using the Printer 97). This function is effective P. 83 Advanced Tab) is selected.
- Page 86 Using the Printer When Panasonic KX-P8410 Document Settings is selected # Undo Changed Option Returns the Page Setup and Advanced tab’s settings to the previous settings. $ About KX-P8410 Printer Driver... Displays the window that contains the program version and copyright...
-
Page 87: Displaying The Panasonic Kx-P8410 Properties Window (For Windows Nt 4.0)
Click Start , select Settings, then click Printers. The Printers window is displayed. Click the Panasonic KX-P8410 icon. Click the File menu, then click Properties. The Panasonic KX-P8410 Properties window is displayed. Click a tab to view the features. Ports Tab Sharing Tab Device Settings Tab P. -
Page 88: Ports Tab (Scsi Port)
Using the Printer Note: Ports Tab (SCSI port) BThis option is available only for Windows NT 4.0. # Checked port Documents will print to the checked port. $ Add Port... button Adds a new port P. 89 Installing the SCSI... - Page 89 B When printing through the SCSI port, the access speed between other connected SCSI devices get slower. B To connect the KX-P8410 to your SCSI port, a SCSI driver and ASPI Manager need to be installed. Refer to your SCSI board manual.
- Page 90 Using the Printer Note: Insert the KX-P8410 CD-ROM into the CD-ROM drive. Click Browse..Click Cancel . The Locate File window is displayed. B The SCSI port cannot be installed through the Monitor.inf file when copied to a directory with long file name.
- Page 91 Using the Printer Click New Port..The Port Name window is displayed. Type the port name (for example; KXP8410GDI), then click OK . The Printer Ports window is displayed. Click Close .
-
Page 92: Sharing Tab
Using the Printer Sharing Tab # Shared To share the printer over the network. For the setup operation, refer to Sharing the printer with a client computer 93). $ Alternate Drivers To install an alternate driver. For the installation, refer to Installing an alternate driver... - Page 93 Sharing the printer with a client computer Click Shared. Type the printer name (for example: KX-P8410). Note: B If the shared printer is used through Windows 95, the printer name must not exceed 12 characters. Click OK . Installing an alternate driver (for example: Windows 95) Select Windows 95, then click OK .
- Page 94 Using the Printer Click Cancel . The Locate File window is displayed. Insert the supplied KX-P8410 CD-ROM into the CD-ROM drive. Select CD-ROM drive. Open Win95, Disk2, then select KXP8410.inf file. Click Open . The Printer Drivers for Window 95 window is displayed.
-
Page 95: Device Settings Tab
Test page As the printer memory increases, printing throughput improves. If the total printer memory is set more than 32 MB, Printer memory usage option ( $ ) becomes effective. Using the Printer... - Page 96 Gray Scale or the Color Photo print style is selected and the Standard (600 dpi) is selected. More than 32 MB is required on the printer to select this option. BUse printer memory to make print performance better Sends the data to the printer with the standard level of compression to improve throughput.
-
Page 97: Using The Hyper-Tetra Adjustment
The Hyper-Tetra Adjustment window is displayed. For Windows NT 4.0 Click on Hyper-Tetra Adjustment ... in the Advanced tab The Hyper-Tetra Adjustment... button appears in the lower box. Click Hyper-Tetra Adjustment..The Hyper-Tetra Adjustment window is displayed. P. 74) P. 82) Using the Printer... -
Page 98: Color Adjustment
Using the Printer To adjust the brightness, contrast, hue or saturation of color, select Color Adjustment in the Hyper-Tetra Adjustment window. & Color Adjustment # Brightness Changes the brightness of an image. A higher brightness setting provides a lighter image and a lower brightness setting provides a darker image. - Page 99 Drag each slider left or right or click I or H , or type the numerical value. B You can see the result of the adjustment in the Preview box. B To reset the setting, click Reset . Click OK to make the setting(s) effective. Using the Printer...
-
Page 100: Color Balance
Using the Printer To adjust the level of red, green or blue, select Color Balance in the Hyper-Tetra Adjustment window. The following options appear. Adjust the color by performing the following steps. Color Balance # Red Lightens or darkens red. A darker level setting provides a stronger cyan. -
Page 101: Color Cmyk Adjustment
Drag each slider left or right or click I or H , or type the numerical value. B You can see the result of the adjustment in the Preview box. B To reset the settings, click Reset . Click OK to make the setting(s) effective. Using the Printer Preview box... -
Page 102: Using The Density Adjustment
Using the Printer Using the Density Adjustment You can adjust the grayscale density of your output using the Density adjustment window. Displaying the Density Adjustment Window For Windows 95/3.1 Click on the Use density adjustment check box in the Option 74). - Page 103 Adjust the gray scale by performing the following steps. Drag the slider left/right, or click I / H Darker Lighter B You can see the result of the adjustment in the Preview box. Click OK to make the adjustment effective. Using the Printer Preview box...
-
Page 104: Two-Sided Printing Using Microsoft Word 95
Open document in Word for Windows 95. From the File menu, click Print..The Print window is displayed. Make sure that Panasonic KX-P8410 is selected in the Printer box, then click Properties . The Panasonic KX-P8410 window is displayed. - Page 105 From the File menu, click Print..The Print window is displayed. Click Properties . The Panasonic KX-P8410 window is displayed. Select MPT Paper 2nd Side from the Paper source pop-up menu, then click OK . The Panasonic KX-P8410 window is closed.
-
Page 106: Cleaning
Care and Maintenance Cleaning Periodic cleaning of the printer is recommended. The frequency of cleaning is dependent upon the environment in which the printer is used. You should clean the printer: BAt least once a month. BWhen the printer experiences frequent media jams. - Page 107 Cleaning the home sensor If your printer panel displays Printer Error 30, clean the home sensor inside the printer. Open the printer’s front door. Care and Maintenance...
- Page 108 B Do not expose the imaging unit to artificial light for more than 45 seconds; or you may damage the unit. Never expose it to direct sunlight. B Do not leave the printer’s front door open for an extended period of time (for example, several hours).
- Page 109 Match the arrow on the right side of the imaging unit with the arrow on the printer, and slightly push the imaging unit into the printer. Then release the left handle and push the unit in until it stops.
-
Page 110: User Replaceable Components
Care and Maintenance User Replaceable Components When the printer panel indicates that a supply needs to be replaced, make sure that you have replacement supplies on hand. The printer may continue to print until the supply is completely used up; then it stops until you replace the indicated supply. - Page 111 Refer to * page 110. The starter cartridges that are shipped with the printer have an average life of approximately 3,000 pages, based on an average of 5% coverage. Specialty media (Transparencies, coated paper, etc.) will result in shortening the life expectancy of each consumable.
-
Page 112: Clearing A Jam
Care and Maintenance Clearing a Jam If the printer has frequent media jams, make sure that you follow these guidelines: BAlways use high-quality laser paper and transparencies. Refer to BMake sure that you load specialty media only in the multi-purpose tray and that you If a media jam occurs, the printer panel reports Jam at <Location>. - Page 113 $ Remove the jammed media. % Close the left side door. # Remove the media tray. $ Remove the jammed media from inside the printer. % Reinsert the media tray. & Open and close the front door to clear the error message from the LCD.
- Page 114 % Close the lower left side door. # Remove the selected media tray (middle or lower media tray). $ Remove the jammed media from inside the printer. % Reinsert the media tray. & Open and close the front door to clear the error message from...
- Page 115 Jam at B Open the left side door. Use the green handles to pull out the paper feeder. Remove the jammed media on the paper feeder. Reinsert the paper feeder and close the left side door. Care and Maintenance...
-
Page 116: Jam At C
$ Turn the small green thumbscrew counterclockwise to unlock the fuser. BThe fuser is hot; to avoid personal injury, turn off the printer and wait 10 minutes (after opening the front door) for the fuser to cool before touching it. - Page 117 # Hold the fuser as shown below, and slide it out of the printer. Safety Caution: B The fuser unit weighs approximately 3.1 k g {6.8 lbs.}. Take care when handling $ Close the front door. Remove the oil supply roll: # Press out on tabs to unlock the oil supply roll.
- Page 118 Care and Maintenance Note: Caution: # Turn the fuser’s large green knob clockwise. $ Remove the jammed media. # Replace the oil supply roll into the fuser. $ Press down firmly on the oil supply roll to snap both sides into place.
- Page 119 # Open the front door. $ Slide the fuser back into the printer. # Turn the small green thumbscrew clockwise to lock the fuser. $ Close the front door. Care and Maintenance...
-
Page 120: Jam At D
Note: Jam at D B The fuser is hot. To avoid personal injury, turn off the printer and wait 10 minutes (after opening the front door) for the fuser to cool before touching it. B First check the exit opening for media that has jammed and folded like an accordion. - Page 121 Remove the jammed media from the fuser and the printer. Safety Caution: BThe fuser is hot; to avoid personal injury, turn off the printer and wait 10 minutes for the fuser to cool before touching it. ' Close the front door.
- Page 122 Care and Maintenance Jam at E Remove the jammed media from the output tray. Pull open the access door (above the plastic output tray) and remove the media. Open and close the front door to clear the error message from the LCD.
- Page 123 Jam at MPT (Multi-purpose tray) Remove the jammed media from the multi-purpose tray. Open and close the front door to clear the error message from the LCD. Care and Maintenance...
-
Page 124: Troubleshooting
Trouble Possible Cause The printer is receiving, processing or printing job. You have entered the Menu mode in the printer panel. The printer is not ready, is disabled, or has detected an error. Error occurred that is not user-correctable. - Page 125 Trouble A single color appears The color density is set faded. incorrectly in the printer panel. The toner is almost depleted. On the Maintenance The toner cartridge is Page, a single color has almost depleted and is a sharp, dark or light not properly applying vertical streak.
- Page 126 Care and Maintenance On the Maintenance Page, a single color shows a light, repeating horizontal line. Prints are missing fine- line detail. Dark color spots and dark or light streaks appear in all colors. On the Maintenance Page, straight, thin light vertical line in colors.
- Page 127 45 seconds. If a new imaging unit does not correct the problem: BPut the old imaging unit back into the printer. BRepack the new imaging unit. Replace the fuser.
- Page 128 Care and Maintenance A piece of the printed image is missing and reappears out of place, approximately 129 mm (5 ) down the page. The surface of the printed image appears to have vertical scratches (visible by holding the print at an angle and observing the “shine”...
- Page 129 Replace the imaging unit. Reinsert the imaging unit to correct the contact for the main charge grid. Replace the imaging unit. Replace the transfer unit. Turn the printer off and back on again. If the problem persists, call for service on your printer.
- Page 130 BLaser scanning unit mirror. An error occurred that is not user-correctable. Corrective Action Turn the printer off and back on again. If the problem persists, call for service on your printer. Turn the printer off and back on again. If the error...
-
Page 131: If You Can't Make A Print
If you can’t make a print Trouble Printer not operating. Make sure that you plugged in the printer and turned it on. Make sure that you connected the interface cable(s) properly. More info to come for If the communication link between your computer and these messages. -
Page 132: Media Problems
Make sure that the media is installed under the hooks at the front of the media tray. If printing on transparencies and your printer has a 2nd Cassette Feeder, make sure that the transparency tray is installed in the upper or middle tray slot. -
Page 133: Print Quality Problems
Streaks or spots Most spots are caused by fingerprints or dust introduced into the printer while installing the imaging unit or loading media. Make sure that the surface where you unpack the imaging unit, paper, and transparencies is free of dust. -
Page 134: Scsi
“ASPInDOS.SYS Installation successful” Start Windows and confirm that the printer is recognized by PC using SCSI utility in EZ-SCSI program group or Show Configuration in KX-P8410 Utilities program group. If the printer is not recognized, please recheck SCSI ID or terminator settings. - Page 135 If the SCSI driver is installed correctly, confirm that the printer is recognized by the PC using Show SCSI utility in EZ-SCSI program group or Show Configuration in KX-P8410 Utilities program group. If the printer is not recognized, please recheck the SCSI ID or terminator settings.
- Page 136 Reinstall the SCSI driver (refer to SCSI host adapter users manual). If the SCSI driver is installed correctly, confirm that the printer is recognized by PC using SCSI utility in EZ-SCSI program. If the printer is not recognized, please recheck the SCSI ID or...
-
Page 137: Error Messages
Error Messages Printer LCD Panel Error Message Jam at A See front door label Jam at B See front door label Jam at C See front door label Jam at D See front door label Jam at E See front door label... - Page 138 Output tray is full. Controller Optional SIMM check error. Communication cannot be established between the printer and your computer. Printer Ethernet Card I/F Error. Imaging unit is worn out. Imaging unit is wearing out.
- Page 139 Memory Overflow There is not enough memory in the printer. Too hot to print Label The printer is too hot or Remove Label, Cancel job room temperature is too high to print Labels. Care and Maintenance Possible Cause...
-
Page 140: Printer Driver For Windows 3.1
Please check SCSI cable, Power ON or Printer condition KX-P8410 or Printer Driver is in error. Abort printing. LPT Port or KX-P8410 is busy. Memory is allocated Above 16MB. If your SCSI controller is connected in an ISA slot, Printing may... - Page 141 Follow the procedure below and disable the bi- directional interface. 1. Double-click Status display setup icon in KX-P8410 Utilities program group. 2. Click Device tab. 3. Click off Monitor Printer check box. 4. Click OK. The Status Display function becomes ineffective.
- Page 142 Table file open error!! Table file read error!! *.DLL function Error *.DLL not found Error message The necessary file for printing is not found. Some application settings may take priority over the printer driver settings. Possible cause Recovery Reinstall the KX-P8410 software.
-
Page 143: Printer Driver For Windows 95
(e.g. install wnaspi32.dll to correctly. your windows (system directory.) BCable connection is Can not find Panasonic KX- P8410. Make sure that Panasonic KX-P8410 is BThe terminator connected to your PC by SCSI, and then retry again. - Page 144 Follow the procedure below and disable the bi- directional interface. 1. Click Start, select Settings, then click Printers. 2. Click the Panasonic KX-P8410 icon. 3. Click the File menu, then click Properties. 4. Click Details tab and Spool settings... 5. Click Disable bi-...
- Page 145 4. Turn off the computer, then turn it on again. BClose all applications except for the one which controls the printer, then print it again. BTurn off the computer, then turn it on again. Print the document again. Reinstall the KX-P8410 software.
- Page 146 Error message Possible cause Hard disk space is insufficient. Some application settings may take priority over the printer driver settings. Recovery Increase the hard disk space. If it is difficult to increase the hard disk space or printing...
-
Page 147: Printer Driver For Windows Nt 4.0
Printer Driver For Windows NT 4.0 Error message ASPI Manager is not SCSI Board and its found. Install ASPI for driver are not installed Windows. (e.g. install correctly. wnaspi32.dll to your system32 directory). Can not initialize ASPI for SCSI Board and its Windows. - Page 148 Recovery Perform the following procedure. 1. Confirm that the terminator is correctly set. 2. Confirm that the printer is ready. 3. Confirm that the printer is correctly connected with a SCSI cable. 4. Turn off the computer, then turn it on again.
-
Page 149: Status Display
3. Double click the Printers icon. 4. Click Connect..5. Click the other port, then click OK. 6. Click Close. Reinstall the KX-P8410 software. Correctly set the SCSI board in the computer. (Refer to the manual of the SCSI board.) - Page 150 Care and Maintenance One or more ASPI for DOS managers are loaded which do not support ASPI for Win16 or 32. There isn’t available LPT Port. This ASPI manager does not support this mode of Windows. You typically see this error code when running Windows in Real Mode SCSI device can not be...
- Page 151 Error message Possible cause SCSI device is not Printer is not responded. responding. Status Display does not KX-P8410 software is exist. not installed correctly. winaspi.dll is not found. SCSI board is not correctly set. Care and Maintenance Recovery Click Yes or No on the message window.
-
Page 152: Status Display Program
Note: For Windows 3.1 users: When Windows 3.1 is started, the Panasonic Printer Status icon appears and stays on the screen. This enables you to display the printer’s status at any stage during operation. The Panasonic Printer Status dialog box appears when: BA SCSI device error is found while using the printer driver. -
Page 153: Printer Status Dialog Box
% This button minimizes the Panasonic Printer Status dialog box. Pressing the ESC key on the keyboard can also minimize it. & This button displays the Setup for Status Display dialog box, where you can change different settings. -
Page 154: Repacking
B Newspaper or drop cloth B Shipping tape and scissors B The printer weighs about 47.9 k g {105.5 lbs.}. It must be handled by two people. B Should you need to send your printer for service, consult your reseller first or Panasonic. - Page 155 Turn off the printer; remove the power cord and all interface cables. Remove the media tray(s) from the printer; remove the media from the tray(s). Press down on a media tray’s metal plate. Place the cardboard packing material into the media tray.
- Page 156 Care and Maintenance Important: Safety Caution: Reinsert the media tray into the printer; use adhesive tape to secure the tray to the printer. If you have other media trays, repack them for shipping or storage in their original shipping boxes.
- Page 157 Wrap the imaging unit with a protective black plastic sheet. Caution: B Do not expose the imaging unit to light for more than 45 seconds to avoid damage. On the imaging unit, turn the upper lever 90° counterclockwise; this is necessary to protect the imaging unit during shipment. Insert the imaging unit into the packaging.
- Page 158 Care and Maintenance # Open the left side door. $ Using the green handles, slide the paper feeder out. # Push in on green tabs to unlock the cover. $ Raise the cover until it catches in the open position. # Rotate the transfer unit’s green handles up.
- Page 159 Place the transfer unit on newspaper or drop cloth. Rotate the handles down and wrap the transfer unit with a piece of paper and adhesive tape. Note: BDo not touch or bump the roller: it can damage the roller Install the plastic cover and insert the transfer unit into a plastic bag and seal the end tightly.
- Page 160 Care and Maintenance Packing the toner cartridges: # Open the right side door. $ Remove a toner cartridge. Caution: BTo avoid possible toner spillage, do not tilt the cartridge. % Replace the shipping cover. & Secure the shipping cover with adhesive tape. &...
- Page 161 # Lift the printer up and away from the 2nd Cassette Feeder. Safety Caution: B The printer weighs approximately 41.4 k g {91.2 lbs.} and the 2nd Cassette Feeder weighs approximately 14.3 k g {31.5 lbs.}. Observe standard precautions for lifting heavy objects.
- Page 162 Care and Maintenance Repack any other accessories in the original shipping box. Repack the printer in the original shipping box. Make sure that you keep the printer upright and level when moving.
-
Page 163: Specifications
Appendix Specifications Printer Power source Refer to the nameplate on the rear of the unit. Temperature Operating: Best Print Quality: Storage: Humidity Operating: Best Print Quality: Storage: Warm-up time Less than 200 seconds (at 20 C) Power consumption 850 W Max. (printing with fuser on) - Page 164 Documents can be printed on Legal size paper when the print style is set to Color Graphics P. 72, 83) provided the data size of the document is small. B More than 32 MB is required on the printer to use “Printer memory usage” in the printer driver P. 77, 96).
-
Page 165: Media
You may need to adjust the page margins in the application software to match the print area. The following table and illustrations show the page sizes, the largest print areas, and the margins for the media sizes supported on this printer. Media Page size... -
Page 166: Paper Weight
Appendix The printer is designed to work well with most types of paper. However, differences in paper may have significant effects on the quality of the print or the reliability of paper handling. It is strongly recommended that you always test paper before purchasing it to make sure it provides desirable performance. -
Page 167: Transparencies And Labels
Transparencies and Labels You may also print on transparencies and labels that are made for the printer. Panasonic has tested and found that the following work satisfactorily. OHP transparency 3M CG3700 Labels AVERY 5163, AVERY 5164, AVERY 5165 Avery L7163, Avery L7165, Avery L7166, Avery L7167... - Page 168 Appendix Envelopes It is recommended that you print in black text only and purchase high quality #10 or larger laser envelopes with diagonal seams, as shown in the diagram below: High quality envelopes have the following characteristics: BA thin, sharply creased leading edge BPaper weight of 90 g/m (24 lbs.) BFlat, free of curls, wrinkles, nicks, etc.
- Page 169 Do not attempt to print on any of the following types of envelopes. These may cause damage to your printer. BEnvelopes with clasps, snaps or tie strings (see Figure 1) BEnvelopes with transparent windows (see Figure 2) BEnvelopes that will melt, discolor, scorch offset or release hazardous emissions when exposed to 200 C (392 F) for 0.1 second...
-
Page 170: Software
Appendix Windows Version BWindows 95, Windows 3.1, Windows NT 4.0 (Intel Only) GDI Printer Driver Color Management: ICM Bundled Software BPanasonic font manager with 96 fonts System Requirement CPU: Operating System: Memory: Free disk space Virtual memory: Display: Drive: Software More than Pentium or Pentium PRO (133 MHz or faster CPU is recommended.) -
Page 171: Bidirectional Parallel Interface
B “Return” denotes the return side wire of a twisted pair cable and is connected to signal ground. B Be sure to use only a shielded cable. The printer will not operate properly if any of the pins is not connected. -
Page 172: Scsi Interface
Appendix The Panasonic SCSI interface is based on fast SCSI-2 ANSI standard. Specifications Connector Type Cable Pin Configuration SCSI Interface Connector (Printer side) SCSI Interface 50-Pin Half Pitch Pin-type Connector Use a shielded cable for SCSI-2 (FAST SCSI). The total length of the SCSI chain must not exceed 3 m (9.8 ft.) to ensure reliable operation. -
Page 173: Index
Add Port button ......Add Printer ...... - Page 174 Page Setup tab ......Panasonic Font Manager ....
- Page 175 Printer memory usage ....77, Printer panel ......18, Printer Status dialog box .