Panasonic KX-UT113 Operating Instructions Manual
Panasonic kx-ut113: user guide
Hide thumbs
Also See for KX-UT113:
- Administrator's manual (298 pages) ,
- Getting started (181 pages) ,
- Operating instructions manual (100 pages)
Table of Contents
Advertisement
<KX-UT136>
Thank you for purchasing this Panasonic product.
Please read this manual carefully before using this product and save this manual for future use.
KX-UT113/KX-UT123/KX-UT133/KX-UT136: Software File Version 01.025 or later
In this manual, the suffix of each model number is omitted unless necessary.
Operating Instructions
KX-UT113/KX-UT123
KX-UT133/KX-UT136
Model No.
SIP Phone
Document Version: 2011-09
Advertisement
Table of Contents

Related Manuals for Panasonic KX-UT113


Summary of Contents for Panasonic KX-UT113
-
Page 1: Operating Instructions
Thank you for purchasing this Panasonic product. Please read this manual carefully before using this product and save this manual for future use. KX-UT113/KX-UT123/KX-UT133/KX-UT136: Software File Version 01.025 or later In this manual, the suffix of each model number is omitted unless necessary. -
Page 2: Feature Highlights
Introduction Introduction Feature Highlights Easy Operation You can easily access features using the Navigator key, fixed buttons, and soft buttons. Also, the Message/Ringer lamp will inform you when you have an incoming call or a message waiting. High-quality Voice Communication This unit implements the standard SIP protocol, enabling high-quality voice communication. -
Page 3: Other Information
Briefly describes basic information about the installation of the unit. Administrator Guide Describes information about the programming and maintenance of the unit. Manuals and supporting information are provided on the Panasonic Web site at: http://www.panasonic.com/sip (for users in the United States) http://panasonic.net/pcc/support/sipphone (for users in Canada) Note •... -
Page 4: For Future Reference
DO NOT send the product to the Executive or Regional Sales offices. They are NOT equipped to make repairs. Product Service (For users in the United States only) Panasonic factory service centers for this product are listed in the service center directory. Consult your authorized Panasonic dealer for detailed instructions. -
Page 5: For Your Safety
For Your Safety To reduce the risk of injury, loss of life, electric shock, fire, malfunction, and damage to equipment or property, always observe the following safety precautions. Explanation of symbols The following symbols are used to classify and describe the level of hazard and injury caused when the denotation is disregarded and improper use is performed. - Page 6 Ethernet cables. • Under power failure conditions, the SIP Phone may not operate. Please ensure that a separate telephone, not dependent on local power, is available for use in remote sites in case of emergency. Document Version 2011-09...
-
Page 7: Data Security
If an error message is shown on your display, consult your phone system dealer or the network administrator. • Use only the correct Panasonic handset. Document Version 2011-09 Data Security We recommend observing the security precautions described in this section, in order to prevent the following: –... -
Page 8: Security Information
Security Information • Security settings, such as passwords, cannot be undone at Panasonic service centers. Take measures to prevent passwords from being lost or forgotten. • If a password is forgotten, initialize the unit and configure the settings again. -
Page 9: Additional Information
Avoid using a telephone (other than a cordless type) during an electrical storm. There may be a remote risk of electric shock from lightning. Do not use the telephone to report a gas leak in the vicinity of the leak. SAVE THESE INSTRUCTIONS... - Page 10 Canadian ICES-003. • This product meets the applicable Industry Canada technical specifications. Compliance with TIA-1083 standard Telephone handsets identified with Compatible with Hearing Aid T-Coil this logo have reduced noise and interference when used with T-Coil equipped hearing aids and cochlear implants.
-
Page 11: Table Of Contents
Table of Contents Before Operating the Telephone ...13 Accessory Information ...13 Location of Controls ...14 Screens ...20 Status Icons ...20 Soft Buttons and Soft Button Icons ...21 Basic Operations ...23 Confirming Your Extension Number ...23 Going off- and on-hook ...23 Adjusting the Volume ...23... - Page 12 Table of Contents Web User Interface Programming ...56 Installation and Setup ...57 Attaching/Removing the Stand ...57 Connections ...60 Wall Mounting ...63 Hooking the Handset ...68 Using a Headset ...70 Setting Up the Unit ...70 Maintaining the Unit ...71 Initializing the Unit ...71 Restarting the Unit ...71 Cleaning the Unit ...71 Appendix ...72...
-
Page 13: Before Operating The Telephone
Document Version 2011-09 Stand (1) • For users in the United States: KX-A239 (PQLV206) • For users in Canada: KX-A239X (PQLV206) • For KX-UT113/KX-UT123: KX-A432 • For KX-UT133/KX-UT136: KX-A433 Before Operating the Telephone Handset Cord (1) [Part No.] Black model: PNJA1066Z... -
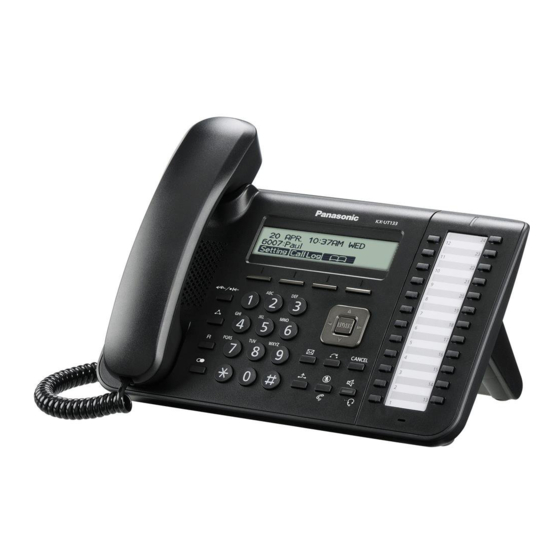
Page 14: Location Of Controls
Before Operating the Telephone Location of Controls Front View For KX-UT136: For KX-UT133: Operating Instructions G IJ KL M NOP Q R G IJ KL M NOP Q R Document Version 2011-09... - Page 15 N O P LCD (Liquid Crystal Display) KX-UT136 is equipped with a 6-Line LCD. KX-UT113/KX-UT123/KX-UT133 is equipped with a 3-Line LCD. KX-UT123/KX-UT133/KX-UT136 is equipped with an LCD backlight. Soft Buttons (S1 to S4) S1 to S4 (located below the display) are used to select the item displayed on the bottom line of the display.
- Page 16 Before Operating the Telephone When a call is on hold, the Hold lamp (KX-UT113/KX-UT123 only) flashes red. MUTE/AUTO ANSWER Used to receive an incoming call in hands-free mode or mute the microphone/handset during a conversation. TRANSFER Used to transfer a call to another party.
-
Page 17: Left Side View
Left Side View For KX-UT133/KX-UT136: For KX-UT113/KX-UT123: EHS Jack (KX-UT133/KX-UT136 only) Headset Jack Document Version 2011-09 Before Operating the Telephone Operating Instructions... -
Page 18: Bottom View
Before Operating the Telephone Bottom View For KX-UT133/KX-UT136: For KX-UT123: For KX-UT113: DC Jack Operating Instructions Document Version 2011-09... - Page 19 Before Operating the Telephone LAN Port PC Port (KX-UT123/KX-UT133/KX-UT136 only) Handset Jack Document Version 2011-09 Operating Instructions...
-
Page 20: Screens
Before Operating the Telephone Screens This section explains the buttons and icons that appear on the display. For KX-UT136: Call Log Setting For KX-UT113/KX-UT123/KX-UT133: Call Log Setting Status Icons Indicates the status of various features (Page 20). Soft Button Icons Indicate the functions that will be accessed when the corresponding buttons are pressed. -
Page 21: Soft Buttons And Soft Button Icons
", or "Press Setting Call Log • You can also use the physical ENTER button to perform the same operation as this soft button. Before Operating the Telephone Description " would indicate pressing S1, S2, or S3, Description Operating Instructions... - Page 22 Before Operating the Telephone Icon For KX-UT113/KX-UT123 only, if multiple lines are available at your unit, select Line the line to use to make a call (Page 25). Answer an incoming call (Page 23). Answer Close the incoming call screen and continue pre-dialing (Page 25).
-
Page 23: Basic Operations
You can adjust the ringer, handset, headset, and speaker volume using [ ] and [ ] on the Navigator key. Adjusting the ringer volume When receiving a call, press [ ] or [ ]. Before Operating the Telephone Answer Operating Instructions... - Page 24 Before Operating the Telephone You can also adjust the ringer volume in the settings. For details, see "Ringer (Page 40)". Note • When the ringer volume is turned all the way down, "Off" is displayed. Also, displayed when the unit is in stand-by mode.
-
Page 25: Feature Operations
To end the call, go on-hook. Note • For KX-UT113/KX-UT123, if more than one line is available at your unit, you can press before going off-hook and then select the line you want to use. Pre-dialing In stand-by mode, you can start dialing (max. -
Page 26: Dialing By Using Call Logs
For details about flexible buttons, see "Flexible Buttons (KX-UT133/ KX-UT136 only) (Page 34)". • For KX-UT113/KX-UT123, you can press instead of going off-hook. If more than Call one line is available at your unit, select the line to use, and then press [ENTER]. -
Page 27: Receiving Calls
In stand-by mode, press Press [ ] or [ ] to select "Call Block", and then press [ENTER]. Press Enter the telephone number (max. 32 digits), and then press [ENTER]. Note • To register additional telephone numbers, repeat the procedure from step 3. -
Page 28: Holding A Call
Note • Erase To retrieve a call on hold at your extension Go off-hook. Do one of the following, depending on your unit: For KX-UT113/KX-UT123 users • Press [HOLD]. For KX-UT133/KX-UT136 users • Press the green flashing DN button (flexible button). -
Page 29: Receiving A Second Call (Answering Call Waiting)
Go on-hook while hearing the call waiting tone. Go off-hook. To hold the current call and then talk to the new party For KX-UT113/KX-UT123 users Press [HOLD] while hearing the call waiting tone. For KX-UT133/KX-UT136 users Press [HOLD] while hearing the call waiting tone. -
Page 30: Transferring A Call (Call Transfer)
Feature Operations Transferring a Call (Call Transfer) You can transfer a call to another destination (extension or outside party). To transfer Press [TRANSFER] during a conversation. Call the party you want to transfer the call to. Wait until the other party answers to announce the transfer. -
Page 31: Conference Call (Local Three-Way Conference)
During a conference, you can remove other parties from the conference. However, this operation is available only during conference calls you initiate. For KX-UT113/KX-UT123 users During a conference call, press [HOLD]. • The second party is put on hold, but you can continue talking to the first party. -
Page 32: Checking Messages
Press [ ] or [ ] to select the missed call. Note • In the incoming call log, "Not Answered" is displayed on missed calls. For KX-UT113/ KX-UT123/KX-UT133, you must press [ ] to see this. • For details about making calls from the call log, see "Dialing by Using Call Logs (Page 26)". -
Page 33: Call Forwarding/Do Not Disturb
Call Forwarding/Do Not Disturb You can have incoming calls automatically forwarded to another destination. You can also have incoming calls rejected (Do Not Disturb). Note • When Call Forwarding or Do Not Disturb is enabled, appears on the display in FWD/DND stand-by mode. -
Page 34: Flexible Buttons (Kx-Ut133/Kx-Ut136 Only)
Feature Operations Flexible Buttons (KX-UT133/KX-UT136 only) The flexible buttons on the unit can be customized to be used to make or receive calls or as feature buttons. These buttons are configured by your administrator or dealer. The following types of flexible buttons are available: DN (Directory Number) Seizes the line assigned to the DN button. -
Page 35: Customizing The Telephone
Phonebook List Adding a New Phonebook Entry You can add a maximum of 500 (for KX-UT123/ KX-UT133/KX-UT136) or 100 (for KX-UT113) phonebook entries to the unit. To make a call from the phonebook, see "Making a Call from the Phonebook List (Page 25)". -
Page 36: Searching For A Phonebook Entry
Press [ ] or [ ] to display the desired entry, or press and search for the desired entry (Page 36). Search Do one of the following, depending on your unit: For KX-UT113/KX-UT123 users • Press , select "Erase", and then press Menu [ENTER]. -
Page 37: User Settings
This section explains how to configure the settings using the unit. Accessing the Settings In stand-by mode, press Press [ ] or [ ] to select the desired setting category, and then press [ENTER]. Configure the settings as necessary. Document Version 2011-09 Setting Customizing the Telephone Operating Instructions... -
Page 38: Available Settings
Customizing the Telephone Available Settings Ringer ECO Mode LCD Contrast Back Light Display Lock FWD/DND Setting Language Date and Time Information Display Network Settings Network Test Restart Firmware version Operating Instructions Ringer Volume Ringtone Do Not Disturb FWD All FWD Busy... - Page 39 Call Block This setting is available only if "DNS" is set to "Manual". This setting is available only on KX-UT123/KX-UT133/KX-UT136. Document Version 2011-09 Customizing the Telephone Page 47 Operating Instructions...
-
Page 40: Settings Details
Value Range Default Level 0 to 6 Level 3 Automatic Automatic (KX-UT133/ (KX-UT133/ KX-UT136 only), KX-UT136) Ringtone 1– Ringtone 32 Ringtone 1 (KX-UT113/ KX-UT123) Value Range Default On, Off Document Version 2011-09... -
Page 41: Lcd Contrast
Forward all incoming calls to a specified destination. Enable or disable the "FWD All" setting. Specify the number to forward calls to when "FWD All" is enabled. Customizing the Telephone Value Range Default Level 1 to 6 Level 3 Value Range... - Page 42 Customizing the Telephone Setting FWD Busy On/Off Phone Number FWD No Ans On/Off Phone Number Ring count Language Setting Language Operating Instructions Description Forward incoming calls to a specified destination when you are on a call. Enable or disable the "FWD Busy"...
-
Page 43: Date And Time
• IP address of the DNS server 2 • ACS status • Display lock status • Firmware version • MAC address Customizing the Telephone Value Range Default Date : dd/mm/yyyy — or mm/dd/yyyy Time : 00:00–23:59 or 12:00–11:59 AM/ Value Range Default —... - Page 44 Customizing the Telephone Setting Network When DHCP is selected DNS1 (Manual DNS only) DNS2 (Manual DNS only) When STATIC is selected IP Address Subnet mask Default Gateway DNS1 DNS2 VLAN Enable VLAN IP Phone Operating Instructions Description Configure the basic network settings.
-
Page 45: Network Test
IP address of the device to which you want to test the connection. If a device does not respond, first check the unit's network settings, and then check the device's network settings and connection. Customizing the Telephone Value Range Default 1–4094 0–7 — —... -
Page 46: Firmware Version
Customizing the Telephone Restart Setting Restart Firmware version Setting Firmware version Note • Your phone system dealer may offer new features or an improved version of the unit's software from time to time. If you set the unit software update setting to manual mode through the Web user interface, you need to download the update when "Update version. -
Page 47: Call Block
Call Block Setting Call Block Document Version 2011-09 Description Register telephone numbers so that calls received from those numbers are blocked. You can also delete registered numbers. To register Press Enter the telephone number to block, and then press [ENTER]. -
Page 48: Entering Characters
Customizing the Telephone Entering Characters The dial keys are used to enter characters and numbers. Each dial key has multiple characters assigned to it. (For example, A, B and C are assigned to the 1 key.) To enter a character, press the corresponding dial key until the character you want appears. To enter another character that is assigned to the same key, first press [ ] to move the cursor to the right. -
Page 49: Character Entry Modes
Press [ENTER]. Note • Depending on the type of information you are entering, you cannot change character modes. For example, when you are entering a phone number, only numeric mode is available. Document Version 2011-09 1/A/? Customizing the Telephone Operating Instructions... - Page 50 Customizing the Telephone Character Tables ABC (Latin) Button Note • For each button, the upper row shows the characters entered in uppercase mode, and the lower row shows the characters entered in lowercase mode. Operating Instructions Characters Document Version 2011-09...
-
Page 51: Document Version 2011-09 Operating Instructions
Customizing the Telephone 0–9 (Numeric) Characters Button Document Version 2011-09 Operating Instructions... - Page 52 Customizing the Telephone ΑΒΓ (Greek) Button Note • For each button, the upper row shows the characters entered in uppercase mode, and the lower row shows the characters entered in lowercase mode. Operating Instructions Characters Document Version 2011-09...
- Page 53 AÄÅ (Latin Extended 1) Button Note • For each button, the upper row shows the characters entered in uppercase mode, and the lower row shows the characters entered in lowercase mode. Document Version 2011-09 Characters Customizing the Telephone Operating Instructions...
- Page 54 Customizing the Telephone SŚŠ (Latin Extended 2) Button Note • For each button, the upper row shows the characters entered in uppercase mode, and the lower row shows the characters entered in lowercase mode. Operating Instructions Characters Document Version 2011-09...
- Page 55 АБВ (Cyrillic) Button Note • For each button, the upper row shows the characters entered in uppercase mode, and the lower row shows the characters entered in lowercase mode. Document Version 2011-09 Characters Customizing the Telephone Operating Instructions...
-
Page 56: Web User Interface Programming
Customizing the Telephone Web User Interface Programming The unit provides a Web-based interface for configuring various settings and features, including some that are not programmable directly from the unit. The following list contains some useful features that are programmable through the Web user interface. -
Page 57: Installation And Setup
Installation and Setup Notice • Panasonic assumes no responsibility for injuries or property damage resulting from failures arising out of improper installation or operation inconsistent with this documentation. Attaching/Removing the Stand Attaching the Stand For KX-UT133/KX-UT136: Insert the catches ( ) of the stand into hooks located in the unit. - Page 58 Installation and Setup Gently rotate the stand in the direction indicated until it is released. For KX-UT113/KX-UT123: Remove the stand in the direction indicated while pushing the catches of the stand with both hands as shown. Adjusting from High to Low Position (KX-UT133/KX-UT136 only)
- Page 59 Tilt the stand in the direction indicated while pushing the PUSH mark with both hands as shown until it locks into the low position ( Adjusting from Low to High Position (KX-UT133/KX-UT136 only) Tilt the stand in the direction indicated while pushing the PUSH mark with both hands as shown until it locks into the high position ( Document Version 2011-09 Installation and Setup...
-
Page 60: Connections
AC adaptor For KX-UT113/KX-UT123: Clamp AC adaptor CAUTION Optional AC Adaptor • Use the following Panasonic AC adaptor: – For users in the United States: KX-A239 (PQLV206) – For users in Canada: KX-A239X (PQLV206) Operating Instructions Optional AC adaptor To a Switching Hub... - Page 61 Notice • It is recommended that you use one of the following headsets: – Wired headsets Panasonic KX-TCA400 or KX-TCA430 – EHS headsets (KX-UT133/KX-UT136 only) Plantronics When selecting Ethernet cables (not included) • Use flexible, high-quality, snagless (without strain relief) cables. Do not use cables with coating that may tear or crack when bent.
- Page 62 Installation and Setup Connections for Handset For KX-UT133/KX-UT136: For KX-UT113/KX-UT123: Operating Instructions Document Version 2011-09...
-
Page 63: Wall Mounting
Make sure the cables are securely fastened to the wall. Insert the 5 tabs (for KX-UT133/KX-UT136) or 3 tabs (for KX-UT113/KX-UT123) of the wall mounting adaptor into the designated openings in the base, and then slide the wall mounting adaptor in the direction of the arrow until it clicks. - Page 64 Installation and Setup For KX-UT113/KX-UT123: Fasten the wall mounting adaptor to the base with 1 screw. (Recommended torque: 0.4 N·m [4.08 kgf·cm/ 3.54 lbf·in] to 0.6 N·m [6.12 kgf·cm/5.31 lbf·in]) For KX-UT133/KX-UT136: Operating Instructions Document Version 2011-09...
- Page 65 For KX-UT113/KX-UT123: Connect the cables to the unit, and run the cables through the wall mounting adaptor, as shown in the illustration below. For details about connecting the cables, see "Connections (Page 60)". Note • The cables can also be run from the bottom of the unit.
- Page 66 Installation and Setup For KX-UT113/KX-UT123: AC adaptor Drive 2 screws into the wall as shown in the illustration below, and mount the unit on the wall. For KX-UT133/KX-UT136: 83 mm 100 mm Operating Instructions Ethernet cables 40 mm (1 or less...
- Page 67 For KX-UT113/KX-UT123: 83 mm 100 mm Note • You can find a wall mounting template at the end of this manual. • For information about locking the handset, see "Hooking the Handset (Page 68)". Document Version 2011-09 Washer Drive the screw to this point.
-
Page 68: Hooking The Handset
Installation and Setup Hooking the Handset You can hook the handset with following operations. To Hook the Handset During a Conversation Hook the handset over the top edge of the unit. To Lock the Handset Hook when the Unit is Wall Mounted Remove the handset hook from the slot. - Page 69 Installation and Setup Handset is safely hooked when it is in the cradle. Document Version 2011-09 Operating Instructions...
-
Page 70: Using A Headset
To end the call, press [SP-PHONE]. Note • For details about connecting a headset, see "Connections (Page 60)". • For KX-UT113/KX-UT123, the Headset mode is automatically enabled when connecting a headset. • The Headset button light shows the current status as follows:... -
Page 71: Maintaining The Unit
Maintaining the Unit Initializing the Unit Doing an initialization resets some or all settings to their default values. For details, consult your administrator or dealer. Restarting the Unit When some of the settings on the unit have been changed via Web user interface programming or configuration file programming, the unit must be restarted. -
Page 72: Appendix
Appendix Appendix Specifications Item KX-UT113 Display 3 line (No backlight) Flexible Buttons — VoIP Connection Method VoIP Audio Codec Ethernet Interface IP Address Mode Speaker Microphone Ethernet Port 1 (RJ45) (LAN) Headset Jack EHS Jack — Dimensions (Width ´ Depth ´... - Page 73 Appendix Specifications Item KX-UT113 KX-UT123 KX-UT133 KX-UT136 Maximum Power Consumption Operating 0 °C to 40 °C (32 °F to 104 °F) Environment Document Version 2011-09 Operating Instructions...
-
Page 74: Troubleshooting
Appendix Troubleshooting Common Issues and Solutions General Use Issue The display is blank. • The display is not shown • well. The unit is not performing • properly. • • • is displayed on the screen. I cannot hear a dial tone. •... -
Page 75: Making And Receiving Calls
→ Wait a few minutes for the operation to complete. → Confirm with your administrator or dealer. Your telephone service does not allow you to make long distance calls. → Make sure that you have subscribed to your telephone company’s long distance service. - Page 76 Possible Cause & Solution The phonebook list is full. → Delete any unnecessary entries. The maximum number of entries in the phonebook list is 500 for the KX-UT123/ KX-UT133/KX-UT136 and 100 for the KX-UT113. Reference — — — —...
-
Page 77: Error Messages
Error Messages During operation, error messages might appear on the unit. The following table lists these messages and possible causes and solutions. Message IP address collision • Illegal IP address Invalid IP address Check LAN cable. • Memory Full • No Entries •... -
Page 78: Revision History
Appendix Revision History Software File Version 01.025 Changed Contents • Removing a Party from the Conference (Page 31) • Ringer (Page 40) • Initializing the Unit (Page 71) Operating Instructions Document Version 2011-09... -
Page 79: Open Source Software
Open Source Software Parts of this product use Open Source Software. Relevant conditions apply to this software. Panasonic cannot accept inquiries regarding the content of the following copyright and license information. <<NetBSD kernel>> This product uses a part of NetBSD kernel. - Page 80 Open Source Software Copyright (c) 1982, 1986, 1993, 1995 The Regents of the University of California. All rights reserved. Copyright (c) 1982, 1988, 1991, 1993 The Regents of the University of California. All rights reserved. Copyright (c) 1983, 1990, 1993 The Regents of the University of California. All rights reserved. Copyright (c) 1983, 1993 The Regents of the University of California.
- Page 81 Copyright (c) 1999, 2000 Jason L. Wright (jason@thought.net) All rights reserved. Copyright (c) 1999, 2000 The NetBSD Foundation, Inc. All rights reserved. Copyright (c) 1999, 2000, 2001 The NetBSD Foundation, Inc. All rights reserved. Copyright (c) 1999, 2001 The NetBSD Foundation, Inc. All rights reserved. Copyright (c) 2000 The NetBSD Foundation, Inc.
- Page 82 Open Source Software 1. Redistributions of source code must retain the above copyright notice, this list of conditions and the following disclaimer. 2. Redistributions in binary form must reproduce the above copyright notice, this list of conditions and the following disclaimer in the documentation and/or other materials provided with the distribution.
-
Page 83: Index
Index AC adaptor Connection Accessories ACD flexible button ACD Group Auto answer AUTO ANSWER/MUTE button Automatic Call Distribution ® ACD Back Light (setting) BLF flexible button Busy Lamp Field ® BLF Call Block (setting) Call Forwarding Call Splitting Call Transfer Call Waiting Calls From call logs... - Page 84 Index Login (to a Group) Logout (from a Group) Maintenance Making calls Calling MESSAGE button Message/Ringer Lamp Messages, checking Missed calls MUTE/AUTO ANSWER button Navigator key Network (setting) Network Test (setting) Off-hook monitor One-touch Dialing One-Touch flexible button One-touch Transfer PC (setting) PC connection PC port...
- Page 85 WALL MOUNTING TEMPLATE 1. Drive the screws into the wall as indicated. 2. Hook the unit onto the screw heads. Note: Make sure to set the print size to correspond with the size of this page. If the dimensions of the paper output still deviate slightly from the measurements indicated here, use the measurements indicated here.
- Page 86 Copyright: This material is copyrighted by Panasonic System Networks Co., Ltd., and may be reproduced for internal use only. All other reproduction, in whole or in part, is prohibited without the written consent of Panasonic System Networks Co., Ltd. Panasonic System Networks Co., Ltd. 2011...