Panasonic Lumix DMC-GX1 Basic Operating Instructions Manual
Digital camera/ lens kit/body
Hide thumbs
Also See for Lumix DMC-GX1:
- Basic owner's manual (289 pages) ,
- Owner's manual (225 pages) ,
- Operating instructions manual (48 pages)
Table of Contents
Advertisement
Basic Operating Instructions
Digital Camera/
Lens Kit/Body
DMC-GX1X/DMC-GX1K
Model No.
DMC-GX1
Before use, please read these instructions completely.
More detailed instructions
on the operation of this
camera are contained in
"Operating Instructions for advanced
features (PDF format)" in the supplied
CD-ROM. Install it on your PC to read it.
Web Site: http://www.panasonic-europe.com
Model number suffix "EB" denotes UK model.
VQT3U05
EB
Advertisement
Table of Contents

Related Manuals for Panasonic Lumix DMC-GX1


Summary of Contents for Panasonic Lumix DMC-GX1
-
Page 1: Basic Operating Instructions
More detailed instructions on the operation of this camera are contained in “Operating Instructions for advanced features (PDF format)” in the supplied CD-ROM. Install it on your PC to read it. Web Site: http://www.panasonic-europe.com Model number suffix “EB” denotes UK model. VQT3U05... -
Page 2: Information For Your Safety
Dear Customer, We would like to take this opportunity to thank you for purchasing this Panasonic Digital Camera. Please read these Operating Instructions carefully and keep them handy for future reference. Please note that the actual controls and components, menu items, etc. of your Digital Camera may look somewhat different from those shown in the illustrations in these Operating Instructions. -
Page 3: Caution For Ac Mains Lead
Caution for AC mains lead For your safety, please read the following text carefully. This appliance is supplied with a moulded three pin mains plug for your safety and convenience. A 5-ampere fuse is fitted in this plug. Should the fuse need to be replaced please ensure that the replacement fuse has a rating of 5-ampere and that it is approved by ASTA or BSI to BS1362. - Page 4 • Do not use any other USB connection cables except the supplied one. • Always use a genuine Panasonic HDMI mini cable (RP-CDHM15, RP-CDHM30; optional). Part numbers: RP-CDHM15 (1.5 m) (5 feet), RP-CDHM30 (3.0 m) (10 feet) • Always use a genuine Panasonic AV cable (DMW-AVC1; optional).
- Page 5 Information for Users on Collection and Disposal of Old Equipment and used Batteries These symbols on the products, packaging, and/or accompanying documents mean that used electrical and electronic products and batteries should not be mixed with general household waste. For proper treatment, recovery and recycling of old products and used batteries, please take them to applicable collection points, in accordance with your national legislation and the Directives 2002/96/EC and 2006/ 66/EC.
-
Page 6: Table Of Contents
Contents Information for Your Safety...2 Care of the camera ...7 Accessories ...8 Names and Functions of Main Parts...12 Changing the Lens...15 Attaching the Shoulder Strap...16 Charging the Battery...17 • Charging ...17 Inserting and Removing the Card (optional)/the Battery...18 About the Card...19 •... -
Page 7: Care Of The Camera
Care of the camera Do not subject to strong vibration, shock, or pressure. • The lens, LCD monitor, or external case may be damaged if used in below conditions. It may also malfunction or image may not be recorded. – If you drop or hit the camera. -
Page 8: Accessories
Check that all the accessories are supplied before using the camera. Product numbers correct as of October 2011. These may be subject to change. Digital Camera Body (This is referred to as camera body in these operating instructions.) Interchangeable Lens “LUMIX G X VARIO PZ 14–42 mm/F3.5–5.6 ASPH./POWER O.I.S.”... - Page 9 DMC-GX1X H-PS14042 VYF3443 DMC-GX1K H-FS014042 VYC1009 DMC-GX1 VKF4385 K1HY08YY0017 DMC-GX1X ¢2 Supplied in DMC-GX1K ¢3 Supplied in DMC-GX1 ¢4 Supplied in VFC4605 VYF3201 DMW-BLD10E VFF0867 only only only VKF4385 VFC4315 VKF4385 DE-A94A K2CT39A00002 VKF4970 VFC4765 (ENG) VQT3U05...
- Page 10 Or go on line through our Internet Accessory ordering application at www.pas-europe.com. • Most major credit and debit cards accepted. • All enquiries transactions and distribution facilities are provided directly by Panasonic UK. • It couldn’t be simpler! • Also available through our Internet is direct shopping for a wide range of finished products.
- Page 11 SDHC/SDXC memory cards. Some optional accessories may not be available in some countries. ¢1 The AC Adaptor (optional) can only be used with the designated Panasonic DC Coupler (optional). The AC adaptor (optional) cannot be used by itself. Do not attempt to use AC adaptor in other devices.
-
Page 12: Names And Functions Of Main Parts
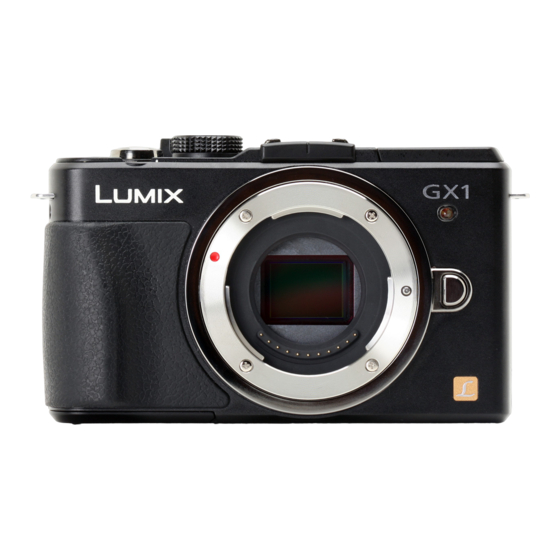
Names and Functions of Main Parts ∫ Camera body Sensor Self-timer indicator/ AF Assist Lamp Flash Lens fitting mark Mount Lens lock pin Lens release button Flash open button Playback button 10 [AF/AE LOCK] button/ [Fn2] button 11 Rear dial 12 Touch screen/LCD monitor 13 [Fn1] button 14 [Q.MENU] button/... - Page 13 Do not attempt to use AC adaptor in other devices. • Always use a genuine Panasonic AC adaptor (DMW-AC8E; optional). • When using an AC adaptor, use the AC Mains Lead supplied with the AC adaptor. •...
- Page 14 ∫ Lens H-PS14042 (LUMIX G X VARIO PZ 14–42 mm/ F3.5–5.6 ASPH./POWER O.I.S.) 37 Lens surface 38 Zoom lever 39 Focus lever 40 Contact point 41 Lens fitting mark 42 Tele 43 Focus ring 44 Wide 45 Zoom ring VQT3U05 (ENG) H-FS014042 (LUMIX G VARIO 14 –...
-
Page 15: Changing The Lens
Changing the Lens By changing the lens, you will increase your picture taking-options and further your enjoyment of the camera. Change the lens using the following procedure. • Check that the camera is turned off. Preparations: Attach the lens cap. While pressing on the lens release button B, rotate the lens toward the arrow until it stops and then remove. -
Page 16: Attaching The Shoulder Strap
Attaching the Shoulder Strap • We recommend attaching the shoulder strap when using the camera to prevent it from dropping. Pass the shoulder strap through the shoulder strap eyelet on the camera body. A: Shoulder strap eyelet Pass the end of the shoulder strap through the ring in the direction of the arrow and then pass it through the stopper. -
Page 17: Charging The Battery
Charging the Battery ∫ About batteries that you can use with this unit The battery that can be used with this unit is DMW-BLD10E. • The battery is not charged when the camera is shipped. Charge the battery before use. •... -
Page 18: Inserting And Removing The Card (Optional)/The Battery
Inserting and Removing the Card (optional)/ the Battery • Check that this unit is turned off. • We recommend using a Panasonic card. Slide the release lever in the direction of the arrow and open the card/ battery door. •... -
Page 19: About The Card
SDXC Memory Card can only be used with SDXC Memory Card compatible equipment. • Check that the PC and other equipment are compatible when using the SDXC Memory Cards. http://panasonic.net/avc/sdcard/information/SDXC.html • This unit is compatible with UHS-I standard SDHC/SDXC memory cards. •... -
Page 20: Setting Date/Time (Clock Set)
Setting Date/Time (Clock Set) The clock can be setup with the following procedure at the time of purchase. Change the clock setting in [CLOCK SET] of the [SETUP] menu. For details, read the PDF. • The clock is not set when the camera is shipped. Turn the camera on. -
Page 21: Selecting The Recording Mode
Selecting the Recording Mode ∫ To select a Recording Mode with the mode dial Select the mode by rotating the mode dial. • Rotate the mode dial slowly to select the desired mode A. ∫ To select Intelligent Auto Mode Press [¦]. - Page 22 ∫ Scene Mode [PORTRAIT] [SOFT SKIN] [SCENERY] [ARCHITECTURE] [SPORTS] [PERIPHERAL DEFOCUS] [FLOWER] [FOOD] [OBJECTS] [NIGHT PORTRAIT] [NIGHT SCENERY] [ILLUMINATIONS] [BABY1] [BABY2] [PET] [PARTY] [SUNSET] ∫ Creative Control Mode [EXPRESSIVE] [RETRO] [HIGH KEY] [LOW KEY] [SEPIA] [HIGH DYNAMIC] [TOY EFFECT] [MINIATURE EFFECT] VQT3U05 (ENG) This mode allows you to improve the appearance of the persons concerned and make their skin tones look healthier.
-
Page 23: Taking A Still Picture
Applicable modes: Taking a Still picture Selecting the Recording Mode. Press the shutter button halfway to focus. A Aperture value B Shutter speed • Aperture value and shutter speed are displayed. (It will flash in red if the correct exposure is not achieved, except when set to flash.) •... -
Page 24: Taking Pictures Using The Automatic Function (Intelligent Auto Mode)
Taking Pictures using the Automatic Function (Intelligent Auto Mode) In this mode, the camera makes the optimal settings for the subject and scene, so we recommend it when you wish to leave the settings to the camera and record without thinking about them. -
Page 25: Recording Using Intelligent Auto Plus Mode
Recording using Intelligent Auto Plus Mode The brightness and colour optimally set by the camera can be easily matched to your preferences. This mode is useful for those who would like the settings made by the camera to match their preferences but do not like dealing with detailed settings. Press [MENU/SET] when in Intelligent Auto Mode. -
Page 26: Taking Pictures With Defocus Control Function
Applicable modes: Taking Pictures with Defocus Control Function You can easily set the blurriness of the background while checking the screen. Touch [ ]. Touch [ ] to display the setting screen. × × Touch the slide bar to set. •... -
Page 27: Recording Motion Pictures
Applicable modes: Recording Motion Pictures • Screen here is an example of when the Recording Mode is set to ] (Programme AE Mode). Start recording by pressing the motion picture button. A Elapsed recording time B Available recording time • Recording of motion picture appropriate for each mode is possible. -
Page 28: Compensating The Exposure
Applicable modes: Compensating the Exposure Use this function when you cannot achieve appropriate exposure due to the difference in brightness between the subject and the background. Look at the following examples. Underexposed Compensate the exposure towards positive. Press the rear dial to switch to Exposure Compensation operation. Rotate the rear dial to compensate the exposure. -
Page 29: Easily Set A Suitable Exposure (One Push Ae)
Easily set a suitable exposure (one push AE) With one push AE, you can easily achieve a suitable exposure setting when the exposure setting is too bright or too dark. ( At purchase, one push AE is assigned to the [Fn1] button. How to tell if the exposure is not adequate •... -
Page 30: Using The Function Button
Using the function button The recording functions etc. registered in the [Fn BUTTON SET] of the [CUSTOM] menu can be assigned to the [Fn1], [Fn2] (function) buttons, [Fn3] and [Fn4] icon. You can use the assigned functions by pressing the buttons for [Fn1] and [Fn2] and by touching the icons for [Fn3] and [Fn4]. -
Page 31: Playing Back Pictures/Motion Pictures
Playing Back Pictures/Motion Pictures Press [(]. Forward or rewind the image by dragging the screen horizontally. Forward: drag from right to left Rewind: drag from left to right Touch the part to enlarge firmly. 1k>2k>4k>8k>16k A The zoom position indication •... -
Page 32: Playing Back Motion Pictures
The motion picture file formats that can be played back on this unit are AVCHD recorded on a Panasonic Digital Camera (LUMIX) (excluding AVCHD Progressive), MP4, and QuickTime Motion JPEG. Press [(]. Select a picture with a Motion Picture icon ([... -
Page 33: Deleting Pictures
Deleting Pictures Once deleted, pictures cannot be recovered. Select the picture to be deleted, and then touch Touch [DELETE SINGLE]. • Confirmation screen is displayed. Picture is deleted by selecting [YES]. To delete multiple pictures (up to 100 ¢ Burst group will be treated as a single picture. (All the pictures in the selected burst group will be deleted.) Touch [ Touch [DELETE MULTI] or [DELETE ALL]. -
Page 34: Switching The Display Of The Lcd Monitor
Switching the display of the LCD Monitor Press [DISP.] to change. (In Recording Mode) • Screen will switch as follows: (Example of LCD monitor display) 98 98 98 A With information B Without information C With information (tilt sensor display) D Without information (tilt sensor display) (In Playback Mode) •... -
Page 35: Setting The Menu
Setting the Menu Press [MENU/SET]. Select the menu item by pressing 3/4 or by rotating the rear dial. • Select the item at the very bottom, and press 4 or rotate the rear dial right to move to the next screen. Press [MENU/SET] or the rear dial. -
Page 36: Setting The Quick Menu
Setting the Quick Menu By using the Quick Menu, some of the menu settings can be easily found. Press [Q.MENU] to display the Quick Menu. Touch the menu item. • Menu item can be switched by touching [ Select and touch the setting. Touch [EXIT] to exit menu once the setting is completed. -
Page 37: Types Of Menus
Types of menus ∫ [REC] Mode Menu This menu lets you set the aspect ratio, number of pixels and other aspects of the pictures you are recording. • [PHOTO STYLE], [METERING MODE], [I.RESOLUTION], [I.DYNAMIC] and [DIGITAL ZOOM] are common to both the [REC] Mode menu and [MOTION PICTURE] Mode menu. Changing these settings in one of these menus is reflected in other menu. - Page 38 [EX. TELE CONV.] [DIGITAL ZOOM] [BURST RATE] [AUTO BRACKET] [SELF-TIMER] [COLOR SPACE] [STABILIZER] ∫ [MOTION PICTURE] Mode Menu This menu lets you set the [REC MODE], [REC QUALITY], and other aspects for motion picture recording. • [PHOTO STYLE], [METERING MODE], [I.RESOLUTION], [I.DYNAMIC] and [DIGITAL ZOOM] are common to both the [REC] Mode menu and [MOTION PICTURE] Mode menu.
- Page 39 ∫ [CUSTOM] Menu Operation of the unit, such as displaying of the screen and button operations, can be set up according to your preferences. Also, it is possible to register the modified settings. [CUST. SET MEM.] [AF/AE LOCK /Fn2] [Fn BUTTON SET] [HISTOGRAM] [GUIDE LINE] [HIGHLIGHT]...
- Page 40 [POWER ZOOM LENS] [LVF DISP.STYLE] [LCD DISP.STYLE] [¦ BUTTON SWITCH] BUTTON] REC AREA] [REMAINING DISP.] [PLAY ON LCD] [TOUCH SETTINGS] [TOUCH SCROLL] [DIAL GUIDE] [MENU RESUME] [PIXEL REFRESH] [SENSOR CLEANING] [SHOOT W/O LENS] VQT3U05 (ENG) Sets the screen display and lens operations when using an interchangeable lens that is compatible with power zoom (electrically operated zoom).
- Page 41 ∫ Setup Menu This menu lets you perform the clock settings, select the operating beep tone settings and set other settings which make it easier for you to operate the camera. [CLOCK SET] [WORLD TIME] [TRAVEL DATE] [BEEP] [VOLUME] [LCD DISPLAY]/ [VIEWFINDER] [LCD MODE] [ECONOMY]...
- Page 42 ∫ [PLAYBACK] Mode Menu This menu lets you set the Protection, Cropping or Print Settings, etc. of recorded pictures. [2D/3D SETTINGS] [SLIDE SHOW] [PLAYBACK MODE] [TITLE EDIT] [TEXT STAMP] [VIDEO DIVIDE] [RESIZE] [CROPPING] [ASPECT CONV.] [ROTATE] [ROTATE DISP.] [FAVORITE] [PRINT SET] [PROTECT] [FACE REC EDIT] VQT3U05 (ENG)
-
Page 43: About The Supplied Software
¢ function to CD-R are supported too. If you forgot to set the date on the digital camera, you can add the date of recording to pictures with this software. Also, [AVCHD] motion pictures can be loaded and written to DVD. -
Page 44: Installing Supplied Software
• Before inserting the CD-ROM, close all running applications. Check the environment of your PC. • Operating environment of “PHOTOfunSTUDIO 7.0 HD Edition” – Windows XP (32bit) SP2/SP3, Windows Vista Windows 7 (32bit/64bit) or SP1 – CPU: Pentium III 500 MHz or higher (Windows Pentium III 800 MHz or higher (Windows Vista Pentium... -
Page 45: Reading The Operating Instructions (Pdf Format)
You can download and install a version of Adobe Reader that you can use with your OS from the following Web Site. http://get.adobe.com/reader/otherversions ∫ To uninstall the Operating Instructions (PDF format) Delete the PDF file from the “Program Files\Panasonic\Lumix\” folder. ∫ For Mac Turn the PC on and insert the CD-ROM containing the Operating Instructions (supplied). -
Page 46: Specifications
Specifications Digital Camera Body (DMC-GX1): Information for your safety Power Source: Power Consumption: Camera effective pixels Image sensor Digital Zoom Extra Tele Conversion (Except for the maximum picture size for each aspect ratio) Focus Shutter system Burst recording Burst speed... - Page 47 ISO sensitivity (Standard Output Sensitivity) Minimum Illumination Shutter speed Metering range White Balance Exposure (AE) Metering Mode LCD monitor Flash AUTO/ /160/200/400/800/1600/3200/6400/12800 (1/3 EV step change possible) Approx. 9 lx (when i-Low light is used, the shutter speed is 1/25th of a second) [When the Interchangeable lens (H-PS14042) is used] Approx.
- Page 48 Flash synchronization speed Microphone Speaker Recording media Picture size Still picture Recording quality Motion pictures Quality Recording file format Still Picture Motion pictures Audio compression VQT3U05 (ENG) Equal to or smaller than 1/160th of a second Stereo Monaural SD Memory Card/SDHC Memory Card/SDXC Memory Card When the aspect ratio setting is [X] 4592k3448 pixels, 3232k2424 pixels, 2272k1704 pixels When the aspect ratio setting is [Y]...
- Page 49 Operating humidity Battery Charger (Panasonic DE-A94A): Information for your safety Input: Output: Battery Pack (lithium-ion) (Panasonic DMW-BLD10E): Information for your safety Voltage/capacity: “USB 2.0” (High Speed) ¢ Data from the PC can not be written to the camera using the USB connection cable.
- Page 50 Interchangeable Lens (H-PS14042) “LUMIX G X VARIO PZ 14–42 mm/F3.5–5.6 ASPH./POWER O.I.S.” Focal length Aperture type Aperture range Minimum aperture value Lens construction Nano surface coating In focus distance Maximum image magnification Optical Image Stabiliser [O.I.S.] switch Mount Angle of view Filter diameter Max.
- Page 51 Interchangeable Lens (H-FS014042) “LUMIX G VARIO 14– 42 mm/F3.5 – 5.6 ASPH./MEGA O.I.S.” Focal length Aperture type Aperture range Minimum aperture value F22 Lens construction In focus distance Maximum image magnification Optical Image Stabiliser [O.I.S.] switch Mount Angle of view Filter diameter Max.
- Page 52 HDMI, the HDMI Logo, and High-Definition Multimedia • Interface are trademarks or registered trademarks of HDMI Licensing LLC in the United States and other countries. HDAVI Control™ is a trademark of Panasonic Corporation. • QuickTime and the QuickTime logo are trademarks or •...