
Related Manuals for Panasonic HM-TA2


Summary of Contents for Panasonic HM-TA2
-
Page 1: Operating Instructions
Operating Instructions High Definition Mobile Camera HM-TA20 Model No. HM-TA2 Before use, please read these instructions completely. VQT3P01-1 Model number suffix “EB” denotes UK model. 1AG6P1P6267-A(S) -
Page 2: Information For Your Safety
≥ Use only the recommended accessories. ≥ Do not remove covers. ≥ Do not repair this unit by yourself. Refer servicing to qualified service personnel. HM-TA2 WARNING: TO REDUCE THE RISK OF FIRE, ELECTRIC SHOCK OR PRODUCT DAMAGE, ≥ Do not expose this unit to rain, moisture, dripping or splashing. -
Page 3: Emc Electric And Magnetic Compatibility
CAUTION! ≥ DO NOT INSTALL OR PLACE THIS UNIT IN A BOOKCASE, BUILT-IN CABINET OR IN ANOTHER CONFINED SPACE. ENSURE THE UNIT IS WELL VENTILATED. TO PREVENT RISK OF ELECTRIC SHOCK OR FIRE HAZARD DUE TO OVERHEATING, ENSURE THAT CURTAINS AND ANY OTHER MATERIALS DO NOT OBSTRUCT THE VENTILATION VENTS. - Page 4 -If you see this symbol- ∫ Information for Users on Collection and Disposal of Old Equipment and used Batteries These symbols on the products, packaging, and/or accompanying documents mean that used electrical and electronic products and batteries should not be mixed with general household waste.
-
Page 5: Cards That You Can Use With This Unit
∫ Indemnity about recorded content Panasonic does not accept any responsibility for damages directly or indirectly due to any type of problems that result in loss of recording or edited content, and does not guarantee any content if recording or editing does not work properly. -
Page 6: Table Of Contents
Contents HM-TA20 Please be sure to read “(Important) About the Waterproof/ Dustproof and Anti-shock Performance of this unit [HM-TA20]” (l 8) before using this unit underwater to prevent the unit from being mishandled, which may cause water to seep in. Information for Your Safety...2 (Important) About the Waterproof/Dustproof... - Page 7 With a PC What you can do with a PC ... 61 Operating environment ... 63 Installation ... 66 Connecting to a PC... 68 About the PC display... 70 Starting HD Writer PE 2.0 ... 71 Reading the operating instructions of the software applications ...
-
Page 8: About The Waterproof/Dustproof And Anti-Shock Performance Of This Unit [Hm-Ta20]
5 devices. (If failure occurs during the test, a new set is used to pass the drop orientation test within a total of 5 devices.) Panasonic’s test method is based on the above “MIL-STD 810F Method 516.5-Shock”. However, the drop height was changed from 122 cm to 150 cm dropping onto 3 cm thick plyboard. - Page 9 ≥ Waterproofing is not guaranteed if the unit is subject to an impact as a result of being hit or dropped etc. If an impact to this unit occurs, it should be inspected (subject to a fee) by a Panasonic’s Service Center to verify that the waterproofing is still effective.
-
Page 10: Check Before Using Underwater
≥ Contact Panasonic’s Service Center if the fogging does not disappear. Conditions in which inner side of the lens may be fogged Condensation may occur and the inner side of the lens may be fogged when this... - Page 11 ≥ The integrity of the rubber seals may decrease after about 1 year, with use and age. To avoid permanently damaging this unit the seals should be replaced once each year. Please contact Panasonic’s Service Center for related costs and other information. Close the door/cover securely.
-
Page 12: Using This Unit Underwater
Using this unit underwater ≥ Use this unit underwater at a depth of up to 3 m with the water temperature between 0 oC and 35 oC. ≥ Do not use this unit at a depth of over 3 m. ≥... -
Page 13: Caring Of This Unit After Using It Underwater
Caring of this unit after using it underwater Do not open or close the door/cover until the sand and dust is removed by rinsing this unit with water. Make sure to clean this unit after using it. ≥ Thoroughly wipe off any water droplets, sand, and saline matter on your hands, body, hair, etc. - Page 14 Drain water by holding this unit upside down and shaking it lightly a few times. ≥ After using this unit at the seaside or underwater, or after washing it, water will remain at the speaker site of this unit for a while and it may cause lower sound or sound distortion.
- Page 15 ≥ For customers within the UK: 0844 844 3869 ≥ For customers within Ireland: 01 289 8333 Direct Sales at Panasonic UK ≥ For customers: 0844 844 3856 ≥ Order accessory and consumable items for your product with ease and confidence by phoning our Customer Care Centre Monday–Thursday...
-
Page 16: Accessories
Accessories Check the accessories before using this unit. Keep the accessories out of reach of children to prevent swallowing. Product numbers correct as of April 2011. These may be subject to change. Hand strap with stylus pen VFC4708 ≥ The stylus pen is used for operations that are hard to operate with your fingers or performing detailed operations with the touch screen operation. -
Page 17: Preparation
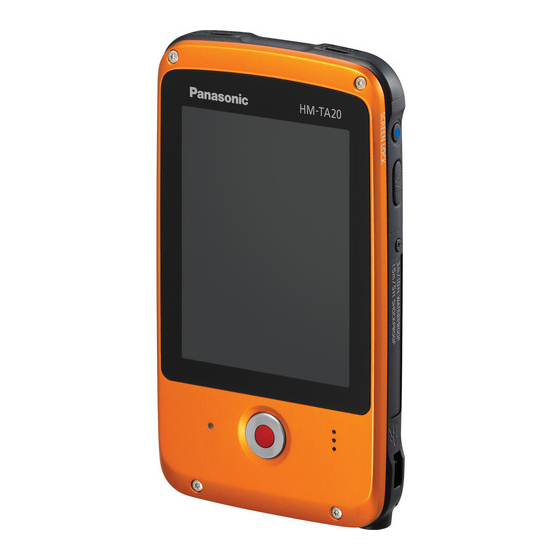
Due to limitations in LCD production technology, there may be some tiny bright or dark spots on the LCD monitor screen. However, this is not a malfunction and does not affect the recorded picture. HM-TA20 Screen lock button (l 41) HM-TA2 ] (l 30) VQT3P01... - Page 18 HM-TA20 10 11 Tripod receptacle ≥ If you attach a tripod which has 5.5 mm screw or larger, it may damage this unit. 10 LED light (l 39) 11 Lens HM-TA2 USB Latch (l 21) VQT3P01 HM-TA2...
- Page 19 13 SD card door (l 28) 14 Card slot (l 28) 15 Headphone terminal [Ë] ≥ Recommended additional earphones: Panasonic RP-HV154, RP-HJE130 (the product number is correct as of April 2011.) j Max. output voltage of unit at earphone terminal:...
- Page 20 17 HDMI mini connector (l 59) HM-TA20 HDMI/Headphone cover HM-TA20 USB Latch (l 21) 20 USB terminal [ 21 USB terminal cover (l 21) HM-TA2 HDMI cover HM-TA2 Headphone terminal cover HM-TA20 About locks for USB terminal cover, HDMI/Headphone cover and SD card door Each door/cover is equipped with a LOCK lever to lock the open/close lever.
-
Page 21: Charging The Battery
USB terminal cover B in the direction indicated by the arrow. 3 Press the USB Latch C until the USB terminal comes out. HM-TA2 1 Slide the USB Latch A until the USB terminal cover opens. 2 Slide the USB Latch A again until the USB terminal comes out. - Page 22 ≥ Insert the USB extension cord securely all the way. (Insert to the line C.) It will not operate properly if it is not inserted all the way. ≥ (EB) Always use a genuine Panasonic AC adaptor (VSK0752; optional). (EP) Always use a genuine Panasonic AC adaptor (VSK0751; optional).
- Page 23 5 Slide the LOCK lever for the USB terminal cover A to lock the open/ close lever for the USB terminal cover B. HM-TA2 1 Slide the USB Latch A. 2 While the USB Latch A is slid, press the USB terminal with your finger.
-
Page 24: Charging And Motion Pictures Recording Time
Number of recordable pictures Recording time Playback time Recording conditions by CIPA standard ≥ CIPA is an abbreviation of Camera & Imaging Products Association. ≥ Using a Panasonic SD Memory Card (2 GB) VQT3P01 Maximum continuous recordable time 1 h 25 min... -
Page 25: Charging And Voices Recording Time
Charging and voices recording time ∫ Charging/Recording time ≥ Temperature: 25 oC/humidity: 60%RH Charging time 4 h 20 min * Maximum continuous recordable time for one voice: Approx. 5 h (up to 4 GB recording capacity) ≥ These times are approximations. ≥... -
Page 26: Preparing The Card
Preparation Preparing the card The following operations can be performed using this unit. ≥ When a card has not been inserted: Scenes, still pictures and voices can be recorded on the built-in memory and played back. appears.) ≥ When a card has been inserted: Scenes, still pictures and voices can be recorded on the card and played back. - Page 27 SDHC Memory Cards/SDXC Memory Cards that can be used for motion picture recording on the following website. http://panasonic.jp/support/global/cs/e_cam (This website is in English only.) ≥ 4 GB or more Memory Cards that do not have the SDHC logo or 48 GB or more Memory Cards that do not have the SDXC logo are not based on SD Memory Card Specifications.
-
Page 28: Inserting/Removing An Sd Card
Inserting/removing an SD card When using an SD card not from Panasonic, or one previously used on other equipment, for the first time on this unit, format the SD card. (l 58) When the SD card is formatted, all of the recorded data is deleted. Once the data is deleted, it cannot be restored. - Page 29 ≥ Do not touch the terminals on the back of the SD card. ≥ Do not apply strong shocks, bend, or drop the SD card. ≥ Electrical noise, static electricity or the failure of this unit or the SD card may damage or erase the data stored on the SD card.
-
Page 30: Turning The Unit On/Off
Preparation Turning the unit on/off Press the power button to turn on the unit. ≥ The LCD monitor lights on. To turn off the unit Continue pressing the power button until the LCD monitor goes off. ∫ About the screen display Please refer to page 76 for details of the icons displayed on the screen. -
Page 31: How To Use The Touch Screen
Preparation How to use the touch screen You can operate by directly touching the LCD monitor (touch screen) with your finger. It is easier to use the stylus pen (supplied) for detailed operation or if it is hard to operate with your fingers. ∫... -
Page 32: Setting Date And Time
Preparation Setting date and time Select the menu. (l 54) [MENU] # Touch the date or time to be set, then set the desired value using ≥ The year can be set between 2000 and 2039. ≥ The 24-hour system is used to display the time. Touch [ENTER]. - Page 33 CONTACT YOUR LOCAL PANASONIC SUPPLIER. (For Australia and New Zealand) WARNING THE LITHIUM BATTERY IN THIS UNIT MUST ONLY BE REPLACED BY QUALIFIED PERSONNEL. IF THIS IS NECESSARY, CONTACT THE PANASONIC CUSTOMER CARE CENTRE ON 132600 FOR YOUR NEAREST AUTHORIZED SERVICE CENTRE. VQT3P01...
-
Page 34: Recording/Playback
Recording/Playback Recording ≥ This unit will perform automatic recording. Auto focusing, auto white balancing, and electronic stabilizer * The electronic stabilizer will not function when recording still pictures or during operation of digital zoom. ≥ Record with this unit vertically. Selecting a mode Touch [MODE]. -
Page 35: Recording Motion Pictures
Recording motion pictures When in Motion Picture Recording Mode Press the Recording button to start recording. ≥ When you begin recording, ; changes to ¥. Press the Recording button again to pause recording. ≥ The images recorded between pressing the Recording button to start recording and pressing it again to pause recording become one scene. -
Page 36: Recording Still Pictures
Recording still pictures When in Still Picture Recording Mode Press the Recording button. is displayed where the focus is set. ≥ (Red) appears on the screen. ≥ ≥ Still pictures cannot be recorded while recording the motion picture. ≥ The screen aspect ratio changes depending on the number of recording pixels that is set. -
Page 37: Recording Voices
Recording voices When in Voice Recording Mode Press the Recording button to start recording. ≥ When you begin recording, (Red). Press the Recording button again to pause recording. ∫ To record still pictures while recording voices Touch ≥ An image is displayed on the screen, and you will be able to record still pictures. -
Page 38: Intelligent Auto Mode
Intelligent Auto Mode The following modes (appropriate for the condition) are set just by pointing the unit to what you want to record. Mode Portrait Scenery Spotlight Night portrait Night scenery Macro Normal *1 In Motion Picture Recording Mode only *2 In Still Picture Recording Mode only ≥... -
Page 39: Digital Zoom In/Out Function
Digital zoom in/out function The maximum digital zoom ratio is k4. Touch and hold ≥ You can also zoom by directly touching the zoom bar. ≥ Motion picture: Independent of zoom magnification, this unit can focus on a subject approx. 30 cm away from the lens. Still picture: Independent of zoom magnification, this unit can focus on a subject approx. -
Page 40: Night View Mode
Night view mode It is possible to record brighter than usual. ¬ Change the mode to Motion Picture Recording Mode. Touch [MENU] while the recording is paused. Touch ≥ Each time is touched, the night view mode is turned on or off. When the scene is dark, or when the night view mode is on and the scene becomes bright, will flash automatically. -
Page 41: For Underwater Recording [Hm-Ta20]
For underwater recording [HM-TA20] This unit can record motion pictures/still pictures under water to a depth 3 m. Press and hold the screen lock button until the message appears. ≥ You cannot perform touch operations. ≥ While setting cannot be set to the screen lock mode. ≥... -
Page 42: Playback
Recording/Playback Playback During playback, we recommend you use this unit horizontally. In these operating instructions, instructions for playback are given primarily for using horizontally. Touch [PLAY]. ≥ The last recorded scene or still picture or voice will be played back. ≥... -
Page 43: Playback Operation
∫ Playback operation Icon/ Playback operation Thumbnail display Pause Volume adjustment Fast forward/rewind playback Playback Skip playback (to the start of a scene/voice) To the next (previous) still pictures Direct playback ≥ It is possible that you touch (Reverse frame-by-frame playback) when editing. (l 51, 52) ≥... - Page 44 ∫ When selecting a scene, still picture or voice to be played back from thumbnail display Scene/Still picture Touch scene, still picture or voice Touch is displayed for scene, and ≥ ≥ To display the next (previous) page: j Touch j Slide the thumbnail display upward (downward) while touching it.
- Page 45 ∫ When switching the thumbnail display for scene/still pictures and voice Touch [MODE]. ∫ Playback with this unit vertically Scene/Still picture 29m59s 29m59s 12m30s Touch the thumbnail display A, then the touched scene, still picture or voice will play back. Touch displayed.
-
Page 46: Motion Picture Compatibility
Motion picture compatibility ≥ This unit is based on the MPEG-4 AVC file format. ≥ This unit may degrade or not play back motion pictures recorded or created on other products, and other products may degrade or not play back motion pictures recorded on this unit, even if the products support MP4. -
Page 47: Playing Back The Slide Show/Continuous Playback
Playing back the slide show/continuous playback Recorded motion pictures/still pictures or voices can be played back as a slide show/continuous playback. For motion pictures/voices Touch and hold 2 seconds. For still pictures Touch appears. ≥ ≥ Slide show/continuous playback will start from the scene/still picture or voices that is currently being played back. -
Page 48: Zooming In On A Still Picture During Playback (Playback Zoom)
Zooming in on a still picture during playback (Playback zoom) You can zoom in by touching a still picture during playback. Touch , and then touch the screen display during still picture playback. ≥ The still picture is zoomed in order of normal display (k1) # k2 # k4. -
Page 49: Deleting Scenes, Still Pictures Or Voices
Deleting scenes, still pictures or voices Deleted scenes, still pictures or voices cannot be restored, so perform appropriate confirmation of the contents before proceeding with deletion. ≥ When a card has been inserted, scenes, still pictures and voices can be deleted on the card. ≥... - Page 50 When scenes or still pictures are selected, all the scenes or still pictures on the SD card/built-in memory will be deleted. [ALL] When voices are selected, all the voices on the SD card/ built-in memory will be deleted. (Only playing back vertically) [SINGLE] Delete the selected scene, still picture or voice.
-
Page 51: Creating Still Picture From Motion Picture
Creating still picture from motion picture A single frame from the recorded motion picture can be saved as a still picture. (Only playing back horizontally) Touch Touch Pause at the scene you want to save as a still picture during playback. ≥... -
Page 52: To Delete Unwanted Parts Of A Motion Picture
To delete unwanted parts of a motion picture You can delete unwanted parts of scenes. (Only playing back horizontally) Touch Touch Slide A or B while touching it to determine the unwanted part C. ≥ When you touch A or B, appears. -
Page 53: Setting Of Online Sharing Of Motion Pictures
Setting of online sharing of motion pictures You can easily upload to YouTube or Facebook when this unit is connected to the PC by setting up the upload destination of the motion pictures. (l 61) The PC for connection needs to have the HD Writer PE 2.0 installed and be connected to the Internet. -
Page 54: Using The Setup Menu Screen
Recording/Playback Using the Setup menu screen Touch [MENU]. Touch Touch the submenu ≥ To display the next (previous) page: j Touch j Slide the submenu display upward (downward) while touching it. Touch the desired item to enter the setting. ≥ Touch [EXIT] to exit the menu setting. Menu list [Video Rec Mode] Switch the picture quality of the motion pictures to be recorded. -
Page 55: Picture Size
≥ When the unit is moved a lot or moved quickly, or when a fast-moving subject is recorded (particularly when recording using type noise may appear at playback. [PICTURE SIZE] The higher the number of pixels, the higher the clarity of the picture when printing. -
Page 56: Self Timer
[SELF TIMER] This is for recording scenes, still pictures or voices using the timer. [MENU] # [OFF]: Cancel the setting [2sec]: Records after 2 seconds [10sec]: Records after 10 seconds ≥ When the Recording button is pressed or Recording Mode only), a motion picture/still picture or voice is recorded after the Ø10 or Ø2 flashes for the time which has been set. -
Page 57: Hdmi Resolution
[ALERT SOUND] You can check the start and stop of recording, or turning the unit on/off with an audio tone. [MENU] # [HDMI resolution] Select the desired method of HDMI output. [MENU] # [AUTO]/[1080i]/[576p]/[480p] ≥ When [HDMI OUTPUT] is set to [50Hz], [576p] is displayed. When [HDMI OUTPUT] is set to [60Hz], [480p] is displayed. -
Page 58: Format Media
[FORMAT MEDIA] Please be aware that if a medium is formatted, then all the data recorded on the medium will be erased and cannot be restored. Back up important data on a PC etc. (l 61) [MENU] # ≥ When the confirmation message appears, select [YES]. ≥... -
Page 59: Watching Motion/Still Pictures On Your Tv
A HDMI mini cable (optional) ≥ Check that the plugs are inserted as far as they go. ≥ Always use a genuine Panasonic HDMI mini cable (RP-CDHM15, RP-CDHM30; optional). Select the video input on the TV. ≥ Example: Select the [HDMI] channel with a HDMI mini cable. - Page 60 Start playback on this unit. Perform playback operations by touching the icons. During playback/pause A Playback operations (l 43) B Switching the modes (l 45) C Thumbnail display (l 44) D Up/down/left/right, Enter VQT3P01 During thumbnail display...
-
Page 61: With A Pc
With a PC What you can do with a PC ≥ The unit comes with built-in HD Writer PE 2.0 video editing software. ≥ See page 66 for how to install HD Writer PE 2.0 on your PC. HD Writer PE 2.0 You can copy the motion/still picture data to the HDD of PCs or write to SD cards using the HD Writer PE 2.0 software. -
Page 62: Important Notice
≥ Refer to page 72 if using a Mac. Important Notice ≥ When using an SDXC Memory Card, check the following support site. http://panasonic.net/avc/sdcard/information/SDXC.html ≥ Motion pictures that have been recorded on another device cannot be written to HD Writer PE 2.0. (EB/EP only) ≥... -
Page 63: Operating Environment
With a PC Operating environment ≥ Even if the system requirements mentioned in these operating instructions are fulfilled, some PCs cannot be used. ≥ Operation is not guaranteed in the following cases. j When 2 or more USB devices are connected to a PC, or when devices are connected through USB hubs or by using extension cables other than the supplied USB extension cord. - Page 64 Display Free hard disk drive space Sound Interface Other requirements ≥ Input is not supported in languages other than English, German, French, Simplified Chinese and Russian. ≥ Operation is not guaranteed on Microsoft Windows Vista Enterprise, Windows XP Media Center Edition, Tablet PC Edition and Windows 7 Enterprise.
-
Page 65: Mass Storage
∫ Operating environment for the card reader function (mass storage) Interface Other requirements Mouse or equivalent pointing device ≥ The USB equipment operates with the driver installed as standard in the OS. IBM PC/AT compatible PC Windows 7 (32 bit/64 bit) or SP1 Windows Vista (32 bit) (SP1/SP2) Windows XP (32 bit) (SP3) Windows 7/Windows Vista:... -
Page 66: Installation
With a PC Installation When installing the software, log on to your computer as the Administrator or with a user name with equivalent authorization. (If you do not have authorization to do this, consult your manager.) ≥ Before starting the installation, close all applications that are running. ≥... - Page 67 Read the [End User License Agreement], then place a check beside [I accept the terms of the license agreement] if you agree to them and click [Next]. Select where the application is to be installed, then click [Next]. Select [Yes] or [No] to create shortcut.
-
Page 68: Connecting To A Pc
With a PC Connecting to a PC A USB extension cord (supplied) ≥ Turn on the unit. Connect USB terminal of this unit to a PC with a USB extension cord. ≥ Do not use any other USB extension cords except the supplied one. (Operation is not guaranteed with any other USB extension cords.) ≥... - Page 69 ∫ To disconnect USB terminal of this unit safely Select the icon in task tray displayed on the PC, and then click [Eject Panasonic Mobile Camera]. ≥ Depending on your PC’s settings, this icon may not be displayed. VQT3P01...
-
Page 70: About The Pc Display
About the PC display When the unit is connected to a PC, it is recognised as an external drive. ≥ Removable disk (Example: (EB/EP only) We recommend using HD Writer PE 2.0 to copy motion picture data. (GC/GN only) We recommend using HD Writer PE 2.0 to copy or write back motion picture data. -
Page 71: Starting Hd Writer Pe 2.0
The software cannot be used with the user name for a guest account. (On the PC) Select [Start] # [All Programs] # [Panasonic] # [HD Writer PE 2.0] # [HD Writer PE]. ≥ For details on how to use the software applications, read the PDF operating instructions of the software. -
Page 72: If Using Mac
With a PC If using Mac ≥ HD Writer PE 2.0 is not available for Mac. ≥ iMovie’11 supported. For details about iMovie’11, please contact Apple Inc. ∫ Operating environment Mac OS X 10.6.6 Intel Core Duo or better 1 GB or more Interface USB port ≥... -
Page 73: To Use As A Camera For Skype
With a PC To use as a camera for Skype It is possible to perform video conferencing using Skype when this unit is connected to a PC that is connected to the Internet. Skype is a software that allows you to perform video conferencing using an Internet connection. - Page 74 ∫ Operating environment for Skype Software Skype 5.1 for Windows Windows 7 (32 bit/64 bit) or SP1 Windows Vista (32 bit) (SP1/SP2) Windows XP (32 bit) (SP3) Intel Core 2 Duo 1.8 GHz or higher 32-bit (x86) or 64-bit (x64) processor Windows 7: 1 GB or more (32 bit)/2 GB or more (64 bit)
-
Page 75: How To Connect
How to connect ≥ Turn on the unit. Connect USB terminal of this unit to a PC with a USB extension cord. ≥ Connect the USB extension cord by inserting it securely all the way without forcing. A USB extension cord (supplied) ≥... -
Page 76: Indications
Others Indications ∫ Recording indications Motion pictures 01h30m ¥ 01h30m 00m00s 00h00m00s ≥ “h” is an abbreviation for hour, “m” for minute and “s” for second. (White) (Red) (White) (Red) VQT3P01 Still pictures 12345 F2.8 1 / 3 0 Video Rec Mode (l 54) Recording motion picture Recording pause (motion picture) Intelligent Auto Mode (l 38) - Page 77 128Low 12345 Ø10/Ø2 F2.8 1/30 ∫ Playback indications Motion pictures 00m00s 100-0001 100-0001 15. 11. 2011 12:34 Voice Rec Mode (l 55) Remaining number of recordable pictures (l 36) Focus area (l 36) Self-Timer Recording (l 56) Iris value Shutter speed Effect icon (l 40) Night View mode (l 40) Recording still pictures during voice recording...
- Page 78 00m00s 00h00m00s 100-0001 15. 11. 2011 12:34 ∫ Confirmatory indications VQT3P01 Playback time for motion pictures (l 45) Playback time for voices (l 45) File number (l 45) Date/Time indication (l 32) SD card is not inserted or is non-compatible.
-
Page 79: Messages/Troubleshooting
Contact Panasonic’s Service Center. ≥ Press the RESET button with the stylus pen. (l 82) Then about 1 minute later, turn on the unit again. - Page 80 Problem The unit arbitrarily stops recording. Scenes, still pictures or voices cannot be played back. Although this unit is correctly connected to a TV, images cannot be seen. Scenes, still pictures or voices cannot be deleted. If the SD card is inserted in this unit, it is not recognised.
- Page 81 Problem If the SD card is inserted in another device, it is not recognised. Colour or brightness of the image changes, or you may see horizontal bars in the image. The LCD monitor flickers indoors. “Error occurred. Please turn unit off, then turn on again.”...
- Page 82 ≥ You will need Adobe Acrobat Reader 5.0 or later or Adobe Reader 7.0 or later to read the PDF operating instructions for HD Writer PE 2.0. ≥ Reconnect the USB terminal of this unit after shutting down Skype, and connect to Skype again. HM-TA2...
-
Page 83: Cautions For Use
In the event of abnormal operation (e.g. if the unit emits smoke or an unusual smell), immediately stop operating the unit and consult the Panasonic Customer Care Centre on 132600. About this unit The unit and the SD card become warm during use. This is not a malfunction. - Page 84 ≥ Sand or dust may damage the unit. (Care should be taken when inserting and removing a card.) HM-TA2 Keep the unit away from sea water. ≥ If sea water splashes onto the unit, wipe off the water with a well wrung cloth.
-
Page 85: Lcd Monitor
≥ The battery or environment is at an extremely high or low temperature. Wait until the temperature has returned to an appropriate level and try charging again. If you are still unable to charge, there may be a fault in this unit. -
Page 86: About The Battery
About the Lens, the microphone and the speaker ≥ Do not press against the lens with excessive force. ≥ Do not leave the unit with the lens facing the sun, as rays of light from the sun may cause it to malfunction. Also, be careful when placing the unit outside or near a window. -
Page 87: About Condensation
≥ The SD card may be damaged or the recorded content may be damaged or deleted. ≥ Put the SD card in the card case or the storage bag after use and when storing or carrying the SD card. ≥ Do not allow dirt, dust or water to get into the terminals on the back of the SD card and do not touch the terminals with your fingers. -
Page 88: Requests When Disposing Of This Unit
Others Requests when disposing of this unit When disposing of your used products, remove the battery built into the unit, and please cooperate in recycling of the battery. Please refer to page 89 about how to remove the battery. ≥ Please make sure that the battery is disposed of at an officially assigned location, if there is one in your country. - Page 89 If disassembled, repair is not possible. ≥ Using a driver (optional), disassemble in the following sequence. ≥ If it cannot be removed smoothly, contact Panasonic’s Service Center. ≥ Keep disassembled parts out of reach of children. Remove all screws shown in the figure.
- Page 90 Open this unit as shown in the figure below, and remove the battery with a driver. HM-TA20 HM-TA2 Regarding the handling of used batteries ≥ Insulate the terminals with cellophane tape or similar. ≥ Do not disassemble. VQT3P01...
-
Page 91: About Copyright
Others About copyright ∫ Carefully observe copyright laws Recording of pre-recorded tapes or discs or other published or broadcast material for purposes other than your own private use may infringe copyright laws. Even for the purpose of private use, recording of certain material may be restricted. ∫... -
Page 92: Recording Modes/Approximate Recordable Time (Motion Pictures)
Others Recording modes/approximate recordable time (motion pictures) ≥ SD cards are only mentioned with their main memory size. The stated times are the approximate recordable times for continuous recording. Recording mode Picture size 1920k1080 4 GB SD card 16 GB 2 h 40 min 3 h 30 min 9 h 50 min 1 h 20 min 64 GB Built-in memory... -
Page 93: Approximate Number Of Recordable Pictures
Others Approximate number of recordable pictures ≥ SD cards are only mentioned with their main memory size. The stated number is the approximate number of recordable pictures. Aspect ratio Picture size 3264k2448 1600k1200 4 GB SD card 16 GB 64 GB Built-in memory Approx. -
Page 94: Specifications
Others Specifications High Definition Mobile Camera Information for your safety Power source: DC 5.0 V (When using USB)/DC 3.7 V (When using battery) Power consumption: Recording; 2.6 W/Charging; 2.5 W Signal system: 1080/30p, 720/30p, 540/30p, 480/30p Recording format: MPEG-4 AVC file format compliant (.MP4) Image sensor: 1/4 type (1/4z) MOS image sensor Total;... - Page 95 Battery charging function (charge via USB terminal with the unit turned off) WEB camera; Compression ; Motion JPEG Picture size; 640k480, 320k240, 160k120 Dimensions: HM-TA20 64.3 mm (W)k112.6 mm (H)k17.7 mm (D) (excluding projecting parts) HM-TA2 59.8 mm (W)k108.9 mm (H)k16.9 mm (D) (excluding projecting parts) VQT3P01...
- Page 96 Mass in operation: HM-TA20 Approx. 155 [with an SD card (optional)] HM-TA2 Approx. 144 [with an SD card (optional)] Mass: HM-TA20 Approx. 153 [without an SD card (optional)] HM-TA2 Approx. 142 [without an SD card (optional)] Operating temperature: 0 °C to 35 °C...
- Page 97 (If failure occurs during the test, a new set is used to pass the drop orientation test within a total of 5 devices.) ≥ Panasonic’s test method is based on the above “MIL-STD 810F Method 516.5-Shock”. However, the drop height was changed from 122 cm to 150 cm dropping onto 3 cm thick plyboard.
- Page 98 ∫ Still pictures Recording media: SD Memory Card (FAT12 and FAT16 system compliant) SDHC Memory Card (FAT32 system compliant) SDXC Memory Card (exFAT system compliant) Refer to page 26 for details on SD cards usable in this unit. Built-in memory; Approx. 10 MB Compression: JPEG (Design rule for Camera File system, based on Exif 2.2 standard) Picture size:...
-
Page 99: Index
Index ∫ A ....57 Alert sound Approximate number of ..93 recordable pictures ∫ B ....86 Battery Battery capacity indication ∫... - Page 100 Panasonic Corporation Web site: http://panasonic.net © Panasonic Corporation 2011 Pursuant to at the directive 2004/108/EC, article 9(2) Panasonic Testing Centre Panasonic Marketing Europe GmbH Winsbergring 15, 22525 Hamburg, Germany 1AG6P1P6267-A(S) VQT3P01-1 F0411MY1041...