Onkyo TX-NR709 Instruction Manual
Onkyo tx-nr709: user guide
Hide thumbs
Also See for TX-NR709:
- Instruction manual (53 pages) ,
- Firmware update manual (7 pages) ,
- Specifications (2 pages)
Table of Contents
Advertisement
AV Receiver
TX-NR709
Instruction Manual
Thank you for purchasing an Onkyo AV Receiver.
Please read this manual thoroughly before making
connections and plugging in the unit.
Following the instructions in this manual will enable
you to obtain optimum performance and listening
enjoyment from your new AV Receiver.
Please retain this manual for future reference.
Contents
Introduction ...................................2
Connections.................................12
Turning On & Basic Operations ......22
Advanced Operations .................43
Controlling Other Components...66
Appendix ......................................74
E
n
Advertisement
Table of Contents

Related Manuals for Onkyo TX-NR709


Summary of Contents for Onkyo TX-NR709
- Page 1 AV Receiver TX-NR709 Instruction Manual Thank you for purchasing an Onkyo AV Receiver. Please read this manual thoroughly before making connections and plugging in the unit. Following the instructions in this manual will enable you to obtain optimum performance and listening enjoyment from your new AV Receiver.
-
Page 2: Introduction
Introduction WARNING: TO REDUCE THE RISK OF FIRE OR ELECTRIC SHOCK, DO NOT EXPOSE THIS APPARATUS TO RAIN OR MOISTURE. CAUTION: TO REDUCE THE RISK OF ELECTRIC SHOCK, DO NOT REMOVE COVER (OR BACK). NO USER-SERVICEABLE PARTS INSIDE. REFER SERVICING QUALIFIED PERSONNEL. -
Page 3: Precautions
If water or any other liquid gets inside this unit, have it checked by your Onkyo dealer. 8. Handling Notes • If you need to transport this unit, use the original packaging to pack it how it was when you originally bought it. -
Page 4: Supplied Accessories
We, ONKYO EUROPE ELECTRONICS GmbH LIEGNITZERSTRASSE 6, 82194 GROEBENZELL, GERMANY declare in own responsibility, that the ONKYO product described in this instruction manual is in compliance with the corresponding technical standards such as EN60065, EN55013, EN55020 and EN61000-3-2, -3-3. GROEBENZELL, GERMANY... -
Page 5: Table Of Contents
Controlling Zone 2 Components... 64 Using the Remote Controller in Zone 2 and Multiroom Control Kits ... 65 Controlling Other Components iPod/iPhone Playback via Onkyo Dock ... 66 Using the Onkyo Dock ... 66 Controlling Your iPod/iPhone ... 67 Controlling Other Components... 69 Preprogrammed Remote Control Codes ... -
Page 6: Features
Connections • 8 HDMI Inputs (1 on front panel) and 2 Outputs • Onkyo p for System Control • 5 Digital Inputs (2 Optical/3 Coaxial) • Component Video Switching (2 Inputs/1 Output) • Universal Port for the Dock for iPod Radio™... - Page 7 Digital Corporation. This HD Radio Ready™ receiver is ready to receive HD Radio broadcasts when connected to the Onkyo UP-HT1 HD Radio tuner module (sold separately). In Europe, using banana plugs to connect speakers to an audio amplifier is prohibited.
-
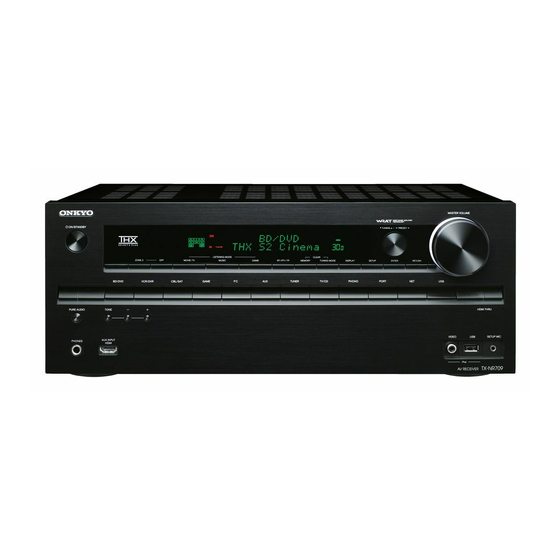
Page 8: Front & Rear Panels
Front & Rear Panels Front Panel (North American and Taiwan models) (European, Australian and Asian models) The page numbers in parentheses show where you can find the main explanation for each item. a 8ON/STANDBY button (22) b ZONE 2, OFF buttons (64) c Remote control sensor (4) d Display (9) e LISTENING MODE buttons (34) -
Page 9: Display
Display For detailed information, see the pages in parentheses. a Speaker/channel indicators b Z2 (Zone 2) indicator (64) c Listening mode and format indicators (34, 62) d 1, 3 and cursor indicators (24) e NET indicator (25, 60) f Tuning indicators RDS indicator (excluding North American and Taiwan models) (29) AUTO indicator (28) -
Page 10: Rear Panel
Speaker Terminals (FRONT L/R, CENTER, SURR L/R, SURR BACK L/R, FRONT HIGH L/R and FRONT WIDE/ZONE 2 L/R) t AC INLET (European, Australian, Asian and Taiwan models) See “Connecting the AV Receiver” for connection (➔ pages 12 to 21). L/R, SUBWOOFER) -
Page 11: Remote Controller
Controlling the AV Receiver To control the AV receiver, press RECEIVER to select Receiver mode. You can also use the remote controller to control Onkyo Blu-ray Disc/DVD player, CD player, and other components. See “Entering Remote Control Codes” for more details (➔... -
Page 12: Connections
Connections Connecting the AV Receiver Connecting Your Speakers Connecting the Speaker Cables The following illustration shows which speaker should be connected to each pair of terminals. If you’re using only one surround back speaker, connect it to the SURR BACK L terminals. - Page 13 Doing so may damage the AV receiver. • Make sure the metal core of the wire does not have ✔ ✔ ✔ ✔ ✔ contact with the AV receiver’s rear panel. Doing so may damage the AV receiver. Color White •...
- Page 14 Refer to your speaker manual. Bi-amping provides improved bass and treble performance. When bi-amping is used, the AV receiver is able to drive up to a 5.1 speaker system in the main room. Once you’ve completed the bi-amping connections as shown...
- Page 15 Connecting a Power Amplifier If you want to use a more powerful power amplifier, you can use the AV receiver as a preamp. Connect all speaker outputs to the power amplifier. See the manuals supplied with your amplifier for details.
-
Page 16: About Av Connections
Note • The AV receiver does not support SCART plugs. • The AV receiver’s optical digital jacks have shutter-type covers that open when an optical plug is inserted and close when it’s removed. Push plugs in all the way. Caution •... -
Page 17: Connecting Components With Hdmi
• When listening to an HDMI component through the AV receiver, set the HDMI component so that its video can be seen on the TV screen (on the TV, select the input of the HDMI component connected to the AV receiver). If the TV power is off or the TV is set to another input source, this may result in no sound from the AV receiver or the sound may be cut off. -
Page 18: Connecting Your Components
Connecting Your Components The on-screen menus appear only on a TV that is connected to the HDMI OUT MAIN. If your TV is connected to other video outputs, use the AV receiver’s display when changing settings. - Page 19 PC IN Note Do not connect the AV receiver’s USB port to a USB port on your computer. Music on your computer cannot be played through the AV receiver in this way. Connect a turntable (MM) that has a built-in phono preamp to TV/CD IN, or connect it to PHONO IN with the phono preamp turned off.
-
Page 20: Connecting Onkyo U Components
AV receiver. The other jack is for connecting additional u-capable components. • Connect only Onkyo components to u jacks. Connecting other manufacturer’s components may cause a malfunction. • Some components may not support all u functions. Refer to the manuals supplied with your Onkyo components. -
Page 21: Connecting The Antennas
AM loop antenna (supplied) Note • Once your AV receiver is ready for use, you’ll need to tune into a radio station and position the antenna to achieve the best possible reception. • Keep the AM loop antenna as far away as possible from your AV receiver, TV, speaker cables, and power cords. -
Page 22: Turning On & Basic Operations
Press 8ON/STANDBY on the front panel. Press RECEIVER followed by 8RECEIVER on the remote controller. The AV receiver will enter standby mode. To prevent any loud surprises when you turn on the AV receiver, always turn down the volume before you turn it off. -
Page 23: Playback
• “Playing Music Files on a Server” page 27) • “Remote Playback” (➔ • “Listening to AM/FM Radio” (➔ • “iPod/iPhone Playback via Onkyo Dock” (➔ page 66) • “Controlling Other Components” To adjust the volume, use VOL q/w. Select a listening mode and enjoy! See also: •... -
Page 24: Understanding Icons On The Display
Note • Do not disconnect the USB device or USB cable that comes with iPod/iPhone from the USB port at the front of the AV receiver, while the message “Connecting...” appears on the display. • If you connect an iPod or iPhone to the USB port on this device,... -
Page 25: Playing A Usb Device
Internet radio stations and podcasts at any time. To enhance your Internet radio experience, the http://onkyo.vtuner.com/ portal is available to you as an easy way to browse to find stations, set up/organize your favorites, add your own stations, get help, etc. After the... - Page 26 (➔ • If you’re using DHCP, your router may not always allocate the same IP address to the AV receiver, so if you find that you can’t connect to the AV receiver, recheck the AV receiver’s IP address on the “Network” screen.
-
Page 27: Playing Music Files On A Server
AV receiver connections. Windows Media Player 11 Setup This section explains how to configure Windows Media Player 11 so that the AV receiver can play the music files stored on your computer. Start Windows Media Player 11. -
Page 28: Listening To Am/Fm Radio
Web Setup in your browser. The volume value of the remote window and the volume value of the AV receiver may not always match. Adjustments you make to the volume in the AV receiver will not be reflected in the “Remote... - Page 29 (➔ page 30). Note • In some cases, the text characters displayed on the AV receiver may not be identical to those broadcast by the radio station. Also, unexpected characters may be displayed when unsupported characters are received. This is not a malfunction.
- Page 30 See the table shown later in this chapter. To start the search, press ENTER. The AV receiver searches until it finds a station of the type you specified, at which point it stops briefly before continuing with the search.
-
Page 31: Using Basic Functions
Turn on the AV receiver and the connected TV. On the TV, select the input to which the AV receiver is connected. Set the speaker setup microphone at the Main Listening Position a, and connect it to the SETUP MIC jack. - Page 32 • Do not connect or disconnect any speakers during Audyssey MultEQ XT Room Correction and Speaker Setup. • If the AV receiver is muted, it will be unmuted automatically when Audyssey MultEQ XT Room Correction and Speaker Setup starts.
- Page 33 • Writing Error! This message appears if saving fails. Try saving again. If this message appears after 2 or 3 attempts, contact your Onkyo dealer. • Speaker Detect Error This message appears if a speaker is not detected. “No” means that no speaker was detected.
-
Page 34: Using The Listening Modes
• The Dolby Digital and DTS listening modes can only be selected if your Blu-ray Disc/DVD player is connected to the AV receiver with a digital audio connection (coaxial, optical, or HDMI). • The listening modes you can select depends on the format of the input signal. To check the format, see “Displaying Source Information”... - Page 35 About Listening Modes The AV receiver’s listening modes can transform your listening room into a movie theater or concert hall, with high fidelity and stunning surround sound. ■ Explanatory Notes SP LAYOUT Listening mode buttons Input Source The following audio formats are supported by the listening mode.
- Page 36 ■ Onkyo-Original DSP Listening Modes Listening Mode Description Orchestra Suitable for classical or operatic music, this mode emphasizes the surround channels in order to widen the stereo image, and simulates the natural O r c e s t r a reverberation of a large hall.
- Page 37 Listening Mode Description Dolby Pro Logic IIx Dolby Pro Logic IIx expands any 2-channel source for 7.1-channel Dolby Pro Logic II playback. It provides a very natural and seamless surround-sound experience that fully envelops the listener. As well as music and movies, video games M o v i e can also benefit from the dramatic spatial effects and vivid imaging.
- Page 38 Listening Mode Description Neo:6 This mode expands any 2-channel source for up to 7.1-channel playback. It uses seven full-bandwidth channels of matrix decoding for matrix-encoded material, providing a very natural and seamless surround sound experience that fully envelops the listener. •...
- Page 39 For the Blu-ray Discs, Dolby Digital is used in a 3.1/5.1-channel speaker system. AV receiver can input the DSD signal from HDMI IN. Setting the output setting on the player side to PCM might obtain a better sound according to the player. In that case, set the output setting on the player side to PCM.
-
Page 40: Using The Home Menu
Depending on the input source and listening mode, not all channels shown here output the sound. Using the Sleep Timer With the sleep timer, you can set the AV receiver to turn off automatically after a specified period. Press RECEIVER followed by SLEEP repeatedly to select the required sleep time. -
Page 41: Displaying Source Information
Information is displayed for about three seconds, then the previously displayed information reappears. Changing the Input Display When you connect an u-capable Onkyo component, you must configure the input display so that u can work properly. This setting can be done only from the front panel. -
Page 42: Using Easy Macros
■ MY MOVIE First, the TV, the Onkyo DVD player, and the AV receiver are turned on. The input selector is set to “BD/DVD”. Finally the player starts playback. Depending on the start-up time of your Blu-ray Disc/DVD player, the AV receiver may not activate this playback command. -
Page 43: Advanced Operations
Press RETURN to return to the previous menu. Note page 69) (➔ • This procedure can also be performed on the AV receiver by using SETUP, the arrow buttons, and ENTER. • During Audyssey MultEQ Setup, messages, etc., that are displayed on the TV screen will appear in the Display. -
Page 44: Input/Output Assign
■ Resolution Through: Select this to pass video through the AV receiver at the same resolution and with no conversion. Auto: Select this to have the AV receiver automatically convert video at resolutions supported by your TV. - Page 45 Blu-ray Disc/DVD player to HDMI IN 2, you must assign “HDMI2” to the “BD/DVD” input selector. If you’ve connected your TV to the AV receiver with an HDMI cable, composite video, S-video and component video sources can be upconverted and output by the HDMI output.
-
Page 46: Speaker Setup
“Bi-amping the Front Speakers” page 14). (➔ Note • When bi-amping is used, the AV receiver is able to drive up to 5.1 speakers in the main room. • Before you change these settings, turn down the volume. ■... - Page 47 Note • If the “Speakers Type(Front)” setting is set to “Bi-Amp”, Powered Zone 2 cannot be used. • When the “Powered Zone 2” setting is set to “Yes”, the surround back, front wide and front high speakers cannot be used. Speaker Configuration This setting is set automatically by Audyssey MultEQ...
- Page 48 The audio is not output from the speakers connected to the wireless unit. When the wireless unit is connected to the UNIVERSAL PORT jack on the AV receiver, you can select if you wish to output the audio from the speakers connected to the wireless unit.
- Page 49 Equalizer Settings With the Equalizer settings, you can adjust the tone of speakers individually with a 7-band equalizer. The volume of each speaker can be set (➔ page 48). ■ Equalizer Manual: You can adjust the equalizer for each speaker manually.
-
Page 50: Audio Adjust
Audio Adjust Main menu Audio Adjust With the Audio Adjust functions and settings, you can adjust the sound and listening modes as you like. Multiplex/Mono ■ Multiplex Input Channel Main Main/Sub This setting determines which channel of a stereo multiplex source is output. Use it to select audio channels or languages with multiplex sources, multilingual TV broadcasts, and so on. - Page 51 ■ Dolby Volume Dolby Volume automatically adjusts the difference in volume levels which can occur between different contents or source components, freeing the user from having to make volume adjustments. Also, by adjusting the frequency balance according to the playback volume, it recreates the original source audio.
-
Page 52: Source Setup
Source Setup Items can be set individually for each input selector. Preparation Press the input selector buttons to select an input source. Main menu Source Setup Audyssey The tone for each speaker is set automatically by Audyssey MultEQ ® XT Room Correction and Speaker Setup. - Page 53 Note • If you want to use Audyssey Dynamic EQ Audyssey Dynamic Volume ® with THX listening modes, set the “Loudness Plus” setting to “Off” and set “Preserve THX Settings” to “No” (➔ page 49). • If you make Dynamic Volume active, “Dynamic EQ” is set to “On”.
- Page 54 All Erase Zoom: Wide Zoom: Auto: According to the input signals and monitor output setting, the AV receiver automatically selects the “4 : 3”, “Full”, “Zoom” or “Wide Zoom” mode. See “Monitor Out” for details on the monitor output setting ■...
- Page 55 Detects whether the input signal is a video or a movie. If it is a movie, the appropriate conversion is applied. The AV receiver will adjust to the picture source, automatically converting it to the appropriate progressive signal and reproducing the natural quality of the original picture.
-
Page 56: Listening Mode Preset
SLEEP indicator is dimly lit in standby mode. In such conditions, the power consumption of the AV receiver slightly increases. With “Auto”, when the iPod/iPhone becomes fully charged, the SLEEP indicator goes off and the power consumption in standby mode is reduced. -
Page 57: Miscellaneous
■ Remote ID 1, 2, or 3 When several Onkyo components are used in the same room, their remote ID codes may overlap. To differentiate the AV receiver from the other components, you can change its remote ID from “1”, to “2” or “3”. - Page 58 • When an p-compatible component is connected to the AV receiver via an HDMI cable, the name of the connected component is displayed on the AV receiver display. For example, while you are watching TV broadcasting, if you...
-
Page 59: Auto Standby
(➔ page 17), turning up the AV receiver’s volume control will make the sound be output from the AV receiver’s front left and right speakers. To stop the AV receiver’s speakers producing sound, change the settings, change your TV’s settings, or turn down the AV receiver’s volume. - Page 60 80). Note • Perform the firmware update only when such an announcement is posted on the Onkyo web site. Visit the Onkyo web site for the latest information. • It takes maximum 60 minutes to complete the firmware update.
-
Page 61: Remote Controller Setup
To save the setting you made here, go to “Level Calibration” setting the AV receiver to standby. Note • You cannot use this function while the AV receiver is muted. • Speakers that are set to “No” or “None” in “Speaker Configuration” Dolby Volume ■... - Page 62 • The Late Night function can be used only when the input source is Dolby Digital, Dolby Digital Plus, or Dolby TrueHD. • The Late Night function is set to “Off” when the AV receiver is set to standby. For Dolby TrueHD sources, it will be set to “Auto”.
-
Page 63: Zone 2
TRIGGER OUT jack goes high (+12 V and max. 150 mA for Zone 2). Connecting this jack to a 12-volt trigger input on a component in Zone 2 will make that component turn on or off as the AV receiver turns on or off the Zone 2. AV receiver Receiver/... -
Page 64: Controlling Zone 2 Components
Press ZONE 2 (the Z2 indicator on the display flash). Use MASTER VOLUME control within 8 seconds to adjust the volume. If your Zone 2 speakers are connected to a receiver or integrated amp in Zone 2, use its volume control to adjust the volume. 8RECEIVER... -
Page 65: Using The Remote Controller In Zone 2 And Multiroom Control Kits
• When Zone 2 is activated and its input selector is selected, the power consumption of standby mode slightly increases. • When setting the AV receiver to standby mode while Zone 2 is active, the Z2 indicator is dimly lit. -
Page 66: Controlling Other Components
Using the Onkyo Dock The Dock is sold separately. Models sold are different depending on the region. For the latest information on the Onkyo Dock components, see the Onkyo web site at: http://www.onkyo.com Before using the Onkyo Dock components, update your iPod/iPhone with the latest software, available from the Apple web site. -
Page 67: Controlling Your Ipod/Iphone
Note • Enter the appropriate remote control code before using the AV receiver’s remote controller for the first time • Connect the RI Dock to the AV receiver with an u cable page 20). (➔ • Set the RI Dock’s RI MODE switch to “HDD” or “HDD/DOCK”. - Page 68 • For detailed operation of iPod/iPhone, please refer to the instruction manual of the RI Dock. This button does not turn the Onkyo DS-A2 or DS-A2X RI Dock on or off. Also, your iPod/iPhone may not respond the first time you press this button, in which case you should press it again.
-
Page 69: Controlling Other Components
ZONE 2. • Only TV remote control codes can be entered for TV. • Except for RECEIVER, TV and ZONE 2, remote control codes from any category can be assigned to the REMOTE MODE. However, these buttons also work as input selector buttons (➔... -
Page 70: Remote Control Codes For Onkyo Components Connected Via U
AV receiver, and operate the component. Controlling Onkyo components without u If you want to control an Onkyo component by pointing the remote controller directly at it, or you want to control an Onkyo component that’s not connected via u, use the... - Page 71 When you press 8SOURCE, the related component is turned on (or off). The p function is not supported. The p supported by the AV receiver is the CEC system control function of the HDMI standard. 3 (Pause) functions as reverse playback.
-
Page 72: Learning Commands
• Remote controller buttons such as Play, Stop, and Pause are preprogrammed with commands for controlling Onkyo CD players, cassette decks, and DVD players. However, they can learn new commands, and you can restore the preprogrammed commands at any time by resetting the remote controller (➔... -
Page 73: Using Normal Macros
1. Press RECEIVER to select the Receiver remote controller mode. 2. Press 8RECEIVER to turn on the AV receiver. 3. Press TV/CD to select the TV/CD input source. 4. Press 1 to start playback on the CD player. You can program ACTIVITIES so that all four actions are performed with just one button press. -
Page 74: Appendix
AV receiver stays on, set the volume to minimum, disconnect the power cord, and reconnect your speakers and input sources. If the AV receiver turns off when you set the volume to maximum, disconnect the power cord, and contact your Onkyo dealer. Audio ■... - Page 75 ■ About DTS signals When DTS program material ends and the DTS bitstream stops, the AV receiver remains in DTS listening mode and the DTS indicator remains on. This is to prevent noise when you use the pause, fast forward, or fast reverse function on your player. If —...
- Page 76 Make sure to set the same ID on both the AV receiver and remote controller. ■ Can’t control other components If it’s an Onkyo component, make sure that the u cable and analog audio cable are connected properly. Connecting only an u cable won’t be enough. —...
- Page 77 To control another manufacturer’s component, point the remote controller at that component. To control an Onkyo component that’s connected via u, point the remote controller at the AV receiver. Be sure to enter the appropriate remote control code first. To control an Onkyo component that’s not connected via u, point the remote controller at the component.
- Page 78 If you’re using DHCP, your router may not always allocate the same IP address to the AV receiver, so if you find that you can’t connect to a server or Internet radio station, recheck the AV receiver’s IP address on the “Network”...
- Page 79 Onkyo is not responsible for damages (such as CD rental fees) due to unsuccessful recordings caused by the unit’s malfunction. Before you record important data, make sure that the material will be recorded correctly.
-
Page 80: Firmware Update
Onkyo recommends that you back up your important music files beforehand. • If you connect a USB hard disk drive to the USB port, Onkyo recommends that you use its AC adapter to power it. • USB hubs and USB devices with hub functions are not supported. - Page 81 • Never unplug the USB storage device containing the firmware file or the AC power cord during the update process. • Do not attempt to access the AV receiver from your PC while it is being updated. • It takes maximum 60 minutes to complete the firmware update.
- Page 82 ONKYO CHINA LIMITED Unit 1&12, 9/F, Ever Gain Plaza Tower 1, 88, Container Port Road, Kwai Chung, N.T., Hong Kong Tel: 852-2429-3118 Fax: 852-2428-9039 <http://www.onkyochina.com/> Asia, Oceania, Middle East, Africa Please contact an ONKYO distributor referring to Onkyo SUPPORT site. <http://www.intl.onkyo.com/support/local_support/index.html>...
-
Page 83: Connection Tips And Video Signal Path
Connection Tips and Video Signal Path The AV receiver supports several connection formats for compatibility with a wide range of AV equipment. The format you choose will depend on the formats supported by your components. Use the following sections as a guide. - Page 84 HDMI. When choosing a connection format, bear in mind that the AV receiver does not convert digital input signals for analog line outputs and vice versa. For example, audio signals connected to an optical or coaxial digital input are not output by the analog VCR/DVR OUT.
- Page 85 Video Resolution Chart The following tables show how video signals at different resolutions are output by the AV receiver. NTSC/PAL Output HDMI Input ✔ HDMI 1080p ✔ 1080i ✔ 720p 480p/576p ✔ ✔ 480i/576i ✔ Component 1080p ✔ 1080i ✔...
-
Page 86: Using An Rihd-Compatible Tv, Player, Or Recorder
Using an RIHD-compatible TV, Player, or Recorder p, which stands for Remote Interactive over HDMI, is the name of the system control function found on Onkyo components. The AV receiver can be used with CEC (Consumer Electronics Control), which allows system control over HDMI and is part of the HDMI standard. - Page 87 • On the TV, when you select anything other than the HDMI jack to which the AV receiver is connected, the input on the AV receiver will be switched to “TV/CD”. • The AV receiver will automatically power on in conjunction when it determines it to be necessary.
-
Page 88: About Hdmi
About Copyright Protection The AV receiver supports HDCP (High-bandwidth Digital Content Protection) video signals. Other devices connected to the AV receiver via HDMI must also support HDCP. DVI (Digital Visual Interface): The digital display interface standard set by the DDWG HDCP (High-bandwidth Digital Content Protection): The video encryption technology developed by Intel for HDMI/DVI. -
Page 89: Network/Usb Features
60). see “Network” (➔ • The AV receiver does not support PPPoE settings, so if you have a PPPoE-type Internet connection, you must use a PPPoE- compatible router. • Depending on your ISP, you may need to specify a proxy server to use Internet radio. - Page 90 • Protected WMA music files on an MP3 player cannot be played. • Onkyo accepts no responsibility whatsoever for the loss or damage to data stored on a USB device when that device is used with the AV receiver. We recommend that you back up your important music files beforehand.
- Page 91 Variable bit-rate (VBR) files are supported. However, playback time may not be display correctly. Note • With remote playback, the AV receiver does not support the following music file formats: FLAC and Ogg Vorbis. • In the case of server playback, the below-mentioned file formats may not be played depending on the server type.
-
Page 92: Specifications
Specifications Amplifier Section Rated Output Power All channels: (North American) 110 watts minimum continuous power per channel, 8 ohm loads, 2 channels driven from 20 Hz to 20 kHz, with a maximum total harmonic distortion of 0.08% (FTC) 130 watts minimum continuous power per channel, 6 ohm loads, 2 channels driven at 1 kHz, with a maximum total harmonic distortion of 0.1% (FTC) - Page 93 ■ Audio Outputs Analog VCR/DVR, ZONE2 LINE OUT Analog Multichannel Pre Outputs Subwoofer Pre Outputs Speaker Outputs Main (L, R, C, SL, SR, SBL, SBR) + Front Wide/ZONE2 (L, R) + Front High (L, R) Phones 1 (6.3 ø) ■ Others Setup Mic RS232...
- Page 94 Memo...
- Page 95 Memo...
- Page 96 1301, 555 Tower, No.555 West NanJin Road, Jin an, Shanghai, China 200041, Tel: 86-21-52131366 Fax: 86-21-52130396 Y1102-1 SN 29400698 (C) Copyright 2011 ONKYO SOUND & VISION CORPORATION Japan. All rights reserved. * 2 9 4 0 0 6 9 8 *...