Table of Contents
Advertisement
Quick Links
IMPORTANT
Read this manual carefully before
assembling, using or servicing this grill.
Keep this manual for future reference. If
you have questions about assembly,
operation, servicing or repair of this grill,
please call Coleman at 1-800-835-3278
or TDD: 316-832-8707.
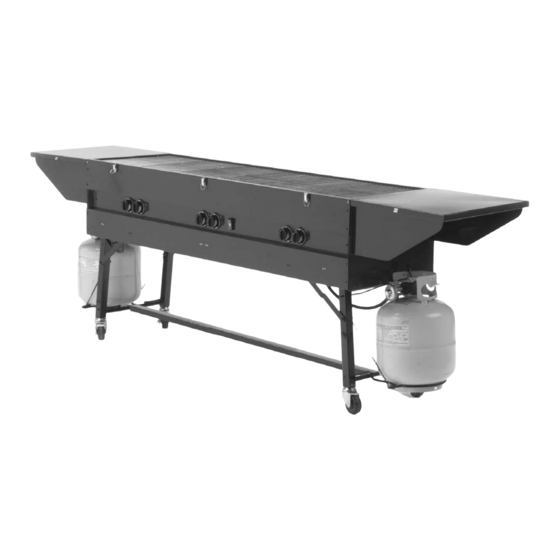
Event Grill
9995A Series
INSTRUCTIONS FOR USE
© 2004 The Coleman Company, Inc.
www.coleman.com
The handling, storage and
transportation of gas cylinders
must be in accordance with
ANSI/NFPA 58, Storage and
Handling of Liquified Gases, or
CSA B149.1, Natural Gas and
Propane Installation Code.
• 9-volt Battery included
• 20# L.P. gas cylinders
not included
For Outdoor Use Only
The owner shall post in a
prominent location instructions
to be followed in the event the
user smells gas. This infor-
matin shall be obtained by
consulting the local gas
supplier.
GAS BARBECUE
ANSI Z83.11 • CSA 1.8 (2002)
FOOD SERVICE EQUIPMENT
®
Advertisement
Table of Contents

Related Manuals for Coleman 9995A Series


Summary of Contents for Coleman 9995A Series
-
Page 1: Instructions For Use
Coleman at 1-800-835-3278 or TDD: 316-832-8707. Event Grill 9995A Series INSTRUCTIONS FOR USE © 2004 The Coleman Company, Inc. www.coleman.com The handling, storage and transportation of gas cylinders must be in accordance with ANSI/NFPA 58, Storage and Handling of Liquified Gases, or CSA B149.1, Natural Gas and... -
Page 2: Table Of Contents
• NEVER place more than 15 pounds on a side table or a side burner. • NEVER use charcoal briquettes or lighter fluid in a gas grill. (Fig. 6) • Grill is hot when in use; to avoid burns, DO NOT touch any hot grill •... -
Page 3: General Safety Information
General Safety Information cont. General Installation • Installation must conform with local codes or, in the absence of local codes, with either the National Fuel Gas Code, ANSI Z223.1 (USA), CAN/CGA-B149.1, Natural Gas and Propane Installation Code (Canada). To check local codes, see your local L.P. gas dealer or natural gas company listed in the Yellow Pages for recommended installation pro- cedures and regulations. -
Page 4: Portable L.p. Gas Barbecue Cylinders
L.P. gas is heavier than air and tends to collect in low areas. It is important that there are no leaking connections on your gas grill that could cause a fire or explosion (see “LEAK TESTING”, Pg. 8). -
Page 5: L.p. Gas Cylinder
Do not use another hose and regulator assembly other than the one supplied with the grill or a Coleman replacement pressure regulator assembly. The pressure regulator and hose assembly provided is factory set at an outlet pressure of 11 inches water column (1/2 psi). -
Page 6: Filling And Purging Type 1 L.p. Gas Cylinders
Transporting the Cylinder WARNING Handle a full cylinder with care. Gas is under high pressure. DANGER • NEVER store a spare L.P. gas supply cylinder under the grill body or inside grill enclosure or in the vicinity of any heat producing appliance. (Fig. 12) •... -
Page 7: To Set Up
To Set Up Step 1 Carefully read and follow the instructions for proper setup & use of ® your Coleman Event Grill. CAUTION Because of its size and weight, it is recommended that there are at least two (2) people available to set up this grill. -
Page 8: Leak Testing
To Set Up continued Step 6 LEFT LID (SHELF) CENTER LID Unlock Right Side Lid. NOTE: Undo latches on LID FLAPS front and back of lid. Release flaps to form Right Side Shelf. IMPORTANT: Always remove Lids in this order: •... -
Page 9: Fixing A Fuel Leak
3. Stop a leak by tightening the loose joint, or by replacing the faulty part with a replacement part recommended by Coleman. DO NOT attempt to repair the cylinder valve if it should become damaged; the cylinder MUST be replaced. -
Page 10: Tear Down/Clean
Lighting the Grill continued Step 3 Turn Righthand Burner Valve to “High.” Press Igniter Button to light. NOTE: If the flame doesn’t imme- diately light, turn off control knob and wait five minutes for gas to clear. Repeat steps 1 through 3. If the burner does not light on second try, turn off knob and try match-lighting the burner. -
Page 11: Tear Down/Clean
Tear Down/Clean continued Step 6 Center Lid goes on first. Step 7 Lift up on Right Side Shelf to remove from grill and fold in flaps as shown. Step 8 Place folded up Right Lid (Shelf) on grill. IMPORTANT: Make sure Lid fits into Channel on Center Lid. -
Page 12: General Use And Correct Burner Flames
General Use and Correct Burner Flames WARNING • Keep grill area clean and free from combustible materials, gasoline and other flammable vapors, liquids, and spare L.P. cylinders. • DO NOT obstruct the flow of combustion and ventilation air. • Keep the ventilation opening(s) of the L.P. cylinder enclo- sure free and clear of debris. -
Page 13: Storage
Frequently check for corroded areas and repair them promptly. • For more complicated maintenance or to obtain repairs, please contact The Coleman Company, Inc. Solution Cylinder is empty. Replace cylinder. Burner may take up to one minute to light after a propane cylinder has been connected. -
Page 14: Replacement Parts List
Replacement Parts 9995 Event Grill Parts List Part No. Description 9943-1501 Control Knobs w/graphics 9990-5481 Castors w/lock (2) 9995-1191 Heat Tent w/hardware 9995-1511 Cooking Grate 9995-1551 Igniter Switch w/wires 9995-1571 Bumpers w/hardware 9995-2021 Burner w/hardware 9995-2051 End Lid 9995-2161 Grease Pan 9995-2181 Center Lid Assembly 9995-3861... - Page 15 Notes...
-
Page 16: Warranty
The Coleman Company, Inc. • 3600 N. Hydraulic • Wichita, KS 67219 U.S.A. Coleman ® and HOW TO OBTAIN WARRANTY SERVICE Take the product to an authorized Coleman service center.