Advertisement
Quick Links
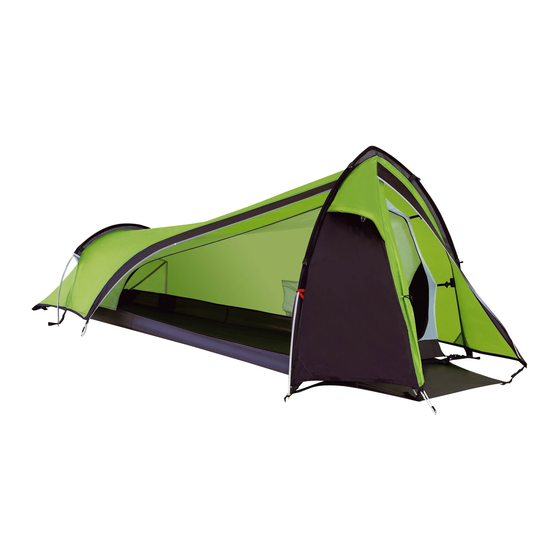
Main Tent Pole (Red)
Part No. 9830-1111
Side Pole (Silver)
Part No. 9830-1211
1
Layout & Positioning
of Rainfly, Pole Assembly
– Layout and position Rainfly with doors facing
desired direction. (illus. 1) Unzip doors.
– For best results in windy conditions, position
back of tent into the wind.
– Insert the cap end of the Main Pole into front
sleeve. (illus. 1)
– Insert the cap end of the Side Pole into
back sleeve. (illus. 1)
2
Assemble Frame
– Start with the Main Tent Pole and
gradually apply pressure to the pole,
forming an arch, until you are able to
insert the pole tip into the grommet on
the corner web. (illus. 2, illus. 3)
– Repeat for Side pole. (illus. 2, illus. 3)
illus. 2
Insert Pole Tip
into grommet.
POLE ASSEMBLY PARTS
Avior
part number 2000000452
Side Pole
illus. 1
Main Tent Pole
Side Pole
illus. 3
Tent frame up
X
1
™
Rainfly
Part No. 9830-1311
Main Tent Pole
Advertisement

Related Manuals for Coleman X1


Summary of Contents for Coleman X1
- Page 1 POLE ASSEMBLY PARTS Main Tent Pole (Red) Part No. 9830-1111 Side Pole (Silver) Part No. 9830-1211 Layout & Positioning of Rainfly, Pole Assembly – Layout and position Rainfly with doors facing desired direction. (illus. 1) Unzip doors. – For best results in windy conditions, position back of tent into the wind.
- Page 2 LOOP TO REMOVE STAKE. • TENT POLES SHOULD NOT BE LEFT TELESCOPED TOGETHER DURING STORAGE. PRINTED IN CHINA Rev. 11/07 © 2006 The Coleman Company, Inc. All Rights Reserved. illus. 6 Completed tent with Rainfly. illus. 4 Tent positions in under Rainfly 3600 N.