Table of Contents
Advertisement
Available languages
Available languages
Quick Links
Download this manual
See also:
User Manual
Advertisement
Chapters
Table of Contents

Related Manuals for Linksys BEFDSR41W


Summary of Contents for Linksys BEFDSR41W
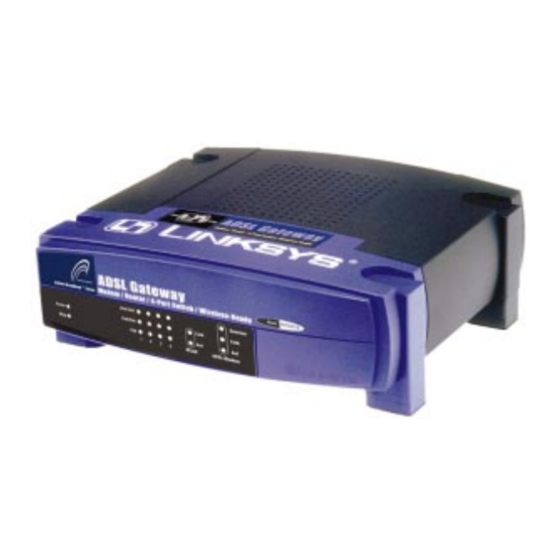
- Page 1 Instant Broadband ™ Series ADSL Gateway Modem / Router / 4-Port Switch / Wireless-Ready Use this guide to install: BEFDSR41W Fast Start Guide...
- Page 2 • Linksys Group™ déclare que la carte PC Instant Wireless IEEE 802.11 est conforme aux conditions essentielles et aux dispositions relatives à la directive 1999/5/EC, la directive 89/336/EEC, et à la directive 73/23/EEC.
- Page 3 COPYRIGHT & TRADEMARKS Copyright © 2002 Linksys, All Rights Reserved. Microsoft, Windows, and the Windows logo are registered trademarks of Microsoft Corporation. All other trademarks and brand names are the property of their respective proprietors. FCC PART 15 CLASS B STATEMENT...
-
Page 4: Table Of Contents
Windows 95, 98, or Millennium Instructions Windows 2000 Instructions Windows XP Instructions Step 3: Configure the ADSL Gateway For product support, product registration, and warranty information, contact us at the addresses below: E-mail europe-support@linksys.com latam-soporte@linksys.com http://www.linksys.com/international Instant Broadband Series ™ ADSL Gateway Minimum Requirements •... -
Page 5: Step 1: Connect The Adsl Gateway
Gateway. with Modem / Router / 4-Port Switch / Wireless-Ready Note: If you have a Linksys Wireless PC Card (WPC11), be sure to fully insert it into the PC Card slot on the back of the Gateway before turning on the power. -
Page 6: Step 2: Configure The Pcs
D. Connect to the power adapter to the Gateway. Connect the power adapter to an electrical outlet. E. Turn on your PCs and the Gateway. Note: You may need to place a small device called a microfilter (not included) between each phone and wall jack to prevent interference. Contact your ISP if you have any questions. -
Page 7: Windows 95, 98, Or Millennium Instructions
Windows 95, 98, or Millennium Instructions A. Click the Start button. Click Settings and then Control Panel. Double- click the Network icon. B. On the Configuration tab, select the TCP/IP line applicable Ethernet adapter. Do not choose a TCP/IP entry whose name mentions DUN, PPPoE, VPN, or AOL. -
Page 8: Windows Xp Instructions
D. Select Internet Protocol (TCP/IP), and click the Properties button. E. Select Obtain an IP address automatically. When the new window appears, click the OK button. Click the OK button again to complete the PC configuration. F. Restart your computer. Proceed to Step 3: Configure the Gateway. -
Page 9: Step 3: Configure The Adsl Gateway
D. Select Internet Protocol (TCP/IP), and click the Properties button. E. Select Obtain an IP address automatically. When the new window appears, click the OK button. Click the OK button again (or the Close button if any settings were changed) to complete the PC configuration. - Page 10 C. The Gateway configuration interface will appear with the Setup tab select- ed. Based on the setup instructions from your ISP, you may need to provide the following information. Host Name and Domain Name: These fields allow you to provide a host name and domain name for the Gateway.
- Page 11 b. WAN IP Address: Static IP Address If your ISP says that you are connecting through a static or fixed IP address supplied by your ISP, perform these steps: 1. Select RFC 14583 Bridged. 2. Select Static IP Address as the WAN IP Address. 3.
- Page 12 3. RFC 2364 PPPoA If your ISP says that you are connecting through RFC2364 PPPoA, perform these steps: a. Select RFC 2364 PPPoA. b. Enter the User Name. c. Enter the Password. d. Click the Apply and then the Continue buttons to save the settings. Instant Broadband Series ADSL Gateway...
- Page 13 Then close the web browser. Test the setup by opening your web browser from any computer and enter- ing http://www.linksys.com/registration. Congratulations! You’ve successfully configured the Gateway. If you are unable to reach our website, you may want to review what you did in this section.
- Page 14 COPYRIGHT & MARQUES DE COMMERCE Copyright © 2002 Linksys. Tous droits réservés. Microsoft, Windows et le logo Windows sont des marques déposées de Microsoft Corporation. Toutes les autres marques de com- merce et tous les autres noms commerciaux appartiennent à leurs propriétaires respectifs.
- Page 15 Instructions pour Windows XP Étape 3 : configuration de la passerelle ADSL Pour le support produit, l’enregistrement du produit et les informations sur la garantie, contactez-nous aux adresses indiquées ci-dessous : E-mail : europe-support@linksys.com latam-soporte@linksys.com Web : http://www.linksys.com/international Instant Broadband Series ™...
-
Page 16: Étape 1 : Connexion De La Passerelle Adsl
Si vous connectez plus de quatre PC à la passerelle, vous devez également y connecter un hub ou un commutateur. Remarque : si vous disposez d’une carte PC sans fil Linksys (WPC11), veillez à l’insérer complètement dans l’emplacement pour carte PC situé à l’arrière de la passerelle avant de mettre l’appareil sous tension. -
Page 17: Étape 2 : Configuration Des Pc
D. Branchez l’adaptateur de courant sur la passerelle. Connectez l’adaptateur de courant à une prise électrique. E. Mettez les PC et la passerelle sous tension. Remarque : il se peut que vous deviez placer un petit appareil appelé microfiltre (non fourni) entre chaque téléphone et chaque prise pour éviter les brouillages. -
Page 18: Instructions Pour Windows 95, 98 Ou Millennium
Instructions pour Windows 95, 98 ou Millennium A. Cliquez sur le bouton Démarrer. Cliquez sur Paramètres, puis sur Panneau de configuration. Double-cliquez sur l’icône Réseau. B. Dans l’onglet Configuration, sélec- tionnez la ligne TCP/IP de l’adapta- teur Ethernet concerné. Ne choisissez pas une entrée TCP/IP dont le nom contient le terme DUN, PPPoE, VPN ou AOL. -
Page 19: Instructions Pour Windows Xp
D. Sélectionnez Protocole Internet (TCP/IP) cliquez bouton Propriétés. E. Sélectionnez Obtenir une adresse IP automatique- ment. Lorsque la nouvelle fenêtre apparaît, cliquez sur le bouton OK. Cliquez de nouveau sur le bouton OK pour achever la configura- tion du PC. F. -
Page 20: Étape 3 : Configuration De La Passerelle Adsl
D. Sélectionnez Protocole Internet (TCP/IP) cliquez bouton Propriétés. E. Sélectionnez Obtenir une adresse IP automatique- ment. Lorsque la nouvelle fenêtre apparaît, cliquez sur le bouton OK. Cliquez de nouveau sur le bouton OK (ou sur le bouton Fermer si vous avez modifié certains paramètres) pour achever la configuration du PC. - Page 21 C. L’interface de configuration de la passerelle apparaît avec l’onglet Setup (Configuration) sélectionné. Selon les instructions de configuration de votre fournisseur d’accés Internet, il se peut que vous deviez fournir les informations suivantes. Host Name (Nom d’hôte) et Domain Name (Nom de domaine) : ces champs vous permettent de fournir un nom d’hôte et un nom de domaine pour la passerelle.
- Page 22 b. WAN IP Address (Adresse IP WAN) : Static IP Address (Adresse IP per- manente) Si votre fournisseur d’accés Internet indique que vous vous connectez par l’in- termédiaire d’une adresse IP permanente ou fixe, procédez comme suit : 1. Sélectionnez RFC 14583 Bridged (RFC 14583 ponté). 2.
- Page 23 3. RFC 2364 PPPoA Si votre fournisseur d’accés Internet indique que vous vous connectez par l’in- termédiaire de RFC 2364 PPPoA, procédez comme suit : a. Sélectionnez RFC 2364 PPPoA. b. Renseignez le champ User Name (Nom d’utilisateur). c. Renseignez le champ Password (Mot de passe). d.
- Page 24 Fermez ensuite le navigateur Web. Testez la configuration en ouvrant votre navigateur Web à partir d’un ordi- nateur et en entrant http://www.linksys.com/registration. Félicitations ! La configuration de la passerelle est terminée. Si vous ne parvenez pas à accéder à notre site Web, il se peut que vous...
- Page 25 Markennamen sind Eigentum der jeweiligen Firmen. FCC-KONFORMITÄTSERKLÄRUNG Gemäß Verordnung der Federal Communications Commission (FCC) werden im folgenden die FCC-Vorschriften des Abschnitts 15 für die Installation und Betrieb des Linksys ADSL- Gateways BEFDSR41W wiedergegeben. Dieses Gerät wurde nach Maßgabe der Grenzwerte von Abschnitt 15 der FCC-Vorschriften geprüft und als digitales Gerät der Klasse B eingestuft.
- Page 26 Anweisungen für Windows 2000 Anweisungen für Windows XP Schritt 3: Konfigurieren des ADSL-Gateways Informationen zur Produktunterstützung, Produktregistrierung und Gewährleistung erhalten Sie unter den folgenden Adressen: E-Mail europe-support@linksys.com latam-soporte@linksys.com http://www.linksys.com/international Instant Broadband -Serie ™ ADSL-Gateway mit Modem / Router / 4-Port-Switch / Wireless-fähig Minimale Anforderungen •...
-
Page 27: Schritt 1: Anschließen Des Adsl-Gateways
Wenn Sie mehr als vier PCs an das Gateway anschließen möchten, müssen Sie an das Gateway zusätzlich einen Hub oder Switch anschließen. Hinweis: Wenn Sie eine Wireless PC-Karte von Linksys verwenden (WPC11), ist darauf zu achten, dass diese im PC-Kartensteckplatz auf der Rückseite des Gateways vollständig eingesteckt ist, bevor das... -
Page 28: Schritt 2: Konfigurieren Der Pcs
Sie mit dem Gateway verbinden. Auf den nächsten Seiten erfahren Sie Schritt für Schritt, wie Sie Ihre Netzwerkeinstellungen für das verwendete Windows-Betriebssystem konfi- gurieren. Nachdem Sie die Konfiguration Ihrer Computer abgeschlossen haben, fahren Sie mit Schritt 3 fort: Konfigurieren des Gateways. -
Page 29: Anweisungen Für Windows 95, 98 Und Me
ADSL-Gateway mit Modem / Router / 4-Port-Switch / Wireless-fähig D. Klicken Sie auf die Registerkarte Gateway, und vergewissern Sie sich, dass das Feld Installierte Gateways leer ist. Klicken Sie auf die Schaltfläche OK. E. Klicken Sie erneut auf die Schaltfläche OK. Möglicherweise werden Sie vom System nach den Original-Installationsdateien von Windows oder nach zusätzlichen Dateien gefragt. -
Page 30: Anweisungen Für Windows Xp
P C - K o n f i g u r a t i o n abzuschließen. F. Starten Sie Ihren Computer neu. Fahren Sie mit Schritt 3 fort: Konfigurieren des Gateways. Instant Broadband -Serie ADSL-Gateway mit Modem / Router / 4-Port-Switch / Wireless-fähig ™... -
Page 31: Schritt 3: Konfigurieren Des Adsl-Gateways
Einstellungen geändert wurden), um die PC- Konfiguration abzuschließen. F. Starten Sie Ihren Computer neu. Fahren Sie mit Schritt 3 fort: Konfigurieren des ADSL-Gateways. Instant Broadband ™ -Serie ADSL-Gateway mit Modem / Router / 4-Port-Switch / Wireless-fähig Schritt 3: Konfigurieren des ADSL-Gateways In Schritt 3 konfigurieren Sie das ADSL-Gateway so, dass es über Ihren... - Page 32 C. Nun wird die Gateway-Konfigurationsoberfläche mit der ausgewählten Registerkarte Setup angezeigt. Abhängig von den Setup-Anweisungen Ihres ISP müssen Sie die folgenden Daten eingeben. Host Name und Domain Name: In diesen Feldern können Sie einen Hostnamen und einen Domänennamen für das Gateway eingeben. Diese Felder bleiben in der Regel leer.
- Page 33 b. WAN-IP-Adresse: Statische IP-Adresse Wenn Ihr ISP vorschreibt, dass Sie eine Verbindung über eine vorgegebene, stati- sche (unveränderliche) IP-Adresse herstellen sollen, führen Sie diese Schritte aus: 1. Wählen Sie RFC 14583 Bridged. 2. Wählen Sie als WAN-IP-Adresse die Option Static IP Address (Statische IP-Adresse).
- Page 34 3. RFC 2364 PPPoA Wenn Ihr ISP vorschreibt, dass Sie eine Verbindung über RFC 2364 PPPoA herstellen sollen, führen Sie diese Schritte aus: a. Wählen Sie RFC 2364 PPPoA. b. Geben Sie unter User Name den Benutzernamen ein. c. Geben Sie unter Password das Kennwort ein. d.
- Page 35 Sie dann den Webbrowser. Testen Sie das Setup, indem Sie Ihren Webbrowser auf einem der Computer öffnen und www.linksys.com/registration eingeben. Das Setup ist beendet! Das Gateway ist nun vollständig konfiguriert. Wenn Sie diese Website nicht öffnen können, sollten Sie die einzelnen...
- Page 36 COPYRIGHT E MARCHI REGISTRATI Copyright © 2002 Linksys. Tutti i diritti riservati. Microsoft, Windows e il logotipo Windows sono marchi registrati della Microsoft Corporation. Tutti gli altri marchi e nomi commerciali sono di proprietà dei rispettivi titolari. DICHIARAZIONE RELATIVA ALLA NORMATIVA FCC PARTE 15 CLASSE B In conformità...
-
Page 37: Contenuto Della Confezione
Istruzioni relative a Windows 95, 98 o Millennium Istruzioni relative a Windows 2000 Istruzioni relative a Windows XP Passaggio 3: Configurazione del gateway ADSL Per assistenza, registrazione del prodotto e informazioni sulla garanzia, rivol- gersi alla Linksys ai seguenti indirizzi: Posta elettronica europe-support@linksys.com latam-soporte@linksys.com Sito Web http://www.linksys.com/international... -
Page 38: Passaggio 1: Collegamento Del Gateway Adsl
Se si stanno collegando più di quattro PC al gateway, sarà necessario colle- gare anche un hub o uno switch al gateway. Nota: se si dispone di una Schoa Senza Fili (WPC11) Linksys, accer- tarsi che sia inserita correttamente nello slot per la scheda PC sulla parte posteriore del gateway prima di fornire alimentazione. -
Page 39: Passaggio 2: Configurazione Dei Pc
D. Collegare l’adattatore di alimentazione al gateway e successivamente a una presa di corrente. E. Accendere i PC e il gateway. Procedere al passaggio 2: Configurazione dei PC. Nota: potrebbe essere necessario inserire un piccolo dispositivo, denominato microfiltro (non incluso), tra ciascun telefono e la presa nel muro per evitare interferenze. -
Page 40: Istruzioni Relative A Windows 95, 98 O Millennium
Istruzioni relative a Windows 95, 98 o Millennium A. Fare clic sul pulsante Start (Avvio). Scegliere Impostazioni, quindi Pannello di controllo. Fare doppio clic sull’icona Rete. B. Nella scheda Configurazione selezionare la voce TCP/IP relativa alla scheda di rete utilizzabile. Non selezionare una voce TCP/IP il cui nome contenga DUN, PPPoE, VPN o AOL. -
Page 41: Istruzioni Relative A Windows Xp
D. Selezionare Protocollo Internet (TCP/IP) e fare clic sul pulsante Proprietà. E. Selezionare Ottieni auto- maticamente un indirizzo IP. Nella nuova finestra visua-lizzata fare clic sul pulsante OK. Fare di nuovo clic sul pulsante OK per completare configu- razione del PC. F. -
Page 42: Passaggio 3: Configurazione Del Gateway Adsl
D. Selezionare Protocollo Internet (TCP/IP) e fare clic sul pulsante Proprietà. E. Selezionare Ottieni auto- maticamente un indirizzo IP. Nella nuova finestra visua-lizzata fare clic sul pulsante OK. Fare di nuovo clic sul pulsante OK (o sul pulsante Chiudi se una qualunque impostazione è... - Page 43 C. Per la configurazione del gateway verrà visualizzata un’interfaccia con la scheda Setup (Configurazione) in primo piano. A seconda delle istruzioni del proprio ISP, potrebbe essere necessario fornire le seguenti informazioni. Host Name (Nome host) e Domain Name (Nome dominio): questi campi consentono di fornire un nome host e un nome dominio per il gateway, ma di solito vengono lasciati vuoti.
- Page 44 b. WAN IP Address (Indirizzo IP WAN): Static IP Address (Indirizzo IP sta- tico) Se si apprende dall’ISP che il collegamento avviene tramite un indirizzo IP sta- tico (o fisso) fornito dall’ISP stesso, seguire i passaggi riportati di seguito. 1. Selezionare RFC 14583 Bridged (Bridging RFC 14583). 2.
- Page 45 3. RFC 2364 PPPoA Se si apprende dall’ISP che il collegamento avviene tramite RFC2364 PPPoA, seguire i passaggi riportati di seguito. a. Selezionare RFC 2364 PPPoA. b. Immettere lo User Name (Nome utente). c. Immettere la Password. d. Fare clic sul pulsante Apply (Applica) seguito dal pulsante Continue (Continua) per salvare le impostazioni.
- Page 46 Per verificare la configurazione aprire una sessione del browser da un qual- siasi computer e immettere www.linksys.com/registration. Congratulazioni. Il gateway è stato configurato correttamente. Se non si riesce a raggiungere il sito Web di Linksys, potrebbe essere neces- sario rivedere le impostazioni effettuate in questa sezione.
- Page 47 DIREITOS DE AUTOR E MARCAS COMERCIAIS Copyright © 2002 Linksys, Todos os direitos reservados. Microsoft, Windows e o logótipo Windows são marcas comerciais registadas da Microsoft Corporation. Todas as outras mar- cas comerciais e nomes de marcas pertencem aos respectivos proprietários.
-
Page 48: Requisitos Mínimos
Instruções para Windows XP Passo 3: Configuração da gateway ADSL Para obter suporte técnico, registar o produto e obter informações sobre a garantia, contacte-nos nos endereços abaixo indicados: Correio electrónico europe-support@linksys.com latam-suporte@linksys.com http://www.linksys.com/international Série Instant Broadband ™ Gateway ADSL com Modem / Router/ Switch de 4 portas / Preparada para utilização sem fios Requisitos mínimos... -
Page 49: Passo 1: Ligação Da Gateway Adsl
Se pretender ligar mais do que quatro PCs à gateway, também será necessário ligar um hub ou switch. Nota: Se possuir uma placa PC Card sem fios da Linksys (WPC11), certifique-se de que está correctamente introduzida na ranhura PC Card na parte posterior da gateway antes de ligar a corrente eléctri- ca. -
Page 50: Passo 2: Configuração Dos Pcs
D. Ligue o adaptador de corrente à gateway. Ligue o adaptador de corrente eléctrica a uma tomada eléctrica. E. Ligue os PCs e a gateway. Prossiga para o passo 2: Configuração dos PCs. Nota: Poderá ser necessário colocar um pequeno dispositivo chama- do microfiltro (não incluído) entre cada telefone e cada tomada na parede para evitar interferências. -
Page 51: Instruções Para Windows 95, 98 Ou Millennium
Instruções para Windows 95, 98 ou Millennium A. Clique no botão Iniciar. Clique em Definições e, em seguida, em Painel de controlo. Faça duplo clique no ícone Rede. B. No separador ‘Configuração’, selec- cione a Linha TCP/IP para o adapta- dor de Ethernet aplicável. -
Page 52: Instruções Para Windows Xp
D. Seleccione Internet Protocol (TCP/IP) e clique no botão Propriedades. E. Seleccione Obter automati- camente um endereço IP. Quando aparecer a nova janela, clique no botão OK. Clique no botão OK nova- mente para concluir a con- figuração do PC. F. -
Page 53: Passo 3: Configuração Da Gateway Adsl
D. Seleccione Internet Protocol (TCP/IP) e clique no botão Propriedades. E. Seleccione Obter automati- camente um endereço IP. Quando aparecer a nova janela, clique no botão OK. Clique no botão OK nova- mente (ou no botão Fechar se tiverem sido efectuadas algumas alterações) para concluir a configuração do F. - Page 54 C. A interface de configuração da gateway irá aparecer com o separador ‘Setup’ (Configuração) seleccionado. Com base nas instruções de configu- ração fornecidas pelo ISP, poderá ser necessário indicar os seguintes dados. Host Name (Nome de anfitrião) e Domain Name (Nome de domínio): Estes campos permitem-lhe fornecer um nome de anfitrião e um nome de domínio para a gateway.
- Page 55 b. Endereço IP da WAN: Endereço IP estático Se o ISP lhe disser que está a ligar através de um endereço IP estático ou fixo fornecido pelo ISP, efectue os seguintes procedimentos: 1. Seleccione RFC 14583 Bridged. 2. Seleccione Static IP Address (Endereço IP estático) como endereço IP da WAN.
- Page 56 3. RFC 2364 PPPoA Se o ISP lhe disser que está a ligar através de RFC2364 PPPoA, efectue os seguintes procedimentos: a. Seleccione RFC 2364 PPPoA. b. Introduza o User Name (Nome de utilizador). c. Introduza a Password (Palavra-passe). d. Clique nos botões Apply (Aplicar) e Continue (Continuar) para salvar a configuração.
- Page 57 Web browser. Teste a configuração abrindo o Web browser a partir de qualquer computa- dor e entrando em http://www.linksys.com/registration. Parabéns! Concluiu com êxito a configuração da gateway. Se não conseguir ir ao nosso Web site, reveja os procedimentos efectuados...
- Page 58 DERECHOS DE AUTOR Y MARCAS COMERCIALES Copyright © 2002 Linksys. Reservados todos los derechos. Microsoft, Windows y el logotipo de Windows son marcas registradas de Microsoft Corporation. Todas las demás marcas comerciales y nombres de productos pertenecen a sus respectivos propietarios.
-
Page 59: Contenido Del Paquete
Instrucciones para Windows 2000 Instrucciones para Windows XP Paso 3: Configuración de la pasarela ADSL Si necesita asistencia técnica sobre los productos y cómo registrarlos, póngase en contacto con nosotros en las direcciones siguientes: Correo electrónico europe-support@linksys.com latam-soporte@linksys.com http://www.linksys.com/international Instant Broadband Series ™... -
Page 60: Paso 1: Conexión De La Pasarela Adsl
Si va a conectar más de cuatro PC a la pasarela, necesitará conectar un hub o un switch a ésta. Nota: Si dispone de la tarjeta de PC inalámbrica de Linksys (WPC11), colóquela correctamente en la ranura PC Card de la parte posterior de la pasarela antes de encenderla. -
Page 61: Paso 2: Configuración De Los Pc
D. Conecte el adaptador de alimentación a la pasarela. Conecte el adaptador de potencia a una toma de corriente. E. Encienda el PC y la pasarela. Nota: es posible que tenga que colocar un pequeño dispositivo denominado microfiltro (no se incluye) entre cada teléfono y su toma para evitar interferencias. -
Page 62: Instrucciones Para Windows 95, 98 O Millennium
Instrucciones para Windows 95, 98 o Millennium A. Haga clic en el botón Inicio. Haga clic en Configuración y, después, en Panel de control. Haga doble clic en el icono Red. B En la ficha Configuración, seleccione la línea TCP/IP del adaptador Ethernet correspondiente. -
Page 63: Instrucciones Para Windows Xp
D. Seleccione Protocolo de Internet (TCP/IP) y haga clic botón Propiedades. E. Seleccione Obtener una dirección IP automática- mente. En el cuadro de diá- logo que aparece, haga clic en el botón Aceptar. Vuelva a hacer clic en Aceptar para completar la configuración del PC. -
Page 64: Paso 3: Configuración De La Pasarela Adsl
D. Seleccione Protocolo de Internet (TCP/IP) y haga clic botón Propiedades. E. Seleccione Obtener una dirección IP automática- mente. En el cuadro de diá- logo que aparece, haga clic en el botón Aceptar. Vuelva a hacer clic en el botón Aceptar (o en el botón Cerrar si ha cambiado algún parámetro) para completar la... - Page 65 C. La interfaz de configuración de la pasarela se abre con la ficha Setup (Configuración) seleccionada. Dependiendo de las instrucciones de su ISP, deberá facilitar la siguiente información. Host Name y Domain Name: en estos campos se especifica el nombre del host y el nombre de dominio de la pasarela.
- Page 66 b. WAN IP Address (Dirección IP WAN): Static IP Address (Dirección IP estática) Si su ISP le indica que su conexión es a través de una dirección IP estática (o fija), siga estos pasos: 1. Seleccione RFC 14583 Bridged. 2. Seleccione Static IP Address como dirección IP WAN. 3.
- Page 67 3. RFC 2364 PPPoA Si su ISP le indica que se conecta mediante RFC2364 PPPoA, siga estos pasos: a. Seleccione RFC 2364 PPPoA. b. Escriba el nombre de usuario en el campo User Name. c. Escriba la contraseña en el campo Password. d.
- Page 68 ™ E. Haga clic en los botones Apply (Aplicar) y Continue (Continuar) para guardar la configuración. Cierre el navegador. Para probar la configuración, escriba http://www.linksys.com/registra- tion en el navegador. ¡Enhorabuena! Ha completado la configuración de la pasarela. Si no puede abrir nuestra página Web, vuelva a comprobar los pasos que ha...
- Page 69 © Copyright 2002 Linksys, All Rights Reserved. Printed in the USA.