Table of Contents
Advertisement
Advertisement
Table of Contents

Related Manuals for Minolta Dimage A1


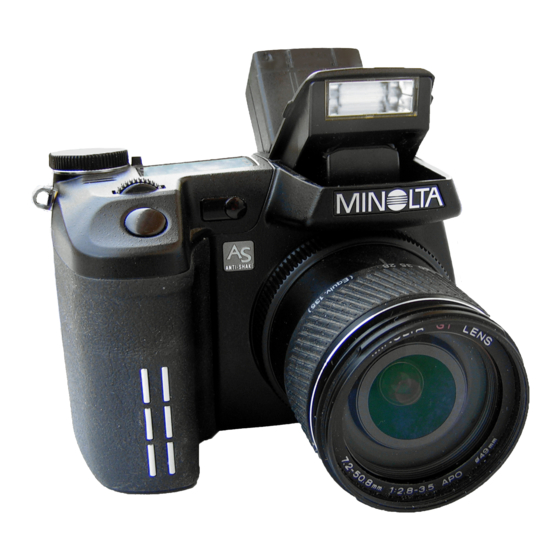
Summary of Contents for Minolta Dimage A1
- Page 1 INSTRUCTION MANUAL 9222-7301-11 SY-A307/ME-0308...
-
Page 2: Table Of Contents
BEFORE YOU BEGIN Before installing DiMAGE Capture software, read the data-transfer section in the camera manual. This section details how to connect the camera to a computer using the USB cable. The examples in this manual assume the camera is connected to the computer with a USB cable as described in the camera manual. -
Page 3: System Requirements
SYSTEM REQUIREMENTS DIMAGE CAPTURE SYSTEM REQUIREMENTS IBM PC/AT compatible computers 300MHz Intel Pentium processor II or higher and must meet the the require- ments of the operating system Windows XP (Home/Professional), Windows Me, Windows 2000 Professional 64MB RAM or the memory required by the operating system, whichever is greater. -
Page 4: Installation
INSTALLATION RAM-stationed programs such as anti-virus or installation-monitoring software may cause the installer to fail. Remove or disable these programs before installing DiMAGE Capture. Reinstall or enable the software when the installation is complete. In the example below, the hard disk drive is drive E. The letters designating the drives will vary between computers. - Page 5 To install the software in the default location - E:\Program Files\DiMAGE Capture for DiMAGE A1, click “Next >.” To install the software in a different location, click browse button to display the folder selection window. Specify the directory in which to install the software.
-
Page 6: Uninstallation
UNINSTALLATION Windows XP: 1. Quit the software. 2. Select Start > Control Panel > Add or Remove Programs. 3. Select DiMAGE Capture for DiMAGE A1. 4. Click Change/Remove. Windows Me and 2000: 1. Quit the software. 2. Select Start > Settings > Control Panel > Add/Remove Programs. -
Page 7: Starting Up The Software
STARTING UP THE SOFTWARE FERRITE CORE Attach the Ferrite core FRC-100 supplied with the camera to the USB cable before use. The ferrite core reduces harmful interference. Slide a thin blunt object under the two latch- es on the core to open it. The core must be placed on the end of the cable that is connected to the camera as shown on the right. - Page 8 5. Select and start the DiMAGE Capture. STARTING UP Windows XP: Choose Start > All Programs > DiMAGE Capture for DiMAGE A1 > DiMAGE Capture. Windows Me and 2000: Choose Start > Programs > DiMAGE Capture for DiMAGE A1 > DiMAGE Capture.
-
Page 9: Quitting / Disconnection
QUITTING / DISCONNECTION When quitting the software, click the Quit button at the lower right corner of the main window. When disconnecting the USB cable, always quit the software first. Then, turn the camera off and disconnect the USB cable. Never disconnect the USB cable while DiMAGE Capture shows the live image;... -
Page 10: Settings
SETTINGS MAIN WINDOW Basic tab (p. 12) Live image Indicator area DiMAGE Viewer Release button Live image: Displays the image the camera is capturing. Quit button: Quits the software. Histogram: The dark area of the histogram shows the luminance distribution of the recorded image from black (left) to white (right). -
Page 11: Focus Modes
FOCUS MODES Flex Focus Point (FFP) The focus point can move anywhere inside the focusing area. When FFP is on, the focus point mark appears in the live image. Move the mouse cursor freely over the focusing area. Click the point you want to focus. -
Page 12: Basic Tab
X8. If somewhere in the live image is clicked again, the image returns to normal size. The DiMAGE A1 has an automatic monitor amplification function which intensifies and turns the monitor image black and white in low-light conditions. - Page 14 During the interval series, the screeen on the right will appear on the computer. The camera will stop recording when the number of frames set has been taken, when the hard disk is full, or when the battery has been exhausted. The use of an AC Adapter is recommended when recording with long intervals or a large number of frames.
-
Page 15: Exposure Tab
EXPOSURE TAB Exposure mode Exposure mode can be selected from Program mode, Aperture priority mode, Shutter priority mode, and Manual mode. Program mode Shutter speed and aperture are set automatically. Aperture priority mode Select the Aperture priority mode, and then set the aperture. -
Page 16: Manual Mode
Manual mode Select the Manual mode, and then set the shutter speed and aperture. When the flash is not in use, as changes are made to the exposure, the effect will be visible on the live image. Metering mode Metering mode can be selected from Multi-segment, Center weighted, FFP Spot, and Center Spot. In FFP (Flex Focus Point) Spot, the metering area moves with the focus point. -
Page 17: Color Tab
COLOR TAB White balance Color temperature White balance White balance can be selected from Auto, Preset, or Manual white balance. Auto / preset white balance When Auto is selected, the white balance is adjusted automatically. Preset white balance can be selected from Daylight, Cloudy, Shade, several kinds of Fluorescent, Tungsten, and Flash. -
Page 18: Color Saturation
3. Move the mouse onto the live image. 4. With the dropper tool, click a neutral area of the image to be defined as the gray point. The color temperature and CC index will be displayed automatically. The area used to calibrate the gray point must be neutral. The brightness level of the area is not important, but if the area has a definite color, the image will not be color balanced correctly. -
Page 19: Display Focus / White Balance Area
Sharpness Sharpness can be adjusted within three levels: Soft, Normal, and Hard. Color mode Color mode can be selected from Natural (sRGB), Vivid (sRGB), Adobe RGB, Embedded Adobe RGB, Black & white, and Solarization. When the color mode is set to Black & white, color saturation cannot be adjusted. When the color mode is set to Solarization, contrast and color saturation cannot be adjusted. -
Page 20: Taking Pictures
TAKING PICTURES Using release button Placing the mouse cursor over the release button acts the same as pressing the camera’s shutter- release button partway down and activates the aut- ofocus and autoexposure system; the edge of the button turns green. Click the release button to take a picture. -
Page 21: Preferences
PREFERENCES PREFERENCES WINDOW File name (p. 22) Color matching (p. 22) Instant playback Version Instant playback: When checked, a captured image is displayed for two seconds after it is record- Version: When clicked, software version information window will appear. Click OK to close the window. -
Page 22: File Destination
FILE DESTINATION Images will be saved in My Picture folder. This can be changed. Click “View...” on the File destination to open the folder tree. FILE NAME COLOR MATCHING PREFERENCES Select the folder where you wish to save the images. Click “Select”... - Page 23 Date / time synchronization The camera’s clock and calender settings can be synchronized with the computer’s. Click the “Date/Time Sync.” button. A synchroniza- tion message will appear. Click “OK” to synchronize the clock and close the window. Default monitor profile set in Color management of the Windows operating system can be confirmed or changed by the following procedure;...
- Page 24 ©2003 Minolta Co., Ltd. under the Berne Convention and the Universal Copyright Convention. Printed in Germany 9222-7301-11 SY-A307/ME-0308...