Advertisement
Available languages
Available languages
Table of Contents
- 1 Installation Instructions
- 2 Before You Start
- 3 Parts Supplied for Installation
- 4 Cabinet Opening
- 5 Gas Supply Requirements
- 6 Electrical Requirements
- 7 Installation
- 8 Gas Conversions
- 9 If You Need Assistance
- 10 If You Need Service
- 11 Maintenance
- 12 Instructions D'installation
- 13 Avant de Commencer
- 14 Alimentation en Gaz
- 15 Installation Électrique
- 16 Entretien
- Download this manual
See also:
Use and Care Manual
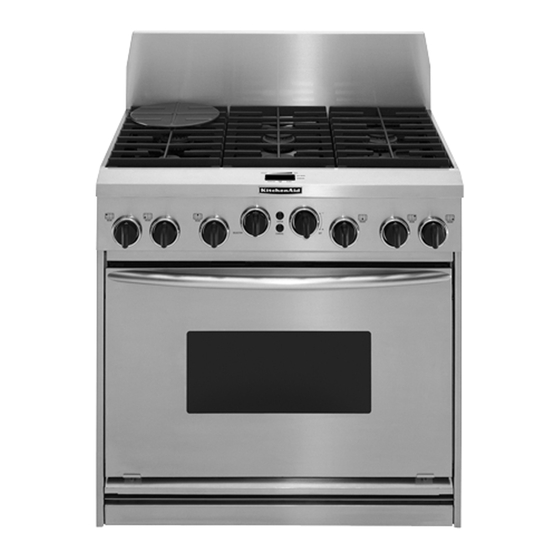
36" (91.4 cm) Professional Dual Fuel Range
with self-cleaning thermal/convection oven
WARNING
Tip Over Hazard
A child or adult can tip the range
and be killed.
Connect anti-tip bracket to wall
behind range.
Reconnect the anti-tip bracket, if
the range is moved.
Failure to follow these instructions
can result in death or serious
burns to children and adults.
IMPORTANT:
Read and save these
instructions.
IMPORTANT:
Installer: Leave Installation
Instructions with the homeowner.
Homeowner: Keep Installation
Instructions for future reference.
Save Installation Instructions for local
electrical inspector's use.
Installation Instructions
for residential use only
For the way it's made
Write down the model and serial numbers
before installing range.
Both numbers are on the model/serial
rating plate, located on the surface below
the control panel.
Model #___________________________
Serial # ___________________________
Backguard
(required for some installations)
®
®
Questions regarding features,
operation, performance, parts or
service? Call 1-800-422-1230 or visit
our web site at www.kitchenaid.com.
Part No. 8300988
Advertisement
Table of Contents

Related Manuals for KitchenAid KDRP467KSS


Summary of Contents for KitchenAid KDRP467KSS
-
Page 1: Installation Instructions
Model #___________________________ Serial # ___________________________ Backguard (required for some installations) ® ® Questions regarding features, operation, performance, parts or service? Call 1-800-422-1230 or visit our web site at www.kitchenaid.com. Part No. 8300988... -
Page 2: Before You Start
All openings in the wall or floor where the range is to be installed must be sealed. It is recommended that a range hood be installed above this range. Copies of the standards listed may be obtained... -
Page 3: Parts Supplied For Installation
24” (61 cm) deep base cabinet is used and there is zero clearance between the back edge of range and combustible rear wall. For island installations or other installations with more than 5"... -
Page 4: Gas Supply Requirements
Provide a gas supply line of 3/4" (1.9 cm) rigid pipe to the range location. A smaller size pipe on long runs may result in insufficient gas supply. Pipe-joint compounds, appropriate for use with L.P. -
Page 5: Electrical Requirements
Place level on rack, first side to side; then front to back. leveling leg sleeves If the range is not level, adjust the feet up or down. Turn leveling leg sleeves to level range and to raise or lower range to the desired countertop height. - Page 6 WARNING Tip Over Hazard A child or adult can tip the range and be killed. Connect anti-tip bracket to wall behind range. Reconnect the anti-tip bracket, if the range is moved. Failure to follow these instructions can result in death or serious burns to children and adults.
-
Page 7: Gas Conversions
Check that gas shutoff valves are set to the “OPEN” position. Repeat Step 16. If a burner still does not light, contact your KitchenAid dealer or designated service company. Adjust height of top burner flames. The cooktop LOW burner flame should be a steady blue flame approximately 1/4"... -
Page 8: If You Need Assistance
If you need service: In the event that your KitchenAid appliance should need service, call the dealer from whom you purchased the appliance or a KitchenAid-designated service company. A... - Page 9 SPARK MODULE IGNITOR ELECTRODES SUPPRESSOR WP#4451985 P4-1 P4-2 WISP CONNECTOR P9-3 P7-4 TEMP SENSOR 1080 AT 70 F 1654 AT 350 F P7-5 DOOR SWITCH 1 P7-1 LATCH SWITCH (OPEREATED BY MOTOR) LATCH ASSY P7-2 P7-3 VALVE SWITCHES YEL OR BRN (6) PLCS Oven schematic ELECTRONIC CONTROL P8-1...
- Page 10 Part No. 8300988 © 2001 KitchenAid. ® Registered Trademark/Trademark of KitchenAid U.S.A., KitchenAid Canada licensee in Canada Prepared by KitchenAid, Benton Harbor, Michigan 49022 ® Printed in U.S.A.
-
Page 11: Instructions D'installation
N° de modèle ______________________ N° de série ________________________ Dosseret (nécessaire pour certaines configurations d’installation) Pour toute question concernant ® caractéristiques, utilisation, ® ® performance, pièces ou service, téléphoner au 1-800-422-1230 ou consulter notre site Internet à l’adresse www.kitchenaid.com Pièce n° 8300988... -
Page 12: Avant De Commencer
Avant de commencer... Votre sécurité et celle des autres est très importante. Nous donnons de nombreux messages de sécurité importants dans ce manuel, et sur votre appareil ménager. Assurez-vous de toujours lire tous les messages de sécurité et de vous y conformer. Voici le symbole d’alerte de sécurité. - Page 13 Pièces fournies pour l’installation 4,4 cm (1-3/4 po) 2,5 cm (1 po) Bride 2 vis à tête Phillips antibasculement n° 10 x 2 po • On doit solidement fixer la bride antibasculement sur un poteau du colombage mural. L’épaisseur des panneaux de gypse peut nécessiter l’emploi de vis plus longues pour une bonne fixation de la bride.
-
Page 14: Alimentation En Gaz
Alimentation en gaz AVERTISSEMENT Risque d’explosion Utiliser un conduit de raccordement à la canalisation de gaz approuvé par AGA ou CSA. Installer un robinet d’arrêt. Bien serrer chaque raccord de connexion du circuit de gaz. Si l’appareil est relié à une canalisation de propane, demander à... -
Page 15: Installation Électrique
Installation électrique Si on utilise un conducteur distinct de liaison à la terre lorsque le code en vigueur le permet, il est recommandé qu’un électricien qualifié vérifie la qualité de la liaison à la terre. Ne pas utiliser une tuyauterie de gaz pour la liaison à... - Page 16 AVERTISSEMENT Risque de basculement Un enfant ou une personne adulte peut faire basculer la cuisinière ce qiu peut causer un décès. Joindre la bride antibasculement sur le mur en arrière de la cuisinière. Joindre de nouveau la bride antibasculement si la cuisinière est déplacée.
- Page 17 (disjoncteur ouvert? fusible grillé?). Vérifier que les robinets d’arrêt sont OUVERTS. Répéter l’étape 16. Si un brûleur ne s’allume toujours pas, contacter le concessionnaire KitchenAid ou une entreprise de service après-vente agréée. Réglage de la taille des flammes. Lorsque le bouton de commande d’un brûleur est à...
-
Page 18: Entretien
KitchenAid, contacter le marchand chez lequel il a été acheté, ou contacter un établissement de service agréé par KitchenAid. On peut trouver les noms et adresses des établissements de service agréés dans l’annuaire local Pages jaunes à la rubrique «Appareils électroménagers –... - Page 19 TERRE MODULE D’ÉTINCELAGE VERT COMMUTATEURS DES ROBINETS JA OU MAR (6) PLCS ÉLECTRODES D’ÉTINCELAGE DISPOSITIF ANTIPARASITE WP no 4451985 COMMANDE ÉLECTRONIQUE P4-1 P4-2 P9-1 CONNECTEUR WISP P9-3 CAPTEUR DE P7-4 TEMPÉRATURE 1080 AT 70 F/21,1 C P7-5 1654 AT 350 F/176,6 C CONTACTEUR DE PORTE 1 P7-1...
- Page 20 Pièce n ° 8300988 ® ©2001 KitchenAid ® Marque déposée/marque de APPAREILS MÉNAGERS commerce de KitchenAid U.S.A.; emploi sous licence au Canada par Préparé par KitchenAid, Benton Harbor, Michigan 49022 Imprimé aux É.-U. KitchenAid Canada...