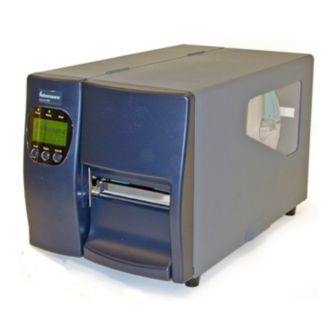
Intermec EasyCoder PD4 Installation Instructions Manual
Cutter
Hide thumbs
Also See for EasyCoder PD4:
- Programmer's reference manual (162 pages) ,
- Service manual (114 pages) ,
- User manual (100 pages)
Advertisement
Quick Links
Advertisement

Related Manuals for Intermec EasyCoder PD4


Summary of Contents for Intermec EasyCoder PD4
- Page 1 Installation Instructions EasyCoder PD4 Cutter...
- Page 2 Intermec Technologies Corporation. © 2005 by Intermec Technologies Corporation. All rights reserved. Th e word Intermec, the Intermec logo, and EasyCoder are either trademarks or registered trademarks of Intermec Technologies Corporation. Th roughout this manual, trademarked names may be used. Rather than put a trademark (™...
-
Page 3: Table Of Contents
Contents Before You Begin ... iv Safety Summary ... iv Global Services and Support ... v Installation Installing the Cutter ... 2 EasyCoder PD4 Cutter Installation Instructions Contents... -
Page 4: Before You Begin
Safety Summary Your safety is extremely important. Read and follow all warnings and cautions in this document before handling and operating Intermec equipment. You can be seriously injured, and equipment and data can be damaged if you do not follow the safety warnings and cautions. -
Page 5: Global Services And Support
Before You Begin Global Services and Support Warranty Information To understand the warranty for your Intermec product, visit the Intermec web site at http://www.intermec.com and click Service & Support. Th e Intermec Global Sales & Service page appears. From the Service & Support menu, move your pointer over Support, and then click Warranty. - Page 6 Before You Begin EasyCoder PD4 Cutter Installation Instructions...
-
Page 7: Installation
Installation Th is chapter describes how to install the EasyCoder PD4 Cutter. EasyCoder PD4 Cutter Installation Instructions... -
Page 8: Installing The Cutter
Chapter 1 — Installation Installing the Cutter 1 Unpack your EasyCoder PD4 cutter kit and check to see that all parts are included. If not, contact your sales representative. Cutter mechanism Cutter cover 2 Make sure the printer is unplugged. Remove the screw that holds the front cover. - Page 9 3 Open the side door and remove the tear bar, which is held by two Phillips screws. Screws 4 Attach the cutter mechanism to the printer using the two Phillips screws and washers included in the kit. EasyCoder PD4 Cutter Installation Instructions Chapter 1 —...
- Page 10 6 Attach the cutter cover onto the cutter mechanism by fi rst connecting the hooks on the back side of the cover over the cutter mechanism and then locking the cover with the screw at the bottom. Cutter cable EasyCoder PD4 Cutter Installation Instructions Cutter connector Cable clips...
- Page 11 6 If needed, fi t the tray to the front of the cutter. 7 Install the media as described in the Loading Media chapter, section “Tear-off (Straight-through)” of the EasyCoder PD4 User's Guide. Rec- ommended label/paper length is at least 30 mm (1.18 in).
- Page 12 Intermec Technologies Corporation Corporate Headquarters 6001 36th Avenue West Everett, WA 98203 U.S.A. tel 425.348.2600 fax 425.355.9551 www.intermec.com EasyCoder PD4 Cutter Installation Instructions *1-960646-00* *1-960646-00*...