Table of Contents
Advertisement
Advertisement
Table of Contents

Related Manuals for Insignia IS-HTIB102732

Summary of Contents for Insignia IS-HTIB102732
-
Page 2: Introduction Safety
SAFETY To ensure proper use of this product, please read this Instruction Manual carefully and retain for future reference. Should the unit require maintenance, contact an authorized service center. GB 1... -
Page 3: Important Safety Instructions
IMPORTANT SAFETY INSTRUCTIONS CAUTION: RETAIN THIS BOOKLET FOR FUTURE REFERENCE. This set has been designed and manufactured to assure personal safety. Improper use can result in electric shock or fire hazard. The safeguards incorporated in this unit will protect you if you observe the following procedures for installation, use and servicing. -
Page 4: Table Of Contents
Contents Introduction Safety ... GB 1 Important Safety Instructions ... GB 2 Contents, Packing ... GB 3 Player Zones, Anti-copy Disc Protection, Installation ... GB 4 DVD Discs & Cleaning DVD Discs ... GB 4 Remote Control ... GB 5 Front Panel ... -
Page 5: Player Zones, Anti-Copy Disc Protection, Installation
Player Zones For the purpose of distribution of DVD Discs, the world has been separated into 6 zones. The zone your unit is intended for is indicated on the Zone Label. This should be the same as the label on discs available in your region. If you have any difficulties in playing a disc, make sure that the disc is for the same zone as your player. -
Page 6: Remote Control
Remote Control turn unit On / Standby 2. GOTO display Time menu 3. BOOKMARK display Bookmark menu 4. V-SELECT select between progressive scan and switching different video output modes. 5. SUBTITLE display Subtitle menu 6. A-B display the Repeat A-B menu 7. -
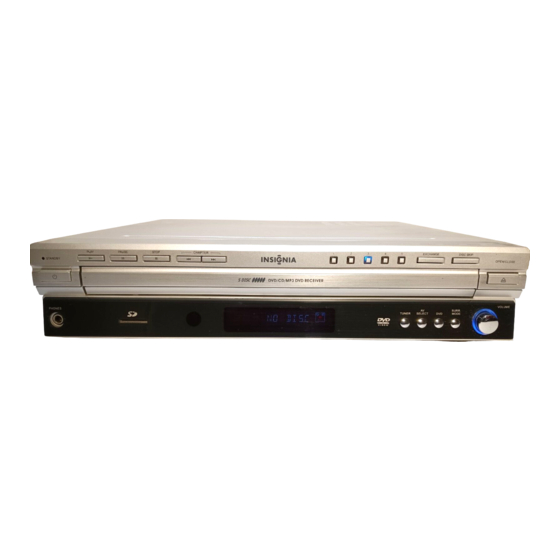
Page 7: Front Panel
Front Panel 1. Standby Indicator 2. Standby On / Off Start playing in DVD mode Pause playing in DVD mode Stop playing CHAPTER 1) skip to previous chapter / track 2) tune down frequency in tuner mode. When the preset function applied, you can search downwards to select the channel you want or start the preset programming mode CHAPTER... -
Page 8: Rear Panel
1. Audio Inputs For connecting audio (Left / Right) input signals from auxiliary source such as VCR or Satellite Receiver and playing them through this Home Theater System. These connections are selected by the AV SELECT button on the front panel. - Page 9 Rear Panel 10. Subwoofer Speaker (Included) For connecting the subwoofer speaker terminals. Connect the correct colored wire to the subwoofer speaker terminal. 11. Center Speaker For connecting the center speaker terminals. Connect the correct colored wire to the center speaker terminal.
-
Page 10: Setup And Installation - Video Connections
Setup and Installation The following setup and installation diagrams show the video and audio connections to TV, VCR or CD Recorder. Important Make sure the AC Voltage matches your local voltage. Connect the AC cord only after the speakers, antennas, and all optional equipment have been connected. -
Page 11: Connections
TV AUDIO OUT TV AUDIO OUT (3) Speaker Connections This Home Theater System is designed to reproduce optimum sound quality when the supplied speakers are used. Correct polarity connection to each speaker is needed. Follow colored wire for correct colour speaker connection. - Page 12 The above connections can be expressed by the below table : SPEAKERS FRONT LEFT FRONT RIGHT Unit Terminals White Black Use Wires Speakers White Black Terminals Note : Always connect colored wire to colored speaker terminal (+). Always connect black wire to black speaker terminal (-). Press the button down &...
-
Page 13: Speaker Placement
Theater System. You can press ‘STOP’ and proceed to do the system setup options on the next page. This will set up all the functions on your Home Theater System. You only need to do this once when you first install your Home Theater System. -
Page 14: Function Setup
Function Setup Proper setup of the unit will provide you better sound and picture quality as well as many useful features. The selections are the preferred options that will be chosen, provided they are available on the disc. NOTE: If the disc loaded does not have the preferred option then the disc’s own preference should be used. -
Page 15: Play, Play Mode, Lock
PLAY Disk Memory Card SD card PLAY MODE Play Mode LOCK Enter New Password Enter New Password When alternative scenes with lower ratings are included, the player will play the highest rated scene that the parental setting allows. For example, consider a disc which is generally suitable for most audiences, and is rated as level 2 for most part. -
Page 16: Display
The Unit The unit’s behavior depends on the setting in the parental menu. Parental Level Set between 2 & 4 Parental Level Set to 5 or 6 Parental Level Set to 7 or 8 A section of the disc can have several different sequences which vary in parental control level. In the above example of a disc with parental control, the player will show a different section depending on the parental control level set in the player menu. -
Page 17: Sound
The setting will change to Progressive Scan ON. Incorrect setting of this item can distort the picture or no video can be observed after proceeding this step. To retrieve correct video output, you can press V.SELECT key several times. Do you want to continue? No, switch to Component output. - Page 18 Front Speaker Size - Small Center Speaker Size - None, Small Subwoofer Speaker - None or Yes Surround Speaker Size - None, Small Surround Back Speaker size - None, Small Note: Absent speakers are shown with dotted outline. Distance You can specify the distance (changing the sound delay) between speakers (front, center and surround speakers) and the listener for optimal stereo sound.
-
Page 19: Language
Panorama Extends the front stereo image to include the surround speakers for an exciting “wraparound” effect with side-wall imaging. Center Width Control With Pro Logic decoding, dominant center signals can come only from the center speaker. If no center speaker is present, the decoder splits the center signals equally to the left and right speakers to create a “phantom”... -
Page 20: General Operation
General Operation Selecting the source Press one of the input selector buttons (on the front panel or remote control) to select the below input source: - AV SEL (press AV1/ AV2 or AV SEL) - TUNER - ANALOG/COAXIAL INPUT SELECTIONS In AV1 / AV2 or TUNER, press MENU button. -
Page 21: Surround Sound & Surround Effects
Selecting Surround Output Modes The number of output modes varies according to the system setup and the input sources. Press SURROUND repeatedly on the remote control to select the different surround modes as shown below: Dolby Pro Logic II Surround VIDEO Stereo Stage... -
Page 22: Radio
Dolby Digital Surround The Dolby Digital Surround system requires connections of all 5 speakers (front left, center, front right, surround right, surround left) for the correct surround sound reproduction. This 5.1 channel digital surround format enables five individual full-range (20Hz-20KHz) channels plus an LFE (Low Frequency Effects) channel for the low-range (20Hz-120Hz) effects. - Page 23 Automatic tuning 1. Press TUNER to select tuner mode. 2. After two seconds the display will change to show the current band and frequency. 3. If necessary, press TUNER again to switch between AM and FM band. 4. Press and hold station is reached, auto tuning will stop.
-
Page 24: Clock&Timer
5. Press OK once more to store into memory when “SAVED” icon flashes. Clock & Timer Clock Setting the Clock 1. Start in either AV or TUNER mode (Timer cannot be set in DVD mode). 2. Press MENU button (Remote Control only) and also press until Clock SETUP Mode is selected. - Page 25 5. Press to set the function ON or OFF. 6. Press OK for confirmation. Clock / Sleep Timer Displaying the Current Time When in DVD/AV1/AV2/TUNER modes, press SLEEP the current time. The clock will stay displayed. Press SLEEP display. When some keys such as MODE, TONE are pressed, it will display their corressponding options. The clock will display again, once the options disappear automatically.
-
Page 26: Loading Discs, Selecting Discs, Exchanging Discs During Play
Loading Discs You can load at maximum 5 discs in the unit for playing. 1. Press to open discs loading tray. 2. Load disc (DVD, CD, MP3 Disc or Picture CD) on disc tray with label side facing upward. 3. Press DISC SKIP to change to next disc tray. 4. -
Page 27: Playing Dvd Discs
Playing DVD Discs 1. To play DVD disc, press 2. Load disc onto the tray with the label side facing upward. 3. Press to close the tray. The disc will start playing automatically. There may be a short delay before playing while the player reads the menu from the disc. -
Page 28: When Dvd Disc Is Stopped
Press Press “Random”, “5 Disc Repeat”, “Disc Repeat”, “Title Repeat ”, “Chapter Repeat ”, and “Repeat A-B”. Press OK to confirm. The feature “Repeat A-B” allows a section to be repeated continuously. Press OK at the start of the required passage. Then press OK again at the end of the passage. - Page 29 5 Disc Random Press OK to set unit playing DVD in random order. Press OK to skip to CD or MP3 Disc and start play. 5 Disc Repeat Press OK to set 5 disc repeat playback On or Off. Create Program - Example shows how to add Title 1and Chapter 1 in Title 2 in Disc 1 to the program then save and start playing.
-
Page 30: Playing Music Cd
Edit Program - Example shows how to delete the last selection from the program. Press “Clear” to delete the last selection Press to select “Done” to save the “Program List” Playing Music CDs 1. To play music CDs, press to open the disc tray. 2. -
Page 31: When Music Cd Is Playing
When Music CD is playing Pause Press to stop playing temporarily. Press again to resume playing. Skip Press to skip forward or backward a track. Fast search To search through disc forward or backward quickly by pressing pressing . Press Stop and Resume Stop Press once to Resume Stop. -
Page 32: When Cd Disc Is Stopped
When CD Disc is stopped The following special menus will display when playing is stopped. For other menus, please refer to “Function Setup”. To select options, use Active Navigation keys (see under “Function Setup - Basic Operations” for detailed operations). Play Resume Play You can resume play from the point where you have stopped previously (Multi Disc Resume). - Page 33 Select Track 3 D3,Track 1 Track 1 3:... Track 2 5:... Track 3 7:... Track 4 Track 5 9:... Track 6 To add, press OK. To erase, press CLEAR. To play, press PLAY Press to select “Done” or press save the “Program List” and start playing Edit Program - Example shows how to delete the last selection in the program.
-
Page 34: Playing Vcd Discs
Playing VCDs 1. To play VCD disc, press to open the disc tray. 2. Load disc onto the tray with label side facing upward. 3. Press to close the tray. The disc will start playing automatically. There may be a short delay before playing while the player reads the menu from the disc. -
Page 35: Playing Mp3 / Wma / Jpeg / Mpeg4 Discs
Playing MP3 / WMA / JPEG / MPEG4 Disc 1. To play MP3/WMA/JPEG/MPEG4 disc, press 2. Load disc onto the tray with label side facing upward. 3. Press to close the tray, then the files in disc will be detected. The player can play either: MP3 / WMA files alone More items available in menu, press... -
Page 36: Mp3 Files Along With Jpeg Files, Mpeg4 Files Alone
MP3 files along with JPEG files More items available in menu, press A parent menu exist, press Track name Picture name MPEG4 files alone More items available in menu, press A parent menu exist, press Track name Movie name Selections and playback logic MP3 / WMA files only: The player begins playing all the files in the currently selected folder, and then follow by all the files in the subfolders contained within its parent folder. -
Page 37: When Disc Is Playing
When disc is playing Pause Press to stop playing temporarily. Press again to resume playing. Skip Press to skip forward or backward a track. Stop and Resume Stop Press once to Resume Stop. In this mode playing can be resumed from the stop point by pressing Press twice to stop playing completely and press Quick keys (ROTATE, MENU, ZOOM) -
Page 38: When Disc Is Stopped
When disc is stopped The TV screen will display the menu with the selection information. Use navigation keys to go back to the first level menu, refer to “Function Setup”. When MP3 disc is stopped, the following special menus will be displayed .For other menus, please see under “Function Setup”. - Page 39 D5,Folder Name Folder Name 3:... Track Name 5:... Track Name Folder Name 7:... Track Name 9:... Track Name To add, press OK. To erase, press CLEAR. To play, press PLAY Edit Program -Example shows how to delete the last selection from the program list Press “Clear”...
-
Page 40: Playing Sd / Mmc Card
Playing SD / MMC Card 1. To play SD/MMC Card, insert the SD/MMC Card to the input jack on the front panel. 2. The files in the SD/MMC Card will be detected automatically and the selection menu similar to MP3/ WMA/JPEG will appear on screen. -
Page 41: Problems Disc You Can Play
DISCS YOU CAN PLAY While our Home Theater System has been designed to ensure that it is compatible with the largest number of discs, it cannot be guaranteed that you will be able to play discs which might not be compliant with the standard. -
Page 42: Jpeg Files
DISCS YOU CAN PLAY WMA Files CD-R with WMA files. Windows Media Audio (WMA) is another compressed audio file format that is similar to MP3. WMA files can also be grouped in folders or albums as MP3 files. • WMA filenames should not exceed 12 characters, and should end with the “.WMA”... -
Page 43: Problems
PROBLEMS If it appears that your DVD-Video player is faulty, first consult this checklist. It may be that something simple has been overlooked. Under no circumstances should you try to repair the player yourself; as this will invalidate the warranty. Only qualified service personnel can remove the cover or service this player.