Icom ID-RP2 Instruction Manual
D-star repeater system
Hide thumbs
Also See for ID-RP2:
- Service manual (150 pages) ,
- Instruction manual (56 pages) ,
- Instruction manual (36 pages)
Table of Contents
Advertisement
Quick Links
Advertisement
Table of Contents

Related Manuals for Icom ID-RP2


Summary of Contents for Icom ID-RP2
- Page 1 D-STAR REPEATER SYSTEM id- rp2 Instruction Manual...
-
Page 2: Important
Use the specified fuse only. For U.S.A. only CAUTION: Changes or modifications to this repeater, not expressly approved by Icom Inc., could void your authority to operate this repeater under FCC regula- tions. CAUTION: The ID-RP2L is intended for use as a fixed base station with the antenna located outdoors on the rooftop or on antenna tower. -
Page 3: Table Of Contents
D ID-RP2D/ID-RP2V ... 48 I Options ... 48 Icom, Icom Inc. and the logo are registered trademarks of Icom Incorporated (Japan) in the United States, the United Kingdom, Germany, France, Spain, Russia and/or other countries. Microsoft and Windows are registered trademarks of Mi- crosoft Corporation in the United States and/or other coun- tries. -
Page 4: System Outline
SYSTEM OUTLINE The D-star repeater site can be constructed by com- bining with the following units according to the plan or scale. ID-RP2C : Repeater controller ID-RP2D : 1.2 GHz data repeater ID-RP2V : 1.2 GHz digital voice repeater ID-RP2L : 10 GHz microwave link repeater In addition, the following options are also required for system repeater operations. - Page 5 D D AH-106 : 10 GHz parabolic antenna 800 (d) D D AH-107 : 10 GHz parabolic antenna 450 (d) ➥Both AH-106 and AH-107 are offset parabolic an- tenna and connect to ID-RP2L. Up to 20 km (approx.; 12.4 miles) * of communication range is provided when 5 miles) AH-106 or AH-107 is used at the both microwave...
-
Page 6: Supplied Accessories
SUPPLIED ACCESSORIES I Accessories for ID-RP2C I Accessories for ID-RP2D/ID-RP2V I Accessories for ID-RP2L q Power cable w Utility CD …………………………………………… 1 e Rubber feet ………………………………………… 4 r Spare fuses q Power cable w Control cable e Rubber feet ………………………………………… 4 r Spare fuses q Pole clamps …………………………………………... -
Page 7: I Accessories For Ah-106
I Accessories for AH-106 I Accessories for AH-107 I Accessories for AH-108 q Element arm w Element e Elevation support plate …………………………… 1 r Support arms ……………………………………… 2 q Pole stopper w Pole clamp ………………………………………… 1 e Clamp base r Bolts (M6×65) t Pole clamps …………………………………………... -
Page 8: Panel Descriptions
Connects data cable connector [A] to left and data cable connector [B] to right connector. u POWER CONNECTOR [DC 13.8V IN] (p. 11) DC power input connector for ID-RP2 system. Connects a 13.8 V DC power supply unit via the DC power cable i GROUND TERMINAL [GND] (p. -
Page 9: I Id-Rp2D (Front Panel)
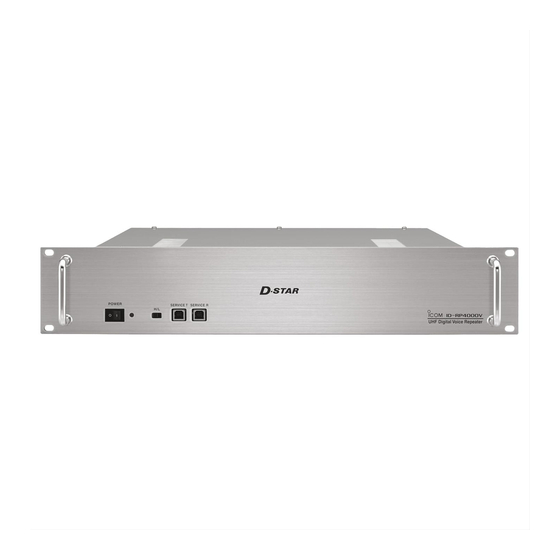
I ID-RP2D (Front panel) q POWER SWITCH [POWER] The power switch for ID-RP2D. The LED indicator located at right lights when the power is turned ON. w HIGH/LOW POWER SELECT SWITCH [H/L] Selects the transmit output power High and Low 10 W) (approx. -
Page 10: I Id-Rp2V (Front Panel)
PANEL DESCRIPTIONS I ID-RP2V (Front panel) q POWER SWITCH [POWER] The power switch for ID-RP2V. The LED indicator located at right lights when the power is turned ON. w HIGH/LOW POWER SELECT SWITCH [H/L] Selects the transmit output power High and Low 10 W) (approx. -
Page 11: I Id-Rp2L
• Flashing slowly: Unlock PLL If the indicator still flashing even after rebooting, contact authorized Icom dealer or distributor.) • Flashing fast : Setting data malfunction. (Data initializing and re-setting are required using with the ID-RP2L utility software.) •... -
Page 12: Connections And Installations
CONNECTIONS AND INSTALLATIONS I Precautions R DANGER! ID-RP2 installation, particularly ID- RP2L and antennas, is intended for professional in- stallation only. We are not responsible for any building breakage, any damage resulting from a drop of the ID-RP2L or antenna from a high place or un- stable site or resulting from any personal injury nor any accident in any other cases. -
Page 13: I When Install Into System Rack
I When install into system rack I Rubber feet attachment • Cross section I Grounding CONNECTIONS AND INSTALLATIONS The ID-RP2C/D/V are designed to install into the 19- inch rack directly. (EIA standard) Use the supplied bolts with the rack when fixing the ID- RP2C/D/V. -
Page 14: I System Connections
CONNECTIONS AND INSTALLATIONS I System connections AH-108 to AH-106/107 Antenna filter ID-RP2C ID-RP2V Duplexer Coaxial cables (purchase locally) ID-RP2D ID-RP2L ID-RP2L (Assist 2) (Assist 1) to AH-106/107 Control cable (supplied w/ID-RP2D/V) OPC-1309 (supplied w/ID-RP2D/V) Control cable (supplied w/ID-RP2D/V) AC outlet OPC-1380 (supplied w/ID-RP2C) OPC-1309... -
Page 15: I Antenna Assembling
I Antenna assembling D D AH-106 Unscrew Element arm Elevation angle Element arm CONNECTIONS AND INSTALLATIONS R DANGER!: professional installation only. We are not responsible for any building breakage, any damage resulting from a drop of the antenna from a high place or un- stable site or resulting from any personal injury nor any accident in any other cases. - Page 16 CONNECTIONS AND INSTALLATIONS Pole (48.6–89.1 mm) Stopper Pole clamp Supplementary t Attach the pole between the elevation angle and the pole clamp, that is removed in steps q, as illus- trated at left. • Tighten the two bolts within an even torque. •...
-
Page 17: D Ah-107
D D AH-107 Bolts M6×30 Element-arm fitting plate Element- q Attach the element arm to the parabolic reflector using with the supplied bolts ment arm fitting plates. w Attach the clamp base. Use the bolts that are attached to the clamp base. Clamp base Bolts (Attached at the... - Page 18 CONNECTIONS AND INSTALLATIONS Pole clamp Pole (Supplied item) Element Element holder Pole (32–60mm) Bolts (M8) Pole clamp Spring washer (M8) Pole clamp r Fix the supplied pole with the pole clamp as illus- trated at left. Pole stopper t Attach the antenna element to the element holder. Check the orientation y Install the assembled parabolic antenna to the pole.
-
Page 19: D Ah-108
D D AH-108 AH-108 Pole (30–60 mm) Spring washer Pole clamps Pole clamps q Attach the nut dial to the AH-108. w Attach the supplied bolts, pole clamps, spring wash- ers, flat washers and nuts to the AH-108 as illus- trated at left. -
Page 20: I Id-Rp2L Installation
CONNECTIONS AND INSTALLATIONS I ID-RP2L installation R DANGER!: The ID-RP2L installation is in- tended for professional installation only. We are not responsible for any building breakage, any damage resulting from a drop of the ID-RP2L from a high place or unstable site or resulting from any personal injury nor any accident in any other cases. -
Page 21: I Adjusting The Parabolic Antenna
I Adjusting the parabolic antenna D D About the test plug to + (voltmeter) to _ (voltmeter) Shorten D D Parabolic antenna beam adjustment Adjust the beam (direction) after loosen the bolts. Adjust the beam (elevation) after loosen the bolts. CONNECTIONS AND INSTALLATIONS Assemble the test plug before adjusting the parabolic antenna as follows. -
Page 22: Driver Installations
A different USB driver from the ID-1 is used for the ID-RP2 system. Uninstall the USB driver for ID-1 first, then install the USB driver for ID-RP2 system if the USB driver for ID-1 is installed in the PC. I Microsoft ®... - Page 23 Select Click Click DRIVER INSTALLATIONS y Insert the supplied CD into the CD drive, select “In- stall the software automatically (Recommended),” then click [Next>]. u The wizard starts searching for the driver and shows the dialog as at left during search. i While searching the driver, the “Hardware Installa- tion”...
- Page 24 DRIVER INSTALLATIONS I Microsoft ® Windows ® XP (Service Pack 2)— continued o Windows starts installing the USB driver. !0 After the installation is completed, click [Finish]. Click !1 After clicking [Finish], “Found New Hardware USB Serial Port” appears as at left. !2 The “Found New Hardware Wizard”...
- Page 25 Select Click Click DRIVER INSTALLATIONS !3 Insert the supplied CD into the CD drive, select “In- stall the software automatically (Recommended),” then click [Next>]. !4 The wizard starts searching for the driver and shows the dialog as at left during search. !5 While searching the driver, the “Hardware Installa- tion”...
- Page 26 DRIVER INSTALLATIONS I Microsoft ® Windows ® XP (Service Pack 2)— continued !6 Windows starts installing the USB driver. !7 After the installation is completed, click [Finish]. Click !8 After clicking [Finish], “Found New Hardware Your new hardware is installed and ready to use” ap- pears as at left.
-
Page 27: I Microsoft Windows 2000
I Microsoft ® Windows ® 2000 q Start up the Windows. • Quit all applications if activated. w Insert the CD that comes with the ID-RP2C, into the CD drive. e Connect the PC and ID-RP2C [SERVICE1] con- nector using with an USB cable separately) r “Found New Hardware ID-RP2C SERVICE 1”... - Page 28 DRIVER INSTALLATIONS I Microsoft ® Windows ® 2000— continued Select u Select “CD-ROM drives,” then click [Next >]. Click i When the appropriate driver is found, the dialog box appears as at left appears. Click [Next >] to start the installation. Click o After the installation is completed, click [Finish].
- Page 29 Click Select Click Select Click DRIVER INSTALLATIONS !1 The “Found New Hardware Wizard” will come up as at left. Click [Next >]. !2 Insert the supplied CD into the CD drive, select “Search for a suitable driver for my device (recom- mended),”...
- Page 30 DRIVER INSTALLATIONS I Microsoft ® Windows ® 2000— continued !4 When the appropriate driver is found, the dialog box appears as at left appears. Click [Next >] to start the installation. Click !5 After the installation is completed, click [Finish]. !6 Eject the CD.
-
Page 31: I Microsoft Windows 98/Me
I Microsoft ® Windows Select Select ® 98/Me q Start up the Windows. • Quit all applications if activated. w Insert the CD that comes with the ID-RP2C, into the CD drive. e Connect the PC and ID-RP2C [SERVICE1] con- nector using with an USB cable separately) r The “Add New Hardware Wizard”... - Page 32 DRIVER INSTALLATION I Microsoft ® Windows ® 98/Me— continued Select Click Confirm u Select the “Driver” folder in the CD then click [OK]. i Confirm the driver folder in the CD is selected, then click [Next >]. Click o When the driver is found, the screen as at left ap- pears.
- Page 33 !0 After the installation is completed, click [Finish]. Click !1 After clicking [Finish], “New Hardware Found ICOM ID-RP2C SERVICE 1” appears as at left. !2 Eject the CD. • Rebooting the PC is recommended. DRIVER INSTALLATIONS...
-
Page 34: I Com Port Confirmation
“Device Manager” screen appears. Click “ ” of Ports (COM&LPT). y Confirm “ICOM ID-RP2C SERVICE1 (COM✱)” is displayed. • If not displayed, or few COM port numbers are displayed at the same time, the driver installation may not be in- stalled properly. -
Page 35: D Microsoft Windows 98/Me
Click [Device Manager] tub. t Click “ ” of Ports (COM&LPT). y Confirm “ICOM ID-RP2C SERVICE1 (COM✱)” is displayed. • If not displayed, or few COM port numbers are displayed at the same time, the driver installation may not be in- stalled properly. -
Page 36: I Usb Driver Un-Installation
DRIVER INSTALLATION I USB driver un-installation IMPORTANT! As described at first of this section, USB driver is in- stalled for each unit and connector. However, only one USB driver can be un-installed when using “Add and Delete” included in OS. So, you should perform the USB driver un-installation with the following instructions. -
Page 37: Utility Installation
UTILITY INSTALLATION The utility is used for the setting of call sign and oper- ating frequencies. Separated utility for each ID-RP2 unit, ID-RP2C, ID- RP2D, ID-RP2L and ID-RP2L, is available. In this section, describes the installation instruction with the utility software for the ID-RP2C for example. - Page 38 UTILITY INSTALLATION I Installation— continued i Click [Next>]. Click o “Choose Destination Location” screen appears. • When installing the utility into the displayed location, click [Next>]. • When installing into a different location, click [Browse…], select the desired location and then click [Next>]. Click !0 Starts the utility installation.
-
Page 39: I Un-Installation
I Un-installation Click Select Click Un-install the utility software using with the standard application of the OS, “Add and Remove Programs,” as follows. q Open “Control Panel.” • “Control Panel” is located in “Setting” in Start menu for Windows w Click “Add or Remove Programs.” e Select the desired utility name, then click [Change/Remove]. -
Page 40: Repeater Settings
REPEATER SETTINGS I ID-RP2C setting Click Click A LAN cable (patch connection; purchase separately) used for the ID-RP2C setting. And the fixed IP address that can be communicated to the ID-RP2C must be set to the PC in advance. Refer to the instruction manual of the PC or LAN card for IP address setting details. -
Page 41: D Id-Rp2C Utility Screen
D D ID-RP2C utility screen q File menu The following sub menus are displayed when clicked. • Clear:Resets to the default setting for all items. • Read from controller: Reads the setting conditions from the ID- RP2C. • Write to controller: Transfers and programs the displayed set- ting conditions into the ID-RP2C. - Page 42 REPEATER SETTINGS D ID-RP2C utility screen— continued t Firmware indication (Revision) Shows the revision number of the programmed firmware in the ID-RP2C. y Callsign (Call sign) Enter the call sign (local repeater). Usable characters are; A to Z to 9 and some symbols (!, “, #, $, %, &, ‘, (, ), *, +, ,, -, ., /, :, ;, <, =, >, ?, @, [, \, ], ^, _).
- Page 43 !0 Unit initial Enter the local repeater initial each connected local repeater to [LOCAL RPT— CONT I/O] connector. This initial is an identical initial for each unit, and fol- lows the call sign. e.g.: The “C” is the initial of JA3YUA_C. Usable characters are A to D IMPORTANT! The initial “A”...
-
Page 44: I Frequency Setting For Id-Rp2D
REPEATER SETTINGS I Frequency setting for ID-RP2D NOTE: The repeater unit connection may not be recognized with the PC according to the using USB cable length. Use the shorter USB cable as possible is recom- mended. w Click q Enter the speci- q Start up the PC. -
Page 45: I Frequency Setting For Id-Rp2V
I Frequency setting for ID-RP2V NOTE: The repeater unit connection may not be recognized with the PC according to the using USB cable length. Use the shorter USB cable as possible is recom- mended. w Click q Enter the speci- q Start up the PC. -
Page 46: I Id-Rp2L Setting
REPEATER SETTINGS I ID-RP2L setting NOTE: The repeater unit connection may not be recognized with the PC according to the using USB cable length. Use the shorter USB cable as possible is recom- mended. q Start up the PC. w Connect an USB cable between PC’s USB port and either [SERVICE rately) 1] or [SERVICE 2] connector of the ID-RP2C, then... - Page 47 e Click w Click [Z], then select “Normal.” q Enter the speci- fied frequencies. REPEATER SETTINGS t The utility reads the ID-RP2L setting and the screen as at left appears when the correct COM port num- ber is set. y Enter the receive and transmit frequency for mi- crowave link repeater operations in to “RX”...
-
Page 48: Maintenance
MAINTENANCE I Troubleshooting If your repeater seems to be malfunctioning, please check the following points before sending it to a ser- vice center. PROBLEM Does not turn ON. • Power connector has a poor contact. • Blown fuse. transmit output •... -
Page 49: I About Cleaning
MAINTENANCE I About cleaning DO NOT use chemical agents such as benzine or al- cohol when cleaning, as they can damage the re- peater’s surfaces. I Fuse replacement If the fuse blows or the repeater stops functioning, find the source of the problem if possible, and replace the damaged fuse with a new, rated one as shown below. -
Page 50: Specifications And Options
SPECIFICATIONS AND OPTIONS I Specifications D D ID-RP2C • General Power supply requirement Current drain Usable temperature range Dimensions (approx.; proj. not incl.) Weight (approx.) Repeater control protocol • Local repeater interface Max. number of connections Communication speed Cable length (approx.) •... -
Page 51: D Id-Rp2D/Id-Rp2V
D D ID-RP2D/ID-RP2V Frequency range Receive Transmit Type of emission Frequency stability Frequency resolutions Antenna connector Communication speed Power supply requirement Current drain Tx (High) (Low) Rx Stand-by Usable temperature range Dimensions (proj. not incl.) Weight (approx.) Tx output power High (at 13.8 V DC) Modulation system... - Page 52 A-6427I-1EX Printed in Japan 1-1-32 Kamiminami, Hirano-ku, Osaka 547-0003, Japan © 2005 Icom Inc.