
Related Manuals for T-Mobile myTouch myTouch 3G


Summary of Contents for T-Mobile myTouch myTouch 3G
-
Page 1: User Guide
T-Mobile myTouch 3G with Google™ User Guide May 19, 2009 Android™ mobile technology platform R1.5.0 TMUSUM-1.5.0-0.8... -
Page 2: Please Read Before Proceeding
Please Read Before Proceeding THE BATTERY IS NOT CHARGED WHEN YOU TAKE IT OUT OF THE BOX. DO NOT REMOVE THE BATTERY PACK WHEN THE DEVICE IS CHARGING. YOUR WARRANTY IS INVALIDATED IF YOU OPEN OR TAMPER WITH THE DEVICE’S OUTER CASING. PRIVACY RESTRICTIONS Some countries require full disclosure of recorded telephone conversations, and stipulate that you must inform the person with whom you are speaking that the conversation is being recorded. -
Page 3: Limitation Of Damages
Limitation of Damages TO THE MAXIMUM EXTENT PERMITTED BY APPLICABLE LAW, IN NO EVENT SHALL HTC OR ITS PROVIDERS BE LIABLE TO USER OR ANY THIRD PARTY FOR ANY INDIRECT, SPECIAL, CONSEQUENTIAL, INCIDENTAL OR PUNITIVE DAMAGES OF ANY KIND, IN CONTRACT OR TORT, INCLUDING, BUT NOT LIMITED TO, INJURY,... - Page 4 Recycle or dispose of used batteries according to the local regulations or reference guide supplied with your product. Note This product should be operated only with the following designated Battery Pack(s): HTC, Model SAPP160 Take extra precautions •...
- Page 5 PREVENTION OF HEARING LOSS CAUTION : Permanent hearing loss may occur if earphones or headphones are used at high volume for prolonged periods of time. SAFETY IN AIRCRAFT Due to the possible interference caused by this product to an aircraft’s navigation system and its communications network, using this device’s phone function on board an airplane is against the law in most countries.
-
Page 6: Nonionizing Radiation
INTERFERENCE WITH MEDICAL EQUIPMENT FUNCTIONS This product may cause medical equipment to malfunction. The use of this device is forbidden in most hospitals and medical clinics. If you use any other personal medical device, consult the manufacturer of your device to determine if they are adequately shielded from external RF energy. - Page 7 • There are noticeable signs of overheating. • The product does not operate normally when you follow the operating instructions. Avoid hot areas • The product should be placed away from heat sources such as radiators, heat registers, stoves, or other products (including amplifiers) that produce heat.
- Page 8 Electrostatic discharge (ESD) • Do not touch the SIM card’s metal connectors. Seizures/Blackouts • This phone is capable of producing bright flashing lights. Loud Noise • This phone is capable of producing loud noises which may damage your hearing. Emergency Calls •...
-
Page 9: Table Of Contents
Contents 1 Phone Basics ..........14 1.1 Getting to Know Your T-Mobile myTouch 3G and Accessories . - Page 10 2 Using Phone Features and Managing Contacts ....34 2.1 Making Calls ..............34 Make a call from the Call log .
- Page 11 Set Gmail settings ..............60 4.3 Using Email.
- Page 12 Post capture ..............85 Copying photos and video to storage .
- Page 13 Exposure to Radio Frequency (RF) Signals ......... .108 SAR Information .
-
Page 14: Phone Basics
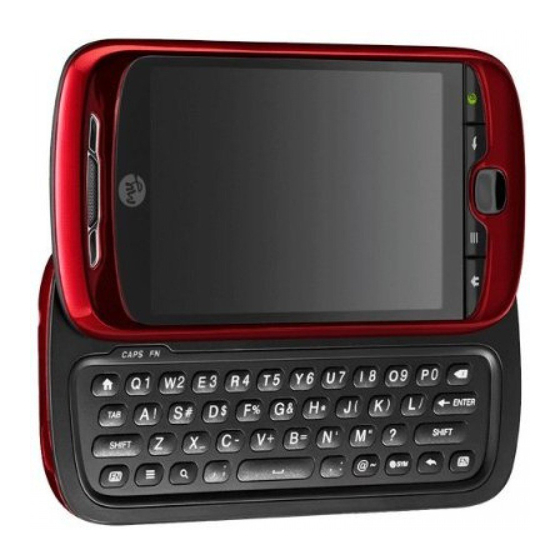
Phone Basics Getting to Know Your T-Mobile myTouch 3G and Accessories Front panel Earpiece Listen to a phone call from here MENU HOME For more information about the functions of the BACK buttons, refer to “Phone Controls” on page 19 for more details. For more information about the TRACKBALL , refer to “Use the Trackball”... -
Page 15: Back And Left Panels
Back and left panels Speaker 3.2 Megapixel Camera See “Using Camera and Camcorder” on page 84 for details. Back Cover Bottom panel USB connector/Earphone Jack Connect the: • USB cable to transfer files. • AC adapter to recharge the battery. •... -
Page 16: Installing The Sim Card, Battery, And Storage Card
Installing the SIM Card, Battery, and Storage Card Always turn off your phone before installing or replacing the SIM card, battery, and storage card. You also need to remove the back cover before you can install the SIM card and battery. To remove the back cover Make sure the phone is turned off. -
Page 17: Battery
To remove the SIM card Remove the back cover and the battery if it is installed. Locate the groove below the SIM card slot, then push the SIM card out of the slot with your finger. Battery Your phone comes with a rechargeable Lithium-ion battery and is designed to use only manufacturer- specified original batteries and accessories. -
Page 18: Storage Card
To remove the battery Make sure the phone is turned off. Remove the back cover. The top side of the battery has a protruding grip. Lift the battery from the grip to remove it. Storage card To store your pictures, music, and applications, install the supplied microSD card into your phone. Note You need to install the microSD card before you can use the Camera application. -
Page 19: Charging The Battery
Charging the Battery New batteries are not charged when shipped. Before you start using your phone, you need to install and charge the battery. Some batteries perform best after several full charge/discharge cycles. To charge the battery Plug the USB connector of the AC adapter to the USB connector at the bottom of your phone. Plug in the AC adapter to an electrical outlet to start charging the battery. -
Page 20: Search Button
CALL • Press to open the Call log screen. • When a contact, contact number, or phone number is highlighted on the screen, press to call the contact or phone number. • If you navigated to another application during a call, press to display the ongoing call on the screen. -
Page 21: Getting Around Your Phone
Getting Around Your Phone There are different ways to navigate around the Home screen, menus and application screens on your phone. You can also change the screen orientation of the phone. Touch When you want to type using the onscreen keyboard, select items onscreen such as application and settings icons, or press onscreen buttons, simply touch them with your finger. -
Page 22: Getting Started
Getting Started Once you’ve installed your SIM card, battery, and microSD card, you can turn on your phone and start using it. Turn your phone on and off To turn on the phone END CALL/POWER Press the button. Note When you turn on the phone for the first time, you will be prompted to sign in to your Google™ Account. -
Page 23: Retrieve Your Google Password
Retrieve your Google password On your computer, open your browser and go to http://google.com/accounts. On the right side of the page, click Please select your issue In the Reset your password now Click Turn off the screen when not in use To save battery power, the phone automatically turns off the screen when you leave it idle after a certain period of time. -
Page 24: Extended Home Screen
Extended Home screen The Home screen extends beyond the screen width to provide more space for adding icons, widgets, and more. Press HOME , then slide your finger horizontally across the screen to go to the left or right side of the extended Home screen. - Page 25 To reposition a Home screen item Touch and hold the item on the screen you want to reposition to activate Move mode. Note When Move mode is activated, the item magnifies and the phone vibrates. Without lifting your finger, drag the icon to the desired position on the screen, then release it. Note To move an item from the Home screen to an extended Home screen, touch and hold the item and then drag it to the left or right edge of the screen until the display shifts to the extended Home...
-
Page 26: Phone Status And Notifications
Phone Status and Notifications Status bar On top of the phone screen is the status bar. The left side of the status bar displays notification icons while the right side of the status bar displays the phone status. When the status bar is full, touch Notification icons These are the icons that may appear on the notifications area of the status bar: Icons that appear in the boxed area... -
Page 27: Notifications Panel
Icons that appear in the boxed area EDGE connected EDGE in use 3G connected 3G in use Connected to a Wi-Fi network Bluetooth is on Connected to another Bluetooth device Airplane mode Alarm is set Signal strength Speakerphone on Notifications panel Notification icons report the arrival of new messages, calendar events, alarms set and ongoing settings such as when call forwarding is on or the current call status. -
Page 28: Notification Led
You can also open the Notifications panel on the Home screen by pressing Notifications touching To close the Notifications Panel Touch and hold the bottom bar of the Notifications panel, then slide your finger up the screen or press BACK Notification LED The Notification LED located at the right corner of the earpiece provides information on the phone status or pending notifications. -
Page 29: Recently-Used Applications
To close the Applications tab Touch Recently-used applications To open a recently-used application HOME Press and hold the button to open the recently-used applications window. The window displays the last six applications you have used. Touch an icon in the window to open the related application. -
Page 30: Adjusting The Volume
1.11 Adjusting the Volume Adjusting the Ringer volume changes the volume level of the phone ring tone, whereas adjusting the Media volume changes the volume level of sound notifications and music or video playback. The ringer volume and media volume can be separately adjusted. To adjust the Ringer volume You can adjust the Ringer volume when you are on the Home screen or any application screens (except during a call or when playing music/video). -
Page 31: Using The Onscreen Keyboard
1.12 Using the Onscreen Keyboard When you start a program or select a field that requires text or numbers, the onscreen keyboard becomes available. 1. Touch to enter letters. 2. Touch and hold to enter accented letters (when applicable). Touch and hold the left-most word on the candidate list to save it to the user dictionary. -
Page 32: Using The Landscape Onscreen Keyboard
Using the landscape onscreen keyboard When entering text, you can choose to use the landscape orientation of the onscreen keyboard, by turning the phone sideways, to use a larger keyboard that lets you type easily using two thumbs. Note Orientation check box in for the screen orientation to automatically change. -
Page 33: Using The Phone's Storage Card As A Usb Drive
1.13 Using the Phone’s Storage Card as a USB Drive To transfer music, pictures, and other files from your computer to your phone’s storage card, you need to set the phone’s storage card as a USB drive. To set the phone’s storage card as a USB drive Connect the phone to the computer using the USB cable. -
Page 34: Using Phone Features And Managing Contacts
Using Phone Features and Managing Contacts Making Calls Use the Dialer to enter and call a phone number or you can use Voice Dialer to make a call. To open the Dialer Do one of the following: • On the Home screen, touch •... -
Page 35: Make A Call From The Call Log
To make an emergency call Dialer On the tab, enter the emergency number for your locale (for example, 000), and then press the CALL button on your phone. Notes • When the screen is locked, you need to unlock it first before you can make an emergency call. If your phone is in sleep mode, press any button to wake up the phone and then press the button to unlock the screen. -
Page 36: Call Voicemail
Call voicemail The voicemail icon appears in the status bar when you have a new voicemail. To call voicemail Touch and hold the status bar, then slide your finger downward on the screen to open the Notifications panel. New voicemail Touch to listen to your voicemail. -
Page 37: Call Options
Call Options MENU When a call is in progress, press dial another contact for a phone conference, mute the phone microphone, and more. Note When the phone is dialing, only the To hold the call MENU Hold Press , then touch to hold the call. -
Page 38: Manage Multiple Calls
When the Bluetooth headset is disconnected from your phone, do the following to reconnect it and transfer the current call: Make sure that Bluetooth on your phone and the Bluetooth headset are on. Refer to “Using Bluetooth” on page 73 for details. HOME MENU During a call, press... -
Page 39: Using The Call Log
During a conference call, press participant or to talk privately to one of the participants. Touch this icon to drop this participant from the conference. Touch to rejoin the remaining conference call participants. To end the conference call and disconnect all callers, press the Using the Call Log Call log tab lists all missed calls... -
Page 40: Adjusting Phone Settings
To add a new phone number to Contacts If the phone number of a person who called is not in your contacts list, you can choose to save the number after you hang up. While on any screen, press the Touch and hold the received call that you want to save to your contacts list. -
Page 41: Turning The Phone Function On And Off
Turning the Phone Function On and Off In many countries, you are required by law to turn off the phone while on board an aircraft. A way to turn off the phone function is to switch your phone to radios on your phone are turned off, including the phone function, Bluetooth, and Wi-Fi. To enable or disable Airplane mode HOME MENU... -
Page 42: Add A New Contact
Add a new contact To add a new contact MENU In the contacts list, press Enter the contact’s name and other contact information such as their mobile phone number, home phone number, or email address. Slide your finger up or down to see more labels. Note To change a default information label, for example Home email to Work email, touch the information label button, then select another label on the menu. -
Page 43: Edit And Customize Your Contacts
To view favorite contacts CALL Favorites Press and then touch the Favorites numbers on the tab. To remove a contact from the Favorites tab Favorites On the tab, touch and hold the contact you want to remove and then touch favorites on the options menu. -
Page 44: T-Mobile Myfaves
To send a text or multimedia message to a contact The contact must have a mobile phone number in their contact details for you to send them a text or multimedia message. Do one of the following: • When the contact’s default number is a mobile phone number, touch and hold the contact’s Send SMS/MMS name in the list, then touch •... -
Page 45: Add Myfaves Contacts
Add myFaves contacts To add myFaves contacts, you can create new contacts or add existing contacts from your phone. HOME myFaves Press and then touch Touch an empty circle on the myFaves screen. Choose whether to create a new contact or use an existing contact. Notes Create new •... -
Page 46: Replace A Myfaves Contact
Replace a myFaves contact HOME myFaves Press and then touch Select the myFaves contact, by positioning the contact’s circle in the center of the screen, you want to replace. MENU Replace contact Press and then touch Follow steps 3 o 5 of “Add myFaves contacts” on page 45. T-Mobile myTouch 3G User Guide on the Home screen. -
Page 47: Managing Your Time
Managing Your Time Using Calendar Use Calendar to create and manage events, meetings, and appointments. Depending on your synchronization settings, the Calendar on your phone stays in sync with your Calendar on the web. Note For more information about Calendar synchronization, refer to “Synchronizing Google Applications”... -
Page 48: Calendar Views
Calendar views You can display the Calendar in daily, weekly, monthly, or agenda view. To change the Calendar view, press MENU , then touch Day view Week view While in a calendar view you can: • To quickly view an event’s details while in TRACKBALL . -
Page 49: Synchronize Microsoft® Office Outlook® Calendar
Synchronize Microsoft® Office Outlook® calendar You can synchronize Outlook calendar on your computer with Calendar on the web. Since Calendar on your phone can automatically synchronize with Calendar, you can access your Outlook calendar appointments and events on your phone anytime. To learn how to synchronize, go to http://www.google.com/support/calendar. -
Page 50: Customize Alarm Clock
Customize Alarm Clock You can change the appearance of the clock displayed on the Alarm Clock screen. On the Alarm Clock screen, touch the clock with your finger to open the clock selection screen. Available clock displays appear at the bottom of the screen. Slide your finger left or right on top of the clock displays to view them. -
Page 51: Exchanging Messages
Exchanging Messages Sending Text and Multimedia Messages Messaging lets you compose and send text (SMS) and multimedia messages (MMS) to other mobile phones. If the list of messages does not fit on the screen, you can scroll up the screen to view more messages, or roll the TRACKBALL down. - Page 52 To create and send a text message On the Messaging screen, touch Enter the mobile phone number of the message recipient in the number, matching contacts will appear on the screen. Touch a recipient or continue entering the recipient’s phone number. Enter a name to look up a contact or touch to enter a phone...
- Page 53 Audio • . Opens the Select audio menu. Touch an audio file to select, then touch file into your message. Record audio • . Touch to open the message recorder. Touch message, then touch to stop. To listen to your recording, touch recording to attach the recording to your message.
-
Page 54: Receive Text And Multimedia Messages
• To remove or replace a picture or an audio attachment, on the Compose screen, touch the Remove button beside the attachment. To remove a slideshow attachment, on the Compose Edit MENU screen, touch , press When you are finished composing the multimedia message, touch Send. The send progress is displayed at the right side of the message in the message thread or in the message list. - Page 55 To open and view a multimedia message In the message list, touch a multimedia message or message thread to open it. Play Touch the button at the right side of a multimedia message to view it. You can save the file attachment on the multimedia message to the SD card. To save, touch and Copy attached to SD card hold the file and then touch Notes...
-
Page 56: Adjust Text And Multimedia Message Settings
Adjust text and multimedia message settings MENU In the message list, press and then touch settings. You can set the following options: SMS settings Delivery reports Manager SIM card messages MMS settings Delivery reports Read reports Auto-retrieve Roaming auto-retrieve Notification settings Notifications Select ringtone Vibrate... -
Page 57: Using Gmail
Using Gmail Gmail is Google’s web-based email service. Gmail is configured when you first set up your phone. Depending on your synchronization settings, Gmail on your phone is automatically synchronized with your Gmail account on the web. For more information about synchronization, see “Synchronizing Google Applications”... -
Page 58: Receive And Read Emails
If you want to add a picture attachment, press you want to attach. Attachment Enter your message here. After composing your email, touch Note While composing the message, touch MENU messages, in the Inbox, press To add a signature to emails You can add a signature to email messages that you send. -
Page 59: Reply To Or Forward Emails
To view emails Do one of the following: HOME • Press , then touch and hold the status bar, and then slide down your finger on the screen to open the Notifications panel. Touch the new email to view it. •... -
Page 60: Manage Conversations And Emails
Manage conversations and emails Conversations In the Inbox, touch and hold the conversation, then touch: Read • to return to the message. Archive • to archive the email message. To display your archived messages, in the Inbox, press Mail Mute •... -
Page 61: Using Email
Select ringtone • Touch if you want your phone to ring when a new email message arrives. On the ring tone menu, select a ring tone specific to new email messages. The ring tone plays briefly when selected. If you don’t want a ring tone to play when you receive a new email message, Silent touch . -
Page 62: Manage Emails On Your External Email Account
Manage emails on your external email account To delete a message On the email account inbox, touch and hold the email you want to delete. Delete On the options menu, touch Edit or delete an external email account You can edit or delete an external email account on your phone. HOME Press , touch the Applications tab, then select... - Page 63 To add a new friend You can only add people who have a Google Account. In the Friends list, press MENU and then touch Enter the Google Talk instant messaging ID or Google email address of the friend you want to add. Note When you add a friend with an instant messaging ID and has been saved in your contacts list, matching contacts will display on the screen as you enter information.
-
Page 64: Manage Your Friends
To switch between active chats You can switch between chats if you have more than one chat going. While on a chat screen or in the friends list, press Switch chats touch On the panel that opens, touch the friend you want to chat with. To close a chat Do one of the following: •... -
Page 65: Mobile Indicators
Note To keep a friend from appearing in the most popular list, touch and hold the friend’s name, then Hide friend touch on the menu. If you pinned the friend, the pin will be removed when you hide the friend. Mobile indicators You can check what type of device your friend is using to chat in Google Talk. -
Page 66: Getting Connected
Getting Connected Connecting to the Internet Your phone’s networking capabilities allow you to access the Internet through one of the following connections: • GPRS/3G/EDGE • Wi-Fi GPRS/3G/EDGE Your phone will be automatically configured to use your wireless service provider’s GPRS/3G/EDGE service when you turn on your phone (if the SIM card is inserted) for the first time. - Page 67 Notes • The next time your phone connects to a previously accessed secured wireless network, you will not be prompted to enter the WEP key again, unless you reset your phone to its factory default settings. • Wi-Fi networks are self-discoverable, which means no additional steps are required for your phone to connect to a Wi-Fi network.
-
Page 68: Using Browser
Using Browser Open Browser to start surfing the web. Browser is fully optimized and comes with advanced functionalities that let you enjoy Internet browsing on your phone. Note You must have an active data (3G, GPRS), or Wi-Fi connection to access the Internet. To open Browser Do one of the following: HOME... - Page 69 Touch and hold the magnifying window, then drag it to the area of the page that you want to view more closely. You can also roll the screen. Magnifying window Release your finger or press the zoom ratio used when you activated scale and scroll. To zoom in or out on a web page Slide your finger to one direction on the screen to activate the zoom controls.
-
Page 70: Manage Links, History, And Downloads
To close a browser window, touch To find text within a web page While viewing a web page, press Enter the search item. As you enter characters, matching characters will be highlighted in green. Touch the left or right arrow to go to the previous or next matching item. Touch to close the search bar. - Page 71 Link What to do Email address • Touch to send an email message to the email address. • Touch and hold, then touch address to the clipboard. You can paste the email address later when creating a new contact or sending a new email message. Browser also recognizes some phone numbers and addresses that allow you to call the phone number or locate the address in Google Maps™.
-
Page 72: Manage Bookmarks
To view your downloads MENU On a browser screen, press Manage bookmarks You can store as many bookmarks as you want on your phone. To bookmark a web page On a browser screen, go to the web page you want to book mark. MENU Bookmarks Press... -
Page 73: Amazon Mp3
Amazon MP3 Amazon MP3 provides you with one-touch access to digital music from Amazon.com. Amazon.com has more than 6 million DRM-free MP3 tracks you can purchase and download to your phone. Note You can only download MP3s using a Wi-Fi connection. You can browse and preview songs using a 3G connection. - Page 74 To change the phone name The phone name identifies your phone in a Bluetooth network. Make sure that you have turned Bluetooth on. On the Wireless controls screen, touch Enter the name for your phone in the dialog box, then touch To pair and connect a Bluetooth hands-free headset or car kit You can connect your phone to a Bluetooth hands-free headset or a Bluetooth car kit and use those devices to send and/or receive calls.
- Page 75 • If you pair with a second headset while connected to the first, the first headset will be disconnected. To switch connection back to the first headset, you must manually select that headset again in the Bluetooth devices list To disconnect a Bluetooth hands-free headset or car kit HOME MENU Press...
-
Page 76: Getting Around With Maps
Getting Around with Maps Using Maps Maps lets you track your current location, view real-time traffic situations, and receive detailed directions to your destination. It also provides a search tool where you can locate places of interest or an address on a vector or aerial map, or view locations in street level. Notes •... -
Page 77: Searching For Places Of Interest
Searching for Places of Interest To search for a place of interest MENU On the Maps screen, press Enter the place you want to search in the search box. You can enter an address, a city, or type of business or establishment (for example, museums in london). Enter the place you want to search here. -
Page 78: Viewing Maps
Viewing Maps While viewing a map, take advantage of the following zoom and navigation techniques. Zoom in or out on a map Touch the screen to show the zoom controls. Touch to zoom out. Navigate on a map TRACKBALL Roll the or slide your finger on the screen in any direction to view other areas of the map. -
Page 79: Getting Directions
Satellite mode Traffic mode (available only in selected areas) Street View mode (available only in selected areas) Getting Directions Use Maps to get detailed directions to your destination. To get directions While viewing a map in any mode (except in Street View), press Enter the starting point in the first text box, then enter your destination in the second text box. - Page 80 Route Touch . The directions to your destination appears in a list. Distance and time to destination. Touch to change your route. Touch to show the previous turn on the map. Next turn When you are finished viewing or following the directions, press to reset the map.
-
Page 81: Finding Your Friends With Google Latitude
Finding your friends with Google Latitude Google Latitude user location service lets you and your friends share locations and status messages with each other. It also lets you send instant messages and emails, make phone calls, and get directions to your friends’ locations. Your location is not shared automatically. -
Page 82: Show Your Friends
Show your friends You can show your friends using the map view or the list view. Map view When you open Google Maps, it shows your friends’ locations. Each friend is represented by a photo icon with an arrow pointing at his or her approximate location. -
Page 83: Control What You Share
Share only city level Share only the city you are in, not the street-level location. Your friend can see your photo icon in the middle of the city you are in. location To share more precise location again, touch Remove Remove the friend from your list and stop sharing locations with him or her altogether. -
Page 84: Camera And Multimedia
Camera and Multimedia Using Camera and Camcorder Use Camera or Camcorder to take and share pictures and videos. Your phone comes with a 3.2 megapixel camera with auto-focus feature that lets you capture sharp pictures and videos. Before you proceed •... -
Page 85: Shoot Videos
Touch onscreen to take the picture. Shoot videos HOME Press , touch the Applications tab and then touch MENU Switch to video and then touch You can change the capture video quality by pressing Select video quality Frame your subject on the screen. Touch onscreen to start capturing video. -
Page 86: Using Gallery
Copy the files into the folder you have created. After copying the files, unmount or eject the drive as required by your computer’s operating system to safely remove the phone. Disconnect the phone from the computer. Using Gallery Gallery lets you view photos and play back videos. For photos, you can also do basic editing tasks, set them as your wallpaper or contact picture, and share to your friends. - Page 87 You can choose to display small or large thumbnails or sort your album and display the latest pictures first or last. On the Gallery screen, press Display size General settings section, touch To browse through pictures When viewing pictures in full screen, do one of the following: •...
- Page 88 To crop a picture While viewing a picture in full screen, press Do one of the following: • To adjust the cropper size, touch and hold the edge of the cropper tool. When the cropper arrows appear, drag your finger inward to or outward from the center of the cropper to resize it. •...
-
Page 89: Work With Videos
You can view the upload progress by opening the Notifications panel and then touching Picasa . Refer to “To open the Notifications panel” on page 27 to learn how to open the Notifications Panel. Work with videos Once you have taken a video, you can view it or share it with friends. To watch videos On the main Gallery screen, touch a video album and then touch the video you want to watch to start playing back the video. -
Page 90: Viewing Videos On Youtube
You can view the upload progress by opening the Notifications panel and then touching YouTube . Refer to “To open the Notifications panel” on page 27 to learn how to open the Notifications Panel. Viewing Videos on YouTube YouTube™ is a free online video streaming service that allows you to view, search, and upload videos. Note You must have an active data (3G/GPRS/EDGE) or Wi-Fi connection to access YouTube. -
Page 91: Using Music
To clear the search history MENU Settings Press and then touch Clear search history Touch and then touch Using Music Music plays digital audio files from the phone’s storage card. Music supports the following music file formats: MP3, M4A (iTunes application AAC, DRM-free), AMR, WMA (8), MIDI, WAV, OGG Vorbis. Since Music only plays audio files saved on the storage card of your phone, you must copy your audio files to the storage card before you open Music. -
Page 92: Play Music
Play music Touch a song to play it back. 1. Touch to jump to the beginning of the song. 2. Touch and hold to rewind the song. 3. Touch twice to play the previous song on the album. Touch and drag to jump to any part of the song. -
Page 93: Set A Song As Ring Tone
• To rearrange the songs or remove a song in a playlist, touch and hold the playlist, then touch on the options menu. Touch and hold position, then release. • To delete a song in a playlist, touch and hold the song, then touch •... -
Page 94: Using Android Market
Using Android Market Using Android Market Android Market provides direct access to useful applications and fun games which you can download and install on your phone. Android Market also allows you to send feedback and comments about an application, or flag an application that you find objectionable or incompatible with your phone. To open Android Market HOME Press... -
Page 95: Getting Help
Getting help If you ever need help or have questions about Android Market, press Browser will take you to the Android Market Help webpage. Finding applications The Android Market home page provides several ways to find applications. It showcases featured applications and includes a list of item applications by category, a list of games, a link to search, and a link to My downloads. -
Page 96: Installing An Application
Installing an application To install and open an application Navigate to the item you want to download, and select it. In the item details screen, read more about the application, including its cost, overall rating, and comments by users. If you scroll down to the applications by this developer, visit the developer’s website, and send the developer an email message. -
Page 97: Purchasing An Application
Purchasing an application If an application has a price associated with it, you have to buy it before you can download it. You can try it out for 24 hours. Your credit card will be charged unless you ask for a refund within 24 hours of purchase. -
Page 98: Managing Your Applications
Managing your applications From the Android Market Home, touch the Android Market screens, press Uninstalling an application To uninstall an application You can uninstall any application that you have downloaded and installed from Android Market. On the My downloads screen, touch the application you want to uninstall, then touch When prompted, touch to remove the application on your phone. -
Page 99: Managing Your Phone
Managing Your Phone Changing Basic Settings Set the date, time zone, and time By default, your phone automatically uses the network-provided date, time zone, and time. To manually adjust the date, time zone, and time HOME MENU Press , then press , and then touch Scroll down the screen, then touch Automatic... -
Page 100: Ringer Settings
Sound & display Touch Scroll down the screen, then clear the To keep the screen on while charging the phone You can keep the phone from turning off the screen while you are charging the phone. HOME MENU Press , then press , and then touch Applications Development... -
Page 101: Language Settings
Important Accessing data services while roaming may incur significant charges. Inquire the data roaming tariffs with your wireless service provider before enabling data roaming. Language settings You can change the operating system language of the phone. To change the language of the operating system HOME MENU Press... -
Page 102: Managing Memory
To create and enable the screen unlock pattern You can increase the security of your phone by creating a screen unlock pattern. When enabled, you have to draw the correct unlock pattern on the screen to unlock the phone’s control buttons and touch screen. -
Page 103: T-Mobile My Account
To uninstall applications not from Android Market You cannot uninstall applications that are preinstalled on the phone. Press HOME , then press MENU , and then touch On the Manage applications screen, touch the application you want to uninstall. On the Application info screen, touch To free up more phone memory or storage card space If your phone is running low on memory, you can try the following: •... -
Page 104: Software Updates
Software Updates Google might send new or updated versions of your phone’s operating system via over-the-air (OTA) updates. When your phone receives an OTA update, it will automatically connect to the Internet using your data connection (3G, GPRS, EDGE, or Wi-Fi) and will download the software update. Note If you are roaming or if you clear the section), you will not receive updates. -
Page 105: Resetting The Phone
Resetting the Phone Resetting the phone deletes all data, including downloaded applications, and resets the phone back to its initial state—the state before you turned on the phone for the first time. Important Make sure to back up important data you have on the phone before you perform a factory data reset. -
Page 106: 10 Appendix
Connectivity Bluetooth® 2.0 with Enhanced Data Rate and A2DP for wireless stereo headsets Wi-Fi®: IEEE 802.11b/g HTC ExtUSB™ (11-pin mini-USB 2.0 and audio jack in one) Camera 3.2 megapixel color camera with auto focus Audio supported AAC, AAC+, AMR-NB, MP3, WMA, WAV, AAC-LC, MIDI, OGG... -
Page 107: A.2 Regulatory Notices
AC adapter Voltage range/frequency: 100 - 240V AC, 47/63 Hz DC output: 5V and 1A Special features Digital Compass, G-Sensor Note Specifications are subject to change without prior notice. 10.2 A.2 Regulatory Notices Regulatory Agency Identifications For regulatory identification purposes, this product is assigned a model number of To ensure continued reliable and safe operation of this product, use only the accessories listed below SAPP300 with your... -
Page 108: Safety Precautions For Radio Frequency Exposure
contain metallic components in its assembly. The use of accessories that do not satisfy these requirements may not comply with FCC RF exposure requirements, and should be avoided. Safety Precautions for Radio Frequency Exposure • Use only original manufacturer-approved accessories, or accessories that do not contain any metal. -
Page 109: Sar Information
levels so as to use only the power required to reach the network. In general, the closer you are to a wireless base station antenna, the lower the power output. Before a phone model is available for sale to the public, it must be tested and certified to the FCC that it does not exceed the limit established by the government-adopted requirement for safe exposure. -
Page 110: Rohs Compliance
The WEEE logo (shown at the left) on the product or on its box indicates that this product must not be disposed of or dumped with your other household waste. You are liable to dispose of all your electronic or electrical waste equipment by relocating over to the specified collection point for recycling of such hazardous waste. -
Page 111: Index
Index Numerics 3G 66 42496 Heading1 4.2 Using Gmail 57 87747 Heading2 Retrieve your Google password. 23 Adjusting keyboard settings 31 Airplane Mode 41 Alarm - set an alarm 49 Alarm Clock 49 Amazon MP3 73 Android Market 94 - finding applications 95 - getting help 95 - installing an application 96 - installing items 96... - Page 112 Extended Home screens 24 External email accounts - add 61 - compose and send emails 61 - delete a message 62 - delete an account 62 Folders 24 Format the SD card 33 Friends list 64 - find 64 - pin 64 Gallery - about 86 - browse through pictures 87...
- Page 113 Playlists - about 92 - create 92 - manage 92 Regulatory notices 107 Resetting the Phone 105 Ring tone 93 - change 100 Ringer settings 100 Roaming 100 Safety information 3 Screen lock 101 Screen unlock pattern 102 Settings 29 Shortcuts 24 SIM card 16 - install 16...