Table of Contents
Advertisement
Quick Links
Advertisement
Table of Contents

Related Manuals for HP iPAQ 510


Summary of Contents for HP iPAQ 510
- Page 1 HP iPAQ Product Guide...
- Page 2 Microsoft, Windows, the Windows logo, Outlook, and ActiveSync are trademarks of Microsoft Corporation in the U.S. and other countries. HP iPAQ Products are Powered by Microsoft Windows Mobile 6.0 Standard. SD Logo is a trademark of its proprietor. Bluetooth® is a trademark owned by its proprietor and used by Hewlett-Packard Development Company, L.P.
-
Page 3: Table Of Contents
Step 2: Install the battery and replace the battery cover ... 7 Step 3: Charge the battery ... 7 Step 4: Turn on your HP iPAQ ... 8 Protecting Your HP iPAQ with a Password ... 8 Finding the Serial and Model Number ... 8 Status Icons ... - Page 4 Connecting to Intranet URLs ... 28 Changing or Deleting an Intranet URL ... 28 Setting Up Proxy Settings ... 28 Setting Up GPRS using HP iPAQ DataConnect ... 29 Configuring Advanced Proxy Settings ... 29 Setting Up a VPN Connection ... 29...
- Page 5 Finding an IP Address ... 31 Deleting a Wireless Network Connection ... 31 Configuring 802.1x Authentication Settings ... 32 Configuring IP PBX using HP iPAQ Setup Assistant ... 32 Bluetooth ... 32 Bluetooth Terms ... 33 Changing Bluetooth Settings ... 33 Bluetooth Device Profiles ...
- Page 6 Adding and Removing a Picture ... 54 Working with the Contact List ... 55 12 Applications Using HP Applications ... 56 Using HP Voice Reply ... 56 HP iPAQ Setup Assistant ... 57 Voice Commands ... 57 HP iPAQ Shortcuts ... 58 Task Manager ...
- Page 7 Playing Solitaire ... 62 Internet Explorer ... 63 13 Storage Cards Using Storage Cards ... 64 Inserting a Storage Card ... 64 Removing a Storage Card ... 64 Viewing Content of a Storage Card ... 64 14 Synchronizing Copying (or Transferring) Files ... 66 Migrating Data from Palm Desktop to Microsoft Windows Mobile 6.0 Standard ...
- Page 8 Why does the HP iPAQ operate slowly at times? ... 80 Why do I see the Home screen layout error message on my HP iPAQ display screen? ... 80 I have trouble charging my battery. What should I do? ... 80 I am unable to use the ActiveSync feature.
-
Page 9: Registering The Ipaq
Sign up for free support alerts, driver notices, and personalized newsletters In some countries, when you register your HP iPAQ with Hewlett-Packard, you receive e-mail regarding special offers and promotions. Take time now to register your HP iPAQ online at http://www.register.hp.com. -
Page 10: Box Contents
Listening to personal stereo equipment at full volume for long periods can damage hearing. To reduce the risk of hearing loss, do not spend much time listening to personal stereo equipment at full volume. HP recommends use of the headset manufactured by Merry, part number EMC220-X00, that is included with your HP iPAQ. -
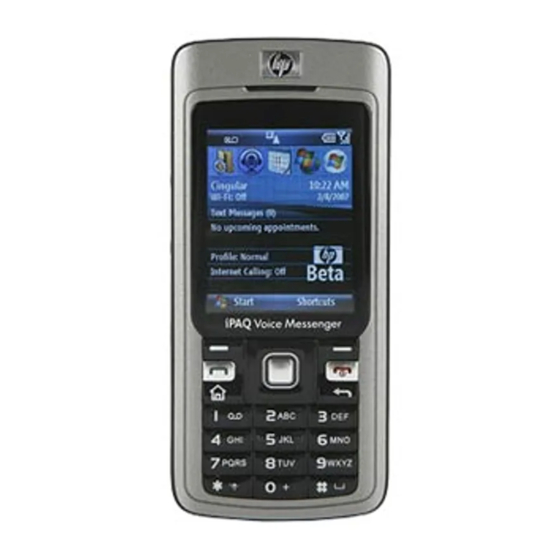
Page 11: Components
Use to view the contents on the screen. Press to launch HP iPAQ Shortcuts from the Home screen. Press to end a phone call. Press and hold to switch your HP iPAQ on or off. Press to go back to the previous screen. -
Page 12: Bottom Panel Components
Function Use to connect the mini-USB synchronization and charging cable. Use for phone conversations or to record notes. Use to attach accessories to carry your HP iPAQ. Function Press to increase or decrease the earpiece volume. Insert a Micro Secure Digital (MicroSD) storage card with the label side down for data storage. -
Page 13: Back Panel Components
Remove to insert or remove the battery and/or the SIM card. With the camera turned on, frame the subject in the camera lens and view it on your HP iPAQ screen before capturing the photo. -
Page 14: Setting Up Your Hp Ipaq
Setting Up Your HP iPAQ Step 1: Remove the battery cover and insert the SIM card Press the release button on the battery cover and slide the cover down and away from the HP iPAQ. Remove the battery. NOTE: If the battery is already installed, remove it before inserting the SIM card. The SIM card is provided by a mobile phone service provider. -
Page 15: Step 2: Install The Battery And Replace The Battery Cover
Connect the mini-USB synchronization cable to the charging/communications port on your HP iPAQ. The cable connector only fits one way. If the connector does not insert easily, turn it over. Step 2: Install the battery and replace the battery cover... -
Page 16: Step 4: Turn On Your Hp Ipaq
Use the keypad to enter information. Protecting Your HP iPAQ with a Password You can secure the data on your HP iPAQ by setting a password. Each time you turn on your HP iPAQ, you will be prompted to enter the password. - Page 17 Icon Status Missed call Voice call active No SIM card installed New Voice mail Instant message received Battery level low No battery or battery fault Ringer off Wi-Fi on Roaming GPRS available in roaming Enhanced Data for GSM Evolution (EDGE) available EDGE in use Phone connection unavailable or network...
-
Page 18: Learning The Basics
Access your shortcuts by selecting Shortcuts. Battery Saving Tips You can adjust the settings on your HP iPAQ to fit your individual needs and to help your battery last as long as possible between charges. Here are some recommendations to conserve battery life: ●... -
Page 19: Entering Text
Entering Text You can enter text and numbers on the HP iPAQ using the keypad. The HP iPAQ supports two input modes for entering text: Multipress and T9. The status indicator on the top of the display screen shows the input mode that is currently in use. -
Page 20: Entering Text In The T9 Mode
You can also enter numbers and symbols in messages. Entering the Owner Information Enter your information so that the HP iPAQ can be returned to you if it is lost. Press Start > Settings > More… > Owner Information. Enter your personal information and press Done. -
Page 21: Adjusting The Volume
To customize additional settings, select the appropriate options. Press Done. To change the language, locale, numbers, date, time, and currency display, follow steps 1 through 4 above, and then perform one of the following: ● From the Language list, select the language. ●... -
Page 22: Installing And Removing Programs
By removing a program from your HP iPAQ, you may increase available memory on the device. If programs are lost from your HP iPAQ for any reason, most of them can be re-installed using Microsoft ActiveSync. Open the ActiveSync help on your computer, click Tools > Add/Remove Programs. Select the program to be added and click OK. -
Page 23: Setting Alarms
Synchronization Microsoft ActiveSync, located on the Getting Started CD, allows your HP iPAQ and your computer to communicate with each other. For synchronization to work properly, install Microsoft ActiveSync on your computer before you connect your HP iPAQ to your computer. -
Page 24: Changing The Type Of Activesync Connection
Synchronizing your HP iPAQ with your computer allows you to keep the same information (such as calendar, contacts, and e-mail messages) on both units, making it available when you work on your computer or when you take your HP iPAQ on the go. You can synchronize your HP iPAQ with your computer using: ●... -
Page 25: Troubleshooting Help For Synchronization Issues
Firewall or other network protection software message box is displayed for ActiveSync to access the network or Internet. Following is a list of troubleshooting tips if you experience difficulty while synchronizing your HP iPAQ and computer. Try the following solutions to troubleshoot any synchronization issues: ●... - Page 26 HP iPAQ using the HP iPAQ Setup Assistant. You can reinstall your applications on your HP iPAQ after the hard or clean reset is complete by using ActiveSync on your computer. After your HP iPAQ is synchronized properly, go to ActiveSync on your computer and select Tools >...
-
Page 27: Using Your Smartphone
Using Your Smartphone Using the Home Key You can use the Home key to return to the Home screen from any application. You can do the following tasks using the Home key: ● Press and hold the Home key to access the Quick List. The Quick List displays a list of available profile types and commands. -
Page 28: Redialing A Number
Calling a Contact You can call a number stored in the contact list. As you enter a contact name, the HP iPAQ searches the Contacts, Call History, Speed Dial lists, and the SIM card to find a matching name and number. -
Page 29: Making A Call Using Voice Commander
HP iPAQ. Your service provider programs one or more emergency phone numbers, such as 911 or 112, which you can call under any circumstance, even when your HP iPAQ is locked or the SIM card is not inserted. NOTE: Emergency numbers vary by country. Your HP iPAQ's preprogrammed emergency number(s) may not work in all locations, and sometimes an emergency call cannot be placed due to network, environmental, or interference issues. -
Page 30: Using Voice Mail
For billing information, please contact your service provider directly. NOTE: Your HP iPAQ has already been configured to allow you to browse and chat. Contact your service provider for information on mobile Internet plans, configuring e-mail or wireless synchronizing with the server. -
Page 31: Making A Conference Call
Press the Action button to place the call. Dialing International Numbers You can make an international call from your HP iPAQ. To make an international call, enter the country code before the phone number. On the Home screen, press and hold 0 until the plus (+) sign appears. -
Page 32: Managing Calls Using Call History
Select All and press the Action button to turn on/off all wireless connections. Quick Launch Quick Launch is a simple way for you to open the Quick List that lets you turn off your HP iPAQ, manage wireless connections, change profiles, or lock your keypad. -
Page 33: Changing The Ring Tone And Ring Type
TIP: You can select a different network by searching the network either automatically or manually. Profiles You can use profiles on your HP iPAQ to personalize the ringtones, ring volumes, and other settings according to your choice. Using profiles To select a profile: Press Start >... -
Page 34: Automatic Frequency Band Selection
E-mail with Exchange/Outlook You can synchronize Contacts, Tasks, Calendar and E-mail with Exchange/Outlook After your computer is synchronized with your HP iPAQ, click Tools > Options on the Microsoft ActiveSync dialog box. Select the check boxes which you want to synchronize. -
Page 35: Setting Up E-Mail Using Exchange Server
You can use Voice recorder to record audio clips. You can attach them as voice notes to e-mails, MMS, and meeting notes. Enter your e-mail address Select this feature to enable your HP iPAQ to obtain e-mail settings from the internet. Enter your user name Enter your password Enter your domain name, if necessary Check this feature to avoid entering your password repeatedly before you send/receive e-mails. -
Page 36: Connections
Connections You can use your HP iPAQ to connect to and exchange information with other handheld devices, your computer, various network types, or the Internet. There are several ways to get connected, including: ● Wi-Fi ● Bluetooth ● GPRS/EDGE Press Start > Settings > Connections to access all these connection types. -
Page 37: Setting Up Gprs Using Hp Ipaq Dataconnect
Setting Up GPRS using HP iPAQ DataConnect You can use the HP iPAQ DataConnect application to automatically configure your GPRS settings according to the service provider and the country in which your HP iPAQ is being used. To set up GPRS using HP iPAQ DataConnect: Press Start >... -
Page 38: Wi-Fi
To delete an existing connection scroll to select the connection and press Menu > Delete. Wi-Fi With wireless access, you do not need to use cables to connect your HP iPAQ to the Internet. Instead, access points transmit data to and from your wireless device. Your HP iPAQ can connect to an 802.11b/g WLAN or connect directly to other WLAN-enabled devices. -
Page 39: Manually Connecting To A Wi-Fi Network
On the Home screen, scroll and select Wi-Fi to open Wireless Manager. Scroll and select Wi-Fi to turn Wi-Fi on. After your HP iPAQ detects any existing Wi-Fi network, select the network you want to connect to and press Connect. -
Page 40: Configuring 802.1X Authentication Settings
Use the keypad to enter the number you want to dial and press the Send key. NOTE: On the Home, if the status of Internet Calling is No Service, it indicates that your HP iPAQ did not register successfully with the IP PBX server. -
Page 41: Bluetooth Terms
Bluetooth Terms Term Authentication Authorization Bonding (Paired devices) Device address Device discovery Device ID Encryption Passkey Personal Information Manager (PIM) Profiles Service discovery Changing Bluetooth Settings Press Start > Settings > Connections > Bluetooth. Scroll and select the bluetooth connection for which you want to change the settings. Follow the on screen instructions and press Done. -
Page 42: Creating, Accepting, And Ending A Bluetooth Partnership
Making a Device Discoverable Press Start > Setting > Connections > Bluetooth. Press Menu > Turn On Visibility. NOTE: If you no longer want your HP iPAQ to be discoverable, press Menu > Turn Off Visibility. Chapter 7 Connections... -
Page 43: Setting Up An Incoming Or Outgoing Com Port
Secure connection check box. Press Done. Ending a Connection It can be useful to end a connection when you are done using it. This frees resources on your HP iPAQ and can save connection charges. ● When connected via mini-USB synchronization cable, detach your HP iPAQ from the cable. -
Page 44: Connecting To A Laptop
Connecting to a Laptop You can use your HP iPAQ as a wireless modem. The Internet Sharing software on your HP iPAQ guides you during the connection process. Insert a GPRS-enabled SIM into your HP iPAQ before setting up Internet Sharing. You may also need to install the software drivers (located on the Getting Started CD) on to your laptop. -
Page 45: Activesync Over Usb Cable, Gprs And Bluetooth
Press Connect after the partnership is established. ActiveSync over USB cable, GPRS and Bluetooth You can use your HP iPAQ to communicate with your computer and manage your pictures, data and music folders easily. To use ActiveSync over cable: Connect the USB end of the synchronization cable to a USB port on your computer. -
Page 46: Camera
Camera Using the Digital Camera Use the built-in digital camera on your HP iPAQ to click and view photos. Capturing Photos You can capture images and store them in your HP iPAQ or memory card. Press Start > Camera. Use the 4-Way Navigation key to zoom in or out. -
Page 47: Changing Resolution Settings
Changing Resolution Settings Press Start > Camera. Press Menu > Resolution. Make the necessary changes and press the Action button. The Resolution settings can be changed to: ● 176*144 ● 352*288 ● 320*240 ● 640*480 ● 1280*1024 NOTE: The larger the resolution you choose, the more the storage space required and it may take longer to send such photos by Multimedia Messaging Service (MMS), e-mail, or Bluetooth. -
Page 48: Configuring File Settings
You can choose the preset depending on your shooting conditions. Configuring File Settings Use your HP iPAQ File Settings to resize pictures for e-mail and to optimize for slideshow viewing. Press Start > Camera, and then press Menu > Options to change one or more of following options: General ●... -
Page 49: Using The Camcorder
Multimedia Messaging Service (MMS), or e-mail. Using the Camcorder Recording Videos You can use the built-in camcorder on your HP iPAQ to create short videos and share them with your friends and family. Press Start > Camera. Press Menu > Video. -
Page 50: Using Bluetooth
Using Bluetooth You can do the following to transfer images from your HP iPAQ to other devices: Press Start > More > Pictures & Videos. Scroll and select a picture. Press Menu > Beam…. Select the device and press Beam. -
Page 51: Messaging
Internet Message Access Protocol 4 (IMAP4) e-mail server. When connecting to a POP3 or IMAP4 server, you use a modem to connect to your ISP. You can also use your HP iPAQ to connect by using a cellular line connection (for example, using MMS). -
Page 52: Synchronizing E-Mail
POP3 account: If you use a POP3 account and you move e-mail messages to a folder you created, the link is broken between the messages on your HP iPAQ and their copies on the e-mail server. When you connect, the e-mail server detects that the messages are missing from the Inbox folder on your HP iPAQ and deletes them from the e-mail server. -
Page 53: Setting Up Messaging Accounts
To compose an audio e-mail: Press the Voice Commander button on your HP iPAQ. Hold your HP iPAQ 10 cm away from your face and say Compose Audio E-mail to (contact name) to start recording. Record your message and press Stop. -
Page 54: Receiving E-Mail Attachments
Enter your name and e-mail address and press Next. Press Done. Receiving E-mail Attachments An attachment sent with an e-mail message or downloaded from the server appears below the subject of the message. Navigate to select the already downloaded attachment or mark an attachment to download it the next time you send and receive e-mail. -
Page 55: Creating Or Changing A Signature
After you are set up to receive meeting requests, do the following: Press the Action button to open the meeting request you received. Press Accept. If you want, you can also include a message with the response. The response is sent the next time synchronize or connect to your e-mail server, and your device calendar is updated. -
Page 56: Replying Or Forwarding A Message
Press Send. NOTE: You can also use the voice commander to reply to any message. Use HP Voice Reply to reply using an audio e-mail message. Adding an Attachment to a Message In an opened message, press Menu > Insert. -
Page 57: Signing In And Out Of Messenger
To use MSN Messenger, you need a Microsoft.NET Passport account unless you already have a Hotmail account. To set up a Microsoft.NET Passport account, go to http://www.passport.net. After you have an account, you can use your HP iPAQ MSN Messenger feature. Signing In and Out of Messenger Press Start >... -
Page 58: Changing Your Status
Changing Your Status You can change your status on MSN Messenger according to your need. To change your status: Press the Action button to select your name in the contact list. Press Menu > Change Appearances, and navigate to select the required status. Chapter 9 Messaging... -
Page 59: 10 Calendar
Press Done. Canceling an Appointment When you delete an appointment in calendar on your HP iPAQ, it is also deleted on your computer the next time you synchronize. If the appointment has not been synchronized with a computer, it will be deleted only from your HP iPAQ. -
Page 60: Changing The Display Of The Work Week
Changing the Display of the Work Week You can customize your calendar for a work week to start on Sunday or Monday. You can schedule your calendar for a five to seven-day week. To change the display of the work week: Press Start >... -
Page 61: 11 Contacts
11 Contacts Adding a Contact Press Start > Contacts. Press New to add a new contact. Select Outlook Contact or SIM Contact type. Enter the information. Press Done. TIP: Select Outlook Contact type to enter more information about contact. Deleting a Contact Press Start >... -
Page 62: Adding A Photo
Adding a Photo To add a photo to contact information: Press Start > Contacts. Select the contact. Press Menu > Edit. Select Picture. Do one of the following: ● Select the photo you want to add ● Select Camera and take a photo Press Done. -
Page 63: Working With The Contact List
Press Menu > Edit. Select Picture. Do one of the following: ● Select the picture you want to add. ● Select Camera and take a picture. Press Done. To remove a picture from the contact information: Press Start > Contacts. Select the contact. -
Page 64: 12 Applications
You can use HP Voice Reply to reply to your e-mail messages or compose a new e-mail. You can either do a reply to all, just reply to the sender, or forward a message. Use HP Voice Reply with your Outlook account as well as the POP3 and IMAP4 accounts from your HP iPAQ. -
Page 65: Hp Ipaq Setup Assistant
VoIP to VoIP phone calls to any provider are typically free. SIP Proxy servers are used to implement call-routing policies and provide features to users. ● Speed Dial – HP iPAQ Setup Assistant helps you to create and manage a list of speed dial numbers for your HP iPAQ. NOTE: The first speed dial entry is usually reserved for Voice mail by your phone service provider, and your service provider may also reserve an entry for emergency response. -
Page 66: Hp Ipaq Shortcuts
Using HP iPAQ Shortcuts Use HP iPAQ Shortcuts to access a list of shortcuts to your favorite applications or features on your HP iPAQ. You can edit the default shortcuts list or create new shortcuts and store them in the existing list. -
Page 67: Task Manager
HP iPAQ Tips Use HP iPAQ Tips to perform operations on your HP iPAQ in a quick and efficient manner. A tip is displayed on your screen every time you switch on your HP iPAQ. Press Next to display the next tip. -
Page 68: Using Voice Recorder
Press the Voice Commander button and say Pause Resume Music to pause or resume the media file. Using Voice Recorder You can use the voice recording feature of your HP iPAQ to record voice clips, and use them as a voice note in your e-mails or MMS. Chapter 12 Applications... -
Page 69: Using Ms Office Applications
Press Record to start recording a voice clip. Press Menu > Play to play the recorded voice clip. To delete or rename the voice clip, press Menu > Rename/Delete. Press Menu > Set as Ringtone to set the voice clip as your HP iPAQ ringtone. Using MS Office Applications To use MS Excel applications: Press Start >... -
Page 70: Playing Games
To create shortcut: Navigate the Tree or List view to select the file for which you want to create a shortcut, and press Menu > File > Create Shortcut. Navigate the Tree or List view to select the destination folder to save the shortcut in and press Done. -
Page 71: Internet Explorer
Use Internet Explorer Mobile to view and download web pages as well as browse Web sites through synchronization, or when connected to the Internet. The HP iPAQ DataConnect application detects the network settings and lets you connect to Internet Web sites. -
Page 72: 13 Storage Cards
Make sure you insert the connection area (the metal area) first. Removing a Storage Card To remove a Micro Secure Digital (Micro-SD) storage card from the storage slot on the HP iPAQ: Close all programs that are using the storage card. - Page 73 If the HP iPAQ does not recognize your storage card, try the following: ● Make sure you have firmly pushed the storage card into the storage slot. ● Make sure to install any drivers that came with the storage card.
-
Page 74: 14 Synchronizing
Office Mobile programs, if necessary. Move your files directly into My Documents on your HP iPAQ (or into a folder inside My Documents), so the programs on your device can locate them. -
Page 75: Wireless Synchronization Cost Saving Tips
ActiveSync on your computer and create a partnership between your HP iPAQ and your computer. Wireless Synchronization Cost Saving Tips How you manage the cost of synchronizing without wires from your HP iPAQ depends on your priorities. Reduce network connection or data transfer costs Extend battery life... -
Page 76: 15 Tasks
15 Tasks Setting the Start and Due Dates for a Task Press Start > Tasks. Select and open the task you want to set start and due dates for. NOTE: To create a new task, press Start > Tasks > Menu > New Task. Press Edit and do one or both of the following: ●... -
Page 77: 16 Product Specifications
16 Product Specifications System Specifications NOTE: Not all models described are available in all regions. For more information on specifications for your particular model, on your HP iPAQ, tap Start > Settings > System tab > AssetViewer. System Feature Processor Operating System... -
Page 78: Operating Environment
Operating Environment Temperature Relative Humidity Maximum Altitude Chapter 16 Product Specifications Operating 32° to 104°F Non-operating -4° to 140°F Operating 85% RH Non-operating Operating 0 – 15,000 ft Non-operating 0 – 40,000 ft Metric 0° to 40°C -20° to 60°C 85% RH 0 –... -
Page 79: 17 Regulatory Notices
Modifications The FCC requires the user to be notified that any changes or modifications made to this device that are not expressly approved by HP may void the user's authority to operate the equipment. Cables To maintain compliance with FCC Rules and Regulations, connections to this device must be made with shielded cables having metallic RFI/EMI connector hoods. -
Page 80: Declaration Of Conformity For Products Marked With The Fcc Logo (United States Only)
Compliance with these directives implies conformity to harmonized European standards (European Norms) that are listed in the EU Declaration of Conformity issued by HP for this product or product family. This compliance is indicated by one of the following conformity markings placed on the product. - Page 81 ● This CE marking is valid for non-telecommunications products and for EU harmonized telecommunications products, such as Bluetooth®. ● This CE marking is valid for EU non-harmonized telecommunications products. *If applicable, a notified body number is used. Refer to the regulatory label provided on this product. Hewlett-Packard GmbH, HQ-TRE, Herrenberger Strasse 140, D-71034 Böblingen, Germany The telecommunications functionality of this product may be used in the following EU and EFTA countries:...
-
Page 82: Products With 2.4-Ghz Wireless Lan Devices
Battery Warning WARNING! This HP iPAQ contains a lithium ion rechargeable battery. To reduce the risk of fire or burns, do not disassemble, crush, puncture, short external contacts, or dispose of in fire or water. Replace only with the HP spare. -
Page 83: Equipment Warning
RF energy. Turn off your HP iPAQ in health care facilities or hospitals when there are posted restrictions requiring you to do so. -
Page 84: Wireless Notices
The Wireless LAN antenna is located in the bottom front side of the HP iPAQ. The GSM antenna is located in the top back of the HP iPAQ. No metallic body accessories are allowed and 1.5 cm spacing between PDA and the body must be maintained to satisfy RF Exposure. -
Page 85: Japanese Notice
● It is advised that a handheld microphone or telephone handset should not be used by the driver while the vehicle is moving, except in an emergency. Speak only into a fixed, neck slung or clipped- on microphone when it would not distract your attention from the road. ●... -
Page 86: Taiwan Dgt Notice
For your own safety, headsets or earphones used with this product should comply with the headphone limits in clause 7 of EN 50332-2. ● HP recommends to use the headset delivered with your HP iPAQ (part number 430219, manufactured by Plantronics), that is in compliance to EN 50332-1. Chapter 17 Regulatory Notices... -
Page 87: 18 Frequently Asked Questions
Have you activated the Fixed Dialing, Call Forwarding, and Call Barring functions? If yes, deactivate them temporarily. ● Are you using your HP iPAQ with other SIM cards with the Enable SIM PIN function activated? If yes, deactivate the function temporarily. ●... -
Page 88: Why Do I Hear Disturbing Noises During A Phone Call
Why does the HP iPAQ operate slowly at times? It is recommended to have at least 1.5 to 2 MB of free memory space on your HP iPAQ for the device to operate efficiently. To check the free memory space, press Start > Settings > More… > About. -
Page 89: 19 Care And Maintenance
Do not leave your HP iPAQ in extreme high or low temperature environments. ● Remove the battery from your HP iPAQ if it is not going to be used for a long period of time. Store the HP iPAQ and its battery in a cool, dark, and dry place.