Advertisement
Quick Links
REWNEWAL PARTS IDENTIFICATION
1. All wiring should be done in accordance with local codes and the
National Electrical Code by a qualified person as defined in the NEC.
2. Connect air heaters to same line voltage as on heater nameplate.
3 . Check possibility of corrosion if heaters are operated in atmospheres
other than air.
4. In general, locate heater approximately 1 foot from the floor, but not
less than 6 inches, for best overall results. Heater, however can be
located anywhere to meet unique requirements of any particular appli-
cation.
5. Heaters are mounted directly on any type of surface-masonry, con-
crete, block, plastered walls, metal framework, etc.-using appropriate
hardware.
6. Standard heaters are mounted in a vertical position with the terminal
end on the bottom. This unit has special baffle plates and vent holes
in the cover to ensure sufficient convection currents. Make sure that
WARNING: Hazard of Shock. Disconnect all power
before installing heater.
1. Locate heater position on wall.
2. To locate mounting holes, see Specifications Table for heater
in question. In standard 16" stud center frame construction,
locate wall studding and locate 1 upper and 1 lower mounting
hole in center of stud.
3. Drill a pilot hole in metal or wood surfaces using a convenient
small size drill.
4. Drill the 4 holes in accordance with sizes in Table 1. Insert
anchors where applicable.
5. Remove cover screws.
6. Remove cover.
7. Fasten to wall with screws as listed in Table 1. Turn tight then
back off 1/2 turn, to allow for expansion and contraction.
8. Replace heater cover-fasten with screws and washers removed
in Step 5.
© 2010 Chromalox
®
, Inc.
Chromalox
Installation
and
®
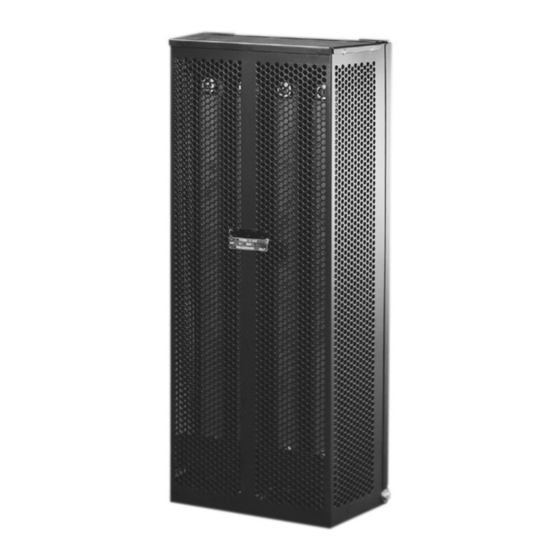
Type V Industrial Wall Mounted
Convection Space Heater
Specifications —
Model
kW
Volts Elem.
V-2020
2
240
V-2030
3
240
V-2030
3
480
V-2040
4.5
120
V-2040
4.5
240
V-2040
4.5
480
GENERAL
the heater is mounted so that the
mounting label located on the back
panel points up as shown in Figure
1 . The end covers will be at the top
and bottom of the heater with the
terminal access at the bottom end.
WARNING: Never recess
heater into wall.
Not Suitable for household or resi-
dential use.
Do not cover.
Keep combustible materials away
from heater.
MOUNTING
Table 1 — Suggested Heater Mounting Screws (Types and Sizes)
Type Mounting
Surface
Concrete, Block
Masonry
Wood Studs
Plaster Wall
Hollow or
Similar Type
*Metal Beam,
Channel, etc.
* If clearance permits, use lockwasher and nut; otherwise, drill and tap. To these lengths add thickness
of beam, washers, nut etc.
** If mounting structure permits, except plastered hollow walls, explosive type anchors can be used.
Suggest sizes noted in Table and/or sketches to be used to determine size of anchors.
SERVICE REFERENCE
4
DIVISION
SECTION
SALES
(Supersedes PF404-3)
REFERENCE
MAY, 1999
DATE
Dimensions (In.)
No.
Amps
Btuh
Height
4
8.3
6,824
27
4
12.5
10,236
27
4
6.3
10,236
27
6
25
10,236
27
6
18.8
15,354
27
6
9.4
15,354
27
Install
With This
End Up
**
Accessory
Screw
Drill Size
Hardware
Type
and Type
Rd. Hd.
Ackerman
1/2" Masonry
Mach. Steel
Rd. Hd Mach.
Steel or Pan
Lead Anchor
3/8" Masonry
Hd. Metal
(Self-Tapping)
Wood or
—
Metal
—
(Self-Tapping)
Toggle
—
#7
Bolt
Rd. Hd.
Nuts, Washers
Mach.
#7 Twist
Steel
V
PF404-4
161-048364-001
Width
Depth
12-3/4
5-3/4
12-3/4
5-3/4
12-3/4
5-3/4
17-3/4
5-3/4
17-3/4
5-3/4
17-3/4
5-3/4
6" Min.
Mounting
Floor
Figure 1 — Mounting
Screw Size to Fit Hole Size
In Heater Mounting Plates
Terminal End
Opposite End
1/4 x 20 x 3"
1/4 x 20 x 2"
#14 x 3"
#14 x 2"
#14 x 3"
#14 x 2"
1/4 x 4"
1/4 x 3"
1/4 x 20 x 1-11/16" 1/4 x 20 x 13/16"
Advertisement

Related Manuals for Chromalox V-2020


Summary of Contents for Chromalox V-2020
- Page 1 7. Fasten to wall with screws as listed in Table 1. Turn tight then back off 1/2 turn, to allow for expansion and contraction. 8. Replace heater cover-fasten with screws and washers removed in Step 5. © 2010 Chromalox ® , Inc. ®...
- Page 2 2. Following long periods of idleness, heater should be vacuumed before start-up to remove accumulated combustible particles which will incinerate causing smoking and consequent wall discoloration. Please refer to the Chromalox limited warranty applicable to this product at http://www.chromalox.com/customer-service/policies/termsofsale.aspx. MOUNTING Heater Mounting —...