
Related Manuals for Go-Video DDV9556


Summary of Contents for Go-Video DDV9556
- Page 1 DDV9556 USER’S GUIDE With ® • QSound 3D Audio Enhancement • Glow-in-the-Dark Remote Control...
- Page 2 DDV9556 User’s Guide Go-Video, Inc. A Division of Sensory Science Corp. 7835 East McClain Drive Scottsdale, Arizona USA 85260 www.govideo.com www.sensoryscience.com...
- Page 3 Para reducir el riesgo de descarga eléctrica, no remueva la cubierta o la parte posterior del VCR. Dentro del VCR no hay partes que requieren servicio. Diríjase solamente a personal calificado cuando requiera servicio.
-
Page 4: Table Of Contents
Menu Navigation - Remote Control ... 23 Tape, Video Sequencing, and Dual- Menu Navigation - Front Panel ... 24 Deck VCR are trademarks of Sensory Reset Factory Settings ... 25 Science Corporation. All other brand and product names are trademarks or On-Screen Display Overview ... - Page 5 4 - Tuner & Channel List 29 Tuner Band ... 29 Auto Channel Search ... 30 Add Channel ... 31 Remove Channel ... 32 Show Weak Channels ... 33 Tuner Audio ... 34 5 - Copy Features 37 Basic Copying ... 37 EZ Copy ...
- Page 6 9 - VCR Plus+ Recording 65 VCR Plus+ Channel Mapping ... 65 VCR Plus+ Channel Worksheet ... 66 How to Program a VCR Plus+ Recording ... 67 VCR Plus+ Recording Options ... 68 VCR Plus+ Timer Extend ... 70 10 - Editing Features 71 8-Scene Editor ...
- Page 7 Appendix A - Multi-Brand Remote Setup 93 Multi-Brand Remote Setup ... 93 Multi-Brand Remote Operation ... 94 Appendix B - Help 95 Frequently Asked Questions (FAQs) ... 95 Technical Specifications ... 100 Dual-Deck VCR Limited Warranty ... 101 Index 103 ’ DUAL DECK USER S GUIDE...
-
Page 8: Safety
VENTILATION - Slots and openings in the cabinet are provided for ventilation to ensure reliable operation of the video unit and to protect it from overheating. These openings must not be blocked or covered. Never place your VCR on a bed, sofa, rug or other similar surface, on or near a radiator or heat register. - Page 9 14. LIGHTNING - For added protection of this video unit during a lightning storm, or when it is left unattended and unused for long periods 15. POWER LINES - An outside antenna system should not be located in the vicinity of overhead power lines or other electric light or power 16.
-
Page 10: Basic Connections
First Things First Unpack your Dual-Deck VCR As you unpack, please check that the following items are included in your Dual-Deck VCR packing case: • Dual-Deck VCR • User’s Guide • Remote Control • 2 “AA” Batteries • 1 RF (Radio Frequency) Antenna Cable •... -
Page 11: Connect Antenna/Basic Cable
Chapter 12. Set VCR Output Channel Set the channel switch on the back panel of the VCR to 3 or 4, whichever is not an active channel in your area. Plug In VCR Connect the VCR power cord to a standard 120V/60Hz wall outlet. - Page 12 Turn On VCR Press the Power button on the remote control or on the VCR’s front panel. Turn On TV Press the power button on your TV. Tune TV to Channel 3 or 4 Be sure to select the same channel you used in Step 3.
- Page 13 ’ DUAL DECK USER S GUIDE...
-
Page 14: Initial Settings
VCR’s internal clock. Run Auto Setup As soon as you set the language, the VCR will automati- cally perform the following steps: • Auto Channel Search — Automatically detects whether you have an antenna or cable, then searches for all active channels. -
Page 15: Set Language Manually
5 : Setup Titler Message AUTO Language/Langue/Idioma •TV To Move MENU to Quit SHUTTLE TV/VCR Hold MENU Key For Setup English MENU PRINCIPAL 1 : Copie facile 2 : Contrôle d'enfant 3 : Enreg. programmable 4 : Montage de 8 scènes 5 : Titres à... -
Page 16: Set Clock Manually
SETUP MENU Set Clock Menu 2 : Copy/Record Settings 3 : Tuner And Channel List MENU 4 : Dual-Deck Features 5 : Reset Factory Settings 6 : VCR Plus Setup 7 : Advanced Features ____________________________________ = Move = Sel DECK1 DECK2... - Page 17 Y2K Compliant Set the Time This Dual-Deck VCR is fully compliant with the calendar Use the number keys or the up/down arrow year 2000. Note that the year keys to set each of the following items. To 2000 is a leap year.
-
Page 18: Set Daylight Savings Time
Set Clock Menu 2 : Copy/Record Settings 3 : Tuner And Channel List MENU 4 : Dual-Deck Features 5 : Reset Factory Settings 6 : VCR Plus Setup 7 : Advanced Features ____________________________________ = Move DECK1 DECK2 SET CLOCK MENU... -
Page 19: Set Time Zone
SETUP MENU Set Clock Menu 2 : Copy/Record Settings 3 : Tuner And Channel List 4 : Dual-Deck Features MENU 5 : Reset Factory Settings 6 : VCR Plus Setup 7 : Advanced Features ____________________________________ = Move = Sel DECK1 DECK2... -
Page 20: Set Auto Clock Set Channel
0-9 keys to set the desired channel. • Line 1/Line 2 — Allows the clock to be set from another AV (Audio/Video) device attached to your VCR’s front (Line 1) or rear (Line 2) inputs. Set Auto Clock Set Channel 2 : Copy/Record Settings... - Page 21 ’ DUAL DECK USER S GUIDE...
-
Page 22: The Dual-Deck System
TV/VCR — Switches between your TV’s tuner and your VCR’s tuner; e.g., press when you are taping a show with the VCR and you want to watch another station on your television. F.Adv/Skip — In Pause mode, advances the tape one frame for every press. - Page 23 SP. •Enter — Performs the same function as the Enter key on your Cable Box remote. VCR Plus+ — Opens the VCR Plus+ program- ming menu. Rew — When the tape is stopped, rewinds the tape. When the tape is playing, visually searches the tape in reverse (Review).
-
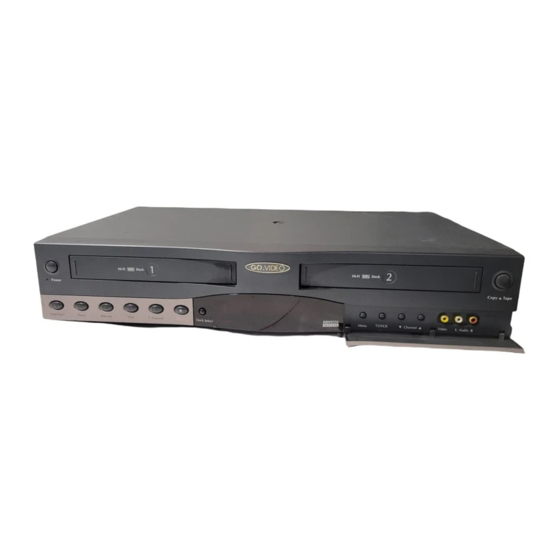
Page 24: Front Panel Overview
Power — Turns the Pause — Pauses the VCR on and off. tape playing or Note: Power will recording in the come on automati- active deck. cally when you insert a videotape. Hi-Fi Deck Power Stop / Eject Pause Rewind Play F. -
Page 25: Front Panel Line Inputs
RCA cable. Connect monaural (mono) audio sources here. Hi-Fi Deck TV/VCR Channel Menu Audio Right Input (Red) — Use to connect the right audio signal from an external device using an RCA cable. -
Page 26: Front Panel Display
Blinks if there is a Timer Recording error. VCR — Lights to show you that the Dual-Deck is in VCR mode; i.e. what you see on screen is coming from the VCR and NOT the televi- sion, as set by the TV/VCR button. -
Page 27: Front Panel Display Settings
SETUP MENU Set Clock Menu 2 : Copy/Record Settings 3 : Tuner And Channel List MENU 4 : Dual-Deck Features 5 : Reset Factory Settings 6 : VCR Plus Setup 7 : Advanced Features ____________________________________ = Move = Sel DECK1 DECK2... -
Page 28: Child Lock
“Off.” operate the VCR. With Child Lock set to “On”: • Auto Power On is disabled - The VCR • Auto Play is disabled - Tapes will not • Front panel buttons are disabled - You will not turn on automatically when a tape is inserted. -
Page 29: Remote Eject
• On — Allows you to eject tapes by pressing the Stop button on the remote control. • Off — To eject tapes, you must use the Stop/Eject button on the VCR’s front panel. SETUP MENU Set Clock Menu 2 : Copy/Record Settings... -
Page 30: Main Menu Tree
The On-Screen Menu System is the control center for your Dual-Deck VCR. It is divided into two sections: • Main Menu — Use for everyday func- tions, such as EZ Copy, Child Lock, and Timer Recording. • Setup Menu — Use for “set and forget”... -
Page 31: Setup Menu Tree
Setup Menu Tree The Setup Menu includes a variety of advanced options that allow you to customize your Dual-Deck VCR in virtually unlimited ways. Don’t forget to press and HOLD the Menu button for 3 seconds to access the Setup Menu. -
Page 32: Menu Navigation - Remote Control
DECK2 DECK1 Clear Press to cancel certain selections in the menu MENU system. DECK1 DECK2 MENU DECK1 DECK2 MENU DECK1 DECK2 POWER SLOW AUTO •TV SHUTTLE TV/VCR F.ADV/SKIP REPEAT 100+ •VOL •CH •MUTE •LCV 3 - THE DUAL DECK SYSTEM... -
Page 33: Menu Navigation - Front Panel
While in the menu system, press to go back to the previous menu. F.Forward Press to select and cycle through menu items. ’ DUAL DECK USER S GUIDE TV/VCR Channel Video L Audio R Menu TV/VCR Channel Video L Audio R... -
Page 34: Reset Factory Settings
Select “Reset Factory Settings” Press 5. Decide What to Reset Press “1” if you want to reset everything except the clock, your VCR Plus+ Channel List, and any saved Timer Recordings. Press “2” if you want to clear all settings. Restore Settings Press the Clear button to confirm your decision and restore factory settings. -
Page 35: On-Screen Display Overview
On-Screen Display Overview View On-Screen Display The On-Screen Display (OSD) shows you the status of the Press Display. Dual-Deck VCR at any given moment, including information from the Tuner, Decks, and Line inputs. It also displays the Date & Time, and communi-... -
Page 36: On-Screen Display Elements
TV View — Shows the source you are currently watching (Tuner, Line 1, Line 2, Deck 1, Deck 2). In Tuner View, shows the Channel Number. Deck Counter Position— Shows the current tape position or time remaining as set by the Clk/Ctr button. -
Page 37: On-Screen Display (Osd) Settings
SETUP MENU Set Clock Menu 2 : Copy/Record Settings 3 : Tuner And Channel List MENU 4 : Dual-Deck Features 5 : Reset Factory Settings 6 : VCR Plus Setup 7 : Advanced Features ____________________________________ = Move = Sel DECK1 DECK2... -
Page 38: Tuner & Channel List
Set Clock Menu 2 : Copy/Record Settings 3 : Tuner And Channel List MENU 4 : Dual-Deck Features 5 : Reset Factory Settings 6 : VCR Plus Setup 7 : Advanced Features ____________________________________ = Move DECK1 DECK2 TUNER AND CHANNEL LIST... -
Page 39: Auto Channel Search
SETUP MENU Set Clock Menu 2 : Copy/Record Settings 3 : Tuner And Channel List MENU 4 : Dual-Deck Features 5 : Reset Factory Settings 6 : VCR Plus Setup 7 : Advanced Features ____________________________________ = Move = Sel DECK1 DECK2... -
Page 40: Add Channel
SETUP MENU Set Clock Menu 2 : Copy/Record Settings 3 : Tuner And Channel List MENU 4 : Dual-Deck Features 5 : Reset Factory Settings 6 : VCR Plus Setup 7 : Advanced Features ____________________________________ = Move = Sel MENU=Quit DECK1... -
Page 41: Remove Channel
SETUP MENU Set Clock Menu 2 : Copy/Record Settings 3 : Tuner And Channel List MENU 4 : Dual-Deck Features 5 : Reset Factory Settings 6 : VCR Plus Setup 7 : Advanced Features ____________________________________ DECK2 = Move = Sel MENU=Quit... -
Page 42: Show Weak Channels
SETUP MENU Set Clock Menu 2 : Copy/Record Settings 3 : Tuner And Channel List 4 : Dual-Deck Features MENU 5 : Reset Factory Settings 6 : VCR Plus Setup 7 : Advanced Features ____________________________________ = Move = Sel MENU=Quit DECK1... -
Page 43: Tuner Audio
When a show is not broadcast in stereo, the sound reverts to Mono. Combines the left and right audio signals into one channel. Use when connecting the VCR to a Mono output device, such as a monitor. SETUP MENU Set Clock Menu... - Page 44 • SAP — Second Audio Program. Optional audio signal, often used to transmit a second language, news, or weather broadcasts. SAP will appear on the front panel display if it is available for the program you are watching. • TV+SAP — Delivers Mono from the left channel and Second Audio Program (SAP) from the right channel.
- Page 45 ’ DUAL DECK USER S GUIDE...
-
Page 46: Copy Features
Copy Your Tape Press the Copy Tape button on either the remote control or the front of the VCR. The tape in Deck 1 will begin copying to Deck 2. • To pause copying, press Copy Tape. • To resume copying, press Copy Tape again. -
Page 47: Ez Copy
Complete Program Record, or CPR, helps to ensure you won’t run out of tape before your copy is complete. When EZ Copy is selected, the VCR begins copying at the same speed as the source tape; it then calculates how much time is remaining on the target tape and adjusts the copy speed to SLP if necessary to copy the entire tape. -
Page 48: Copy Mode
SETUP MENU Set Clock Menu 2 : Copy/Record Settings 3 : Tuner And Channel List MENU 4 : Dual-Deck Features 5 : Reset Factory Settings 6 : VCR Plus Setup 7 : Advanced Features ____________________________________ = Move = Sel MENU=Quit DECK1... -
Page 49: Speed Matching
SETUP MENU Set Clock Menu 2 : Copy/Record Settings 3 : Tuner And Channel List MENU 4 : Dual-Deck Features 5 : Reset Factory Settings 6 : VCR Plus Setup 7 : Advanced Features ____________________________________ = Move = Sel MENU=Quit DECK1... -
Page 50: Copy Audio Insert
SETUP MENU Set Clock Menu 2 : Copy/Record Settings 3 : Tuner And Channel List 4 : Dual-Deck Features MENU 5 : Reset Factory Settings 6 : VCR Plus Setup 7 : Advanced Features ____________________________________ = Move = Sel DECK1 DECK2... - Page 51 Notes: • If there is no audio source playing, the audio track will be blank. • Copy Audio Insert automatically reverts to “Off” when the VCR is turned off. ’ DUAL DECK USER S GUIDE...
-
Page 52: Playback Features
Basic Playback To play a videotape, simply Insert Tape insert it in either deck and press the Play button. Tapes Insert a standard VHS tape into Deck 1 or without Record Safety Tabs can Deck 2. be set to play automatically when inserted;... -
Page 53: Special Playback Features
• Picture Search — Press and release Rewind to review the tape at 5 times DECK1 DECK2 normal speed. • Jet Search — Press and hold Rewind SHUTTLE TV/VCR to review the tape at 7 times normal F.ADV/SKIP REPEAT speed. 100+ •VOL •CH... -
Page 54: Tracking
The Auto Tracking button (Auto) will automatically align the recorded tracks with the playback heads to solve this Resume Auto Tracking problem. You may also set tracking manually. Press Auto to have the VCR adjust tracking automatically. Tracking POWER SLOW AUTO •TV... -
Page 55: Sequential/Loop Playback
Sequential/Loop Playback You can insert two tapes in Open “Setup Menu” your Dual-Deck VCR and have them play sequentially or in a Press and hold the menu button on the continuous loop. For example, remote control for 3 seconds. you may rent a movie that... -
Page 56: Auto Play/Rewind
SETUP MENU Set Clock Menu 2 : Copy/Record Settings 3 : Tuner And Channel List MENU 4 : Dual-Deck Features 5 : Reset Factory Settings 6 : VCR Plus Setup 7 : Advanced Features ____________________________________ = Move = Sel MENU=Quit DECK1... -
Page 57: Playback Audio Settings
SETUP MENU Set Clock Menu 2 : Copy/Record Settings 3 : Tuner And Channel List MENU 4 : Dual-Deck Features 5 : Reset Factory Settings 6 : VCR Plus Setup 7 : Advanced Features ____________________________________ = Move = Sel DECK2 DECK1... -
Page 58: Qsound
SETUP MENU Set Clock Menu 2 : Copy/Record Settings 3 : Tuner And Channel List MENU 4 : Dual-Deck Features 5 : Reset Factory Settings 6 : VCR Plus Setup 7 : Advanced Features ____________________________________ = Move = Sel DECK1 DECK2... - Page 59 ’ DUAL DECK USER S GUIDE...
-
Page 60: Recording Features
(whichever the switch is set to on the back of the VCR). • Make sure the TV/VCR button on the front panel is set to VCR (the VCR icon will appear on the front panel display). • Be sure the tape is long enough to record the entire program. -
Page 61: Recording Options
Record. To Watch a Different Channel... Press the TV/VCR Button on the remote or front panel to switch to TV mode (the VCR icon will disappear from the front panel display), then select a different channel using your TV’s tuner. -
Page 62: One-Touch Recording (Otr)
While in Record mode, press Record again to activate One-Touch Recording. OTR 0:30 will appear on the On-Screen Display and the VCR will record for exactly 30 minutes. Add Recording Time Continue pressing Record to add recording time in 30 minute increments up to 9 hours and 30 minutes. -
Page 63: Record Speed
Record Speed You can adjust the Record Start Recording Speed to fit more than 2 hours of programming on a T-120 Follow the basic Recording instructions on tape. page 51. Set Record Speed Press the SP/SLP button on the remote control to switch the record speed between: •... -
Page 64: Record Source
You can set the Dual-Deck Open “Setup Menu” VCR to record from the Tuner (television), Deck 1, Deck 2, Press and hold the Menu button for 3 seconds. Line 1 (front) or Line 2 (rear) inputs. The Auto setting will record whatever is currently visible on-screen. -
Page 65: Sequential/Loop Recording
Sequential/Loop Recording You can insert two tapes in Open “Setup Menu” your Dual-Deck VCR and have them record sequentially or in Press and hold the Menu button for 3 seconds. a continuous loop. This will allow you to record up to 18 hours of programming in SLP mode. -
Page 66: Date/Time Stamp
SETUP MENU Set Clock Menu 2 : Copy/Record Settings 3 : Tuner And Channel List MENU 4 : Dual-Deck Features 5 : Reset Factory Settings 6 : VCR Plus Setup 7 : Advanced Features ____________________________________ = Move = Sel MENU=Quit DECK1... - Page 67 ’ DUAL DECK USER S GUIDE...
-
Page 68: Timer Recording
- - - / - - - H - - M Ch-- Deck - - - SHUTTLE TV/VCR 3 : - - : - - - - - - - - - - / - - - H - - M... - Page 69 SET LENGTH (H) [0-9] : 00 Jan 2000 12:25 PM 1H00M POWER SLOW AUTO •TV 1 - Time Ch10 Deck1 SHUTTLE TV/VCR REPEAT F.ADV/SKIP 100+ •CH •VOL •LCV •MUTE POWER SET TYPE [1-4] : 1 Jan 2000 12:25 PM 1H00M...
- Page 70 SET SOURCE [1-4] : 01 Jan 2000 12:25 PM 1H00M POWER SLOW AUTO •TV 1 - Time Ch10 Deck1 SHUTTLE TV/VCR SET DECK [1-2] : 1 Jan 2000 12:25 PM 1H00M POWER SLOW AUTO •TV 1 - Time Ch10 Deck1...
- Page 71 SLP if necessary to fit the entire event. If there is not enough tape to record the entire event, the VCR will Confirm Settings record in SLP until the end of the tape is reached.
-
Page 72: Insert Tape
Timer icon will flash on the front panel display and a Timer Record Error will appear on the TV screen; see page 64. power is on or off; i.e., if the VCR power is off, it will turn on automatically when the Timer Recording begins. -
Page 73: Timer Recording Errors
• Press Stop to stop the recording deck. Overlapping Events Two or more events are programmed to occur at the same time: • When you program a new event, the VCR checks • If events overlap, the first event will be completely ’ DUAL... -
Page 74: Vcr Plus+ Recording
Press the right arrow key. Map Your Channels Using the worksheet on the following page, determine the local equivalents of the VCR Plus+ channels for your viewing area. You can find this information in your local television listings or by contacting your local cable company. -
Page 75: Vcr Plus+ Channel Worksheet
VCR Plus+ Channel Worksheet Listed at right are many of the standard VCR Plus+ channel numbers used in the US and Canada. The first group consists of Cable TV stations and the second group consists of Broadcast TV stations. Spaces have been provided... -
Page 76: How To Program A Vcr Plus+ Recording
Open VCR Plus+ Menu channels, you are ready to program VCR Plus+ recordings. Press the VCR Plus+ button on the remote Open up your local TV listings control. If you haven’t set the clock, the Set and jot down the VCR PlusCode Clock menu will appear. -
Page 77: Vcr Plus+ Recording Options
VCR will then calculate how much time is remaining on the tape and adjusts the record speed to SLP if neces- sary to fit the entire event. If there is not enough tape to record the entire event, the VCR will record in SLP until the end of the tape is reached. - Page 78 • Deck 2 — Show will be recorded on tape in Deck 2. View Event Summary When you are satisfied with your VCR Plus+ recording options, press the Menu button to view a summary of the event and all other programmed events.
-
Page 79: Vcr Plus+ Timer Extend
VCR Plus+ Timer Extend If you set your VCR’s clock Open “Setup Menu” manually, it may be fast or slow by a few minutes. To Press and hold the menu button on the ensure that VCR Plus+ records remote control for 3 seconds. -
Page 80: Editing Features
8-Scene Editor There are two ways to edit Insert Source Tape movies with the Dual-Deck VCR: Put the tape with your unedited source 1. You can use the 8-Scene material in Deck 1. Editor to automatically as- semble up to 8 scenes by... - Page 81 SCENE For Begin And End AUTO CLEAR To Correct •TV COPY TAPE To Make A Tape MENU To Quit SHUTTLE TV/VCR Scene 1 - - - - - - POWER Begin 0 : 00 : 00 - : - - : - -...
- Page 82 Copy Tape to begin assembling the tape. Notes: • The Dual-Deck VCR will automatically copy each scene in order from the source tape to the target tape. • When the process is finished, return to Step 6 to add more scenes, or press Menu to quit.
-
Page 83: Sync Editing
Sync Editing Sync (as in “synchronized”) Before You Begin — Editing is useful if you only want to copy part of a tape, or • Turn off Auto Play; see page 47. if you want to cut commercials • Turn off EZ Copy; see page 38. while copying a TV show. - Page 84 Stop Sync Edit To stop the Sync Edit process, press Stop on both decks. MENU DECK1 DECK2 POWER SLOW AUTO •TV SHUTTLE TV/VCR POWER SLOW AUTO •TV SHUTTLE TV/VCR MENU DECK1 DECK2 10 - EDITING FEATURES...
-
Page 85: How To Cut Commercials With Skip Edit
Deck 1 to Deck 2. Cut the Commercials When the commercials start, press F.Adv/ Skip once for every minute of commercials to be deleted. The Dual-Deck VCR will automatically skip edit (omit) the commer- cials on the target tape, then resume copying. -
Page 86: On-Screen Titler
4 : 8-Scene Edit List 5 : Setup Titler Message 6 : Language/Langue/Idioma To Move MENU to Quit Hold MENU Key For Setup DECK1 DECK2 POWER SLOW AUTO •TV SHUTTLE TV/VCR MENU DECK1 DECK2 MENU DECK1 DECK2 10 - EDITING FEATURES To Select... -
Page 87: Recording Titler Message
Recording Titler Message Once you have set up your Start Recording Titler Message, you can record it by pressing the Scene/Title Insert your target tape in Deck 2 and button while a tape is record- initiate any Record mode, i.e., Record, ing in Deck 2. -
Page 88: Search/Index Features
Overview The Dual-Deck VCR Search/ Clk/Ctr Button Index features allow you to scan and search for Index Press the Clk/Ctr button repeatedly to cycle Marks, quickly find blank the front panel display through the follow- space on a tape, search for... -
Page 89: Placing Index Marks
Placing Index Marks Index Marks are like bookmarks Automatic Index Marks on your videotapes. They are inserted automatically at the Index Marks are placed automatically start of every recording, or you whenever you start recording. This includes can place them manually Recording, OTR (One Touch Recording), anywhere on a tape. -
Page 90: Index Scan
When Index Scan locates an Index Mark, it will play the tape for 5 seconds. If it is the scene you want to watch, press Play. If it is not, the VCR will automatically search for the next Index Mark. Index Scan... -
Page 91: Index Search
Enter a number from 1 to 99; e.g. for “5” press “0-5”. Search for Index Marks Press Fast-Forward or Rewind to begin searching forward or backward for the specified Index Mark. When the VCR locates the Index Mark, it will play the tape. ’ DUAL DECK USER... -
Page 92: Blank Search
From Stop or Play mode, press the Search/ your videotape. Index button. Select “Blank Search” Press 2. The Dual-Deck VCR will automati- cally search for the next available blank space on your tape and stop. If no blank space is found, the tape will eject. -
Page 93: Direct Time Search
•TV Search To : - - : - - : - - Enter Counter Value SHUTTLE TV/VCR Enter [ 1 ] = Pos Or [ 2 ] = Neg Press CLEAR To Correct MENU to Quit DECK ONE TIME SEARCH... -
Page 94: Return To 0:00:00
2 : Blank Search 3 : Direct Time Search 4 : Return to 0:00:00 ____________________________________ = Move = Sel MENU = Quit POWER D E C K O N E SLOW AUTO •TV SHUTTLE TV/VCR 11 - SEARCH INDEX FEATURES Hi-Fi... - Page 95 ’ DUAL DECK USER S GUIDE...
-
Page 96: Advanced Connections
ANT.)” jack on the back panel of the VCR. Connect VCR to TV Connect the supplied RF cable from the “OUT (TO TV)” jack on the back panel of the VCR to your television’s “Antenna In” jack. Plug In VCR Connect the VCR power cord to a standard 120V/60Hz wall outlet. - Page 97 Set VCR Output Channel Set the channel switch on the back panel of the VCR to 3 or 4, whichever is NOT used by your cable box. Tune TV to the Same Channel Select the channel you used in step 6.
-
Page 98: Audio Connections
Connect RCA cables from the Left & Right Dual-Deck VCR to your home Audio Outputs on the back of the VCR to stereo system or stereo TV. the Auxiliary Inputs on your stereo receiver. If you are using a stereo television, connect the Video Output as well. -
Page 99: Tv Monitor Connections
Connect RCA cables from the Audio and because they receive the Video Outputs on the back of the VCR to audio and video signals the Audio and Video Inputs on your TV directly from the VCR monitor. -
Page 100: Connecting Other Video Equipment
You can connect a wide Connect Device to VCR variety of audio/video equip- ment to your Dual-Deck VCR, Connect RCA cables from the Audio and including: Video Outputs of your external device to the • A Third VCR Audio and Video Inputs on the front or back •... -
Page 101: Line Input Labeling
Line 2, respectively. You can label these inputs to match the specific devices you have connected to your Dual-Deck VCR. For example, if you have a DVD Player connected to Select “Advanced Features” your rear line inputs, you can Press 7. -
Page 102: Appendix A - Multi-Brand Remote Setup
Press TV to set the remote control to operate your TV. Note: When the remote control is in TV mode, it will NOT operate your VCR. To return to VCR mode, press VCR on the remote control. Appendix A TV CODES... -
Page 103: Multi-Brand Remote Operation
Multi-Brand Remote Operation This table shows which remote control buttons are available for Daewoo various brands of television. Emerson Goldstar POWER Hitachi SLOW AUTO •TV Magnavox SHUTTLE TV/VCR Mitsubishi F.ADV/SKIP REPEAT Panasonic 100+ •CH •VOL •MUTE •LCV RCA/GE Samsung Sanyo Sharp... -
Page 104: Appendix B - Help
Why is the picture quality poor? follows: • Change the channel switch on the back of the VCR, i.e. if it’s set to 3 change it to 4. Then make sure your TV is set to the same channel. • Phone: (480) 922-0896 •... - Page 105 Why isn’t my remote control working? • Make sure you are pointing the remote control directly at the VCR and that there are no obstacles between • Make sure the batteries in your remote are fresh and installed properly. • The “TV” button may have been pressed by accident. This makes the remote control only operate the Why do my tapes record at different speeds when I use Copy Tape? Because Speed Matching is “Off”...
- Page 106 Why does my on-screen display show “Error”? This indicates a problem with the VCR tape mechanism. Turn the power off and on again to reset. If this does not clear the error, unplug the VCR from the power outlet and inspect both tape slots for foreign objects, or for jammed or crooked tapes.
- Page 107 • If the Date/Time Stamp is set to “Cont” (Continuous) and a recording is in progress, the on-screen menus and Why do I get a blue screen? • If a channel is too weak to deliver a clear picture, the VCR will display a blue screen in its place. To see • Double-check your antenna connections or tuner settings.
- Page 108 Why do I lose stereo sound when I turn on my VCR? If your TV and VCR are connected with an RF coaxial cable, you will only hear stereo sound if the VCR is turned off. To hear stereo sound with the VCR turned on, you must connect the TV and VCR with RCA line cables;...
-
Page 109: Technical Specifications
Technical Specifications VIDEO SYSTEM TELEVISION SYSTEM AUDIO TRACK TAPE WIDTH TAPE SPEED PLAY/RECORD TIME FF/REW TIME HEADS VIDEO AUDIO WOW & FLUTTER RF MODULATION FREQUENCY RESPONSE POWER REQUIREMENT CLOCK BACKUP TIME ENVIRONMENT DIMENSIONS WEIGHT ’ DUAL DECK USER S GUIDE 1/2-inch VHS system, 4 rotary head helical scanning;... -
Page 110: Dual-Deck Vcr Limited Warranty
Who Provides the Limited Warranty During the warranty period, the Go-Video Warranty Administrator will honor Dual-Deck VCR service for 90 days labor, 1 year parts from the original date of consumer purchase. See below for Commercial, Industrial or Educational use coverage. - Page 111 Other Warranty Coverage Commercial, Industrial or Educational use has the same warranty coverage as stated in this warranty. What are the Exceptions This warranty does not cover: (1) Normal maintenance service, such as video head cleaning. (2) Damage from misuse, abuse neglect or accident, natural disasters or Acts of God.
-
Page 112: Index
Complete Program Record 61, 62, 68, 69 Remote Button 14 Computer Monitor 90 Tape Status 17 Connect Deck Play/Record Speed 27 Antenna to VCR 2 Deck Select Button 15 Audio Source 42 Deck Status 27 VCR to Monitor 90 Digital Satellite System (DSS) 92... - Page 113 Error Messages 27 Event Length, Set 60 Event Number, Choose 59 Event Type, Set 60 EZ Copy 21, 38, 74 F.Adv/Skip Button Basic 13 Frame Advance 44 Skip 44 Skip Edit 76 F.Forward 14, 15, 24, 44, 81, 82 Factory Settings 25 FAQs 95 FM Radio 35 FM Stereo 61...
- Page 114 Panel Display, Set 18 Pause 15 Picture Search 44 Play Button During Index Scan 81 Front Panel 15 Menu Navigation 24 Play Mode 44 Playback Audio 48, 89 Basic 43 Front Panel Display 17 Special Features 44 Speed 40 While Recording 52 Power Button During OTR 53 Front Panel 15...
- Page 115 TV Mode 52 TV Monitor Connections 90 TV View Button 14, 26, 27, 91 TV+SAP 34, 35 TV/VCR Button 13, 15, 17, 51, 52, 90 Up/Down Arrows 23, 61 User’s Guide 1 VCR 2, 3, 17, 19 VCR Mode 17, 93...
- Page 116 7835 East McClain Drive Scottsdale, Arizona USA 85260 www.sensoryscience.com www.govideo.com Printed in Korea...