Table of Contents
Advertisement
Quick Links
Advertisement
Table of Contents

Related Manuals for Gestetner 5309L


Summary of Contents for Gestetner 5309L
-
Page 1: Operating Instructions
Operation Optional Functions User Tools Replenishing Supplies Troubleshooting Remarks Specifications For safety, please read this manual carefully before you use this product and keep it handy for future reference. Operating Instructions DRAFT 2002/08/02... - Page 2 Notes: The model names of the machines do not appear in the following pages. Check the type of your ma- chine before reading this manual. • LG drum: 5309L, 3160DNP • A4 drum: Not Available • B4 drum: Not Available Certain types might not be available in some countries.
- Page 3 Note to users in the United States of America Notice: This equipment has been tested and found to comply with the limits for a Class B digital device, pursu- ant to Part 15 of the FCC Rules. These limits are designed to provide reasonable protection against harmful interference in a residential installation.
-
Page 4: Table Of Contents
TABLE OF CONTENTS Safety Information ... 1 Safety During Operation... 1 How to Read this Manual ... 3 What You Can Do with this Machine...4 Machine Exterior ...7 Machine Interior ...8 Options ... 9 Control Panel... 10 Keys ...10 Indicators...12 1. - Page 5 Class Mode—Group Printing from the Same Original ...41 Memory Mode—Group Printing from Different Originals ...43 Combine—Combining 2 Originals onto One Print... 46 Skip Feed Printing ... 49 Program—Storing Your Print Settings in Memory ...50 Storing Your Settings ...50 Recalling a Program... 51 Protecting a Program ...52 Removing Program Protection ...
- Page 6 x Clearing Misfeeds ... 94 “x” + “ORIGINAL JAM. REMOVE ORIGINAL” ...94 “x” + “PAPER FEED JAM. REMOVE JAMMED PAPER” ... 97 “x” + “MASTER FEED JAM. REMOVE JAMMED MASTER”...100 “x” + “PAPER WRAP JAM. REMOVE JAMMED PAPER” ...102 “x” + “MASTER EJECT JAM. REMOVE JAMMED MASTER” ...104 “x”...
- Page 7 DRAFT 2002/08/02...
-
Page 8: Safety Information
Safety Information When using this machine, the following safety precautions should always be fol- lowed. Safety During Operation In this manual, the following important symbols are used: R WARNING: Indicates a potentially hazardous situation which, if instructions are not followed, could result in death or serious injury. R CAUTION: Indicates a potentially hazardous situation which, if instructions are not followed, may result in minor or moderate injury or damage to property. - Page 9 R CAUTION: • Protect the machine from dampness or wet weather, such as rain, snow. • Unplug the power cord from the wall outlet before you move the machine. While moving the machine, you should take care that the power cord will not be damaged under the machine.
-
Page 10: How To Read This Manual
How to Read this Manual Symbols In this manual, the following symbols are used: R WARNING: This symbol indicates a potentially hazardous situation that might result in death or serious injury when you misuse the machine without following the in- structions under this symbol. -
Page 11: What You Can Do With This Machine
What You Can Do with this Machine Below is a quick summary of this machine's features and where to look in this manual for more information ❖ ❖ ❖ ❖ Standard Printing See ⇒ p.17 “Standard Printing”. ❖ ❖ ❖ ❖ Adjusting the Print Image Position See ⇒... - Page 12 ❖ ❖ ❖ ❖ Erasing Center and Edge Margins See ⇒ p.30 “Center/Edge Erase—Erasing center and Edge Margins”. ❖ ❖ ❖ ❖ Erasing Edge Margins See ⇒ p.32 “Edge Erase—Erasing Edge Margins”. ❖ ❖ ❖ ❖ Erasing the Shadow of Pasted Originals See ⇒...
- Page 13 ❖ ❖ ❖ ❖ Group Printing from Different Originals See ⇒ p.43 “Memory Mode—Group Printing from Different Originals”. ❖ ❖ ❖ ❖ Combining Originals onto One Print See ⇒ p.46 “Combine—Combining 2 Originals onto One Print”. ❖ ❖ ❖ ❖ Skip Feed Printing See ⇒...
-
Page 14: Machine Exterior
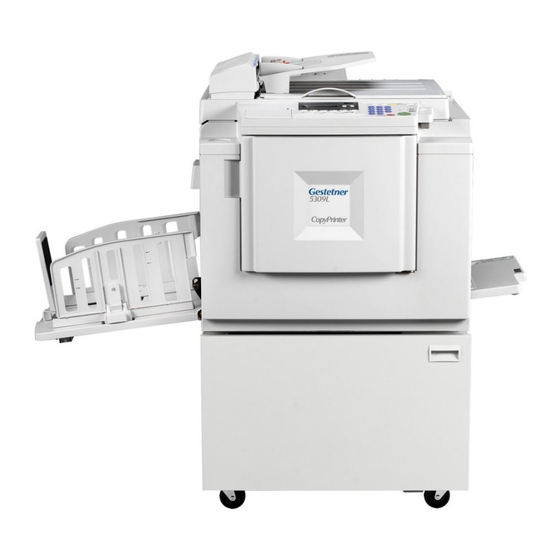
Machine Exterior Front door Open for access to the inside of the ma- chine. Control panel Operator controls and indicators are lo- cated here. See ⇒ p.10 “Control Panel”. Exposure glass cover Lower this cover over an original before printing. Original tray release lever Use to open the original tray unit when installing the master. -
Page 15: Machine Interior
Machine Interior Document feeder (Option) Original inserted into the document feed- er are individually and automatically fed onto and removed from the exposure glass. See ⇒ p.55 “Printing Using the Op- tional Document Feeder”. Paper delivery side plates Use to align the prints on the paper deliv- ery tray. -
Page 16: Options
Options ❖ ❖ ❖ ❖ Document feeder Note ❒ Other options: • Color Drum: LG drum • Color Drum: A4 drum • Color Drum: B4 drum • Tape Dispenser • Key Counter DRAFT 2002/08/02... -
Page 17: Control Panel
Control Panel Keys { { { { Security} } } } key Press to make prints of secret documents. See ⇒ p.54 “Security Mode—Printing Se- cret Documents”. { { { { Paste Shadow Erase} } } } key Press to erase the shadow of pasted orig- inals. - Page 18 { { { { Type of Original} } } } key Press to select Letter, Photo, or Let- ter/Photo mode. See ⇒ p.37 “Selecting Original Type”. { { { { Fine} } } } key Press to select the fine image. See ⇒ p.25 “Fine Mode—Making Clear Prints”.
-
Page 19: Indicators
Indicators Error indicators Show errors and machine status. u: Key Counter indicator See ⇒ p.110 “When Other Indicators Light”. j: Add Ink indicator See ⇒ p.85 “When the Add Ink Indicator (j) Lights”. C: Master End indicator See ⇒ p.87 “Master Roll Replacement”. B: Load Paper indicator See ⇒... -
Page 20: Operation
1. Operation Printing Paper The following types of print paper are not recommended for this machine. • Paper smaller than 90 mm × 148 mm, 3.6" × 5.9" • Paper larger than 268 mm × 388 mm, 10.5" ×15.2" • Paper heavier than 209.3 g/m , 55.6 lb •... -
Page 21: Originals
Operation Originals Note ❒ Originals that can be set on the exposure glass are as follows: • Maximum size: 257 × 364 mm, 10.2" × 14.4" • Maximum total thickness: 30 mm, 1.1" • Maximum total weight: 5 kg, 11.0 lb ❒... -
Page 22: Preparation For Printing
Preparation for Printing Loading Paper A A A A Carefully open the paper feed tray. B B B B Shift the paper feed side plates lock lever forward. Adjust the side plates to match the paper size. 1: Paper Feed Side Plates Lock Le- C C C C Load paper into the paper feed tray. -
Page 23: Setting Up The Paper Delivery Tray
Operation D D D D Make sure that the paper feed side plates touch the paper light- ly. Shift the lock lever to its origi- nal position. Setting Up the Paper Delivery Tray A A A A Open the paper delivery tray. Reference When the prints are not deliv- ered in a neat stack, see ⇒... -
Page 24: Standard Printing
A standard copier scans in the origi- nal for each copy set made. This ma- chine, however, scans in your original once and makes multiple prints from this master. - Page 25 Operation E E E E Press the { { { { Proof} } } } key and check the image density and the image position of the proof print. Note ❒ If the image position is not cor- rect, adjust it using the { { { { Image Position} } } } keys or the fine adjust- ment dial.
-
Page 26: Restoring Paper Feed And Paper Delivery Trays
Restoring Paper Feed and Paper Delivery Trays A A A A Remove the paper from the paper feed tray. The paper feed tray will move down. B B B B Turn off the main switch. C C C C Close the paper feed tray. Restoring Paper Feed and Paper Delivery Trays D D D D Move the end plate until the plate... -
Page 27: Energy Saver Mode - Saving Energy
Operation Energy Saver Mode — Saving Energy If you do not operate the machine for a certain period after printing, or when you press and hold the { { { { Clear Modes/Energy Saver} } } } key for three seconds, the panel display turns off and the machine enters Energy Saver mode. -
Page 28: Adjusting The Print Image Position
Adjusting the Print Image Position After master making, you can adjust the print image position to suit your needs. There are two ways: ❖ ❖ ❖ ❖ Shifting the Image Position Forward or Backward Shift the image position using the { { { { Image Position} } } } keys. - Page 29 Operation A A A A Turn the side tray fine adjusting dial as shown in the illustrations. ❖ ❖ ❖ ❖ Shifting the image to the right ❖ ❖ ❖ ❖ Shifting the image to the left Note ❒ The image position can be shift- ed up to about 10 mm, 0.4"...
-
Page 30: Adjusting The Print Image Density
Adjusting the Print Image Density You can adjust the print image densi- ty to suit your needs. There are two ways: ❖ ❖ ❖ ❖ Before Making a Master Adjust the image density using the { { { { Image Density} } } } key. ❖... -
Page 31: Tint Mode-Halftone Printing
Operation Tint Mode—Halftone Printing Use the { { { { Tint/Economy} } } } key to make halftone prints. A A A A Press the { { { { Tint/Economy} } } } key to se- lect Tint mode (Upper indicator). B B B B Set your originals on the exposure glass or in the optional document... -
Page 32: Fine Mode-Making Clear Prints
Fine Mode—Making Clear Prints Use the { { { { Fine} } } } key to make clear prints. A A A A Press the { { { { Fine} } } } key to select Fine mode. B B B B Set your originals on the exposure glass or in the optional document feeder. -
Page 33: Changing The Printing Speed
Operation Changing the Printing Speed Use the { { { { W W W W } } } } or { { { { V V V V } } } } key to adjust the speed of the machine with the image density and printing paper. -
Page 34: Stopping The Machine During The Multi-Print Run
Stopping the Machine during the Multi- print Run When You Want to Stop the Machine during the Multi-print Run and Print the Next Original A A A A Press the { { { { Clear/Stop} } } } key. B B B B Set the new original. -
Page 35: Preset Reduce/Enlarge-Reducing And Enlarging Using Preset Ratios
Operation Preset Reduce/Enlarge—Reducing and Enlarging Using Preset Ratios You can select a preset ratio for print- ing. Note ❒ The center and the leading edge of the print image do not shift when a print image is made with this func- tion. - Page 36 ❖ ❖ ❖ ❖ Enlargement (Inch version) Enlarge- Original Print Size ment Ratio Size " × 8 155% " 8 " × 8 129% " 8 121% — A A A A Select the desired reduction or en- largement ratio using the { { { { Re- duce} } } } key or the { { { { Enlarge} } } } key.
-
Page 37: Center/Edge Erase-Erasing Center And Edge Margins
Operation Center/Edge Erase—Erasing center and Edge Margins When printing from thick books, or similar originals, the binding margin at the center and the edges might ap- pear on prints. To prevent this, follow the steps below. Note ❒ As a default setting, the paper sizes and directions that can be used are as follows: Metric... - Page 38 C C C C When you reach the desired paper size and direction, press the { { { { q key. D D D D Set the book on the exposure glass. E E E E Press the { { { { Master Making} } } } key. F F F F Check the image position of the trial or proof print.
-
Page 39: Edge Erase-Erasing Edge Margins
Operation Edge Erase—Erasing Edge Margins If you want to erase edge margins of a book original, follow the steps below. Note ❒ As a default setting, the paper sizes and directions that can be used are as follows: Metric B4L, A4L, A5K, A5L, version B5K, B5L "... - Page 40 E E E E Press the { { { { Master Making} } } } key. F F F F Check the image position of the trial or proof print. Note ❒ If the image position is not cor- rect, adjust it using the { { { { Image Position} } } } keys (see ⇒...
-
Page 41: Paste Shadow Erase-Erasing The Shadow Of Pasted Originals
Operation Paste Shadow Erase—Erasing the Shadow of Pasted Originals If you want to erase the shadow of pasted originals, follow the steps be- low. A A A A Set the original on the exposure glass. B B B B Press the { { { { Paste Shadow Erase} } } } key. C C C C Press the { { { { Master Making} } } } key. -
Page 42: Printing On Thick Or Thin Paper
Printing on Thick or Thin Paper When you make prints on thick (127.9 to 209.3 g/m , 34.0 to 55.6 lb), stan- dard (52.3 to 127.9 g/m , 13.9 to 34.0 lb) or thin (47.1 to 52.3 g/m 13.9 lb) paper, perform the following steps. - Page 43 Operation When printing onto thin paper A Set the side pads to both sides of the paper feed side plates. Make sure that the paper feed side plates touch the paper lightly. D D D D Shift the lock lever to its original position.
-
Page 44: Selecting Original Type
Selecting Original Type Select one of the following three types to match your originals: ❖ ❖ ❖ ❖ Photo mode Delicate tones of photographs and pictures can be reproduced with this mode. ❖ ❖ ❖ ❖ Letter mode Select this mode when your origi- nals contain only letters (no pic- tures). -
Page 45: Economy Mode-Saving Ink
Operation Economy Mode—Saving Ink When you want to save ink, select Economy mode. Note ❒ Prints will come out lighter. A A A A Press the { { { { Tint/Economy} } } } key to light the lower indicator. B B B B Set your originals on the exposure glass or in the optional document... -
Page 46: Auto Cycle-Printing From Several Originals At Once
Auto Cycle—Printing from Several Originals at Once Use the { { { { Auto Cycle} } } } key to process masters and make prints at one stroke. Note ❒ When you use the optional docu- ment feeder, it is not necessary to place originals one by one. - Page 47 Operation Note ❒ If you press the { { { { Auto Cycle} } } } key, you cannot make proof prints by pressing the { { { { Proof} } } } key. F F F F If you use the optional tape dis- penser, turn on the tape dispenser power switch.
-
Page 48: Class Mode-Group Printing From The Same Original
Class Mode—Group Printing from the Same Original Use the { { { { Memory/Class} } } } key to make sets of prints from the same original. The same number of prints is made for each set. Note ❒ The optional tape dispenser auto- matically feeds out strips of paper w h i c h s e p a r a t e t h e p r i n t i n g groups on the paper delivery tray. - Page 49 Operation E E E E Turn on the optional tape dis- penser power switch. O f f F F F F Set one original face down on the exposure glass or in the optional document feeder. G G G G Press the { { { { Master Making} } } } key.
-
Page 50: Memory Mode-Group Printing From Different Originals
Memory Mode—Group Printing from Different Originals Use the { { { { Memory/Class} } } } key to make sets of prints from different originals. Note ❒ With the optional document feed- er, you can set several originals and make prints of all of them at once. - Page 51 Operation D D D D With the number keys, enter the number of prints for the second original. E E E E Press the { { { { q q } } } } key. This stores the number of prints to be made for the second original in memory 2.
- Page 52 J J J J Turn on the optional tape dis- penser power switch. O f f K K K K Press the { { { { Auto Cycle} } } } key. Note ❒ If you press the { { { { Auto Cycle} } } } key, you cannot make proof prints by pressing the { { { { Proof} } } } key.
-
Page 53: Combine-Combining 2 Originals Onto One Print
Operation Combine—Combining 2 Originals onto One Print You can print 2 separate originals on a single sheet of paper. The following diagrams show the available paper lists and orientations. " × 11"L. 1: 8 " × 11"L. 2: 8 " × 11"L. 3: 8 "... - Page 54 ❒ Make sure that the paper feed side plates touch the paper lightly when using the Combine Copies function. If they do not, the two original images will not appear at the proper position on the prints. Reference For how to use the optional docu- ment feeder with this function, see ⇒...
- Page 55 Operation C When you reach the desired size and direction, press the { { { { q q } } } } key. C C C C Press the { { { { Master Making} } } } key. D D D D The beeper sounds after the first original has been stored.
-
Page 56: Skip Feed Printing
Skip Feed Printing If the backs of prints are dirty, you can increase the time between two prints using the { { { { Skip Feed} } } } key. In the default setting, when one sheet of paper is fed the drum rotates twice. However, you can select the number of rotations of the drum. -
Page 57: Program-Storing Your Print Settings In Memory
Operation Program—Storing Your Print Settings in Memory You can store up to 9 frequently used print job settings in machine memory, and recall them for future use. Note ❒ The stored programs are not cleared when you turn off the main switch. -
Page 58: Recalling A Program
E E E E Select the program number you want to store the settings in with the number keys. Note ❒ Make sure that the previous job settings stored under the select- ed program number are over- written. F F F F Press the { { { { q q } } } } key. -
Page 59: Protecting A Program
Operation E E E E Press the { { { { Master Making} } } } key. Protecting a Program If you want to prevent someone from writing over your program, do the following procedure. A A A A While holding { { { { Clear/Stop} } } } key, press the { { { { Pro- gram} } } } key. -
Page 60: Removing Program Protection
Removing Program Protection A A A A While holding down { { { { Clear/Stop} } } } key, press the { { { { Pro- gram} } } } key. B B B B Enter “0” with the number key. C C C C Press the { { { { q q } } } } key. -
Page 61: Security Mode-Printing Secret Documents
Operation Security Mode—Printing Secret Documents This function prevents others from making prints of secret documents from the master. For example, if you want to print some documents with sensitive information, use this func- tion after making your prints so that nobody can access that master again. -
Page 62: Optional Functions
2. Optional Functions Printing Using the Optional Document Feeder Insert a stack of originals in the document feeder. They will be fed automatically. Document Feeder Exterior Original tray Original used to make masters are deliv- ered to this tray. ADF unit Feeds the original to the master making position. -
Page 63: Setting Originals In The Document Feeder
Optional Functions • Originals with glue on them • Originals perforated for ring binders • Book originals • Originals written with a pencil or ball-point pen • Originals smaller than 148 mm × 105 mm, 5.8" × 4.1" • Originals larger than 257 mm × 364 mm, 10.2" × 14.4" •... - Page 64 A A A A Adjust the guide to the original size. B B B B Insert the aligned originals face up in the document feeder until they stop. Limitation ❒ Approximately 30 originals (64 g/m document feeder. The first (top) original will be fed first. Note ❒...
-
Page 65: Combine Copies With The Document Feeder
Optional Functions Note ❒ If the next original has been set in the document feeder before the machine stops, that original is fed automatically and a trial print is delivered to the paper delivery tray after the print of the first original is completed. Check the image position of the trial print of the next original. -
Page 66: Memory Mode With The Document Feeder
D D D D Press the { { { { Master Making} } } } key. E E E E Check the image position of the trial or proof print. Note ❒ If the image position is not correct, adjust it using the { { { { Image Position} } } } keys (see ⇒... - Page 67 Optional Functions A A A A Press the { { { { Memory/Class} } } } key to light the Memory indicator. B B B B With the number keys, enter the desired number of prints for the first orig- inal.
- Page 68 D D D D Set your originals face up into the document feeder. Note ❒ When you use the optional document feeder, the originals are fed from the bottom of the stack. Make sure that the originals are set in the correct se- quence with the first original on the bottom.
- Page 69 Optional Functions G G G G Turn on the optional tape dispenser power switch. O f f H H H H Press the { { { { Auto Cycle} } } } key. Note ❒ In Auto Cycle mode, printing starts automatically after a trial print is de- livered.
-
Page 70: Color Printing Using The Optional Color Drum
Color Printing Using the Optional Color Drum Color drum units (red, blue, green, brown, yellow, purple, navy, ma- roon, orange, teal and gray) are avail- able as options in addition to the standard black unit. For making color prints, a separate drum unit is neces- sary for each color. - Page 71 Optional Functions C C C C Pull out the drum unit handle. Note ❒ If you cannot pull out the drum unit, push the drum unit han- dle, then pull out the drum unit. D D D D Hold the rail on the drum and slide out the drum while pulling the release towards you.
-
Page 72: Printing In Two Colors
Note ❒ Make sure that the Cover Open indicator (M) turns off, and the COLOR is shown in the guid- ance display. Printing in Two colors After printing in one color, you can print in another color on the same side of the print. - Page 73 Optional Functions F F F F Remove the prints from the paper delivery tray and set them on the paper feed tray again as shown in the illustration. G G G G Exchange the drum unit. See ⇒ ⇒ ⇒ ⇒ p.63 “Changing the color Drum Unit”.