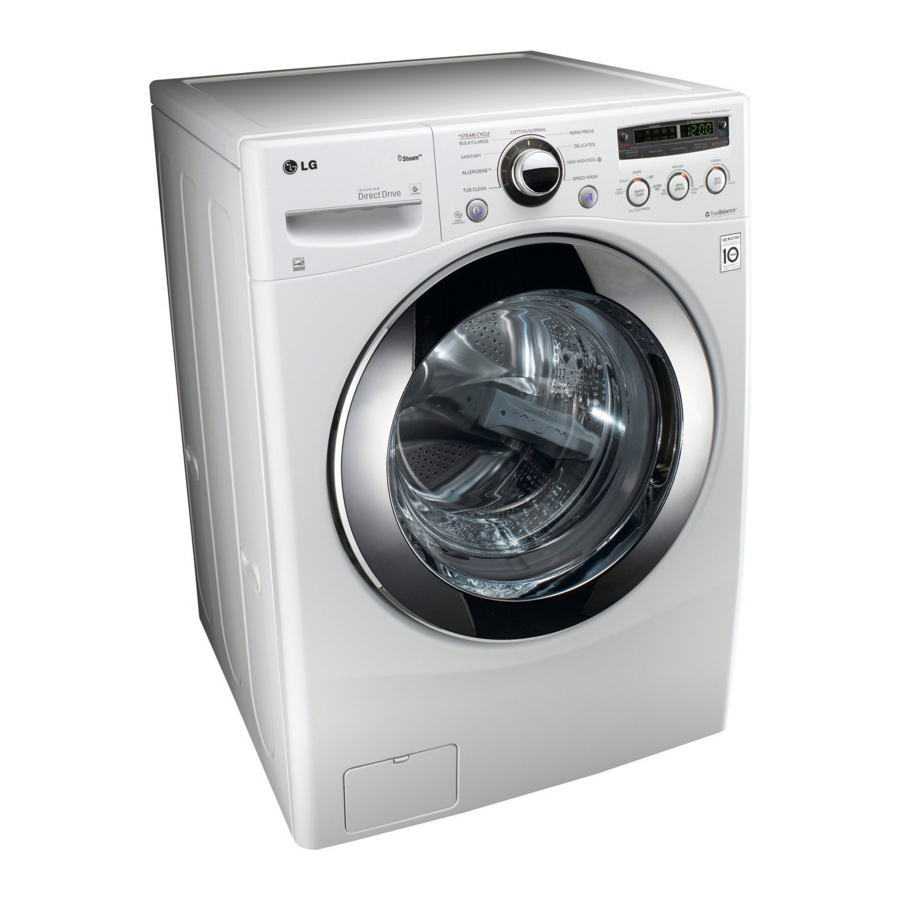
LG WM2650HRA Owner's Manual
3.6 cu.ft. extra large capacity steamwasher™ with coldwash technology™
Hide thumbs
Also See for WM2650HRA:
- Owner's manual (81 pages) ,
- Owner's manual (80 pages) ,
- Specifications (2 pages)
Table of Contents
Advertisement
Available languages
Available languages
OWNER'S MANUAL
WASHING MACHINE
Before beginning installation, read these instructions carefully. This will simplify
installation and ensure that the washer is installed correctly and safely.
Leave these instructions near the washer after installation for future reference.
WM2650H*A
P/No.: MFL67360414
www.lg.com
Advertisement
Chapters
Table of Contents

Related Manuals for LG WM2650HRA


Summary of Contents for LG WM2650HRA
-
Page 1: Washing Machine
OWNER’S MANUAL WASHING MACHINE Before beginning installation, read these instructions carefully. This will simplify installation and ensure that the washer is installed correctly and safely. Leave these instructions near the washer after installation for future reference. WM2650H*A P/No.: MFL67360414 www.lg.com... -
Page 2: Product Features
The four-compartment dispenser drawer makes it easy to separate the pre-wash detergent, the main laundry detergent, liquid bleach, and fabric softener into different compartments. HIGH-EFFICIENCY STEAM CYCLES During LG’s unique high-efficiency STEAM cycles, with hot steam a gently removes tough stains. -
Page 3: Important Safety Instructions
IMPORTANT SAFETY INSTRUCTIONS READ ALL INSTRUCTIONS BEFORE USE WARNING For your safety, the information in this manual must be followed to minimize the risk of fire or explosion, electric shock, or to prevent property damage, injury to persons, or death. Your Safety and the safety of others are very important. -
Page 4: Grounding Instructions
IMPORTANT SAFETY INSTRUCTIONS IMPORTANT SAFETY INSTRUCTIONS READ ALL INSTRUCTIONS BEFORE USE WARNING For your safety, the information in this manual must be followed to minimize the risk of fire or explosion, electric shock, or to prevent property damage, injury to persons, or death. BASIC SAFETY PRECAUTIONS WARNING To reduce the risk of fire, electric shock, or injury to persons when using this appliance, follow basic precautions, including the... - Page 5 IMPORTANT SAFETY INSTRUCTIONS READ ALL INSTRUCTIONS BEFORE USE WARNING For your safety, the information in this manual must be followed to minimize the risk of fire or explosion, electric shock, or to prevent property damage, injury to persons, or death. SAFETY INSTRUCTIONS FOR INSTALLATION WARNING To reduce the risk of fire, electric shock, or injury to persons when using this appliance, follow basic precautions, including the...
-
Page 6: Safety Instructions For Use, Care, Cleaning, And Disposal
IMPORTANT SAFETY INSTRUCTIONS IMPORTANT SAFETY INSTRUCTIONS READ ALL INSTRUCTIONS BEFORE USE WARNING For your safety, the information in this manual must be followed to minimize the risk of fire or explosion, electric shock, or to prevent property damage, injury to persons, or death. SAFETY INSTRUCTIONS FOR USE, CARE, CLEANING, AND DISPOSAL WARNING To reduce the risk of fire, electric shock, or injury to persons when using this appliance, follow basic precautions, including the... -
Page 7: Table Of Contents
TABLE OF CONTENTS PRODUCT FEATURES IMPORTANT SAFETY INSTRUCTIONS BASIC SAFETY PRECAUTIONS GROUNDING INSTRUCTIONS SAFETY INSTRUCTIONS FOR INSTALLATION SAFETY INSTRUCTIONS FOR USE, CARE, CLEAN- ING, AND DISPOSAL INTRODUCING YOUR wASHING MACHINE Parts and Accessories Control panel features INSTALLATION INSTRUCTIONS Preview installation order Checking and choosing the proper location Unpacking and removing shipping bolts Connecting the water lines... -
Page 8: Introducing Your Washing Machine
Tie strap NOTE Contact LG Customer Service at 1-800-243-0000 (1-888-542-2623 in Canada) if any accessories are missing. For your safety and for extended product life, use only authorized components. The manufacturer is not responsible for product malfunction or accidents caused by the use of separately purchased unauthorized components or parts. -
Page 9: Control Panel Features
Control panel features Cycle selector Power Button Operation Button Turns the washing machine on and off. (During the wash cycle) stops operation, and cancels the settings. ALLERGIENE™ - For cotton, underwear (See page 24) SANITARY - For underwear, diaper etc. (See page 24) BULKY/LARGE - For blankets or large bulky items (See page 24) COTTON/NORMAL... -
Page 10: Display
INTRODUCING YOUR WASHING MACHINE Operation (continued) Button Display Load size sensing indicator (See page. 27) Button (Press before wash cycle) Pre-wash heavily soiled laundry (See (Press and hold during wash cycle) Lock/Unlock the button (See RINSE + SPIN - For items that only require rinsing and spinning (See page 26). (Press before wash cycle) Add extra rinse cycle to the selected one (See (Press before wash cycle) Add water during wash and rinse cycle (See (Press and hold) Tuning on/off melody and button tones (See... -
Page 11: Installation Instructions
INSTALLATION INSTRUCTIONS Preview installation order Checking and choosing the proper location Connecting the drain line Test run WARNING Washer is heavy! Two or more people are required when moving and unpacking the washer. back or other injury. Store and install the washer where it will not be exposed to temperatures below freezing or exposed to outdoor weather conditions. -
Page 12: Checking And Choosing The Proper Location
INSTALLATION INSTRUCTIONS Checking and choosing the proper location Install the washing machine on a solid floor that is strong and rigid enough to support the weight of the washing machine, even when fully loaded, without flexing or bouncing. If the floor has too much flex, you may need to reinforce it to make it more rigid. -
Page 13: Unpacking And Removing Shipping Bolts
Unpacking and removing shipping bolts When removing the washer from the carton base, be sure to remove the foam drum support in the middle of the carton base. If you must lay the washer down to remove the base packaging materials, always lay it carefully on its side. Do NOT lay the washer on its front or back. -
Page 14: Connecting The Water Lines
Use new hoses when you install the washing machine. Do not reuse old hoses. Use only the inlet hoses provided with the washer. LG does not recommend the use of aftermarket hoses. Periodically check the hoses for cracks, leaks and wear, and replace the hoses every 5 years. -
Page 15: Connecting The Drain Line
Connecting the drain line Secure the drain hose in place to prevent moving and leaking. NOTE The drain hose should be properly secured. Failure to properly secure the drain hose can result in flooding and malfunction. Total height of the house end should not exceed 96 inches (244.8 cm) from the bottom of the washer. -
Page 16: Leveling The Washing Machine
INSTALLATION INSTRUCTIONS Leveling the washing machine The washer tub of your new washing machine spins at very high speeds. To minimize vibration, noise, and unwanted movement, the floor must be perfectly level and solid. Check the washing machine’s level. - Check the precise level by rocking the top edges of the washing machine or placing a level on the washing machine. -
Page 17: Plugging In The Power Cord And Grounding
Plugging in the power cord and grounding Make sure to ground the washing machine to prevent a short circuit or an electric shock when plugging in. Using a 3-prong outlet Plug in the electrical outlet without additional grounding. WARNING The power outlet must be within 60 inches (1.5 m) of either side of the washer. -
Page 18: Preparation
PREPARATION PREPARATION Sorting wash loads Precautions for fabric care before wash cycle Read and observe the following to prevent shrinkage or damage to clothes. Check all pockets to make sure that they are empty. -Items such as clips, matches, pens, coins, and keys can damage both your washer and your clothes. -
Page 19: Fabric Care Labels
Fabric care labels Most articles of clothing feature fabric care labels that include instructions for proper care. Category Label Hand Wash Machine Wash, Normal Cycle Use Permanent Press/Wrinkle Resistant washing machine setting (which has a cool down or cold spray before the reduced spin) Use Gentle/Delicate washing Washing... -
Page 20: Using Detergent/Fabric Softener
PREPARATION Using detergent/fabric softener Recommended detergent Make sure to use HE (High-Efficiency) detergent for front- loading washing machines. HE detergents dissolve more efficiently and produce fewer suds to ensure efficient washing and rinsing. Use the correct amount of detergent as indicated on the label of the detergent packaging. - Page 21 Pre-wash Detergent Compartment Add liquid or powdered detergent to this compartment when using the pre-wash option. Always use HE (High-Efficiency) detergent with your washing machine. NOTE If liquid detergent is to be used for the main wash when using the pre-wash option, the liquid detergent cup accessory must be used in main wash dispenser to prevent the main wash liquid detergent from being dispensed immediately.
-
Page 22: Using Your Washing Machine
USING YOUR WASHING MACHINE USING YOUR WASHING MACHINE Basic operation Load the laundry into the washing machine and close the door. Press - The lights around the cycle selector knob will illuminate and a chime will sound. Turn - The proper default option is automatically set according to the wash cycle. See page 23, Cycle guide, for more detailed default options for each cycle. -
Page 23: Cycle Guide
Cycle guide The cycle guide below shows the options and recommended fabric types for each cycle. DISPLAY CYCLE FABRIC TYPE TIME(MIN) TUB CLEAN This cycle is designed to remove a mildewy ALLERGIENE™ Cotton, underwear, 99~122 pillow covers, bed sheets, baby wear 98~105 EXTRA HOT ... -
Page 24: Main Cycle
USING YOUR WASHING MACHINE Main cycle You can wash laundry items more thoroughly by selecting the wash cycle that best suits the type of items to be washed. Turn the to the desired cycle. When you select a wash cycle, the light for the corresponding wash cycle will turn on. -
Page 25: Cycle Setting Buttons
Cycle setting buttons Each cycle has preset settings that are selected automatically. You may also customize the settings using the cycle setting buttons. Press the button for that option to view and select other settings. The washer automatically adjusts the water level for the type and size of wash load for best results and maximum efficiency. -
Page 26: Prewashing, Pre-Wash
USING YOUR WASHING MACHINE Prewashing, PRE-WASH Pre-wash for 16 minutes when clothes are covered in dirt or dust. This feature is suitable for heavily soiled items. Press and turn to the desired cycle. Press light will turn on. 3 Press the desired option to use the other options. - Skip to step 4 to use the default setting without changing the options. -
Page 27: Saving Energy, Coldwash
Saving energy, COLDWASH ™ Adding the COLDWASH™ option reduces energy usage and provides the same washing performance as a warm water wash. By using 6 different washing motion (Tumbling, Rolling, Stepping, Scrubbing, Swing, Filtration), fabrics get the cleaning benefits, without the energy usage. Press and turn to the desired cycle. -
Page 28: Maintenance
MAINTENANCE MAINTENANCE Care Care after wash After the cycle is finished, wipe the door and the inside of the door seal to remove any moisture. Leave the door open to dry the washer tub interior. Wipe the body of the washing machine with a dry cloth to remove any moisture. -
Page 29: Cleaning
When the Drain Line is Frozen Pour hot water in the washer tub and close the door. - Leave it for 10 minutes. Press after 10 minutes. Press for draining and spinning. Press - Check if the water drains. MAINTENANCE Cleaning Periodically clean the washing machine to help maintain its performance and to minimize the chance of malfunction. -
Page 30: Cleaning The Detergent Dispenser Drawer
MAINTENANCE Automatic alert for cleaning washing machine When the power is on and the O message blinks, it means the washer tub needs cleaning. Use TUB CLEAN to clean the washer tub. The automatic indication alert for cleaning the washer tub depends on the frequency of use, however, the message will generally blink every 1~2 months. -
Page 31: Cleaning The Water Inlet Filters
If you use the washing machine in an area with hard water, the inlet filter may clog due to lime buildup. Contact your nearest LG customer service center if the inlet filter is not clean or is missing. NOTE... -
Page 32: Cleaning The Drain Pump Filter
MAINTENANCE Cleaning the drain pump filter The washing machine fails to drain if the drain pump filter is clogged. Periodically clean the drain filter to prevent clogging with foreign objects. Press to turn off the washing machine and pull out the plug. -
Page 33: Cleaning The Door Seal
Cleaning the door seal Clean the door seal once a month to prevent build-up of dirt in the door seal. Wear rubber gloves and protective goggles. Dilute 3/4 cup (177 ml) of liquid chlorine bleach in 1 gallon (3.8 L) of water. Soak a sponge or a soft cloth in this diluted solution and wipe down all around the door seal. -
Page 34: Troubleshooting
Open the drain pump plug cap and remove the dirt. Press to turn off the washing machine and press it again to turn it on. Unplug the power cord and contact your nearest LG service center. Unplug the power cord and contact your nearest LG service center The water level sensor is not working correctly. -
Page 35: Before Calling For Service
Unplug the power cord and contact your nearest LG service center if the noise persists. This sound is normal and occurs when the load is out of balance. Stop the cycle and rearrange the load for balancing. -
Page 36: Specifications
SPECIFICATIONS Problem Power is not turned on Is the power cord plugged in properly? Has a house fuse blown, a circuit breaker tripped, or a power outage occurred? The door does not open Is the temperature in the tub too high? when the cycle pauses or Is the water level in washer high? finishes... -
Page 37: Using Smartdiagnosis
USING SMARTDIAGNOSIS™ - Only use this feature when instructed to do so by the call center. The transmission sounds similar to a fax machine, and so has no meaning except to the call center. - SMARTDIAGNOSIS™ cannot be activated if the washer does not power up. If this happens, then troubleshooting must be done without SMARTDIAGNOSIS™. -
Page 38: Warranty
LG Electronics U.S.A., Inc. (“LG”) warrants your LG Washing Machine (“product”) against defect in materials or workmanship under normal household use, during the warranty period set forth below, LG will, at its option, repair or replace the product. This limited warranty is valid only to the original retail purchaser of the product, is not assignable or transferrable to any subsequent purchaser or user, and applies only when the product is purchased through an LG authorized dealer or distributor and used within the United States (“U.S.”) including U.S. - Page 39 MEMO...
- Page 40 MEMO...
- Page 41 Antes de comenzar la instalacion, lea atentamente estas instrucciones. Esto simplifi cara la instalacion y asegurara que la lavadora esta instalada en forma correcta y segura. Conserve estas instrucciones cerca de la lavadora luego de la instalacion para futuras consultas. WM2650H*A P/No.: MFL67360414 www.lg.com...
- Page 42 El cajón dispensador de cuatro compartimentos facilita la separación del detergente de prelavado, detergente de lavado principal, blanqueador líquido, y suavizante en compartimentos diferentes. CICLOS DE VAPOR DE ALTA EFICIENCIA Durante los ciclos de VAPOR de alta eficiencia unicos de LG, vapor caliente ayuda a eliminar suavemente las manchas mas dificiles.
-
Page 43: Instrucciones Importantes De Seguridad
INSTRUCCIONES IMPORTANTES DE SEGURIDAD LEA TODAS LAS INSTRUCCIONES ANTES DE USAR ADVERTENCIA Por su seguridad, debe seguir la informacion indicada en este manual para minimizar el riesgo de incendio o explosion, descarga electrica, o para prevenir danos a la propiedad, lesiones personales o muerte. Su seguridad y la de otros es muy importante. -
Page 44: Precauciones Básicas De Seguridad
INSTRUCCIONES IMPORTANTES DE SEGURIDAD INSTRUCCIONES IMPORTANTES DE SEGURIDAD LEA TODAS LAS INSTRUCCIONES ANTES DE USAR ADVERTENCIA Por su seguridad, se debe seguir la informacion indicada en este manual para minimizar el riesgo de incendio o explosion, descarga electrica, o para prevenir danos a la propiedad, lesiones personales, o muerte. PRECAUCIONES BÁSICAS DE SEGURIDAD ADVERTENCIA Para minimizar el riesgo de incendio o explosion, descarga electrica, o para prevenir lesiones personales cuando use... - Page 45 INSTRUCCIONES IMPORTANTES DE SEGURIDAD LEA TODAS LAS INSTRUCCIONES ANTES DE USAR ADVERTENCIA Por su seguridad, se debe seguir la informacion indicada en este manual para minimizar el riesgo de incendio o explosion, descarga electrica, o para prevenir danos a la propiedad, lesiones personales o muerte. INSTRUCCIONES DE SEGURIDAD PARA LA INSTALACIÓN ADVERTENCIA Para minimizar el riesgo de incendio o explosion, descarga electrica, o para prevenir lesiones personales cuando use...
- Page 46 INSTRUCCIONES IMPORTANTES DE SEGURIDAD INSTRUCCIONES IMPORTANTES DE SEGURIDAD LEA TODAS LAS INSTRUCCIONES ANTES DE USAR ADVERTENCIA Por su seguridad, se debe seguir la informacion indicada en este manual para minimizar el riesgo de incendio o explosion, descarga electrica, o para prevenir danos a la propiedad, lesiones personales o muerte. INSTRUCCIONES DE SEGURIDAD PARA LA UTILIZACIÓN, CUIDADO Y LIMPIEZA, Y LA ELIMINACIÓN ADVERTENCIA Para minimizar el riesgo de incendio o explosion, descarga electrica, o para prevenir lesiones personales cuando use...
- Page 47 ÍNDICE CARACTERÍSTICAS DEL PRODUCTO INSTRUCCIONES IMPORTANTES DE SEGURIDAD PRECAUCIONES BÁSICAS DE SEGURIDAD INSTRUCCIONES PARA LA CONEXIÓN A TIERRA INSTRUCCIONES DE SEGURIDAD PARA LA IN- STALACIÓN INSTRUCCIONES DE SEGURIDAD PARA LA UTI- LIZACIÓN, CUIDADO Y LIMPIEZA, Y LA ELIMI- NACIÓN INTRODUCCIóN A LA LAvADORA Partes y Accesorios Características del panel de control INSTRUCCIONES DE INSTALACIóN...
-
Page 48: Partes Y Accesorios
Brida NOTA Póngase en contacto con el Departamento de atención al cliente de LG, en el número 1-800-243-0000 (1-888-542-2623 en Canadá) si falta alguno de los accesorios. Para su seguridad, y con el fin de extender la vida útil de su lavadora, utilice sólo componentes autorizados. El fabricante no se hace responsable de los fallos del producto o accidentes causados por la utilización de piezas o componentes no... -
Page 49: Características Del Panel De Control
Características del panel de control Selector de Ciclos Botón de Encendido Funcionamiento Botón Enciende y apaga la lavadora. (Durante el ciclo de lavado) Detiene el funcionamiento, y cancela los ajustes. ALLERGIENE™ - Para algodón, ropa interior (véase página 24) SANITARY - Para ropa interior, pañales, etc. - Page 50 INTRODUCCIÓN A LA LAVADORA Funcionamiento (continuación) Botón Pantalla Indicador del sensor de carga (Véase página 27) Botón (Seleccione antes del ciclo de lavado) Prelavar prendas bien sucias (véase página 26). (Durante el ciclo de lavado, mantenga pulsado) Bloquear / Desbloquear el botón (véase página 27). RINSE + SPIN - Para prendas que sólo requieren enjuague y centrifugado (véase página 26) (Seleccione antes del ciclo de lavado) Añade un ciclo de enjuague adicional al seleccionado...
-
Page 51: Vista Previa Del Orden De Instalación
INSTRUCCIONES DE INSTALACIóN vista previa del orden de instalación Comprobación y elección de la ubicación adecuada Conexión del tubo de desagüe Prueba de funcionamiento ADVERTENCIA La lavadora es pesada. Se necesitan dos o más personas para instalar y trasladar el electrodoméstico. cumple se podrán sufrir heridas en la espalda u otras herida. - Page 52 INSTRUCCIONES DE INSTALACIÓN Comprobación y elección de la ubicación adecuada Instale la lavadora sobre un suelo con la resistencia y rigidez suficiente para soportar el peso de la máquina, incluso con la carga completa, sin que se flexione o rebote. Si el suelo tiene una flexibilidad excesiva, quizás deba reforzarse para hacerla más rígida.
- Page 53 Desempaque y retiro de los tornillos de transporte Al retirar la lavadora de la base de cartón, asegúrese de quitar el soporte del tambor de foam colocado en la mitad de la base de cartón. Si debe acostar la lavadora para quitar los materiales de empaque de la base, hágalo siempre cuidadosamente sobre su parte lateral.
-
Page 54: Conexión De Las Tuberías De Agua
Utilice mangueras nuevas para la instalación de la lavadora. No vuelva a utilizar mangueras viejas. Utilice únicamente las mangueras suministradas con la lavadora. LG no recomienda el uso de otras mangueras adquiridas en los comercios. Revise periódicamente las mangueras por si hubiera grietas, fugas y desgaste, y sustitúyalas cada 5 años. -
Page 55: Conexión Del Tubo De Desagüe
Conexión del tubo de desagüe Fije el tubo de desagüe para evitar que se mueva y que se produzcan fugas. NOTA La manguera de desagüe debe fijarse correctamente. En caso contrario, podría resultar en inundación o funcionamiento incorrecto La longitud total de la manguera de drenaje debe ser inferior a 96 pulgadas (2,44m) desde la parte inferior de la lavadora. -
Page 56: Nivelación De La Lavadora
INSTRUCCIONES DE INSTALACIÓN Nivelación de la lavadora El tambor de su nueva lavadora gira a alta velocidad . Para reducir las vibraciones, el ruido y los movimientos no deseados, el suelo debe estar nivelado y debe ser una superficie sólida. Compruebe que la lavadora esté... -
Page 57: Prueba De Funcionamiento
nuevo la lavadora. Conexión del enchufe y la toma de tierra Conecte a tierra la lavadora para evitar un cortocircuito o descargas eléctricas durante la conexión. Utilización de una toma de 3 clavijas Conecte el enchufe en la toma sin conexión a tierra adicional. PRECAUCIÓN El tomacorriente debe estar dentro de un área minima de 1,5 m (60 pulgadas) a cualquiera de los lados de la lavadora. -
Page 58: Clasificación De Las Cargas De Lavado
PREPARACIÓN PREPARACIÓN Clasificación de las cargas de lavado Precauciones para el cuidado de los tejidos antes del ciclo de lavado Lea y cumpla con las siguientes instrucciones para evitar que la ropa se encoja o se dañe. Revise todos los bolsillos para asegurarse de que esten vacios. -
Page 59: Etiquetas De Cuidado De Las Telas
Etiquetas de cuidado de las telas La mayoria de las prendas de vestir tienen etiquetas de cuidado de las telas para lograr un cuidado adecuado. Categoría Etiqueta Instrucciones Lavado a mano Lavado a máquina, ciclo normal Utilice el ajuste de planchado permanente/ resistente a las arrugas (la cual tiene un enfriado o rociado con agua fría... -
Page 60: Cargando El Dispensador
PREPARACIÓN Utilización de detergente/suavizante Detergente recomendado Asegúrese de utilizar detergentes de alta eficiencia (HE) para máquinas de carga frontal. Los detergentes de alta eficiencia se disuelven mejor y producen menos espuma para lograr un lavado y enjuague más eficiente. Utilice la cantidad correcta de detergente, siguiendo las instrucciones en la etiqueta del empaque del detergente. - Page 61 Compartimiento de detergente para prelavado Agregue el detergente liquido o en polvo a este compartimiento cuando se usa la opcion de Prewash (prelavado). Use siempre detergente tipo HE (Alta eficiencia ) con su lavadora. NOTA Si usted va utilizar detergente liquido para el lavado principal y va agregar la opción de prelavado, la cajita de detergente líquido debe ser usado en el compartimiento del lavado principal para evitar que el detergente liquido...
-
Page 62: Funcionamiento Básico
UTILIZACIÓN DE LA LAVADORA UTILIZACIÓN DE LA LAVADORA Funcionamiento básico Cargue la ropa en la lavadora y cierre la puerta. Pulse - Las luces alrededor del dial selector de ciclos se iluminarán y sonará una señal acústica. Gire - Se selecciona automáticamente la opción por defecto según el ciclo de lavado. Consulte la página 23, Guía de ciclos, para más información sobre las opciones por defecto de cada ciclo de lavado. -
Page 63: Guía De Ciclos
Guía de ciclos La guía de ciclos indicada más abajo muestra las opciones y tipos de telas recomendadas para cada ciclo. TIEMPO CICLO TIPO DE TEJIDO` DESPLEGADO (MIN) TUB CLEAN This cycle is designed to remove a mildewy ALLERGIENE™ Algodon, ropa 99~122 interior, fundas de almohadas, sabanas,... -
Page 64: Ciclo Principal
UTILIZACIÓN DE LA LAVADORA Ciclo principal Puede lavar la ropa de forma más intensiva seleccionando el ciclo de lavado más adecuado para el tipo de prendas que se van a lavar. Gire el al ciclo deseado. Cuando seleccione un ciclo de lavado, se iluminará la luz para el ciclo de lavado correspondiente. -
Page 65: Botones De Ajuste De Ciclo
Botones de ajuste de ciclo Cada ciclo tiene ajustes preprogramables que se seleccionan automaticamente. Tambien puede personalizar los ajustes utilizando los botones de programacion de ciclos. Apriete el boton para ver esa opcion y seleccionar otros ajustes. La lavadora ajusta automaticamente el nivel de agua segun el tipo y tamano de la carga de lavado para proporcionar los mejores resultados y eficiencia maxima. -
Page 66: Prelavado, Pre-Wash
UTILIZACIÓN DE LA LAVADORA Prelavado, PRE-WASH Haga el prelavado por 16 minutos cuando la ropa tiene suciedad o polvo. Esta función es adecuada para ropa muy sucia. Pulse y gire al ciclo deseado. Pulse para seleccional el PRELAVADO. - Se iluminará la luz Pulse el botón de la opción deseada para utilizar otras opciones. -
Page 67: Opciones De Ajuste Durante El Ciclo
NOTA No se pueden usar todos los ciclos con la opcion STEAM(vapor). Puede que el vapor no sea claramente visible durante los ciclos de vapor. Esto es normal. Demasiado vapor podria danar las prendas. No utilice el vapor en telas delicadas tales como lana, seda o telas que se decoloren facilmente. -
Page 68: Cuidados Tras El Lavado
MANTENIMIENTO MANTENIMIENTO Cuidados Cuidados tras el lavado Una vez finalizado el ciclo, limpie la puerta y el interior de la junta hermética de la puerta para eliminar la humedad. Deje la puerta abierta para secar el interior del tambor. Limpie el cuerpo de la lavadora con un trapo seco para eliminar la humedad. -
Page 69: Limpieza Del Tambor, Tub Clean
Cuando se congela el tubo de desagüe Vierta agua caliente en el tambor de la lavadora y cierre la puerta. - Deje el agua adentro durante 10 minutos. Pulse después de 10 minutos. Pulse Pulse - Verifique si se vacía el agua. MANTENIMIENTO Limpieza Periódicamente limpie su lavadora para ayudar a mantener... -
Page 70: Eliminación De La Cal Acumulada En Acero Inoxidable
MANTENIMIENTO Alerta automática para la limpieza de la lavadora Cuando se enciende la lavadora y se parpadea el mensaje tcL, significa que el tambor de la lavadora necesita ser limpiado. Utilice la LIMPIEZA DEL TAMBOR. La alerta de indicación automática para la limpieza del tambor depende en la frecuencia de uso, pero el mensaje generalmente parpadeará... -
Page 71: Limpieza De Los Filtros De Entrada De Agua
Si utiliza la lavadora en un área con agua dura, el filtro podría obstruirse debido a la acumulación de cal. Póngase en contacto con el servicio de atención al cliente de LG si no se puede limpiar correctamente el filtro o se ha perdido. NOTA Parpadeará... - Page 72 MANTENIMIENTO Limpieza del filtro de la bomba de desagüe La lavadora no se vaciará correctamente si el filtro de la bomba de desagüe está obstruido. Limpie periódicamente el filtro para evitar obstrucciones por objetos extraños. Pulse para apagar la lavadora y desconecte el enchufe.
-
Page 73: Limpieza De La Junta De La Puerta
Limpieza de la junta de la puerta Limpie la junta hermética de la puerta una vez al mes para evitar la acumulación de suciedad. Utilice guantes de goma y gafas de protección. Diluya 3/4 de taza (177 mL) de blanqueador líquido con lejía en 1 galón (3.8 litros) de agua. -
Page 74: Comprobación De Los Mensajes De Error
Cierre la puerta firmemente. Si sigue apareciendo el mensaje, desconecte el enchufe y póngase en contacto con el servicio técnico de LG más cercano. Baje la manguera de desagüe hasta 3 pies por debajo del extremo del soporte de codo. -
Page 75: Antes De Llamar Al Servicio Técnico
Desconecte el enchufe y póngase en contacto con el servicio técnico de LG más cercano. Este sonido es normal y se produce cuando se ha desequilibrado la carga. Detenga el ciclo y reorganice la carga para equilibrarla. - Page 76 ESPECIFICACIONES Problema Ropa arrugada ¿Ha retirado la carga inmediatamente después que se acabó el ciclo? ¿Ha sobrecargado el tambor? ¿Ha invertido las entradas de agua caliente y agua fría? La lavadora no se enciende ¿Se ha conectado correctamente el enchufe? ¿Tiene un fusible fundido, se ha disparado el interruptor de circuito, o se ha producido un corte de suministro eléctrico?
- Page 77 UTILIZACIÓN DEL SMARTDIAGONOSIS ™ - Utilice esta función sólo cuando así se lo indique el agente del Centro de Atención al Cliente. La transmisión tiene un sonido similar al de un fax, y no tiene ningún significado, excepto para el Centro de Atención al Cliente. - El DiagnósticoInteligente™...
- Page 78 LG Electronics U.S.A., Inc. (“LG”) garantiza su lavadora LG (“producto”) contra cualquier defecto en materiales o mano de obra bajo un uso doméstico normal, durante el periodo de garantía indicado más adelante, y LG podrá reparar o sustituir el producto, bajo su exclusivo criterio. Esta garantía limitada tiene validez sólo para el comprador minorista original del producto, no puede cederse o transferirse a cualquier comprador o usuario posterior, y se aplica sólo cuando el producto se haya adquirido a través de...
- Page 80 “factory default (Home Use)” setting. Changing the factory default settings or enabling other features may increase power consumption that could exceed the limits necessary to quality for ENERGY STAR. LG Customer Information Center 1-800-243-0000 1-888-542-2623 CANADA Register your product Online!