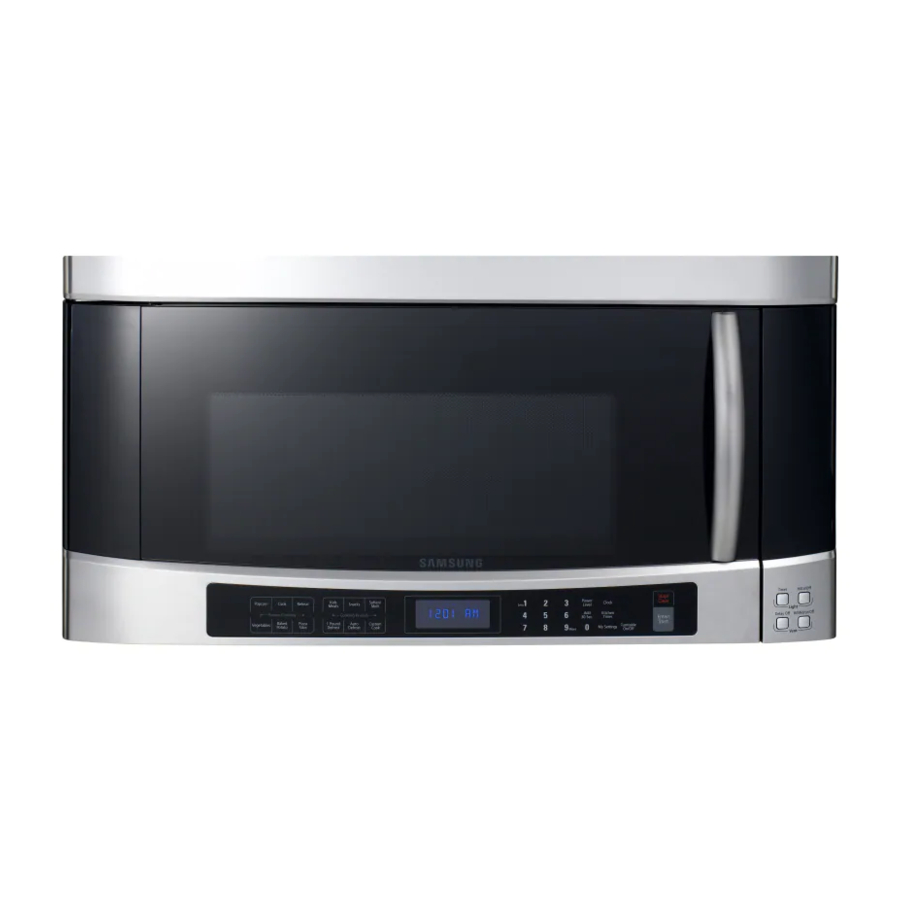
Samsung SMH9207ST User Manual
Samsung microwave oven user manual
Hide thumbs
Also See for SMH9207ST:
- Manual del usuario (48 pages) ,
- Service manual (43 pages) ,
- Service manual (43 pages)

Related Manuals for Samsung SMH9207ST


Summary of Contents for Samsung SMH9207ST
-
Page 1: Microwave Oven
SMH9207 Microwave Oven user manual imagine the possibilities Thank you for purchasing this Samsung product. Please register your product at www.samsung.com/global/register ENGLISH... -
Page 2: Safety Information
Congratulations on your new Samsung microwave oven. This manual contains important information on the installation, use and care of your appliance. Please take time to read this manual to take full advantage of your microwave oven’s many benefits and features. -
Page 3: Important Safety Instructions
IMPORTANT SAfETY SYMBOLS AND PRECAUTIONS What the icons and signs in this user manual mean: Hazards or unsafe practices that may result in WARNING severe personal injury or death. Hazards or unsafe practices that may result in CAUTION minor personal injury or property damage. To reduce the risk of fire, explosion, electric shock, or personal injury when using your microwave CAUTION... - Page 4 Stir the liquid both before and halfway through heating it. c. Do not use straight-sided containers with narrow necks. d. After heating, allow the container to stand in the microwave oven for a short time before removing the container.
-
Page 5: Grounding Instructions
If you use an extension cord, the interior light may flicker and the blower may vary when the microwave oven is on. Cooking times may be longer, too. SAVE ThESE INSTRUCTIONS... - Page 6 SEVERE WARNING SIGNS FOR INSTALLATION WARNING The installation of this appliance must be performed by a qualified technician or service company. - Failing to do so may result in electric shock, fire, an explosion, problems with the product, or injury. Unpack oven, remove all packaging material and examine the oven for any damages such as dents on the interior or exterior of the oven, broken door latches, cracks in the door, or a door that is not lined up correctly.
- Page 7 Do not twist or tie the power cord. Do not hook the power cord over a metal object, place a heavy object on the power cord, insert the power cord between objects, or push the power cord into the space behind the appliance. - This may result in electric shock or fire.
- Page 8 oven off and disconnect the power cord, or shut off power at the fuse or circuit breaker panel. If the door is opened, the fire may spread. Always observe Safety Precautions when using your oven. Never try to repair the oven on your own - there is dangerous voltage inside. If the oven needs to be repaired, contact an authorized service center near you.
- Page 9 - Failing to do so may result in electric shock or injury. Do not tamper with or make any adjustments or repairs to the door. Under no circumstances should you remove the outer cabinet. Do not store or use oven outdoors. CAUTION SIGNS FOR USING CAUTION When the surface is cracked, turn the power switch of the appliance off.
- Page 10 Do not abruptly cool the door, the inside of the appliance, or the dish by pouring water over it during or just after cooking. - This may result in damage to the appliance. The steam or water spray may result in burns or injury. Do not try to preheat oven or operate while empty.
-
Page 11: Table Of Contents
CookwAre guiDe Cooking guiDe Checking The Parts oven Setting Up Your Microwave Oven Turning On The Power For The First Time Setting The Time Child Lock My Settings Using the Kitchen Timer button Using The Add 30 Sec. - Page 12 Cleaning The Interior Cleaning The Turntable And Roller Rings Storing And Repairing Your Microwave Oven Replacing The Cooktop/Night Bulb Replacing The Oven Bulb Cleaning The Grease Filter Replacing The Charcoal Filter AppenDix Specifications Check These Points If Your Microwave Oven wArrAnty...
-
Page 13: Setting Up Your New Microwave Oven
Carefully unpack your microwave oven, and make sure you’ve received all parts shown below. If your microwave oven was damaged during shipping, or if you do not have the parts, contact Samsung Customer Service (Refer to the “WARRANTY AND SERVICE INFORMATION” on page 45). -
Page 14: Setting Up Your Microwave Oven
Make sure the shelf is positioned properly inside the microwave to prevent damage to the oven from arcing. CAution 14_ setting up your new microwave oven damp cloth pre-assembled roller ring indentation... - Page 15 The display includes clock and indicators to tell you the time of day, cooking time DisplAy settings and cooking functions selected. Press this button when popping popcorn in your microwave oven. The oven’s sensor popCorn will tell the oven how long to cook depending on the amount of humidity it detects from the popcorn.
- Page 16 Press this button to turn the fan on/off. lo/oFF Refer to “Using your microwave oven” on the next page for detailed information on the buttons described in the table above. 16_ setting up your new microwave oven • Turntable On/Off is not available in sensor cook and defrost modes.
-
Page 17: Turning On The Power For The First Time
Your microwave oven is equipped with a built-in clock. Set the clock when first installing your microwave oven and after a power failure. The time is displayed whenever the microwave oven is not being used. 1. Press the Clock button. -
Page 18: My Settings
SETTINGS ( Your new microwave oven can be customized to suit your personal preferences. Simply press the my settings button to configure the following options. The options are summarized in the following table: Function Weight mode selected Sound on/off control... -
Page 19: Using Your Microwave Oven
The following section describes everything you need to know about using your microwave oven. USING ThE kITChEN TImER bUTTON ( This microwave allows you to use your microwave oven as a timer. Use the Kitchen Timer for timing up to 99 minutes, 99 seconds. -
Page 20: Using The Vent Delay Off Button
7. Press the enter / start button. 8. Use the Number buttons to select AM or PM. 9. Press the enter / start button. 10. Press the light timer button and “0” button to cancel the light timer. 20_ using your microwave oven... -
Page 21: Using The Turntable On/Off Button
Reheating food To reheat food on 2 levels or to reheat food on the lower level: • Multiply the reheating time by 1½. • Switch places halfway through the reheating process. shelf turntable uneven results using your microwave oven _21... -
Page 22: Using The Sensor Cooking Button
Do not use the Auto Sensor cooking feature continuously. Wait 5 minutes before selecting another sensor cooking operation. To avoid poor results, do not use the Auto Sensor when the room ambient temperature is too high or too low. 22_ using your microwave oven... -
Page 23: Sensor Cooking Table
Do not let the slices overlap. Do not cover. Let the oven cool for at least 5 minutes before using it again. Use the more (9) button to increase the reheating time for pizzas with thick crusts. using your microwave oven _23... -
Page 24: Contents
Follow the instructions below when reheating different types of food. FooD dinner plate Casserole Pasta 24_ using your microwave oven Amount proCeDure Use only precooked, refrigerated foods. Cover the plate with vented plastic wrap or waxed paper tucked under the plate. If the food is not as hot as you would like after using the “sensor reheat”... -
Page 25: Using The Auto Defrost Button
After each stage, rearrange or remove any pieces of food that are nearly defrosted. Let stand for 10-20 minutes. 1.0 LB. TURN THE FOOD OVER twice during the TURN THE FOOD OVER is displayed, the oven will be using your microwave oven _25... - Page 26 Soften / melt table item melt chocolate Soften cream cheese melt butter 26_ using your microwave oven Amount remArks Place the chocolate chips or squares in a microwave- safe container. 1 cup chips or 1 When the oven beeps, stir the chocolate and restart square the oven.
-
Page 27: Using The Kids Meals Button
(which is in a package) and place on a microwave-safe plate. Remove from the “crisping sleeve”. Let stand for 2 minutes after heating. For large sandwiches, use the more (9) button to increase the heating time. using your microwave oven _27 (Refer to the Kids... - Page 28 Snack bar table item Nachos Chicken wings Potato skins Cheese sticks (frozen) 28_ using your microwave oven SELECT MENU 1 TO 4 Amount remArks Place the nachos on a plate without letting them overlap. Sprinkle cheese evenly over them. 1 serving...
-
Page 29: Power Levels
4. Press the start button to begin cooking, or repeat steps 2 and 3 to set a cooking time and power level for a third cooking stage. When finished, press the start button. Simmer Medium high Reheat Sauté High TIME. appears in the display. TIME. using your microwave oven _29 PRESS START PRESS PRESS... - Page 30 5. To retrieve a Custom Recipe, press the Custom Cook button, then press the enter/start button. • You can only recall one stored recipe at a time. You can check the power level anytime while cooking by pressing the power level button. 30_ using your microwave oven TOUCH START OR ENTER NEW TIME.
- Page 31 To cook food in the microwave oven, the microwaves must be able to penetrate the food without being reflected or absorbed by the dish. It is important to choose the correct cookware, therefore look for cookware that is marked microwave-safe.
- Page 32 CookwAre Paper Plates, cups, napkins and kitchen paper Recycled paper Plastic Containers Cling film Freezer bags Wax or grease-proof paper Thermometer Straw, wicker, and wood 32_ cookware guide miCrowAve-sAFe Comments Recommended For short cooking times and warming. Also to absorb excess moisture. Recommended Do not use recycled paper towels, which may contain metal and may catch fire or...
-
Page 33: Cooking Techniques
The altitude and the type of cookware you are using can affect the cooking time. When using a new recipe, use the minimum cooking time and check the food occasionally to prevent overcooking. Home canning in the microwave oven is not recommended because not all harmful bacteria may be destroyed by the microwave heating process. - Page 34 Adding moisture Microwave energy is attracted to water molecules. Food that is uneven in moisture content should be covered or allowed to stand so that the heat disperses evenly. Add a small amount of water to dry food to help it cook. Venting After covering a dish with plastic wrap, vent the plastic wrap by turning back one corner to let excess steam escape.
- Page 35 COOkING POULTRy Place the poultry on a microwave-safe roasting rack in a microwave-safe dish and cover with wax paper to prevent spattering. Use aluminum foil to shield the bone tips, thin pieces of meat, or areas that may start to overcook.
- Page 36 COOkING EGGS You can use your microwave oven to cook eggs. Cook them until they are just set as they become tough if they are overcooked. Never cook eggs in their shells or the sphere shaped yolk, and never warm up hard-boiled eggs in their shells as they may explode.
-
Page 37: Recipes
RECIPES beef and barley stew 1½ lbs. beef stew cubes, cut into ½-inch pieces ½ cup chopped onion 2 Tbs. all-purpose flour 1 Tbs. Worcestershire sauce 1 can (13.75-14.5 oz.) beef broth 2 medium carrots, cut into ½-inch slices (about 1 cup) ½... -
Page 38: Warm Potato Salad
cooking guide Warm potato salad 2 lbs. small red potatoes, cut into ½-inch pieces 4 slices bacon (uncooked), cut into ½-inch pieces ¼ cup chopped onion 2 tsp. sugar 1 tsp. salt 1 tsp. flour ½ tsp. celery seed 1/8 tsp. pepper 2½... -
Page 39: Cleaning The Exterior
CLEANING ThE ExTERIOR It’s best to clean spills on the outside of your microwave oven as they occur. Use a soft cloth and warm, soapy water. Rinse and dry. Do not get water into the vents. Never use abrasive products or chemical solvents such as ammonia or alcohol as they can damage the appearance of your microwave. -
Page 40: Storing And Repairing Your Microwave Oven
STORING ANd REPAIRING yOUR mICROWAVE OVEN If you need to store your microwave oven for a short or extended period of time, choose a dust-free, dry location. Dust and dampness may adversely affect the ability of the microwave parts. -
Page 41: Cleaning The Grease Filter
CLEANING ThE GREASE FILTER Your microwave oven has two metal reusable grease filters. The grease filters should be removed and cleaned at least once a month, or as required. To avoid risk of personal injury or property damage, do not operate the oven hood without filters in place. -
Page 42: Replacing The Charcoal Filter
(every 6 to 12 months, and more often if necessary). The charcoal filter cannot be cleaned. To order a new charcoal filter, contact the Parts Department at your nearest Authorized Service Center or Samsung dealer (Charcoal filter part no.: De63-00367D). 1. Unplug the oven plug or turn off the power at the main power supply. -
Page 43: Specifications
Power Output Cook top Light Oven Light Oven Cavity dimensions Outside dimensions Shipping dimensions Net/Shipping Weight smh9207st 2.0 cuft 10 power levels, including defrost 99 minutes, 99 seconds 120 VAC, 60 Hz 1650 Watts 1100 Watts 40 Watts incandescent bulb 40 Watts incandescent bulb ”(W) X 10... -
Page 44: Check These Points If Your Microwave Oven
ChECk ThESE POINTS IF yOUR mICROWAVE OVEN proBlem The display and/or the oven is not working. The display is working, but the power won’t come on. Is the power going off before the set time has elapsed? Cooks food too slowly. -
Page 45: Warranty And Service Information
WARRANTy ANd SERVICE INFORmATION To help us to serve you better, please complete the enclosed registration card and promptly return it by mail. If the registration card is missing, you can call Samsung Electronics, Inc., at 1-800-sAmsung (726-7864) or register online at www.samsung.com/global/register. - Page 46 SAMSUNG or SAMSUNG’s authorized service center. SAMSUNG will repair this product or replace it if cannot repair it, at our option and at no charge as stipulated herein, with new or reconditioned parts or products if found to be defective during the limited warranty period specified above.
- Page 47 memo...
- Page 48 Code No.: DE68-03686A-01...