Table of Contents
Advertisement
Quick Links
Contact SAMSUNG WORLDWIDE
If you have any questions or comments relating to Samsung products, please contact the SAMSUNG customer care centre.
Country
Customer Care Centre
EIRE
0818 717100
U.K
0845 SAMSUNG (7267864)
© 2010 Samsung Electronics Co., Ltd. All rights reserved.
Web Site
www.samsung.com
www.samsung.com
BN68-02589D
BN68-02589D-00
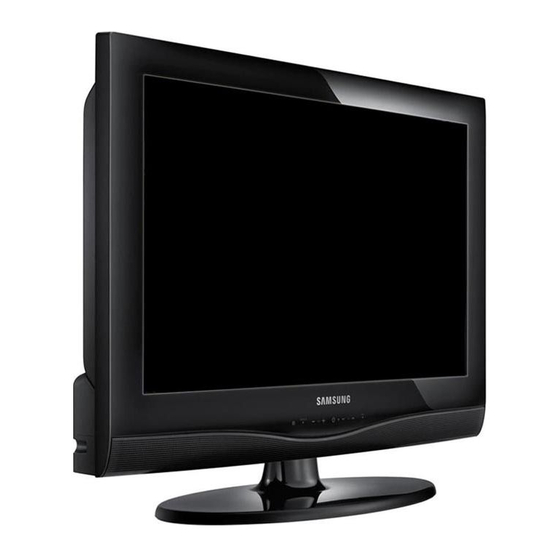
LCD TV
user manual
imagine the possibilities
Thank you for purchasing this Samsung product.
To receive more complete service, please register
your product at
www.samsung.com/register
Model _____________ Serial No. _____________
Advertisement
Table of Contents

Related Manuals for Samsung LE26C350D1W


Summary of Contents for Samsung LE26C350D1W
- Page 1 Contact SAMSUNG WORLDWIDE If you have any questions or comments relating to Samsung products, please contact the SAMSUNG customer care centre. Country Customer Care Centre EIRE 0818 717100 0845 SAMSUNG (7267864) © 2010 Samsung Electronics Co., Ltd. All rights reserved.
-
Page 2: Securing The Installation Space
The reception quality of TV may be affected due to differences in broadcasting method between the countries. Please check the TV performance in the local SAMSUNG Authorized Dealer, or the Samsung Call Centre whether it can be improved by reconfiguring TV setting or not. -
Page 3: Table Of Contents
Getting Started Connections Basic Features Advanced Features Other Information Check the Symbol! This function can be used by pressing the TOOLS button on the remote control. Accessories Viewing the Control Panel Viewing the Remote Control Connecting to an Antenna Plug & Play (Initial Setup) Connecting to an AV Device Connecting to an Audio Device Connecting to a PC... -
Page 4: Getting Started 4 Accessories
✎ Please make sure the following items are included with your LCD TV. If any items are missing, contact your dealer. ✎ The items’ colours and shapes may vary depending on the models. Remote Control & Batteries (AAA x 2) ... -
Page 5: Viewing The Remote Control
Turn the TV on and off. (P. 6) Change the channel. Alternately select Teletext, Double or MiX. Adjust the volume. Display the main on-screen menu. (P. 10) View the Media play. Quickly select frequently used functions. Select on-screen menu items and change menu values. -
Page 6: Connecting To An Antenna
When the TV is initially powered on, basic settings proceed automatically. ✎ Preset: Connecting the mains and antenna. Power Input When the TV is initially powered on, a sequence of on-screen prompts will assist in confi guring basic settings. Press the POWERP button. -
Page 7: Connections
Connections Using an HDMI / DVI Cable: HD connection (up to 1080p) Available devices: DVD, Blu-ray player, HD cable box, HD STB (Set-Top-Box) satellite receiver, cable box, satellite receiver (STB) Red White ✎ HDMI (DVI) IN / PC/DVI AUDIO IN When using an HDMI/DVI cable connection, you must use the connection, use a DVI to HDMI cable or DVI-HDMI (DVI to HDMI) adapter for video connection and the AUDIO IN... -
Page 8: Connecting To An Audio Device
Using an Optical or Audio Cable Connection Available devices: digital audio system, amplifi er, DVD home theatre ✎ DIGITAL AUDIO OUT (OPTICAL) When a digital audio system is connected to the of both the TV and the system. 5.1 CH (channel) audio is available when the TV is connected to an external device supporting 5.1 CH. When the receiver (home theatre) is set to on, you can hear sound output from the TV’s TV is receiving a DTV signal, the TV will send 5.1 CH sound to the home theatre receiver. - Page 9 Display Modes (D-Sub and HDMI/DVI Input) Optimal resolution is 1360 X 768 @ 60 Hz.1920X1080@60Hz. Horizontal Frequency Mode Resolution 640 x 350 720 x 400 640 x 480 832 x 624 640 x 480 800 x 600 VESA DMT 1024 x 768 1280 x 720 1360 x 768 720 x 576...
-
Page 10: Changing The Input Source
Changing the Input Source Source List Use to select TV or other external input sources such as DVD / Blu-ray players / cable box / STB satellite receiver connected to the TV. TV / Ext. / AV / Component / PC / ■... -
Page 11: Using The Info Button (Now & Next Guide)
Using the INFO button (Now & Next guide) POWER The display identifies the current channel and the status of certain audio-video settings. The Now & Next guide shows daily TV programme information for each channel according to the broadcasting time. Scroll ◄, ►... -
Page 12: Channel Menu
Channel Manager Delete or set favourites channels and use the programme guide for digital broadcasts. Select a channel in the Channels, My Channels or Scheduled screen. Radio Data/Other Analogue Antena Zoom Channels: Shows the channel list according to ■ channel type. My Channels: Shows the group of the channel. -
Page 13: Auto Store
Auto Store Scans for a channel automatically and stores in the TV. ✎ Automatically allocated programme numbers may not correspond to actual or desired programme numbers. If a channel is locked using the Child Lock function, the PIN input window appears. Antenna Source (Air / Cable) : Select the antenna ■... -
Page 14: Picture Menu
Channel Manager Option Menu (in Channel Manager) Set each channel using the Channel Manager menu options (Lock / Unlock, Timer Viewing, Sort, Delete, Select All / Deselect All). Option menu items may differ depending on the channel status. 1. Select a channel and press the 2. -
Page 15: Economical Solutions
Economical Solutions ¦ ECO Solution Energy Saving (Off / Low / Medium / High / Picture ■ Off / Auto) : Adjust the brightness of the TV in order to reduce power consumption. If you select Picture Off, the screen is turned off, but the sound remains on. - Page 16 : Your cable box/satellite receiver Size ■ may have its own set of screen P.MODE sizes as well. However, we highly recommend you use 16:9 mode most of the time. Auto Wide: Automatically adjusts the picture size to the 16:9 aspect ratio. 16:9 : Adjusts the picture size to 16:9 for DVDs or wide broadcasting.
-
Page 17: Sound Menu
PC may differ in which case the same basic set-up information will almost always be applied. (If not, contact your computer manufacturer or Samsung Dealer.) 1. Click on “Control Panel” on the Windows start menu. -
Page 18: Audio Description
Audio Description (not available in all locations) (digital channels only) This function handles the Audio Stream for the AD (Audio Description) which is sent along with the Main audio from the broadcaster. Audio Description (Off / On) : Turn the audio description ■... -
Page 19: Setup Menu
Setup Menu Setting the Time ¦ Time Clock : Setting the clock is for using various timer ■ features of the TV. The current time will appear every time you press INFO button. ✎ If you disconnect the power cord, you have to set the clock again. -
Page 20: Common Interface
: Change your personal ID number required Change PIN ■ to set up the TV. ✎ If you forget the PIN code, press the remote control buttons in the following sequence, which resets the PIN to “0-0-0-0”: → 8 → 2 → 4 → MUTE POWER Other Features... -
Page 21: Support Menu
Samsung customer service centre. Software Upgrade Software Upgrade can be performed via a broadcasting signal or by downloading the latest firmware from samsung. com to a USB memory device. Current Version the software already installed in the TV. -
Page 22: Advanced Features
Before connecting your device to the TV, please back up your files to prevent them from damage or loss of data. SAMSUNG is not responsible for any data file damage or data loss. Do not disconnect the USB device while it is loading. -
Page 23: Screen Display
Screen Display ¦ Move to the file you desired using the up/down/right/left buttons and then press the ENTERE button. The file is played. ✎ Supports the Device Mode and Contents Mode in Media Play homepage. Information : You can ascertain the selected file name and the number of files and page. -
Page 24: Playing The Multiple Files
Photos Viewing a Photo (or Slide Show) 1. Press the ◄ or ► button to select Photos, then press the ENTERE button in the Media Play menu. 2. Press the ◄/►/▲/▼ button to select the desired photo in the file list. 3. - Page 25 Media Play Additional Function ¦ Sorting the file list Press the blue button in the file list to sort the files. Category Basic View Displays the whole folder. You can view the photo by selecting the folder. Title Sorts and displays the file title in Symbol/Number/Alphabet/Special order. Sorts and displays the file by preference.
-
Page 26: Analogue Channel Teletext Feature
The index page of the Teletext service gives you information on how to use the service. For Teletext information to be displayed correctly, channel reception must be stable. Otherwise, information may be missing or some pages may not be displayed. ✎... -
Page 27: Installing The Wall Mount
For detailed information on installing the wall mount, see the instructions provided with the Wall Mount items. Contact a technician for assistance when installing the wall mount bracket. Samsung Electronics is not responsible for any damage to the product or injury to yourself or others if you elect to install the TV on your own. -
Page 28: Anti-Theft Kensington Lock
The Kensington Lock is a device used to physically fix the system when using it in a public place. The appearance and locking method may differ from the illustration depending on the manufacturer. Refer to the manual provided with the Kensington Lock for proper use. -
Page 29: Troubleshooting
If you have any questions about the TV, first refer to this list. If none of these troubleshooting tips apply, please visit “www. samsung.com,” then click on Support, or contact the call centre listed on the back-cover of this manual. - Page 30 Try pointing the remote directly at the TV from 5~6 feet away. • Programme the Cable/Set top box remote control to operate the TV. Refer to the Cable/Set user manual for the SAMSUNG TV code. • Check the supported resolution of the TV, and adjust the external device’s output resolution accordingly.
- Page 31 Issues Solutions and Explanations Your settings are lost after 30 minutes or • every time the TV is turned off. You have intermittent loss of audio or • video. • You see small particles when you look • closely at the edge of the frame of the TV. The message “Scramble signal”...
-
Page 32: Specifications
Panel native Environmental Considerations Operating Temperature Operating Humidity Storage Temperature Storage Humidity TV System Colour/video system Sound System HDMI IN Stand Swivel (Left / Right) Model Name Screen Size (Diagonal) Sound Output Dimensions (WxDxH) Body With stand Weight With Stand ✎... -
Page 33: Index
Amplify Antenna Auto Adjustment Auto Volume Background Music Balance L/R Basic View Batteries Black Tone Brightness Change PIN Channel Manager Clock Colour Tone Component Connecting to a PC Connecting to an Audio Device Digital Audio out D-sub Dynamic Dynamic Contrast Edit Name Editing channels Energy Saving... - Page 34 Warning! Important Safety Instructions Please read the appropriate section that corresponds to the marking on your Samsung product before attempting to install the product. CAUTION RISK OF ELECTRIC SHOCK DO NOT OPEN CAUTION: TO REDUCE THE RISK OF ELECTRIC SHOCK, DO NOT REMOVE COVER (OR BACK).
-
Page 35: Warranty Card
3. Warranty repairs must be carried out by Authorised Samsung Dealers or Authorised Service Centres. No re-imbursement will be made for repairs carried out by non Samsung Dealers and, any such repair work and damage to the products caused by such repair work will not be covered by this warranty. - Page 36 This page is intention- ally left blank.