Table of Contents
Advertisement
Available languages
Available languages
Safe Operation Practices • Set-Up • Operation • Maintenance • Service • Troubleshooting • Warranty
O
'
M
peratOr
s
anual
Self Propelled Mower — Models TB230, TB260, & TB280 ES
WARNING
READ AND FOLLOW ALL SAFETY RULES AND INSTRUCTIONS IN THIS MANUAL
BEFORE ATTEMPTING TO OPERATE THIS MACHINE.
FAILURE TO COMPLY WITH THESE INSTRUCTIONS MAY RESULT IN PERSONAL INJURY.
TROY-BILT LLC, P.O. BOX 361131 CLEVELAND, OHIO 44136-0019
Printed In USA
Form No. 769-06359
(October 4, 2010)
Advertisement
Table of Contents

Related Manuals for Troy-Bilt TB230


Summary of Contents for Troy-Bilt TB230
- Page 1 Safe Operation Practices • Set-Up • Operation • Maintenance • Service • Troubleshooting • Warranty ’ peratOr anual Self Propelled Mower — Models TB230, TB260, & TB280 ES WARNING READ AND FOLLOW ALL SAFETY RULES AND INSTRUCTIONS IN THIS MANUAL BEFORE ATTEMPTING TO OPERATE THIS MACHINE.
-
Page 2: Table Of Contents
Call a Customer Support Representative at (800) 828-5500 or (330) 558-7220 ◊ Write us at Troy-Bilt LLC • P.O. Box 361131 • Cleveland, OH • 44136-0019 If you have any problems or questions concerning the machine, phone a authorized Troy-Bilt service dealer or contact us directly. -
Page 3: Safe Operation Practices
Important Safe Operation Practices WARNING: This symbol points out important safety instructions which, if not followed, could endanger the personal safety and/or property of yourself and others. Read and follow all instructions in this manual before attempting to operate this machine. Failure to comply with these instructions may result in personal injury. - Page 4 A missing or damaged discharge cover can cause blade contact or thrown object injuries. Many injuries occur as a result of the mower being pulled over the foot during a fall caused by slipping or tripping. Do not hold on to the mower if you are falling; release the handle immediately.
- Page 5 Service Safe Handling Of Gasoline: To avoid personal injury or property damage use extreme care in handling gasoline. Gasoline is extremely flammable and the vapors are explosive. Serious personal injury can occur when gasoline is spilled on yourself or your clothes, which can ignite.
-
Page 6: Spark Arrestor
Notice Regarding Emissions Engines which are certified to comply with California and federal EPA emission regulations for SORE (Small Off Road Equipment) are certified to operate on regular unleaded gasoline, and may include the following emission control systems: Engine Modification (EM), Oxidizing Catalyst (OC), Secondary Air Injection (SAI) and Three Way Catalyst (TWC) if so equipped. -
Page 7: Safety Symbols
Safety Symbols This page depicts and describes safety symbols that may appear on this product. Read, understand, and follow all instructions on the machine before attempting to assemble and operate. Symbol READ THE OPERATOR’S MANUAL(S) Read, understand, and follow all instructions in the manual(s) before attempting to assemble and operate DANGER —... - Page 8 2 — i ectiOn MpOrtant peratiOn ractices...
-
Page 9: Assembly & Set-Up
Assembly & Set-Up Contents of Carton • One Lawn Mower • One Lawn Mower Operator’s Manual NOTE: Please be aware that this Operator’s Manual covers both the low and high wheel models of this mower. While this manual illustrates the high wheel model, the instructions and features are equally applicable to the low wheel model as well, unless otherwise noted. - Page 10 Remove the T-bolts from the handle brackets as shown in Fig. 3-3. Figure 3-3 Follow the steps below to complete handle assembly: Pull upward on the handle until holes in lower handle (shown in Fig. 3-3 deck cutaway) line up with holes in handle bracket.
- Page 11 Slip plastic channel of grass bag over hooks on the frame. See Fig. 3-7. Figure 3-7 Follow steps below to attach grass catcher: Lift rear discharge door. Place grass catcher into the slots in the handle brackets as shown in Fig. 3-8. Let go of discharge door so that it rests on the grass catcher.
- Page 12 NOTE: For mowers with low wheels, the height adjustment levers move in the opposite direction to adjust; for those with high wheels, the levers move in the same direction. Higher Lower Higher High Wheel Figure 3-10A Release lever towards deck. IMPORTANT: Both the front and rear wheels must be placed in the same relative position.
-
Page 13: Controls & Features
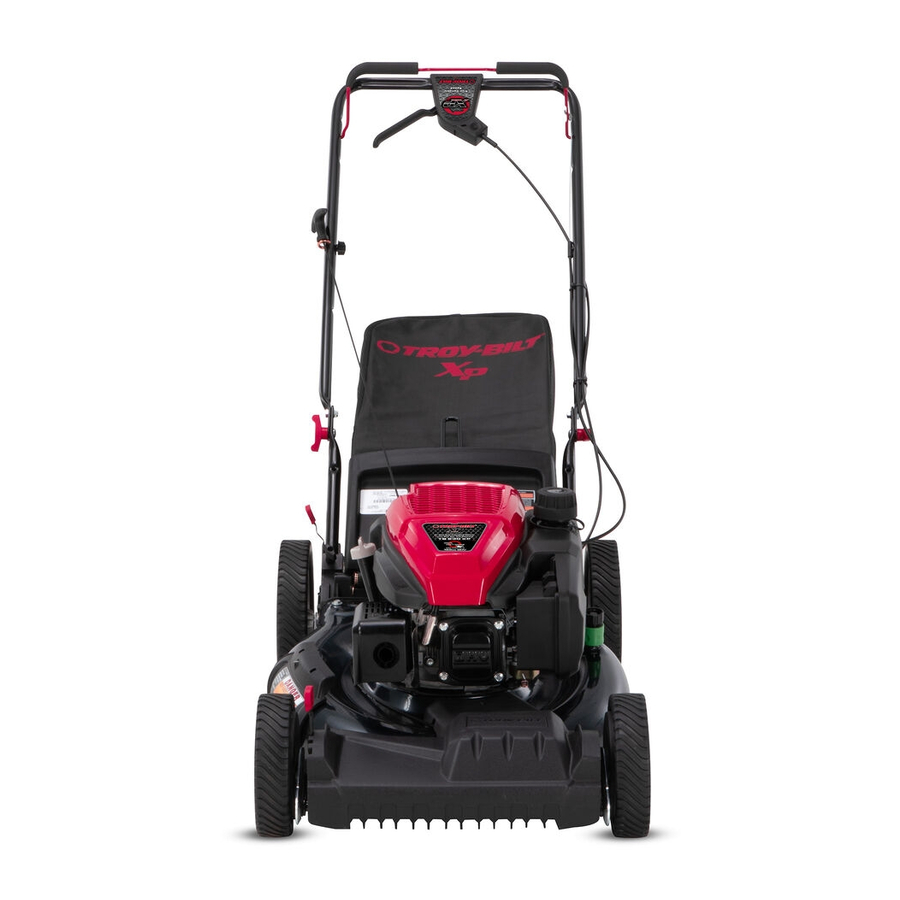
Controls and Features Drive Control Electric Start Ignition Switch Recoil Starter Side Discharge Chute Cutting Height Adjustment Lever Blade Control The blade control is attached to the upper handle of the mower. Depress and squeeze it against the upper handle to operate the unit. -
Page 14: Starting/Stopping Engine
Operation Starting Engine WARNING: Be sure no one other than the operator is standing near the lawn mower while starting engine or operating mower. Never run engine indoors or in enclosed, poorly ventilated areas. Engine exhaust contains carbon monoxide, an odorless and deadly gas. - Page 15 Using Your Lawn Mower Be sure lawn is clear of stones, sticks, wire, or other objects which could damage lawn mower or engine. Such objects could be accidently thrown by the mower in any direction and cause serious personal injury to the operator and others. Once the engine is running, squeeze the drive control against the upper handle to propel mower.
-
Page 16: Lubrication, Deck Care
Maintenance & Adjustments Maintenance General Recommendations • Always observe safety rules when performing any maintenance. • The warranty on this lawn mower does not cover items that have been subjected to operator abuse or negligence. To receive full value from warranty, operator must maintain the lawn mower as instructed here. -
Page 17: Deck Wash, Engine Care
Deck Wash (If Equipped) Your mower’s deck may be equipped with a water port on its surface as part of its deck wash system. Use the deck wash to rinse grass clippings from the deck’s underside and prevent the buildup of corrosive chemicals. Complete the following steps AFTER EACH MOWING: Push the mower to a level, clear spot on your lawn, near enough for your garden hose to reach. -
Page 18: Blade & Belt Care
Service Blade Care WARNING: When removing the cutting blade for sharpening or replacement, protect your hands with a pair of heavy gloves or use a heavy rag to hold the blade. Periodically inspect the blade adapter for cracks, especially if you strike a foreign object. -
Page 19: Replacing, Charging Battery
Replacing Battery (If Equipped) WARNING: Batteries contain sulfuric acid which may cause burns. Do not short circuit or mutilate batteries in any way. Do not put batteries in fire as these may burst or release toxic materials. Unhinge cover seal and lift off battery cover. Remove positive and negative leads from battery, and pull up on battery to remove. - Page 20 Replacing Fuse (If Equipped) The electric starter circuit and battery are protected by a 40 ampere fuse. If the fuse burns out, the electric starter will not operate. If the unit fails to start with the electric starter, perform the following steps to check the fuse inside the battery housing: Open the battery cover as described in Replacing Battery.
- Page 21 Notes...
-
Page 22: Troubleshooting
Troubleshooting Problem Engine Fails to start Engine runs erratic Engine overheats Occasional skips (hesitates) at high speed Idles poorly Excessive Vibration Mower will not mulch grass Cause Blade control disengaged. Spark plug boot disconnected. Fuel tank empty or stale fuel. Engine not primed (if equipped with primer). - Page 23 Problem Uneven cut Wheels not positioned correctly. Dull blade. Mower will not self propel Belt not installed properly. Debris clogging drive operation. Damaged or worn belt. Cause Place front and rear wheels in same height position. Sharpen or replace blade. Check belt for proper pulley installation and movement.
-
Page 24: Replacement Parts
Replacement Parts Component † If Equipped (800) 828-5500 or (330) 558-7220 Phone serial number ready). Parts Manual downloads are also available free of charge at www.troybilt.com Part Number and Description 490-250-0009 759-3338 16952-ZA8-800 Fuel Filter (Honda) BS-298090S † 17211-ZL8-023 BS-491588S BS-493537S †... - Page 25 Component † If Equipped (800) 828-5500 or (330) 558-7220 Phone serial number ready). Parts Manual downloads are also available free of charge at www.troybilt.com Part Number and Description 731-07131 942-0741A 964-04117 954-04260 725-04329 † 725-04903 † 925-0201 † to order replacement parts or a complete Parts Manual (have your full model number and Discharge Chute Mulching Blade Grass Bag...
-
Page 26: Warranty
MANUFACTURER’S LIMITED WARRANTY FOR The limited warranty set forth below is given by Troy-Bilt LLC with respect to new merchandise purchased and used in the United States and/or its territories and possessions, and by MTD Products Limited with respect to new merchandise purchased and used in Canada and/ or its territories and possessions (either entity respectively, “Troy-... - Page 27 Medidas importantes de seguridad • Configuración • Funcionamiento • Mantenimiento • Servicio • Solución de problemas • Garantía anual del OperadOr Podadora tipo abonadora autopropulsada — Modelos TB230, TB260, y TB280 ES ADVERTENCIA LEA Y SIGA TODAS LAS INSTRUCCIONES DE ESTE MANUAL ANTES DE PONER EN FUNCIONAMIENTO ESTA MÁQUINA.
- Page 28 Llame a un representante de Asistencia al Cliente al (800) 828-5500 ó (330) 558-7220 ◊ Escríbanos a Troy-Bilt LLC • P.O. Box 361131 • Cleveland, OH • 44136-0019 estándar sin previo aviso y sin generar responsabilidad por obligaciones de ningún tipo.
- Page 29 Medidas importantes de seguridad ADVERTENCIA: La presencia de este símbolo indica que se trata de instrucciones importantes de seguridad que se deben respetar para evitar poner en peligro su seguridad personal y/o material y la de otras personas. Lea y siga todas las instrucciones de este manual antes de poner en funcionamiento esta máquina.
- Page 30 No ponga las manos o los pies cerca de las piezas rotatorias o en la tolva de la cortadora. El contacto con las cuchillas puede producir la amputación de manos y pies. Una cubierta de descarga faltante o dañada puede provocar el contacto con la cuchilla o lesiones por objetos arrojados.
- Page 31 Niños Pueden ocurrir accidentes trágicos si el operador no está atento a la presencia de niños. Por lo general a los niños les atraen las podadoras y la actividad de podar el césped. No entienden los riesgos ni los peligros. Nunca dé por sentado que los niños permanecerán en el mismo lugar donde los vio por última vez.
- Page 32 Nunca trate de ajustar una rueda o la altura de corte mientras el motor está en marcha. Los componentes de la tolva para recorte, cubierta de descarga y escudo de riel, están sujetos a desgaste y daños que podría dejar expuestas partes que se mueven o permitir que se arrojen objetos.
- Page 33 Símbolos De Seguridad Esta página representa y describe la seguridad los símbolos que pueden parecer en este producto. Lea, comprenda, y siga todas instrucciones de la máquina antes de intentar ensamblar y operar. Símbolo LEA EL MANUAL(S) DEL OPERADOR Lea, comprenda, y siga todas instrucciones en el manual (manuales) antes de operar el producto.
- Page 34 2 — M ección edidas iMpOrtantes de seguridad...
- Page 35 Montaje y Configuración Contenido de la caja • Una Podadora • Uno Manual de Operador NOTA: Tenga en cuenta que este manual del operador abarca tanto los modelos de rueda alta y baja de este cortacésped. Aunque este manual se ilustra el modelo de rueda alta, las instrucciones y las características son igualmente aplicables al modelo de rueda baja, así, a menos que se indique lo contrario.
- Page 36 Siga los siguientes pasos para completar conjunto del mango: Tire hacia arriba en el asa hasta agujeros en la manija (que se muestra en la figura. 3-3 corte de la cubierta) se alinean con los agujeros en el mango soporte. Vea la fig.
- Page 37 Figura 3-7 Para acoplar el colector de césped. Levante la puerta de descarga posterior. Lugar de colección de césped en las ranuras en el mango entre corchetes como se muestra en la fig. 3-8. Suelte la puerta de descarga de modo que descanse sobre el colector de césped.
- Page 38 NOTA: para cortadoras de césped con ruedas de bajo, el ajuste de altura de las palancas se mueven en la dirección opuesta para ajustar, para aquellos con altas ruedas, el movimiento palancas en la misma dirección. Superior Inferior Superior Alto de ruedas Figura 3-10A Libere la palanca hacia la cubierta de la podadora.
- Page 39 Controles Y Características Control de la transmisión Arrancador eléctrico Arrancador de retroceso Canal de Descarga Lateral Palanca de ajuste de altura de corte Control de Cuchilla El control de la cuchilla está unido a la manija superior. Presione la manija de control de la cuchilla contra la manija superior para operar la unidad.
- Page 40 Funcionamiento Encendido del Motor ADVERTENCIA: Asegúrese que ninguna persona aparte del operador permanezca cerca de la podadora mientras arranca el motor u opera la misma. Nunca encienda un motor en espacios cerrados o en una zona con poca ventilación. El escape del motor contiene monóxido de carbono, un gas inodoro y letal.
- Page 41 Detención del Motor Suelte la manija de control de la cuchilla para detener el motor y la cuchilla. ADVERTENCIA: Espere a que la cuchilla se haya detenido por completo antes de hacer cualquier trabajo en la podadora o de retirar el colector de césped.
- Page 42 Mantenimiento Y Ajustes Mantenimiento Recomendaciones Generales • Respete siempre las reglas de seguridad cuando realice tareas de mantenimiento. • La garantía de esta podadora no cubre elementos que han estado sujetos al mal uso o la negligencia del operador. Para recibir el reembolso total de la garantía, el operador deberá...
- Page 43 Lavado de la Plataforma (De ser equipado) La plataforma de su podadora está equipada con un puerto de agua sobre su superficie como parte del sistema de lavado de la plataforma. Utilice el lavado de la plataforma para lavar la parte inferior de la plataforma y quitar los recortes de césped e impedir la acumulación de sustancias químicas corrosivas.
- Page 44 NOTE: Varios componentes deben ser quitados a fin de cambiar Cuchilla el cinturón del cortacésped. Ver a un Distribuidor de Servicio de Troy-Bilt autorizado para hacer sustituir su cinturón. Reemplazo de la batería ADVERTENCIA: sulfúrico que puede causar quemaduras. No ponga en corto circuito o mutile las baterías de ninguna...
- Page 45 Figura 7-2 Reemplace por una nueva batería. Conecte el conductor positivo (rojo) al lado positivo del paquete de batería, luego conecte el lado negativo (negro). Vea la Fig. 7-3. Figura 7-3 Vuelva a colocar la cubierta y la batería sello de la cubierta. Carga de la batería ADVERTENCIA: corrosivo y material tóxico;...
- Page 46 IMPORTANTE: No quite el paquete de baterías del alojamiento del arrancador eléctrico por ninguna razón que no sea el reemplazo. IMPORTANTE: Siempre conecte el conductor del cargador dentro del paquete de baterías en primer lugar, y luego inserte la clavija del cargador de baterías en una salida residencial estándar de 120 voltios.
- Page 47 Notas...
- Page 48 Solución de problemas Problema El motor no arranca El motor funciona de manera errática El motor recalienta Saltos ocasionales (pausas) a alta velocidad Funciona mal en marcha lenta Causa El control de lámina se retiró. Alambre de bujía desconectado. Depósito de combustible combustible vacío o añejo.
- Page 49 Problema Demasiada vibración Cuchilla floja o desequilibrada. Cuchilla abollada. La podadora no abona Césped húmedo. el césped Césped excesivamente alto. La cuchilla de la cortadora no está afilada. Corte desigual La posición de las ruedas no es correcta. La cuchilla de la cortadora no está afilada. La podadora no Correa mal instalada.
- Page 52 Las disposiciones de esta garantía cubren el recurso de reparación única y exclusiva que surge de la venta. Troy-Bilt no se hará responsable de ninguna pérdida o daño incidental o resultante, incluyendo sin limitación, los gastos incurridos para los servicios de mantenimiento del césped, o los gastos de arrendamiento para...