
Related Manuals for Toshiba MA-600

Summary of Contents for Toshiba MA-600
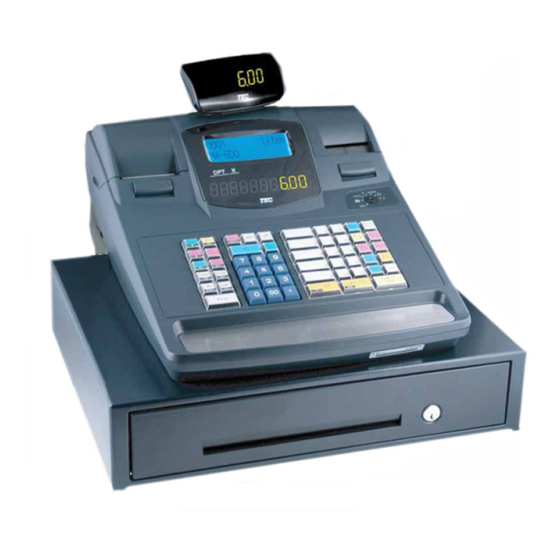
- Page 1 TEC Electronic Cash Register MA-600 SERIES Programming Manual Document No. EO3-11106 Original Dec., 2005 (Revised PRINTED IN JAPAN...
-
Page 2: Table Of Contents
1. INTRODUCTION ...1- 1 Main Features ...1- 1 Description of Model Number ...1- 1 2. SPECIFICATIONS ...2- 1 3. CAPACITIES...3- 1 Indexing Capacities ...3- 1 Basic Memory Capacities ...3- 2 Financial Memory ...3- 3 Cashier Memory ...3- 6 Others ...3- 8 Memory Balance...3- 9 4. - Page 3 7. VERIFICATION OF PROGRAMMED DATA...7- 1 CAUTION! 1. This manual may not be copied in whole or in part without prior written permission of TOSHIBA TEC. 2. The contents of this manual may be changed without notification. 3. Please refer to your local Authorised Service representative with regard to any queries you may have in this manual.
-
Page 4: Introduction
This programming manual is provided for salespersons, field engineers, and other personal as supplementary manual for TOSHIBA TEC Electronic Cash Register MA-600 series. Reading through the MA-600 Owner’s Manual is recommended in order to thoroughly understand the descriptions in this manual. -
Page 5: Specifications
SPECIFICATIONS SIZE: WEIGHT: POWER REQUIREMENT: POWER CONSUMPTION: BATTERY: Type ----------------------------------------------------- Lithium-vanadium battery Life ------------------------------------------------------- 5 years Back-up duration ------------------------------------- 1 month (in case of full charge) Charge method --------------------------------------- Inserting the power plug into an outlet Full charge time--------------------------------------- 48 hours or more AMBIENT TEMPERATURE: RELATIVE HUMIDITY: PRINTER:... - Page 6 PAPER ROLL (RECEIPT and JOURNAL) Media ---------------------------------------------------- Thermal roll paper Width ---------------------------------------------------- 58 +0/-1 mm Thickness----------------------------------------------- 0.060 mm to 0.075 mm Outside dimension ----------------------------------- 80 mm or less Recommended thermal paper -------------------- Only paper rolled onto a core is acceptable, however, the DISPLAY: Operator Display Upper row ---------------------------------------------- LCD display (192 x 64 dots)
-
Page 7: Capacities
CAPACITIES Indexing Capacities Input Item Amount Quantity in Multiplication Unit Price in Multiplication Tender Media Keys Non-add Number Percent Rate VAT Rate PLU Code Cashier Code Salesperson Code Department Code Group Code Digits 3 integer digits + 3 decimal digits (0.001 to 999.999) 2 integer digits + 3 decimal digits (0.001 to 99.999%) 2 integer digits + 2 decimal digits (0.01 to 99.99%) 2-digit cashier’s own secret code (01 to 99) + 2-digit manager-... -
Page 8: Basic Memory Capacities
Basic Memory Capacities (NOTE: For Item Count below, “6 + 2 digits” means that it has 6 integer digits and 2 decimal digits.) Group Memory (Group Name: 12 characters; max. 15 groups) Memory Type Daily Memory GT Memory Department Memory (Department Name: 16 characters; max. 40 departments) Memory Type Daily Memory GT Memory... -
Page 9: Financial Memory
Financial Memory Name of Total/Counter GT (Grand Total) NET GT (All-media Sales GT) NEG GT GS (Gross Sale) Tax 1 to Tax 8 Tax Total Net Sale with Tax %+ (% I) %- (% II) Vender Coupon Amount Discount Negative Departments Total Special Rounding All-media Sales Cash Sales... - Page 10 Financial Memory: (continued) Name of Total/Counter Cheque-in-drawer Cheque-in-drawer (Foreign Currency 1) Cheque -in-drawer (Foreign Currency 2) Cheque -in-drawer (Foreign Currency 3) Cheque -in-drawer (Foreign Currency 4) Cheque -in-drawer (Foreign Currency 5) Credit-in-drawer Credit-in-drawer (Foreign Currency 1) Credit-in-drawer (Foreign Currency 2) Credit-in-drawer (Foreign Currency 3) Credit-in-drawer...
- Page 11 Financial Memory: (continued) Name of Total/Counter Credit-in-drawer Difference Misc. Media-in-drawer Difference Media-Coupon-in-drawer Difference Credit 1-in-drawer Difference Credit 2-in-drawer Difference Credit 3-in-drawer Difference Credit 4-in-drawer Difference Credit 5-in-drawer Difference Item Correct Void Misc. Void All Void Store Coupon Returned Merchandise Negative Mode ( - ) Total %- on Line Items Amount Discount on Line Items Transfer Balance GT...
-
Page 12: Cashier Memory
Cashier Memory Name of Total/Counter GS (Gross Sale) Net Sale with Tax %+ (% I) %- (% II) Vender Coupon Amount Discount Negative Departments Total All-media Sales Cash Sales Cheque Sales Credit Sales Misc. Media Sales Media-Coupon Sales Credit 1 Sales Credit 2 Sales Credit 3 Sales Credit 4 Sales... - Page 13 Cashier Memory: (continued) Name of Total/Counter Credit-in-drawer Credit-in-drawer (Foreign Currency 1) Credit-in-drawer (Foreign Currency 2) Credit-in-drawer (Foreign Currency 3) Credit-in-drawer (Foreign Currency 4) Credit-in-drawer (Foreign Currency 5) Misc. Media-in-drawer Misc. Media-in-drawer (Foreign Currency 1) Misc. Media -in-drawer (Foreign Currency 2) Misc.
-
Page 14: Others
Cashier Memory: (continued) Name of Total/Counter Item Correct Void Misc. Void All Void Returned Merchandise Negative Mode ( - ) Total No-sale Counter Clear Key Counter Consignment Key Counter Validation Counter Money Declaration Counter Read Report Counter Reset Report Counter Others Name of Total/Counter Hourly Range Reset Counter... -
Page 15: Memory Balance
Memory Balance GT (Grand Total) = Sum of Daily GS (Gross Sale) NET GT = Sum of Daily Net Sales NEG GT = GT – NET GT GS (Gross Sale) = (Sum of Positive Depts) + (Sum of Add-on Taxes) Net Sale = GS –... -
Page 16: System Start-Up Procedure
SYSTEM START-UP PROCEDURE Case 1: To start-up using the MA-600 terminal only RAM Clear (Chapter 5) All the programming operations required for the terminal (Chapter 6) Case 2: To start-up by installing programming data from the PC CAUTION! < Precautions for connection to PC >... - Page 17 PC Transmission Information Setting Data transmission information setting with a PC connection is performed here. CONDITION Any time outside a sale OPERATION Mode Lock: BLIND 68 [X] NOTE: When performing the key operation of 68 [X] [AT/TL], a receipt containing the currently programmed values is issued.
-
Page 18: Ram Clear, Data Clear, Status Clear
RAM CLEAR, DATA CLEAR, STATUS CLEAR RAM Clear CAUTION! This clear operation deletes all programmed data and sales data stored in the memory of the ECR. (i.e., the ECR goes back to initial status.) If the ECR becomes completely inoperative due to battery discharge or malfunction of the program memory, the RAM Clear operation must be carried out. -
Page 19: Data Clear
DATA Clear CAUTION! This clear operation deletes all sales data of any operation sequence stored in the memory of the ECR. Performing the DATA Clear operation will clear only the sales data accumulated in the memory of the ECR (report memory), however, the programmed data will not be cleared. By this operation, all sales data including non-resettable totals and counters, Reset Report Counts, and Receipt Consecutive No. -
Page 20: Status Clear
STATUS Clear Performing the STATUS Clear operation will clear an error and the key locked condition, however, the sales data and the programmed data will not be cleared by this operation. When the STATUS Clear is operated to clear a key locked condition during sale, the sale item data that has already been entered for the current sale will be cleared. -
Page 21: Terminal File Programming
TERMINAL FILE PROGRAMMING Operation Instructions for Programming Character Entries Condition Required for Programming Operations SFKC (Selective Function Key Code) Programming System Option Programming Commercial Message Programming Footer Message Programming Store Name Message Programming Department Name Programming Department Group Name Programming Cashier Name and Status Programming PLU Name Programming Salesperson Name Programming... -
Page 22: Instructions For Programming
Instructions for Programming On the MA-600 series adopting the LCD display, each programming operation is performed by selecting the corresponding menu item on the LCD display. The keyboard layout is automatically switched among three according to operation to be performed (ordinary registration, read/reset, programming) when the Mode Lock is turned to the corresponding position. -
Page 23: Keyboard Layout Variations
6.1.2 Keyboard Layout Variations The keyboard layout is automatically switched among three according to operation to be performed (ordinary registration, read/reset, programming) when the Mode Lock is turned to the corresponding position. In this chapter, various programming operations are performed with the keyboard layout for programming. Keyboard layout for ordinary registration (It is programmed as default setting.) Mode Lock Position: •... - Page 24 Keyboard layout for programming Mode Lock Position: • Ordinary Type Keyboard ↑ History ↓ VOID ← → Enter • Flat Type Keyboard β Σ ú á é Ä Ö Ü Å Æ BLIND & ê â è ç Œ Ñ £...
- Page 25 Keyboard layout for Read/Reset Mode Lock Position: • Ordinary Type Keyboard ↑ ↓ ← → Enter • Flat Type Keyboard 6- 5 6.1 Instructions for Programming AT/TL ↑ ← EO3-11106 ↓ → Enter AT/TL...
-
Page 26: Basic Key Functions
6.1.2 Basic Key Functions The following are main keys and their functions to be used in programming operations. (1) Keys for selecting items on the menu screen [ ↑ ] This key is used for moving the cursor upward. [ ↓ ] This key is used for moving the cursor downward. -
Page 27: Character Entries
To clarify the operation flow, definitions of keys of the ECR keyboard are as shown below. | --------- Selective numeric value which is entered through the Numeric keys. ]---------- Depression of the function key. xxxx------------- Fixed numeric value which is entered through the Numeric keys. Fixed Table of key names in SET and REG modes The keyboard layout for programming is adopted in SET mode. - Page 28 6.2.1 Character Code Entry Method Character Code Table 1: Standard Characters Column Code Code " & < > NOTE: Characters of those character codes 1007, 1206, 1207, 1211, 1500 through 1503, and 1506 through 1514 cannot be printed on the slip printer. €...
- Page 29 Character Setting Operations • To set a one-byte character, enter the COL (column) code and then the ROW code, followed by the [#] key. ex.) To set “%”, enter 205 and depress the [#] key. To set “kg”, enter1508 and depress the [#] key. •...
-
Page 30: Direct Character Entry Method
6.2.2 Direct Character Entry Method Using Keyboard (installed as the ECR Main Keyboard): • Ordinary Type Keyboard ↑ History ↓ VOID ← → Enter • Flat Type Keyboard β Σ ú á é Ä Ö Ü Å Æ Character keys in programming Character Keys: Simply depress the key to enter the character. - Page 31 Using PK-2 (PLU Keyboard; hardware option) The PK-2 keyboard is used for entering a required PLU code by simply depressing the code-preset key on this keyboard in REG or MGR mode. In addition, the PK-2 can be used for directly entering characters during the programming operations that require character settings such as STORE NAME/MESSAGE AND COMMERCIAL MESSAGE PROGRAMMING and DEPARTMENT NAME PROGRAMMING.
- Page 32 6.2.3 How to use the [History] key The [History] key is used for performing character entries with the name previously entered. Operation: [History] ([↓]) 1) The [History] key depression will let the most recently programmed name displayed on the LCD display. 2) The [↓] key depression will let the second most recently programmed name displayed.
-
Page 33: Condition Required For Programming Operations
6. TERMINAL FILE PROGRAMMING EO3-11106 6.3 Condition Required for Programming Operations Condition Required for Programming Operations “CONDITION” is given at the top of each programming operation. The ECR must satisfy this condition to perform programming operations. There are two types of conditions: “Any time outside a sale”... -
Page 34: Sfkc (Selective Function Key Code) Programming
SFKC (Selective Function Key Code) Programming SFKC Programming is to determine the keyboard layout with the required keys. performed first before any other programming operation. If the RAM Clear is performed prior to the SFKC programming, program only the keys that require changes from the SFKC in the Standard Keyboard which has been set by the RAM Clear operation automatically. - Page 35 SFKC Key Name Dead-key code 1 to 40 Department Preset-code Keys 1 to 60 RF (Receipt Feed) JF (Journal Feed) 00 (Double-zero) 000 (Triple-zero) • (Decimal Point) VND CPN (Vender Coupon) STR CPN (Store Coupon) -- vacant -- - (Amount Discount) %+ (% I) %- (% II) RTN MDSE (Returned Merchandise)
- Page 36 SFKC Key Name TRF (Transfer) 105 to 107 -- vacant -- AMT (Amount) RPT (Repeat) 110 to 115 -- vacant -- TX3/M (Tax 3 Modifier) 117 to 120 -- vacant -- CUR 1 (Foreign Currency 1) CUR 2 (Foreign Currency 2) CUR 3 (Foreign Currency 3) CUR 4 (Foreign Currency 4) CUR 5 (Foreign Currency 5)
- Page 37 • Ordinary Type Keyboard LOG/ VALI RECEIPT RECEIPT DATE ISSUE ↑ History MDSE VOID ↓ ITEM CORR ← OPEN → OPEN Enter • Flat Type Keyboard PLU Preset-code keys SFKC Receipt Sample 31-10-2005 MON SFKC → #054 → #043 → #044 →...
-
Page 38: System Option Programming
System Option Programming This operation is used to set the ECR’s basic features and selective functions to meet the requirement of the market and your user. This programming operation is performed in SET mode or BLIND mode. In SET mode, you can select a desired menu item on the LCD display. Address No. 1 to Address No. 29 are programmable. - Page 39 Setting Example) To set Address No. 1 with the following requirements: (Refer to the Address No. 1 table on the subsequent page.) Bit No. 1: Time NON-PRINT (SET status) Bit No. 3: Subtotal NON-PRINT (SET status) Other bits will be selected to “RESET” status. Operation When the ECR is being outside a sale and in SET mode, depress the [↓] key...
- Page 40 Operation Depress the [→] key to select the status of Bit No. 1. Depress the [↓] key twice to move the cursor on to Bit No. 3 (B3ST). Depress the [→] key to select the status of Bit No. 3. The [Enter] key depression results in that the Address No.
- Page 41 Setting Example) To set Address No. 1 with the following requirements: (Refer to the Address No. 1 table on the next page.) Bit No. 1: Time NON-PRINT (SET status) Bit No. 3: Subtotal NON-PRINT (SET status) Other bits will be selected to “RESET” status. Key Operation: Mode Lock: BLIND, enter 18, depress [X].
-
Page 42: Set
ADDRESS NO. ITEM Time (on Sale Receipt, Report, Program Receipt) Sale Item Count on each Sale Receipt Subtotal Amount print by [ST] key on Receipt and Journal -- vacant -- Customer Count for each Department on Department Reports Sale % of each Department and Group, on Department and Group Reports... -
Page 43: Set
ADDRESS NO. ITEM -- vacant -- -- vacant -- -- vacant -- -- vacant -- -- vacant -- INPS 1 for the Charge Posting on Remote Slip Printer INPS 2 for the Charge Posting on Remote Slip Printer -- vacant -- NOTE 1: If SET, print items except the following will not be printed on the Remote Slip Printer in the charge posting operation. -
Page 44: Set
ADDRESS NO. ITEM Fraction Rounding ROUND UP Fraction Rounding ROUND DOWN [ST] key before finalizing a sale Credit Balance in REG mode Drawer Opening on taking Financial Reports Quantity Extension (Multiplication) order Manager Intervention for entering Negative Departments/PLUs in REG mode Manager Intervention for finalizing Negative- balance Sales in REG... -
Page 45: Set
ADDRESS NO. ITEM Zero-skip in All Department and Department Group Reports Zero-skip in PLU Reports Zero-skip on Financial and Cashier Reports Cashier feature Cashier No. Display on Operator Display PLU Price Level Display on Operator Display -- vacant -- -- vacant -- NOTE 1: If SET, the cashier feature is not active as the registering operation is possible without cashier sign-ON. -
Page 46: Set
ADDRESS NO. REMOTE SLIP PRINTER CONTROL ITEM Remote Slip Print Compulsory for any PB entry -- vacant -- -- vacant -- -- vacant -- -- vacant -- -- vacant -- -- vacant -- -- vacant -- NOTE: If SET, printing operation on the Remote Slip Printer is compulsory. In this case, a slip paper should be set prior to performing any Previous Balance entry. -
Page 47: Set
ADDRESS NO. ITEM -- vacant -- -- vacant -- -- vacant -- -- vacant -- -- vacant -- Cashier Sign ON/OFF Receipts Drawer Open by Cashier Sign ON/OFF -- vacant -- NOTE: If SET, the cashier sign-ON/OFF receipt will not be issued. regardless of the setting. -
Page 48: Set
ADDRESS NO. ITEM -- vacant -- -- vacant -- -- vacant -- -- vacant -- [C] (Clear) Key Counter on Reports Financial and Cashier Daily Read Counter on Reports -- vacant -- [C] (Clear) Key on Journal NOTE 1: If RESET, when performing a financial read/reset or cashier read/reset operation, their respective read counter (X counter) is printed on the report. -
Page 49: Set
ADDRESS NO. ITEM -- vacant -- -- vacant -- -- vacant -- Price Shift Function -- vacant -- -- vacant -- -- vacant -- -- vacant -- SET: When the [2nd PRICE] or [3rd PRICE] key is pressed, second or third price level is active for the next PLU entry only. Then first price level is automatically regained. -
Page 50: Set
ADDRESS NO. ITEM Single-Consignment or Multi-Consignment Date Print Consecutive No. (of Receipt) Print -- vacant -- Cashier Code Print Logo, Store Message, Commercial Message, Footer Message Print Receipt feed after the trailer line print (5-line feed) Receipt feed after the trailer line print (10-line feed) NOTE 1:... - Page 51 ADDRESS NO. ITEM Add-on Tax 1 Open/Close Add-on Tax 2 Open/Close Add-on Tax 3 Open/Close Add-on Tax 4 Open/Close Add-on Tax 5 Open/Close Add-on Tax 6 Open/Close Add-on Tax 7 Open/Close Add-on Tax 8 Open/Close NOTE: This optional function is effective when Address No. 21, Bit No. 5 has been SET (Add-on Tax feature). When SET status is selected on the ECR adopting the Add-on Tax feature, Tax 1 through Tax 8 are open.
- Page 52 ADDRESS NO. ITEM Multiple Taxes Separate Print on Receipt Tax Total Amount on Receipt Taxable Total Print on Receipt VAT Calculation Method (VAT = ) Tax Type: VAT or Add-on Tax NET VAT Total Separate Print on Receipt (NOTE 3) -- vacant -- NET Total Print on Receipt (NOTE 4)
- Page 53 ADDRESS NO. ITEM VAT Symbol Print Print order of VAT TL and NET TL Single line spacing under each VAT -- vacant -- -- vacant -- -- vacant -- -- vacant -- -- vacant -- NOTE 1: If SET, the VAT symbols (A to H) are printed. They will be programmable in the Print Line Item Name Programming. NOTE 2: This bit status selection is effective when the following options have been SET.
-
Page 54: System Option Table
ADDRESS NO. ITEM Drawer Close Compulsory Drawer Warning Alarm Single-drawer or Multi- drawer Multi-drawer Control Selection of Change at Tendering in Foreign Currencies Number of Drawers (if Multi-drawer spec.) -- vacant -- -- vacant -- NOTE 1: If SET, the Drawer-close Compulsory option is active. In this case, when the drawer remains open, any operations except [RF], [JF], [C], numeric input for Sign-ON are prohibited. - Page 55 ADDRESS NO. ITEM No-sale Entry After Non-add # Entry Number of Times for Non-add # Entries Within a Receipt [RF] Operation During a Sale Consecutive No. on Receipt and Journal Consecutive No. Resetting Negative Mode ( - ) Operation Drawer Open when operating the [TRF] key -- vacant -- NOTE:...
- Page 56 ADDRESS NO. OPTIONAL FUNCTION VII ITEM -- vacant -- -- vacant -- -- vacant -- -- vacant -- -- vacant -- Footer Message Print -- vacant -- -- vacant -- NOTE: Footer message print is selected. SET: NON-PRINT RESET: It is printed under the trailer line (cashier name, consecutive No., current time). System Option Table CONTENTS SELECTIVE STATUS...
- Page 57 ADDRESS NO. OPTIONAL FUNCTION VIII ITEM IPD or INPD on Journal in REG and MGR modes -- vacant -- -- vacant -- -- vacant -- -- vacant -- Cashier Interrupt -- vacant -- -- vacant -- NOTE 1: RESET: IPD (Items Printed Detail) ······················Details of the sale entry are printed on journal, just as on receipts. SET: INPD (Items Not Printed Detail) ·············Details of the Department/PLU entry in REG or MGR mode (excepting NOTE 2:...
- Page 58 ADDRESS NO. ITEM -- vacant -- -- vacant -- Date, day of week, and Register No. print on Journal -- vacant -- Selection of the Store Name Message or Store Name Logo on Receipt -- vacant -- Group Print in All Department Read Report -- vacant --...
- Page 59 ADDRESS NO. ITEM [%+] and [%-] after a Subtotal within a Sale -- vacant -- Automatic Cashier Sign OFF on finalizing a sale [% I] key Use (= SFKC [% II] key Use (= SFKC Amount Print on [CRT] Depression to Finalize a Sale including Previous Balance Salesperson Sign-ON...
- Page 60 ADDRESS NO. ITEM Date Set and Print Order Date Set and Print Order Special Rounding on Sale Total Number of Digits Subject to Special Rounding Denmark Special Rounding/Australia Special Rounding -- vacant -- -- vacant -- -- vacant -- NOTE: To realize the Denmark Special Rounding feature or the Australia Special Rounding feature, set Bit No.3 through No.5 in this address as follows.
- Page 61 ADDRESS NO. OPTIONAL FUNCTION XII ITEM Decimal Point in Item Count and % Rate Amount Division Symbol between Main and Subsidiary digits for 0.00 type Amount Division Symbol between 3rd and 4th digits for . - - 0 -- vacant -- -- vacant -- -- vacant -- -- vacant --...
- Page 62 ADDRESS NO. FOREIGN CURRENCY OPTION ITEM [CUR 1] (Foreign Currency 1) Zero- suppress Display [CUR 2] (Foreign Currency 2) Zero- suppress Display [CUR 3] (Foreign Currency 3) Zero- suppress Display [CUR 4] (Foreign Currency 4) Zero- suppress Display [CUR 5] (Foreign Currency 5) Zero- suppress Display Foreign Currency...
- Page 63 ADDRESS NO. OPTIONAL FUNCTION XIII ITEM -- vacant -- Department Memory Process for %- on Department Item PLU Memory Process for %- on PLU Item Post-issue Receipt Print Form -- vacant -- -- vacant -- % Calculation on additional item entries after Subtotal and % entries -- vacant --...
- Page 64 ADDRESS NO. OPTIONAL FUNCTION XIV ITEM -- vacant -- -- vacant -- Cashier Identifying Method: Push SFKC Keys -- vacant -- -- vacant -- -- vacant -- -- vacant -- -- vacant -- NOTE: If SET, PUSH SFKC KEYS specification is effective. CODE ENTRY METHOD: PUSH SFKC KEYS: System Option Table...
- Page 65 ADDRESS NO. OPTIONAL FUNCTION XV ITEM Money Declaration Operation Money Declaration is performed by: -- vacant -- -- vacant -- -- vacant -- -- vacant -- -- vacant -- -- vacant -- NOTE 1: The Money Declaration Operation Compulsory (SET) status may be selected only when the ECR adopts the PUSH SFKC Keys Method (not CODE ENTRY method).
- Page 66 ADDRESS NO. OPTIONAL FUNCTION XVI ITEM -- vacant -- -- vacant -- -- vacant -- -- vacant -- -- vacant -- -- vacant -- -- vacant -- Consecutive No. Print immediately after the previous daily financial reset NOTE: If SET status is selected, the consecutive No. immediately after the previous daily financial reset is printed on the daily financial reset report.
- Page 67 ADDRESS NO. ITEM -- vacant -- -- vacant -- -- vacant -- -- vacant -- -- vacant -- Zero-skip of PLU Data when transmitting to PC -- vacant -- -- vacant -- System Option Table CONTENTS PC OPTION SELECTIVE STATUS RESET RESET RESET...
- Page 68 ADDRESS NO. OPTIONAL FUNCTION XVII ITEM Narrow Printing on Journal -- vacant -- Disconnection of the Journal Printer -- vacant -- -- vacant -- -- vacant -- -- vacant -- -- vacant -- NOTE 1: Narrow printing on journal SET: Journal print is performed with narrow printings.
-
Page 69: Commercial Message Programming
Commercial Message Programming A maximum of 96 characters of Commercial Message (32 characters x 3 lines) to be printed on the receipt is programmed here. CONDITION Any time outside a sale OPERATION Mode Lock: SET Menu Tree Operation Flowchart Main Menu Depress [1] or [Enter]. - Page 70 Example: To program the following Commercial Message. O p e n 8 : 0 0 a m C l o s e d : e v e r y Operation When the ECR is being outside a sale and in SET mode, depress the [1] or [Enter] key.
- Page 71 Operation The [Enter] key depression results in that the input message is entered and displayed. The [Enter] key depression allows the ECR to enter the 3rd line message input mode. (The [C] key depression clears the message already programmed.) The 3rd line message is input.
-
Page 72: Footer Message Programming
Footer Message Programming A maximum of 64 characters of Footer Message (32 characters x 2 lines) to be printed on the receipt is programmed here. Prior to the Footer Message Programming, be sure to select RESET status for Address No. 29, Bit No. 6 of the system option. - Page 73 Example: To program the following Footer Message. T h a n k y o u Operation When the ECR is being outside a sale and in SET mode, depress the [1] or [Enter] key. Depress the [↓] key. Depress the [2] or [Enter] key. The message already programmed is displayed.
- Page 74 Operation The [Enter] key depression allows the ECR to enter the 2nd line message input mode. (The [C] key depression clears the message already programmed.) The 2nd line message is input. The [Enter] key depression results in that the input message is entered and displayed.
-
Page 75: Store Name Message Programming
Store Name Message Programming A maximum of 128 characters of Store Name Message (32 characters x 4 lines) to be printed on the receipt is programmed here. Prior to the Store Name Message Programming, be sure to select SET status for Address No. 31, Bit No. 5 of the system option. - Page 76 NOTES: For each line, a maximum of 32 one-byte characters or 16 two-byte characters can be entered. A combination of both types is also available. When blanks are entered for the whole one line, it results in one line feed. When the store name message specification has been selected, the 4-line range assigned for the store name message is either printed or fed, regardless of any system option selection.
- Page 77 Example: To program the following Store Message. 1 3 4 3 P H O N E : Operation When the ECR is being outside a sale and in SET mode, depress the [1] or [Enter] key. Depress the [↓] key twice. Depress the [3] or [Enter] key.
- Page 78 Operation The [Enter] key depression results in that the input message is entered and displayed. The [Enter] key depression allows the ECR to enter the 3rd line message input mode. (The [C] key depression clears the message already programmed.) The 3rd line message is input.
-
Page 79: Department Name Programming
Department Name Programming A maximum of 16 characters of department name is programmed here. CONDITION Any time outside a sale OPERATION Mode Lock: SET Menu Tree Operation Flowchart Main Menu Depress [↓] then [Enter]. Depress [2]. Depress [2] or [Enter] key. Select a department of which name is to be programmed with the [↑] or [↓] Input a department name. - Page 80 Example To program “FOOD” as the name of Department 01. Operation When the ECR is being outside a sale and in SET mode, depress the [↓] key. Depress the [2] or [Enter] key. Depress the [1] or [Enter] key. Depress the [Enter] key. (Department 01 is selected.) The [C] key depression clears the department name already...
-
Page 81: Department Group Name Programming
6.10 Department Group Name Programming In this operation, the name of each Department Group is programmed. Which Departments are linked to each Group has been set in the DEPARTMENT TABLE PROGRAMMING operation. A maximum of 15 department groups can be set. CONDITION Any time outside a sale OPERATION... - Page 82 Operation Depress the [2] or [Enter] key. Depress the [↓] key. Depress the [2] or [Enter] key. Depress the [Enter] key. (Department Group 1 is selected.) The [C] key depression clears the department group name already programmed. Input a desired name. The [Enter] key depression results in that the input name is entered and displayed.
-
Page 83: Cashier Name And Status Programming
6.11 Cashier Name and Status Programming Cashier Name and Cashier Status for each cashier can be programmed here. Any time outside a sale CONDITION Mode Lock: SET OPERATION Menu Tree Operation Flowchart Main Menu Depress [↓] then [Enter]. Depress [2]. Depress [↓] twice then [Enter]. - Page 84 NOTES: 1. Cashiers 1 to 8 are programmed with the names “1CL” to “8CL” as default setting. 2. For the name of each cashier, a maximum of 12 one-byte or 6 two-byte characters can be entered. A combination of both types is also available. 3.
- Page 85 Operation The [Enter] key depression allows the ECR to enter the cashier 1 name input mode. (The [C] key depression clears the name already programmed.) The cashier 1 name is input. The [Enter] key depression results in that the input name is entered and displayed.
-
Page 86: Plu Name Programming
6.12 PLU Name Programming A maximum of 16 characters of PLU name is programmed here. CONDITION Any time outside a sale OPERATION Mode Lock: SET Menu Tree Operation Flowchart Main Menu Depress [↓] then [Enter]. Depress [2]. Depress the [↓] key three times then [Enter]. - Page 87 Operation Depress the [2] or [Enter] key. Depress the [↓] key three times. Depress the [4] or [Enter] key. Depress the [Enter] key. (PLU Code No. 0001 is selected.) The [C] key depression clears the PLU name already programmed. Input a desired name. The [Enter] key depression results in that the input name is entered and displayed.
-
Page 88: Salesperson Name Programming
6.13 Salesperson Name Programming By programming Salesperson here, the name of each salesperson can be programmed in a maximum of 12 characters. CONDITION Any time outside a sale OPERATION Mode Lock: SET Menu Tree Operation Flowchart Main Menu Depress [↓] then [Enter]. Depress [2]. - Page 89 Example To program “White” on Salesperson Code 01: Operation When the ECR is being outside a sale and in SET mode, depress the [↓] key. Depress the [2] or [Enter] key. Depress the [↓] key four times. Depress the [5] or [Enter] key. Depress the [Enter] key.
- Page 90 Operation The [End] key depression allows the ECR to end this programming. (continued from the previous page) LCD Display 6-70 EO3-11106 6.13 Salesperson Name Programming Remarks A long receipt is issued and the display returns to Main Menu screen. TEC STORE 1343 PEACH DRIVE PHONE: 87-6437 Open...
-
Page 91: Financial Report Item Name Programming
6.14 Financial Report Item Name Programming Item Names printed on Financial Report are programmed here. Many of them are also printed on sales receipts. Other Line Item Names will be programmed in 6.15 Print Line Item Name Programming. CONDITION After Financial Reset OPERATION Mode Lock: SET Menu Tree... - Page 92 Example To program “NET GT” instead of “NET GT” for Item Code 2 (NET GT) all in double-sized characters. Operation When the ECR is being outside a sale and in SET mode, depress the [↓] key. Depress the [2] or [Enter] key. Depress the [↓] key five times.
- Page 93 Operation The [End] key depression allows the ECR to end this programming. Item Item Name Code Ground Total NET GT NEG GT Gross Sale Tax 1 (Add-on Tax 1) Tax 2 (Add-on Tax 2) Tax 3 (Add-on Tax 3) Tax 4 (Add-on Tax 4) Tax 5 (Add-on Tax 5) Tax 6 (Add-on Tax 6) Tax 7 (Add-on Tax 7)
- Page 94 Financial Report Item Name Table (continued) Item Item Name Code Media 4 Sales (CPN) Media 5 Sales (Credit 1) Media 6 Sales (Credit 2) Media 7 Sales (Credit 3) Media 8 Sales (Credit 4) Media 9 Sales (Credit 5) Received-on-Account Paid-Out Cash-in-drawer Cash-in-drawer (Foreign Currency 1)
- Page 95 Financial Report Item Name Table (continued) Item Item Name Code Media 2-in-drawer Difference Media 3-in-drawer Difference Media 4-in-drawer Difference Media 5-in-drawer Difference Media 6-in-drawer Difference Media 7-in-drawer Difference Media 8-in-drawer Difference Media 9-in-drawer Difference Item Correct Void Misc. Void All Void Store Coupon Returned Merchandise Negative Mode Total...
- Page 96 Financial Report Item Name Table (continued) Item Item Name Code VAT 2 or Tax 2 Exempt VAT 3 or Tax 3 Exempt VAT 4 or Tax 4 Exempt VAT 5 or Tax 5 Exempt VAT 6 or Tax 6 Exempt VAT 7 or Tax 7 Exempt VAT 8 or Tax 8 Exempt Sales Item Count per Customer...
-
Page 97: Print Line Item Name Programming
6.15 Print Line Item Name Programming Print Line Item Names not listed in Section 6.14 Financial Report Item Name Programming can be programmed here. CONDITION Anytime outside a sale OPERATION Mode Lock: SET Menu Tree Operation Flowchart Main Menu Depress [↓] then [Enter]. Depress [2]. - Page 98 Example To program the amount mark “€” in Item Code 7: (The amount mark has not been preset as the standard program data). Meanwhile, the names of the other items in the Item Code 7 should remain unchanged as the standard program data (i.e.
- Page 99 6. TERMINAL FILE PROGRAMMING Operation The [End] key depression allows the ECR to end this programming. Item Item Name or Application Code Subtotal in transactions Cash Tendered in transactions Sale Total of each transaction Change due in transactions Cash Refunded Negative Department Total The following items must be set together.
- Page 100 6. TERMINAL FILE PROGRAMMING Item Item Name or Application Code VAT symbol (VAT 1 to VAT8) VAT 1 symbol VAT 2 symbol VAT 3 symbol VAT 4 symbol VAT 5 symbol VAT 6 symbol VAT 7 symbol VAT 8 symbol -- vacant -- -- vacant -- Post-issue Receipt Header...
- Page 101 6. TERMINAL FILE PROGRAMMING Item Item Name or Application Code Foreign Currency 2 (for Sales Entry, Programming, Program Data Read) Foreign Currency 3 (for Sales Entry, Programming, Program Data Read) Foreign Currency 4 (for Sales Entry, Programming, Program Data Read) Foreign Currency 5 (for Sales Entry, Programming, Program Data Read) -- vacant --...
- Page 102 NOTES: The standard program data for the Amount Mark in Item Code 7 is set with a blank after a RAM Clear. When the specific Amount Mark for the domestic currency is required on sales receipts (such as £, ¥, $), you must program the entire contents of Item Code 7.
-
Page 103: Display Item Name Programming
6.16 Display Item Name Programming Display Item Name to be displayed on the LCD display can be programmed here. (Max. 16 characters) CONDITION Any time outside a sale OPERATION Mode Lock: SET Menu Tree Operation Flowchart Main Menu Depress [↓] then [Enter]. Depress [2]. - Page 104 Item Application Code -- vacant -- Signed-OFF condition (in REG, MGR, or - mode) Balance due after a short tendered 4 to 9 -- vacant -- Price Shift 1 Operation Price Shift 2 Operation Price Shift 3 Operation -- vacant -- 13 to 43 Slip Printer Connection Check -- vacant --...
- Page 105 Example To program “BALANCE DUE” instead of standard program data “TOTAL” for Item Code 3. Operation When the ECR is being outside a sale and in SET mode, depress the [↓] key. Depress the [2] or [Enter] key. Depress the [↓] key seven times. Depress the [8] or [Enter] key.
- Page 106 Operation The [End] key depression allows the ECR to end this programming. (continued from the previous page) LCD Display 6-86 EO3-11106 6.16 Display item Name Programming Remarks A long receipt is issued and the display returns to Main Menu screen. TEC STORE 1343 PEACH DRIVE PHONE: 87-6437...
-
Page 107: Error Item Name Programming
6.17 Error Item Name Programming Error item names to be displayed on the LCD display are programmed here. A maximum of 16 one-byte characters by 2 lines can be programmed. CONDITION Any time outside a sale OPERATION Mode Lock: SET Menu Tree Operation Flowchart Main Menu... - Page 108 Example To program “CALL MANAGER” instead of standard program data “MANAGER REQUIRED” for Error Code 3. Operation When the ECR is being outside a sale and in SET mode, depress the [↓] key. Depress the [2] or [Enter] key. Depress the [↓] key eight times. Depress the [9] or [Enter] key.
- Page 109 Operation The [End] key depression allows the ECR to end this programming. Error Content or Cause of Error Code Operation or Key Sequence Error Manager Intervention Required -- vacant -- Drawer-Close Compulsory Error Code Entry Compulsory Error -- vacant -- -- vacant -- -- vacant -- Other Miscellaneous Errors...
- Page 110 Error Content or Cause of Error Code Limit Over Warning (in Media Pick Up) -- vacant -- -- vacant -- -- vacant -- -- vacant -- Consignment Print Compulsory Error Endorsement Print Compulsory Error -- vacant -- -- vacant -- -- vacant -- -- vacant -- -- vacant --...
- Page 111 Error Content or Cause of Error Code Slip Printer Paper Out -- vacant -- -- vacant -- -- vacant -- -- vacant -- -- vacant -- [ST] Key Entry Compulsory error -- vacant -- -- vacant -- -- vacant -- -- vacant -- Salesperson Entry Compulsory Error Salesperson Sign-ON Prohibit Error...
- Page 112 Error Content or Cause of Error Code -- vacant -- -- vacant -- -- vacant -- -- vacant -- Price Input Prohibition Error No price is input. Key Mode Change Error -- vacant -- -- vacant -- 151 to -- vacant -- Error Code and Error Item Name Table (continued) 6-92 6.17 Error Item Name Programming...
-
Page 113: Read/Reset Report Name Programming
6.18 Read/Reset Report Name Programming Read/Reset Report Names are programmed here. A maximum of 12 one-byte characters can be programmed. Any time outside a sale CONDITION OPERATION Mode Lock: SET Menu Tree Operation Flowchart Main Menu Depress [↓] then [Enter]. Depress [2]. - Page 114 Example To program “X_DP_PROFIT” instead of standard program data “X_PROFIT” for Report No. 21. Operation When the ECR is being outside a sale and in SET mode, depress the [↓] key. Depress the [2] or [Enter] key. Depress the [↓] key nine times. Depress the [0] or [Enter] key.
- Page 115 Operation The [End] key depression allows the ECR to end this programming. Report Report Financial All Cashier Individual Cashier All Salesperson -- vacant -- (continued from the previous page) LCD Display Read/Reset Report Name Table Type 6-95 6.18 Read/Reset Report Name Programming Remarks A long receipt is issued and the display returns to Main Menu screen.
- Page 116 Report Report Department Gross Profit -- vacant -- Hourly Range All Department -- vacant -- All Media Sales and Cash-in Drawer All PLU -- vacant -- Zone PLU -- vacant -- Money Declaration -- vacant -- Read/Reset Report Name Table (continued) Type 6-96 6.18 Read/Reset Report Name Programming...
- Page 117 Report Report Enforced Clear of Hold Condition -- vacant -- Financial + All Department -- vacant -- Read/Reset Report Name Table (continued) Type 6-97 6.18 Read/Reset Report Name Programming Daily Read Daily Reset GTX: GT Read GTZ: GT Reset Standard Program EO3-11106...
-
Page 118: Department Table Programming
6. TERMINAL FILE PROGRAMMING 6.19 Department Table Programming For each department, memory opening, and department various statuses settings are performed here. To change the positive/negative status: CONDITION After Department and PLU Daily and GT Resets To change any other programmed data or to newly program departments: Any time outside a sale OPERATION Mode Lock: SET... - Page 119 *1: Department Group No. • Input a department group code (2 digits: 01 to 15), then depress the [Enter] key. • To cancel a department group, input 0 then depress the [Enter] key. • All departments can be programmed in a group. Negative departments are added to the group total. *2: Preset Price •...
- Page 120 *5: High Amount Limit • Enter a maximum of 7 digits to be set as the high amount to be locked out. Example) To prohibit any amount equal to or larger than 40,00: 4000 [Enter] (Allows any amount equal to or smaller than 39,99.) NOTES: 1.
- Page 121 Operation Depress the [3] or [Enter] key. Depress the [1] or [Enter] key. Depress the [1] or [Enter] key. Depress the [Enter] key to select Department 01. *1: see NOTE below Input 01 (or 1), then depress the [Enter] key. (Department Group No.
- Page 122 Operation Move the cursor on to a desired status setting with the [↓] or [↑] key. Depress the [→] key then the [Enter] key. (The status of SINGLE-ITEM DP is selected.) Input 12, then depress the [Enter] key. (VAT/Add-on tax statuses 1 and 2 are set.) Input 4000, then depress the [Enter] key.
- Page 123 Operation Depress the [Rtn] key. The display returns to the Department Setting screen. Move the cursor on to another desired department with the [↓] or [↑] key, then depress the [Enter] key. The [End] key depression allows the ECR to end this programming. NOTE: (1) Opening the department memory •...
-
Page 124: Department Preset Price Setting Or Changing
6.20 Department Preset Price Setting or Changing The preset price of each department may be set in the DEPARTMENT TABLE PROGRAMMING already described. However, in setting or changing the price only but not other programmed data, the following operation will be more convenient. Any time outside a sale CONDITION OPERATION... - Page 125 Operation Depress the [3] or [Enter] key. Depress the [1] or [Enter] key. Depress the [↓] key. Depress the [2] or [Enter] key. Input 100 for the preset price of Department 1 (FOOD). Depress the [Enter] key. The [End] key depression allows the ECR to end this setting.
-
Page 126: Department Listing Capacity (Lc) Programming
6.21 Department Listing Capacity (LC) Programming The High Amount to be Locked Out (HALO) and Low Amount to be Locked Out (LALO) relating to the department entry are programmed here. Entry of an amount larger than HALO or smaller than LALO can be prohibited. - Page 127 • The HALO and LALO programmed here are effective at the department entry in REG mode only. They are not effective in MGR and - mode, as a maximum of 7-digit amount value can be entered. • Zeros must be entered as all the digits other than the highest digit. If any other value is entered, it will be regarded as a zero.
- Page 128 Operation Input 10, then depress the [Enter] key. (LALO: 10) The [End] key depression allows the ECR to end this programming. (continued from the previous page) LCD Display 6-108 6.21 Department Listing Capacity (LC) Programming Remarks When the [Enter] key is depressed, the programmed data is printed.
-
Page 129: Key Sticker Printing
6. TERMINAL FILE PROGRAMMING 6.22 Key Sticker Printing Key stickers of department names which were programmed in the DEPARTMENT NAME PROGRAMMING can be printed on the receipt printer. Any time outside a sale CONDITION OPERATION Mode Lock: SET Menu Tree Operation Flowchart •... - Page 130 NOTES: Print format < Single key > • For the single key, a maximum of 12-digit department name (6 characters x 2 lines) can be printed. • For a 7-digit-or-more department name, the first 6 digits are printed in the first line and the 7th digit and after are printed in the second line.
- Page 131 Operation Depress the [1] or [Enter] key. A confirmation message is displayed. The [End] key depression allows the ECR to end this operation. TEC STORE 1343 PEACH DRIVE PHONE: 87-6437 Open 8:00am to 7:00pm Closed: every Wednesday 31-10-2005 MON (continued from the previous page) LCD Display 6-111 EO3-11106...
- Page 132 (2) To print part of department names. Operation When the ECR is being outside a sale and in SET mode, depress the [↓] key twice. Depress the [3] or [Enter] key. Depress the [1] or [Enter] key. Depress the [↓] key three times. Depress the [4] or [Enter] key.
-
Page 133: Plu Table Programming
6.23 PLU Table Programming This programming can be operated when new PLU items are to be added, PLU program data is to be changed, or PLUs are to be deleted. 6.23.1 Programming or Changing Any time outside a sale CONDITION OPERATION Mode Lock: SET Menu Tree... - Page 134 NOTES: A maximum of 1,000 PLUs are programmable. If a PLU is linked to a negative department, the PLU is automatically set as negative PLU. The [PLU] key here indicates the key labelled simply as “PLU” but not any PLU preset-code keys. *1: Linked Department Code •...
- Page 135 Example To program the following PLU data: PLU Code: Linked Department: Preset Price: 2nd Preset Price: 3rd Preset Price: Tax Status: Operation When the ECR is being outside a sale and in SET mode, depress the [↓] key twice. Depress the [3] or [Enter] key. Depress the [↓] key.
- Page 136 Operation Input 100, then depress the [Enter] key. (Preset Price €1,00 is set.) Input 120, then depress the [Enter] key. (2nd Preset Price €1,20 is set.) Input 150, then depress the [Enter] key. (3rd Preset Price €1,50 is set.) Input 12, then depress the [Enter] key. (VAT statuses 1 and 2 are set.) The [PLU] key depression completes the programming for PLU code 0010.
- Page 137 6.23.2 Deletion To delete a PLU with sales data of zero: CONDITION To delete a PLU with sales data of not zero: After PLU Reset OPERATION Mode Lock: SET Individual PLU Deletion: Menu Tree Operation Flowchart Main Menu Depress [↓] twice then [Enter]. Depress [3].
- Page 138 Operation Depress the [↓] key. Depress the [1] or [Enter] key. Depress the [↓] key three times. Depress the [4] or [Enter] key. Input 0501 (or 501), then depress the [PLU] key. (PLU Code 0501 is specified.) The [End] key depression allows the ECR to end this operation.
- Page 139 All PLU Deletion: Menu Tree Operation Operation When the ECR is being outside a sale and in SET mode, depress the [↓] key twice. Depress the [3] or [Enter] key. Depress the [↓] key. Depress the [2] or [Enter] key. Depress the [↓] key four times.
-
Page 140: Plu Preset Price Setting Or Changing
6.24 PLU Preset Price Setting or Changing The preset price of each PLU may be set in the PLU TABLE PROGRAMMING already described. However, in setting or changing the price only (not other programmed data), the following operation will be more convenient. CONDITION Any time outside a sale OPERATION... - Page 141 NOTES: When no price is input then the [Enter] key is depressed, the PLU will be open (i.e. open-price PLU). If inputting a nonexistent PLU code that was not programmed in the PLU Table Programming, this may cause an error. The [PLU] key depression here results in that the next PLU code (i.e.
- Page 142 Operation Make sure the cursor is shown on 01PRICE. Then, input 315 and depress the [Enter] key. Make sure the cursor is shown on 022ND PRICE. Then, input 540 and depress the [Enter] key. As the 3rd preset price remains unchanged, depress the [PLU] key.
-
Page 143: Plu Preset-Code Key Setting
6.25 PLU Preset-Code Key Setting When there are any keys programmed as PLU Preset-code Keys (SFKC 96) on the ECR Keyboard (ordinary or Flat type), and /or when the PK-2 PLU Keyboard (hardware option) is connected to the ECR, a PLU code may be preset to each of those keys in this operation. - Page 144 • For PK-2 Keyboard Main Menu Depress [↓] twice then [Enter]. Depress [3]. Depress [↓] then [Enter]. Depress [2] Depress [↓] twice then [Enter]. Depress [3]. Depress [Enter]. Depress [1] Input a PLU Code. NOTE: PLU Codes 1 through 130 are automatically assigned to the PK-2 after performing a RAM Clear. Key Location Code •...
- Page 145 • Flat type keyboard Example (1) To assign PLU Code 1111 to Key Location Code 55 on the ordinary type keyboard. Operation When the ECR is being outside a sale and in SET mode, depress the [↓] key twice. Depress the [3] or [Enter] key. Depress the [↓] key.
- Page 146 Operation Depress the [↓] key. Depress the [2] or [Enter] key. Input 55, then depress the [Enter] key. (Key Location Code 55 is set.) Input 1111, then depress the [Enter] key. (PLU Code 1111 is set.) The display returns to the key location code input screen.
- Page 147 Operation Depress the [↓] key. Depress the [2] or [Enter] key. Depress the [↓] key twice. Depress the [3] or [Enter] key. Depress the [1] or [Enter] key. Input 1111, then depress the [Enter] key. (PLU Code 1111 is set.) Directly depress a key on the PK-2 keyboard where PLU Code 1111 is to be assigned.
-
Page 148: And %- Preset Rate Setting
6.26 %+ and %- Preset Rate Setting A preset rate may be set on each of the [%+] and [%-] keys, one independent rate for each key. Once a rate is preset, the % key will simply be depressed without a prior rate entry to activate the preset rate. If a rate is entered prior to the depression of the key, the entered rate (manual rate) will be activated instead. - Page 149 Example To program the following rate on the [%-] key: [%-] key ………. Rate 5,00% Operation When the ECR is being outside a sale and in SET mode, depress the [↓] key three times. Depress the [4] or [Enter] key. Depress the [1] or [Enter] key.
-
Page 150: Vat Or Add-On Tax Rate Setting
6.27 VAT or Add-on Tax Rate Setting The rates of VATs or Add-on Taxes are set in this operation,. (Which VAT or Add-on Tax is applicable to each Department or PLU has already been set in the DEPARTMENT TABLE PROGRAMMING and PLU TABLE PROGRAMMING.) CONDITION After Financial Daily Reset... - Page 151 6. TERMINAL FILE PROGRAMMING Example To set the following VAT rate: VAT1………10% Operation When the ECR is being outside a sale and in SET mode, depress the [↓] key three times. Depress the [4] or [Enter] key. Depress the [↓] key Depress the [2] or [Enter] key.
-
Page 152: Foreign Currency Exchange Rate Setting
6.28 Foreign Currency Exchange Rate Setting The rate of each foreign currency (corresponding to the [CUR1] to [CUR5] keys) are set in this operation. By setting a rate on each Foreign Currency Key, reading the sale total and tendering in the foreign currency value will be possible for sale finalization. - Page 153 Foreign Currency Exchange Rate Calculation The rate must be calculated in the subsidiary currency unit values for both the domestic and the foreign currencies. (In case of calculating the rate from the domestic to a foreign currency with the same zero- suppress form, such as from Euro to U.S.
- Page 154 Operation Make sure the cursor is shown on 01CUR1. Then, input 1.20 and depress the [Enter] key. Make sure the cursor is shown on 02CUR2. Then, input 1.3774 and depress the [Enter] key. Depress the [↓] key twice. Make sure the cursor is shown on 05CUR5.
-
Page 155: Negative Amount Key Limit Amount Setting
6.29 Negative Amount Key Limit Amount Setting The limit amount to be entered through each of the negative-amount keys [VND CPN], [STR CPN], and [-] Are set here. CONDITION Any time outside a sale OPERATION Mode Lock: SET Menu Tree Operation Flowchart Main Menu Depress [↓] three times then [Enter]. - Page 156 Example To set the following preset amount on the keys below: Limit Amount [VND CPN] 10.00 [STR CPN] 20.00 Operation When the ECR is being outside a sale and in SET mode, depress the [↓] key three times. Depress the [4] or [Enter] key. Depress the [↓] key three times.
-
Page 157: Time Setting Or Adjustment
6.30 Time Setting or Adjustment Any time outside a sale CONDITION OPERATION Mode Lock: SET Menu Tree Operation Flowchart Main Menu Depress [↓] four times then [Enter]. Depress [5]. Depress [1] or [Enter]. Input a 4-digit time value. NOTE: If an hour value of more than 23 or a minute value of more than 59 is entered, the current data remains unchanged by setting or adjusting the time. -
Page 158: Date Setting Or Adjustment
Operation Input 1315. The [End] key depression allows the ECR to end this setting. 6.31 Date Setting or Adjustment Any time outside a sale CONDITION Mode Lock: SET OPERATION Menu Tree Operation Flowchart Main Menu Depress [↓] four times then [Enter]. Depress [5]. - Page 159 Example To set Date “Monday 31 October, 2005” Operation When the ECR is being outside a sale and in SET mode, depress the [↓] key four times. Depress the [5] or [Enter] key. Depress the [↓] key. Depress the [2] or [Enter] key. Depress the [↓] key.
-
Page 160: Store/Register No. Setting
6.32 Store/Register No. Setting A maximum of 6 digits may be set as ID No. for the store and/or register. And once set, it will be printed on every receipt. CONDITION Any time outside a sale OPERATION Mode Lock: SET Menu Tree Operation Flowchart Main Menu... - Page 161 Operation Depress the [↓] key twice. Depress the [3] or [Enter] key. Input 3001. (Store/Register No. 3001 is set.) The [End] key depression allows the ECR to end this setting. (continued from the previous page) LCD Display 6-141 EO3-11106 6.32 Store/Register No. Setting Remarks The cursor is moved on to “3 REGISTER NO.”.
-
Page 162: Hourly Range Table Setting
6.33 Hourly Range Table Setting By setting a maximum of 24 terms per day, sales data control for each term can be performed. CONDITION After Hourly Range Reset OPERATION Mode Lock: SET Menu Tree Operation Flowchart Main Menu Depress [↓] four times then [Enter]. Depress [5]. - Page 163 Example To set the following hourly range table: TIME01 until 8:00* TIME02 8:00 to 12:00 TIME03 12:00 to 15:00 TIME04 15:00 to 19:00 *(The first term is automatically continued from 19:00 of the preceding day.) Operation When the ECR is being outside a sale and in SET mode, depress the [↓] key four times.
- Page 164 Operation Input 1500, then depress the [Enter] key. (TIME03 is set with 15:00.) Input 1900, then depress the [Enter] key. (TIME04 is set with 19:00.) The [End] key depression allows the ECR to end this setting. • Hourly Range Table Resetting Procedure If the hourly range table is reset, follow the procedure below.
- Page 165 Operation Depress the [2] or [Enter] key. A guidance message is displayed. The [End] key depression allows the ECR to end this setting. -- Receipt Sample of Hourly Range Table Setting -- TEC STORE 1343 PEACH DRIVE PHONE: 87-6437 Open 8:00am to 7:00pm Closed: every Wednesday 31-10-2005 MON...
-
Page 166: Tone Volume Setting
6.34 Tone Volume Setting Key-in tone for the ECR keyboard and error tone are selectable from High, Low, and OFF. CONDITION Any time outside a sale OPERATION Mode Lock: SET Menu Tree Operation Flowchart Main Menu Depress [↓] four times then [Enter]. Depress [5]. - Page 167 Example To change the key tone from “HIGH” (default setting) to “LOW”. Operation When the ECR is being outside a sale and in SET mode, depress the [↓] key four times. Depress the [5] or [Enter] key. Depress the [↓] key four times. Depress the [5] or [Enter] key.
-
Page 168: Report Item Print/Non-Print Setting
6.35 Report Item Print/Non-Print Setting Items to be printed on Financial, Cashier, and Salesperson Reports are set here. Any time outside a sale CONDITION OPERATION Mode Lock: SET Menu Tree Operation Flowchart Main Menu Depress [↓] five times then [Enter]. Depress [6]. - Page 169 6. TERMINAL FILE PROGRAMMING Example To set Item Code 3 “NEG GT” with Non-print status. Operation When the ECR is being outside a sale and in SET mode, depress the [↓] key five times. Depress the [6] or [Enter] key. Depress the [1] or [Enter] key.
- Page 170 Item Item Name Code Ground Total NET GT NEG GT Gross Sale Tax 1 (Add-on Tax 1) Tax 2 (Add-on Tax 2) Tax 3 (Add-on Tax 3) Tax 4 (Add-on Tax 4) Tax 5 (Add-on Tax 5) Tax 6 (Add-on Tax 6) Tax 7 (Add-on Tax 7) Tax 8 (Add-on Tax 8) Tax Total...
- Page 171 Item Item Name Code Media 2-in-drawer (CRT) Credit-in-drawer (Foreign Currency 1) Credit-in-drawer (Foreign Currency 2) Credit-in-drawer (Foreign Currency 3) Credit-in-drawer (Foreign Currency 4) Credit-in-drawer (Foreign Currency 5) Media 3-in-drawer (MISC) MISC-in-drawer (Foreign Currency 1) MISC-in-drawer (Foreign Currency 2) MISC-in-drawer (Foreign Currency 3) MISC-in-drawer (Foreign Currency 4) MISC-in-drawer (Foreign Currency 5) Media 4-in-drawer (CPN)
- Page 172 Item Item Name Code Transfer + Daily Transfer – Daily PB (Previous Balance) Sales PB R/A (PB Paid) PB PO (PB Refunded) Taxable Total 1 VAT 1 or Tax 1 Taxable Total 2 VAT 2 or Tax 2 Taxable Total 3 VAT 3 or Tax 3 Taxable Total 4 VAT 4 or Tax 4...
-
Page 173: Key Status Programming
6.36 Key Status Programming Various selective statuses of media keys and other function keys are programmed here. Any time outside a sale CONDITION OPERATION Mode Lock: SET Menu Tree Operation Flowchart Main Menu Depress [↓] five times then [Enter]. Depress [6]. Depress [↓] twice then [Enter]. - Page 174 Operation Depress the [↓] key twice. Depress the [3] or [Enter] key. Depress the [↓] key twice. Depress the [Enter] key. (Key Code 3 “CHECK” is selected.) Depress the [↓] key, then depress the [→] key. Depress the [Enter] key. The [End] key depression allows the ECR to end this programming.
- Page 175 Bit No. TOTAL-only TENDER-only -- vacant bit -- SHORT TENDERING OVER TENDERING -- vacant bit -- NO-PURCHASE CASHING FINALIZING R/A ITEMS CONSIGNMENT -- vacant bit -- DRAWER OPEN AFTER THE KEY OPERATION (see NOTE below) Key Name Code [AT/TL] [CHK TEND] [CRT] [MISK TEND] [CPN]...
- Page 176 Bit No. -- vacant bit -- MGR INTERVENTION (in REG mode) ADD-ON TAX/VAT STATUS -- vacant bit -- -- vacant bit -- -- vacant bit -- -- vacant bit -- -- vacant bit -- Key Name Code [ - ] (Disc) [VND CPN] [STR CPN] -- vacant --...
-
Page 177: Cash Tender Key Preset Amount Setting
6.37 Cash Tender Key Preset Amount Setting A maximum of 6-digit amount is preset to the Cash Key ([CASH 1] to [CASH 3]). When depressing the cash key with preset amount in a registration operation, it will be processed as a tendering operation of the preset amount. - Page 178 Example To preset €10000,00 to the [CASH 1] key and €10,00 to the [CASH 2] key. Operation When the ECR is being outside a sale and in SET mode, depress the [↓] key five times. Depress the [6] or [Enter] key. Depress the [↓] key three times.
-
Page 179: Drawer Warning Time Setting
6.38 Drawer Warning Time Setting This operation sets the number of seconds as the period of time for the cash drawer remaining open until the alarm buzzer is generated to warn operator to close the drawer. Any time outside a sale CONDITION OPERATION Mode Lock: SET... - Page 180 Example To set 30 seconds for the drawer warning time. Operation When the ECR is being outside a sale and in SET mode, depress the [↓] key five times. Depress the [6] or [Enter] key. Depress the [↓] key four times. Depress the [5] or [Enter] key.
-
Page 181: Special Rounding Process Setting, 1-Digit Type
6.39 Special Rounding Process Setting, 1-digit type For Special Rounding and Denmark/Australia rounding, the pre-rounded value of the least effective digit and the post-rounded value are set here. This operation is effective when the option “Special Rounding ACTIVE” and “1 digit subject to Special Rounding”... - Page 182 Operation When the ECR is being outside a sale and in SET mode, depress the [↓] key five times. Depress the [6] or [Enter] key. Depress the [↓] key five times. Depress the [6] or [Enter] key. Input 200, then depress the [Enter] key.
-
Page 183: Special Rounding Process Setting, 2-Digit Type
6.40 Special Rounding Process Setting, 2-digit type For Special Rounding and Denmark rounding, the pre-rounded value of the two least effective digit and the post- rounded value are set here. This operation is effective when the option “Special Rounding ACTIVE” and “2 digits subject to Special Rounding”... - Page 184 Example of Denmark rounding For the Denmark rounding, the amount total is rounded as shown below. Pre-rounded value of the two least effective digits 0 to 12 13 to 37 37 to 62 63 to 87 88 to 112 Example To set the Denmark rounding.
- Page 185 Operation Input 3725, then depress the [Enter] key. Input 6250, then depress the [Enter] key. Input 8775, then depress the [Enter] key. The [End] key depression allows the ECR to end this setting. (continued from the previous page) LCD Display 6-165 6.40 Special Rounding Process Setting, 2-digit type Remarks...
-
Page 186: Number Of Receipt Print Buffer Line Setting
6.41 Number of Receipt Print Buffer Line Setting The number of receipt print buffer line is set here. When it reaches the set value, only a receipt print operation starts. This setting is effective only in REG, MGR, and - modes or programming operation. CONDITION Any time outside a sale OPERATION... - Page 187 Operation Depress the [↓] key seven times. Depress the [8] or [Enter] key. Input 30. The [End] key depression allows the ECR to end this setting. (continued from the previous page) LCD Display 6-167 EO3-11106 6.41 Number of Receipt Print Buffer Line Setting Remarks The cursor is moved on to “8 RCT PRINT BUFFER”.
-
Page 188: Serial No. Setting
6.42 Serial No. Setting A maximum of 8-digit serial No. is set here. The serial No. will be printed on the Daily and GT Financial Read/Reset Reports. CONDITION Any time outside a sale OPERATION Mode Lock: SET Menu Tree Operation Flowchart Main Menu Depress [↓] five times then [Enter]. - Page 189 Example To set the serial No. 12345678. Operation When the ECR is being outside a sale and in SET mode, depress the [↓] key five times. Depress the [6] or [Enter] key. Depress the [↓] key eight times. Depress the [9] or [Enter] key. Input 12345678.
-
Page 190: Verification Of Programmed Data
7. VERIFICATION OF PROGRAMMED DATA VERIFICATION OF PROGRAMMED DATA The programmed data entered in the preceding chapter can be read for verification purposes. The print format of each program reading is almost the same as on the program receipt, except that “X” is printed instead of printing Program Name. - Page 191 PROGRAM DATA READ menu X mode 1 DAILY 2 GT 3 PROGRAM DATA READ 4 OTHER ITEMS SET mode 4 RATE, LIMIT AMOUNT SET 5 BASIC 6 OTHER 7 PROGRAM DATA READ 1 MESSAGES 1 COMMERCIAL MESSAGE 2 FOOTER MESSAGE 3 STORE MESSAGE 2 MAMES 1 DP GROUP NAME...