Advertisement
Advertisement
Table of Contents

Related Manuals for Stanton T.55 USB


Summary of Contents for Stanton T.55 USB
-
Page 2: Important Safety Precautions
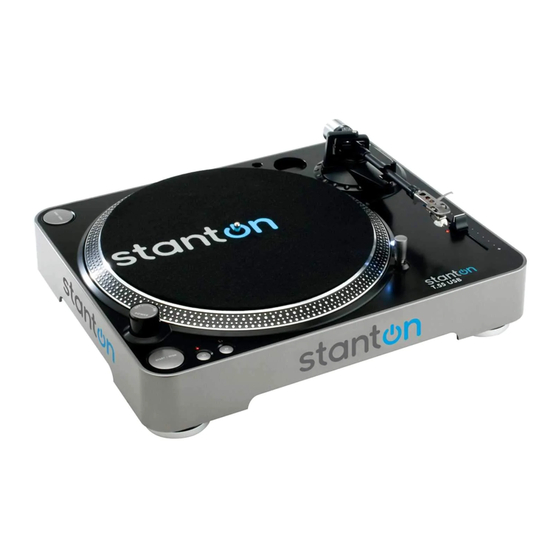
IMPORTANT SAFETY PRECAUTIONS 1. Read Instructions - All the safety and operating instructions should be read before this product is operated. 2. Retain Instructions - The safety and operating instructions should be retained for future reference. 3. Heed Warnings - All warnings on the appliance and in the operating instructions should be adhered to. - Page 3 Thank you for purchasing the T.55 USB turntable from Stanton. The T.55 USB is built upon Stanton’s heritage of designing audiophile products for the most discriminating listener. Before assembling the T.55 USB please check to make sure the following items are included with the main unit in the carton.
-
Page 4: Maintenance
The majou cause of problems with acoustic performance and skipping on the vinyl is the lack of proper set up of the needle and turntable adjustments. The needle is designed to operate at a specific angle to the vinyl. The T.55 USB has several adjustments to correctly position the needle to the vinyl! 1. -
Page 5: Control Overview
CONTROL OVERVIEW 1. Start/Stop - Press this button to start or stop the platter. 2. Strobe dots - The dots around the edge of the platter are used in conjunction with the light located inside the motor On/Off switch. While the platter is in rotation, the dots help to indicate the speed of rotation. -
Page 6: Audacity Software Overview
The T.55 USB includes a USB computer interface and Cakewalk Pyro Audio Creator LE CD software for Windows. Macintosh users can download the free Audacity software for recording directly from the T.55 USB. By connecting the T.55 USB to your computer and using the correct software, you can custom CDs from your record albums. - Page 7 AUDACITY SOFTWARE OVERVIEW Recording & saving tracks 10. When you are ready to record, click the Red record button on the computer. 11. When you have finished the recording, click the Yellow stop button. Click the Green play button to playback your finished recording. You can now click File and choose Export As AIFF (Macintosh) or Wave (Windows) to save the recording.
- Page 8 Complete instructions on how to use all the features of the software are included in the Help Menu. To transfer and record LPs to your hard drive from your T.55 USB, start by connecting your T.55 USB to your computer using the included USB cable.
- Page 9 EDITOR button, the screen below will appear. 3. Press the (3) Input Monitoring button. This will allow you to listen to the audio as you record it from the T.55 USB. 4. Press the red (4) Record button. This will also light up the (5) Pause button. Play a record on your turntable and you will see the meters at the right of window show you the recording level.
- Page 10 EDITING THE AUDIO Now you are ready to trim any unwanted audio (such as the silence between songs). Trimming will also separate the songs to create new “Clips.” It is easy to see the separation between songs. This is where the volume of the waveform is at a low-level. If there is only a short space between songs, then it might not be quite as easy to see.
- Page 11 6. To make it easier to split up tracks or delete unwanted silence between songs, left-click the mouse and drag it over the areas between the songs. Press the (6) Zoom Selection button and the screen now zooms into the area between the songs. 7.
- Page 12 The next step is to name the Markers with the song names. Markers are indicated with a triangle. Place the cursor over a Marker and right-click the mouse. That displays the Marker naming window. Enter the name of the song and press OK. Continue doing this for each Marker. Now you are ready to process the audio. PROCESSING CLIPS Audio Creator LE allows you to process your audio clips.
- Page 13 Clip before normalizing Clip normalizing 9. To normalize a Clip, fi rst press the (9) Clip Select button. Then, place the cursor over a Clip and click to select it. 10. Next, press the (10) Normalize button. This brings up the Normalize window, as shown below.
- Page 14 It is usually best not to normalize to 100%. Instead, choose -0.5 dB or -1 dB. Set the normalization level to your desired amount and then press OK. Using the Audio Restore Plug-in Audio Creator LE includes an audio plug-in that helps eliminate noise, clicks and pops from a record. The plug-in is called Audio Restore by iZotope. To select the Audio Restore Plug-in from Cakewalk, right-click on the clip you wish to process.
- Page 15 In this window, you can select the following options: - DeNoiser-This will help eliminate record background noise. - Declipper-This will eliminate parts of the audio where clipping occurs. Clipping happens when the recorded audio exceeds maximum level. - DeClicker-This will remove clicks or pops from the audio file. It is best to try the default settings first.
- Page 16 3) Click the “Use Markers as Track Indicators” checkbox to select it. This will automatically save each track and give it the same name as the Markers that you named. 4) Then, click the “Add to Audio CD Track List” checkbox. This will automatically add all the tracks to the CD track list, making it easy to make a CD after saving the tracks.
- Page 17 2) Click the “Use Markers as Track Indicators” checkbox to select it. This will automatically save each track as an MP3 file and give it the same name as the Markers that you named. Press the Save button, and the following screen is displayed. 3) First, select the bit rate for the MP3 files.
- Page 18 Congratulations! You have successfully digitized your 1st vinyl record! Feel free to experiment with the other features of Pyro Audio Creator LE. The online Help screens offer help about the various functions. You can find further help for all Stanton products online. The Stanton FAQ can be found at: http://www.stantondj.com/v2/spt_faq.asp...
-
Page 19: Specifications
SPECIFICATIONS General Model: T.55 USB Dimensions 452(W) x 370(D) x 87(H)mm Weight 5.4Kgs Power supply AC 100V, 50/60Hz (For Japan) AC 110V, 60Hz (For Taiwan) AC 120V, 60Hz (For U.S.A., Canada, Mexico) AC 220V, 50Hz (For United Arab Emirates, Chile, Argentina) -
Page 20: Warranty And Return Policy
Stanton’s liability for any claim, whether based on breach of contract, negligence, infringement of any rights of any party, or product liability, and relating to the merchandise shall not exceed the price received by Stanton from your purchase of such merchandise. In no event will Stanton be liable for any special, incidental or consequential damages (including loss of use, loss of profit and claims of third parties) however caused, whether by the negligence of Stanton or otherwise.