Advertisement
Table of Contents
- 1 Getting Acquainted
- 2 General Guide
- 3 Digital Compass
- 4 Daylight Saving Time (DST)
- 5 Recalling Altitude Data
- 6 Tide/Moon Data
- 7 Countdown Timer
- 8 World Time
- 9 Questions and Answers
- 10 Power Supply
- 11 Battery Power Indicators
- 12 Charging Precautions
- 13 Specifications
- 14 City Code Table
- Download this manual
MO0909-EA
Getting Acquainted
Congratulations upon your selection of this CASIO watch. To get the most out
of your purchase, be sure to read this manual carefully.
Applications
The built-in sensors of this watch measure direction, barometric pressure,
temperature and altitude. Measured values are then shown on the display.
Such features make this watch useful when hiking, mountain climbing, or
when engaging in other such outdoor activities.
• The measurement functions built into this watch are not intended for
taking measurements that require professional or industrial precision.
Values produced by this watch should be considered as reasonable
representations only.
• The Moon phase indicator and tide graph data that appear on the
display of this watch are not intended for navigation purposes. Always
use proper instruments and resources to obtain data for navigation
purposes.
• This watch is not an instrument for calculating low tide and high tide
times. The tide graph of this watch is intended to provide a reasonable
approximation of tidal movements only.
• When engaging in mountain climbing or other activities in which losing
your way can create a dangerous or life-threatening situation, always be
sure to use a second compass to confirm direction readings.
• Note that CASIO COMPUTER CO., LTD. assumes no responsibility for
any damage or loss suffered by you or any third party arising through
the use of this product or its malfunction.
Keep the watch exposed to bright light
Bright light
Solar cell
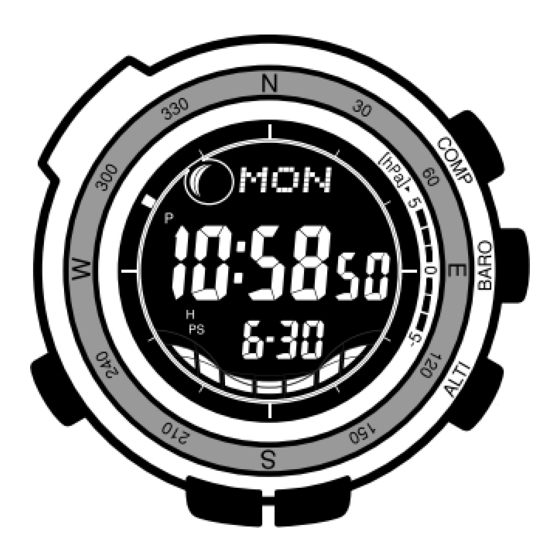
General Guide
• The illustration below shows which buttons you need to press to navigate
between modes.
• In any mode, press L to illuminate the display.
Stopwatch
Countdown
Mode
Timer Mode
L
World Time Mode
Alarm Mode
Operation Guide 3135 3206
Warning!
The electricity generated by the solar cell of the
watch is stored by a built-in battery. Leaving or
using the watch where it is not exposed to light
causes the battery to run down. Make sure the
watch is exposed to light as much as possible.
• When you are not wearing the watch on your
wrist, position the face so it is pointed at a
source of bright light.
• You should try to keep the watch outside of
your sleeve as much as possible. Charging is
reduced significantly if the face is covered only
partially.
Timekeeping Mode
Tide/Moon Data
Mode
Press
D.
Data Recall
Mode
• The watch continues to operate, even when it is not exposed to light.
Leaving the watch in the dark can cause the battery to run down, which will
result in some watch functions being disabled. If the battery goes dead, you
will have to re-configure watch settings after recharging. To ensure normal
watch operation, be sure to keep it exposed to light as much as possible.
Battery charges in the light.
Solar cell
(Converts light to
electrical power.)
Charge
• The actual level at which some functions are disabled depends on the
watch model.
• Frequent display illumination can run down the battery quickly and require
charging. The following guidelines give an idea of the charging time
required to recover from a single illumination operation.
Approximately five minutes exposure to bright sunlight coming in through
a window
Approximately 50 minutes exposure to indoor fluorescent lighting
• Be sure to read "Power Supply" for important information you need to
know when exposing the watch to bright light.
If the display of the watch is blank...
If the display of the watch is blank, it means that the watch's Power Saving
function has turned off the display to conserve power.
• See "Power Saving" for more information.
About This Manual
(Light)
Module 3135
Module 3206
• You can use buttons A, B, and C to enter a sensor mode directly from
the Timekeeping Mode or from another sensor mode. To enter a sensor
mode from the Tide/Moon Data, Countdown Timer, Stopwatch, World Time,
Alarm, or Data Recall Mode, first enter the Timekeeping Mode and then
press the applicable button.
Press C.
Compass Mode
L
Battery discharges in the dark.
Bright light
Electrical
energy
All
LEVEL 1
functions
LEVEL 2
enabled
LEVEL 3
LEVEL 4
Rechargeable battery
• Depending on the model of your watch, display
text appears either as dark figures on a light
background (Module 3135), or light figures on a
dark background (Module 3206). All sample
displays in this manual are shown using dark
figures on a light background.
• Button operations are indicated using the
letters shown in the illustration.
• Each section of this manual provides you with
the information you need to perform operations
in each mode. Further details and technical
information can be found in the "Reference"
section.
Sensor Modes
Press B.
Digital
Barometer/
Thermometer Mode
Press D.
LEVEL 1
LEVEL 2
Some
LEVEL 3
Dis-
functions
charge
LEVEL 4
disabled
Press A.
Altimeter Mode
1
Advertisement
Table of Contents

Related Manuals for Casio 3206


Summary of Contents for Casio 3206
-
Page 1: Getting Acquainted
MO0909-EA Operation Guide 3135 3206 Getting Acquainted Congratulations upon your selection of this CASIO watch. To get the most out of your purchase, be sure to read this manual carefully. Applications The built-in sensors of this watch measure direction, barometric pressure, temperature and altitude. -
Page 2: Digital Compass
Home City (the city where you normally use the watch). If your location is not included in the preset city codes, select the preset city code that is in the same time zone as your location. - Page 3 CASIO distributor to have the watch checked. To perform northerly calibration 3. Place the watch on a level surface, and position it so that its 12 o’clock position points north (as measured with another compass). 4. Press C to start the calibration operation.
- Page 4 • To determine the direction angle to an objective on a map and head in that direction To set a map and find your current location North indicated 1. With the watch on your wrist, position it so the on the map face is horizontal. 2. In the Timekeeping, Digital Compass, Barometer/Thermometer, or Altimeter Mode, press C to take a compass reading.
- Page 5 When you measure altitude using a reference altitude specified by you After you specify a reference altitude, the watch uses that value to convert the current measured barometric pressure value to altitude. • When mountain climbing, you can set the...
-
Page 6: Recalling Altitude Data
After you specify a reference altitude, the watch adjusts its air-pressure-to- altitude conversion calculation accordingly. The altitude measurements produced by this watch are subject to error caused by changes in air pressure. Because of this, we recommend that you update the reference altitude whenever one is available during your climb. -
Page 7: Countdown Timer
• The high tide time setting is not affected by the DST (summer time) setting of the Timekeeping Mode. • On some days, there are two high tides. With this watch, you can adjust the first high tide time only. The second high tide time for that day is adjusted automatically based on the first high tide time. -
Page 8: World Time
Turning on the auto light switch causes illumination to turn on, whenever you position your wrist as described below in any mode. Note that this watch features a “Full Auto EL Light”, so the auto light switch operates only when available light is below a certain level. It does not illuminate the display under bright light. -
Page 9: Questions And Answers
If you experience problems getting the special rechargeable battery to charge fully, contact your dealer or CASIO distributor about having it replaced. • Never try to remove or replace the watch’s special battery yourself. Use of Temperature the wrong type of battery can damage the watch. -
Page 10: Battery Power Indicators
(L, M, H) on the display. • If battery indicators (L, M, H) appears frequently, it probably means that remaining battery power is low. Leave the watch in bright light to allow it to charge. Charging Precautions Certain charging conditions can cause the watch to become very hot. - Page 11 To recover from the sleep state Perform any one of the following operations. • Move the watch to a well-lit area. It can take up to two seconds for the display to turn on. • Press any button.
-
Page 12: Specifications
This does not necessarily indicate malfunction. • You may notice a very faint clicking sound coming from the watch when it is shaken back and forth. This sound is caused by mechanical operation of the auto light switch, and does not indicate a problem with the watch. -
Page 13: City Code Table
• 2 hours of barometric pressure measurement per day Frequent use of illumination runs down the battery. Particular care is required when using the auto light switch. 20 months when the watch is left in the sleep state (display off) after a full charge. City Code Table...