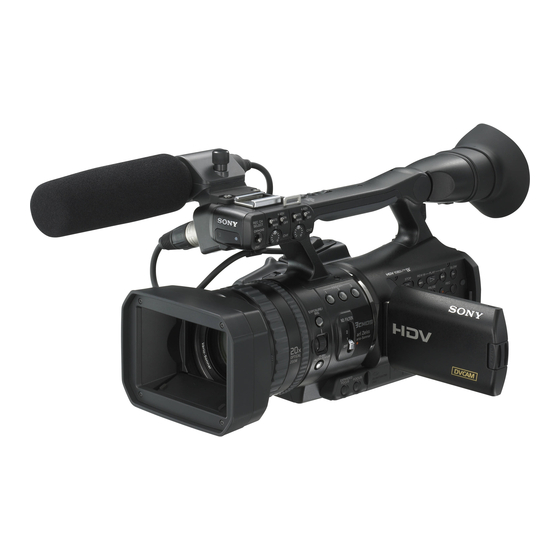
Sony HVR-V1U Operating Manual
Operating guide
Hide thumbs
Also See for HVR-V1U:
- Brochure & specs (17 pages) ,
- Service manual (21 pages) ,
- Service manual (475 pages)
Table of Contents
Advertisement
Digital HD Video
Camera Recorder
Caméscope
numérique HD
Operating Guide
Before operating the unit, please read this manual thoroughly,
and retain it for future reference
The supplied CD-ROM includes Operating Guide for the HVR-V1 series.
(Japanese, English, French, German, Italian, Spanish, and Simplified Chinese
versions).
For more details, see "Using the CD-ROM Manual" on page 12.
HVR-V1U/V1N
© 2006 Sony Corporation
2-887-519-11(1)
Advertisement
Table of Contents

Related Manuals for Sony HVR-V1U


Summary of Contents for Sony HVR-V1U
- Page 1 The supplied CD-ROM includes Operating Guide for the HVR-V1 series. (Japanese, English, French, German, Italian, Spanish, and Simplified Chinese versions). For more details, see “Using the CD-ROM Manual” on page 12. HVR-V1U/V1N © 2006 Sony Corporation 2-887-519-11(1)
- Page 2 WARNING To reduce fire or shock hazard, do not expose the unit to rain or moisture. For Customers in the U.S.A. This symbol is intended to alert the user to the presence of uninsulated “dangerous voltage” within the product’s enclosure that may be of sufficient magnitude to constitute a risk of electric shock to persons.
-
Page 3: Important Safeguards
IMPORTANT SAFEGUARDS For your protection, please read these safety instructions completely before operating the appliance, and keep this manual for future reference. Carefully observe all warnings, precautions and instructions on the appliance, or the one described in the operating instructions and adhere to them. -
Page 4: Replacement Parts
IMPORTANT SAFEGUARDS (Continued) Lightning For added protection for this set during a lightning storm, or when it is left unattended and unused for long periods of time, unplug it from the wall outlet and disconnect the antenna or cable system. This will prevent damage to the set due to lightning and power-line surges. -
Page 5: Read This First
Owner's Record The model and serial numbers are located on the bottom. Record the serial number in the space provided below. Refer to these numbers whenever you call upon your Sony dealer regarding this product. Model No. HVR- Serial No. - Page 6 Perchlorate Material: Lithium battery contains perchlorate. Types of cassette you can use in your camcorder Your camcorder is capable of recording in HDV, DVCAM and DV formats. When recording in HDV/DV format, it is recommended to use mini DV cassettes.
- Page 7 Be sure to insert the “Memory Stick Duo” into the Memory Stick Duo Adaptor. Memory Stick Duo Adaptor Using the camcorder • Do not hold the camcorder by the following part. b Notes • The camcorder is not dustproof, dripproof or waterproof.
- Page 8 About the Carl Zeiss lens Your camcorder is equipped with a Carl Zeiss lens, which was developed jointly by Carl Zeiss, in Germany, and Sony Corporation, and produces superior images. It adopts the MTF measurement system for video cameras and offers a quality typical of a Carl Zeiss lens.
-
Page 9: Table Of Contents
Step 2: Attaching the supplied microphone and the lens hood with lens cover ...14 Step 3: Charging the battery pack ...16 Step 4: Turning the power on and holding your camcorder properly ...19 Step 5: Adjusting the LCD panel and viewfinder ...20 Step 6: Setting the date and time ...22 Step 7: Inserting a tape or a “Memory Stick Duo”... - Page 10 Using the menu items ... 57 Menu items ... 59 (CAMERA SET) menu ... 62 Settings to adjust your camcorder to the recording conditions (EXPOSURE/ IRIS/STEADYSHOT/BACK LIGHT, etc.) (AUDIO SET) menu ... 68 Settings for the audio recording (DV AU. MODE/XLR SET, etc.)
- Page 11 Copying movies on a tape to a computer ...98 Troubleshooting Troubleshooting ...101 Warning indicators and messages ...110 Additional Information Using your camcorder abroad ...113 HDV format and recording/playback ...114 Compatibility of the DVCAM/DV formats ...116 About the “Memory Stick” ...118 About the “InfoLITHIUM” battery pack ...120 About i.LINK ...121...
-
Page 12: Using The Cd-Rom Manual
Using the CD-ROM Manual English The supplied CD-ROM includes versions of the Operating Guide for the HVR-V1 series in Japanese, English, French, German, Italian, Spanish, and Simplified Chinese in PDF format. Preparation The following program must be installed on your computer in order to read the Operating Guide contained on the CD- ROM. -
Page 13: Getting Started
Getting Started Step 1: Checking supplied items Make sure that you have following items supplied with your camcorder. The number in the parentheses indicates the number of that item supplied. • The cassette tape and “Memory Stick Duo” are not included. See page 24, 114 and 118 for compatible cassettes and “Memory Stick Duo”... -
Page 14: Step 2: Attaching The Supplied Microphone And The Lens Hood With Lens Cover
the lens hood with lens cover Attach the wind screen 1 to the microphone 2. Loosen the screw of the microphone holder 3 and open the cover. Place the microphone into the holder with the model name facing upward, close the cover, and tighten the screw. - Page 15 Attaching lens hood with lens cover Lens hood fixing screw Align the marks on the lens hood to those on the camcorder, and turn the lens hood in the direction of the arrow. Tighten the lens hood fixing screw. To remove the Lens hood with lens...
-
Page 16: Step 3: Charging The Battery Pack
Step 3: Charging the battery pack You can charge the battery by attaching the “InfoLITHIUM” battery pack (L series) to your camcorder. b Note • You cannot use batteries other than the “InfoLITHIUM” battery pack (L series) (p. 120). DC plug... - Page 17 Battery pack NP-F570 (supplied) NP-F770 NP-F970 b Note • You cannot use the NP-F330 battery pack with this camcorder. Recording time Approximate time (min.) available when you use a fully charged battery pack. Recording in the HDV format Battery pack...
- Page 18 Adaptor or battery terminal with any metallic objects. This may cause a malfunction. PRECAUTION • Even if your camcorder is turned off, AC power (house current) is still supplied to it while connected to the wall outlet via the AC Adaptor.
-
Page 19: Step 4: Turning The Power On And Holding Your Camcorder Properly
• After you have set the date and time ([CLOCK SET], p. 22), the next time you turn on the power of your camcorder, the current date and time will be displayed on the LCD screen for a few seconds. -
Page 20: Step 5: Adjusting The Lcd Panel And Viewfinder
Step 5: Adjusting the LCD panel and viewfinder The LCD panel Open the LCD panel while pressing the OPEN button 90 degrees to the camcorder (1), then rotate it to the best angle to record or play (2). z Tips •... - Page 21 When the picture in the viewfinder is hard to see If you cannot see the picture in the viewfinder clearly under bright circumstances, use the supplied large eyecup. To attach the large eyecup, stretch it slightly and align it with the eyecup groove in the viewfinder.
-
Page 22: Step 6: Setting The Date And Time
POWER switch position. z Tip • If you do not use your camcorder for about 3 months, the built-in rechargeable battery gets discharged and the date and time settings may be cleared from the memory. In that case, charge the rechargeable battery and then set the date and time again (p. - Page 23 z Tip • The date and time do not appear during recording, but they are automatically recorded on the tape, and can be displayed during p. 73 playback ([DATA CODE] ( Changing the language setting You can change the on-screen displays to show messages in a specified language.
-
Page 24: Step 7: Inserting A Tape Or A "Memory Stick Duo
Cassette tape See page 114 for details of usable cassettes and prevention of accidental erasure. Slide and hold the EJECT lever in the direction of the arrow and open the lid. OPEN/EJECT lever The cassette compartment automatically comes out and opens up. Insert a cassette with its window facing outwards, then press The cassette compartment automatically... - Page 25 • When the access lamp is lit or flashing, your camcorder is reading/writing data. Do not shake or knock your camcorder, turn the power off, eject the “Memory Stick Duo,” or remove the battery pack. Otherwise, image data may be damaged.
-
Page 26: Recording/Playback
This camcorder records movies on tape and still images on “Memory Stick Duo.” The procedure for recording movies is below. • This camcorder can record movies in HDV or DVCAM (DV) format. The factory setting is HDV format ([REC FORMAT] p. 75). - Page 27 • The recording lamp can be set to stay off ([REC LAMP] p. 84). • You cannot record the movie on a “Memory Stick Duo”. To record in mirror mode Open the LCD panel 90 degrees to the camcorder (1), then rotate it 180 degrees toward the lens (2). z Tip •...
- Page 28 To record still images Press the PHOTO/EXPANDED FOCUS button. The image is recorded on a “Memory Stick Duo.” Recording is complete when movie recording. z Tips • When you are not recording a movie, you will hear the shutter click. •...
-
Page 29: Playback
• You cannot play back the tape recorded in the HDV format on video cameras of the DVCAM (DV) format or mini-DV players. • DV format tapes are played back on your camcorder only if they are recorded in the SP mode appears on the screen). Tapes recorded in the LP mode are not played back. - Page 30 Playback (Continued) • Time code and user bits are not displayed correctly unless time code and user bits are recorded on the tape, or the recorded time code is compatible with your camcorder. z Tips • Indicators displayed on the screen during playback are shown on page 138.
-
Page 31: Changing The Settings Of Your Camcorder Recordings
Close view: (Telephoto) z Tips • The minimum distance required between your camcorder and the subject for focus is about 1 cm (about 13/32 in.) for wide angle and about 80 cm (about 2 5/8 feet) for telephoto. • The focus may not be adjusted at certain zoom positions if the subject is within 80 cm (about 2 5/8 feet) from your camcorder. -
Page 32: Adjusting The Focus Manually
Adjusting the focus manually You can adjust the focus manually for different recording conditions. Use this function in the following cases. – To record a subject behind a window covered with raindrops. – To record horizontal stripes. – To record a subject with little contrast between the subject and its background. - Page 34 Changing the settings of your camcorder recordings (Continued) z Tip • This is handy for changing the brightness of the screen and setting the desired brightness by dial operation. EXPOSURE2 You can adjust the display brightness by adjusting the iris (the gain and shutter speed remain fixed).
- Page 35 Adjust the picture quality by turning the EXPOSURE/IRIS dial z Tip • If you set the AUTO LOCK switch A to HOLD after manual adjustment, the manually adjusted items are saved. To restore automatic adjustment Press the EXPOSURE/IRIS button H, or set the AUTO LOCK switch A to AUTO LOCK.
- Page 36 Changing the settings of your camcorder recordings (Continued) To hide the zebra pattern • Set the ZEBRA switch E to OFF. b Note • The zebra pattern is not recorded on the tape. z Tip • This is convenient for adjusting the brightness while a histogram (p.
-
Page 37: Adjusting To Natural Color (White Balance)
Adjusting to Natural Color (White balance) You can adjust the white balance according to the light of the recording environment. You can set two sets of white balance adjustment data separately in memory A and memory B for two different recording conditions with A and recording, you can select the setup data... -
Page 38: Customizing The Picture Quality (Picture Profile)
Connect your camcorder to a TV or monitor, and adjust the picture quality while observing the picture on the TV or monitor screen. - Page 39 Picture profile number (setting Recording condition name) You can assign your own :------ setting. During standby, press the PICTURE PROFILE button C. Select a picture profile number by turning the SEL/PUSH EXEC dial A, then press the dial. You can shoot with the settings of the selected picture profile.
- Page 40 Changing the settings of your camcorder recordings (Continued) Item Adjustment [KNEE The starting point of video POINT] signal compression, set in order to prevent overexposed highlights by keeping the subject's high- brightness area signal within the dynamic range of your camcorder.
- Page 41 6 Repeat steps 4 and 5 to adjust other items. 7 Select [ RETURN] by turning the SEL/PUSH EXEC dial A, then press the dial. 8 Select [OK] by turning the SEL/PUSH EXEC dial A, then press the dial. A picture profile indicator appears. b Note •...
-
Page 42: Adjusting The Volume
Adjusting the volume You can adjust the volume of a microphone connected to INPUT1/INPUT2. z Tip • You can find how to attach the supplied microphone on page 14. Set the AUTO/MAN switch A of the channel to be adjusted to MAN. -
Page 43: Assigning The Functions To The Assign Buttons
Assigning the functions to the ASSIGN buttons You may need to assign some functions to the ASSIGN buttons. You can assign a single function to each the ASSIGN button 1 to 6. Functions you can assign to the ASSIGN buttons •... -
Page 44: Focusing On A Distant Subject (Focus Infinity)
Assigning the functions to the ASSIGN buttons (Continued) Select [OK] by turning the SEL/ PUSH EXEC dial B, then press the dial. Press the MENU button A to hide the menu. z Tips • Shot transition is assigned to the ASSIGN buttons 1, 2 and 3 (p. -
Page 45: Reviewing The Most Recently Recorded Scenes (Rec Review)
[REC REVIEW] during standby mode. The last 2 seconds (approx.) of the most recently recorded scene are played back. Then, your camcorder is set to standby. Searching for the last scene of the most recent recording (End search) b Note •... -
Page 46: Using The Shot Transition
Assigning the functions to the ASSIGN buttons (Continued) z Tip • If you press the ASSIGN button again during the last scene review, your camcorder plays back the last 5 seconds of the most recently recorded movie, then goes to standby at the end of the recording. - Page 47 2 Press the ASSIGN button 2 to check the SHOT-A. Press the ASSIGN button 3 to check the SHOT-B. The selected setting will take effect on the picture on the screen. The focus, zoom, and so on, are automatically adjusted as stored in the setting. b Note •...
-
Page 48: Changing/Checking The Settings In Your Camcorder
• You can display the screen indicators during playback on a TV. Select [DISP OUTPUT], then [V-OUT/PANEL] (p. 74). Displaying the settings in your camcorder (Status check) You can check the setup value of the following items. • Audio setup such as [DV AUDIO MIX] (p. 70) •... -
Page 49: Checking The Remaining Battery (Battery Info)
Checking the remaining battery (Battery Info) Set the POWER switch to OFF (CHG), then press the DISPLAY/BATT INFO button C. The approximate recordable time in the selected format and battery information appear for about 7 seconds. You can view the battery information for up to 20 seconds by pressing the button again while the information is displayed. -
Page 50: Locating A Scene On A Tape
Commander. b Notes • If one day’s recording is less than 2 minutes, your camcorder may not accurately find the point where the recording date changes. • The Date search will not function correctly when there is a blank section between recorded sections on the tape. - Page 51 Press STOP 6 on the Remote Commander. b Notes • If index recording is less than 2 minutes, your camcorder may not accurately find the index point. • The Index search will not function correctly when there is a blank section between recorded...
-
Page 52: Playing The Picture On A Tv
AUDIO t (p. 55) b Notes • Make all menu settings on your camcorder before connecting. The TV may not recognize the video signal properly when changing [VCR HDV/DV] and [i.LINK CONV] settings after connecting with an i.LINK cable. * Pictures recorded in the DVCAM (DV) format are played back as SD (standard definition) images regardless of the connection. - Page 53 Jacks on your camcorder Open the jack cover and connect the cable. Connecting to a high definition TV Type Camcorder Component video cable (supplied) A/V connecting cable (supplied) b Note • An A/V connecting cable is also needed to output audio signals. Connect the white and red plugs of the A/ V connecting cable to the audio input jack of your TV.
- Page 54 • If your TV is not compatible with HDV1080i, connect your camcorder and TV with the supplied component video cable and A/V connecting cable as illustrated in • The TV needs to be set so that it recognizes that the camcorder is connected. See the instruction manuals supplied with your TV.
- Page 55 (optional) b Notes • The TV needs to be set so that it recognizes that the camcorder is connected. See the instruction manuals supplied with your TV. • This camcorder has a 4-pin i.LINK terminal. Select a cable that fits the terminal on the device to be attached.
- Page 56 Notes • If you connect your camcorder to your TV using more than one type of cable to output images from a jack other than the i.LINK jack, the order of priority of the output signals is as follows: HDMI t component video t S VIDEO t audio/video.
-
Page 57: Using The Menu Items
Using the Menu Using the menu items You can change various settings or make detailed adjustments using the menu items displayed on the screen. While pressing the green button, set the POWER switch. Press the MENU button to display the menu index screen. - Page 58 Select the desired setting by turning the SEL/PUSH EXEC dial, then press the dial. 1 2 0 REMOTE CTRL MENU : END Press the MENU button to hide the menu screen. To return to the previous screen, select RETURN]. --:--:--:--...
-
Page 59: Menu Items
Menu items Available menu items (z) vary depending on the POWER switch position. (CAMERA SET) menu (p. 62) EXPOSURE/IRIS SMTH SLW REC CNTRST ENHCR PROG. SCAN STEADYSHOT COLOR BAR AF ASSIST FOCUS MACRO AE SHIFT AE RESPONSE AGC LIMIT AT IRIS LMT ATW SENS FLCKR REDUCE HANDLE ZOOM... - Page 60 Menu items (Continued) LCD BRIGHT LCD COLOR LCD BL LEVEL VF B.LIGHT VF COLOR VF POWERMODE DATA CODE LETTER SIZE REMAINING DISP OUTPUT (IN/OUT REC) menu (p. 75) REC FORMAT VCR HDV/DV DV REC MODE DV WIDE REC EXT REC CTRL COMPONENT i.LINK CONV DOWN CONVERT...
- Page 61 Position of POWER switch: CLOCK SET WORLD TIME LANGUAGE USB SELECT PB ZOOM QUICK REC DATE REC BEEP REC LAMP REMOTE CTRL HOURS METER CAMERA – – – – –...
-
Page 62: (Camera Set) Menu
(CAMERA SET) menu Settings to adjust your camcorder to the recording conditions (EXPOSURE/IRIS/ STEADYSHOT/BACK LIGHT, etc.) The default settings are marked with B. The indicators in parentheses appear when the items are selected. See page 57 for details on selecting menu items. - Page 63 WIDE CONV. Select when a wide conversion lens (optional) is attached. This mode is the most effective with Sony VCL-HG0862K wide conversion lens. COLOR BAR ON/OFF You can display the color bar or record it on the tape by setting to [ON].
- Page 64 Press the MENU button t select the dial. TYPE You can select the color bar type. TYPE 1 TYPE 2 TYPE 3 TONE When you set [ON/OFF] to [ON] and [TONE] to [ON], audio tone signals (1kHz: full bit -20dB) are output (the default setting is [OFF]).
- Page 65 b Note • If you adjust the iris manually, you cannot obtain the effect of [AT IRIS LMT]. ATW SENS You can set the auto white balance for operation under a reddish light source such as an incandescent lamp or candle, or under a blueish light source such as in outdoor shade.
- Page 66 6 Press the REC START/STOP button. The [INTERVAL REC] recording starts. To cancel [INTERVAL REC], press the REC START/STOP button. The operation of your camcorder differs depending on when you press the REC START/STOP button. If you press the button during [INTERVAL...
- Page 67 DV FRAME REC You can record pictures with a stop-motion animated effect by alternately recording a few frames and then moving the subject a little. Operate your camcorder using the Remote Commander to prevent camera shake. B OFF Select to record in the standard recording mode.
-
Page 68: (Audio Set) Menu
Press the MENU button t select the (CAMERA SET) by turning the SEL/ PUSH EXEC dial. FADER You can record a transition with the following effects adding to the interval between scenes. 1 Select the desired effect in [STBY] (during fading in) or [REC] (during fading out) mode. - Page 69 b Notes • This function is effective only when the AUTO/ MAN switches of both CH1and CH2 are set to MAN (p. 42). • When [LINKED] is set, you can adjust the volume with the AUDIO LEVEL dial of CH1 (p.
-
Page 70: (Display Set) Menu
Select to output sound of CH2 from channel 1/2. z Tip • When you select [CH1,CH2] and output from the stereo of your camcorder, sound is mixed sound of CH1 and CH2. DV AUDIO MIX You can monitor the sound recorded on the tape with audio dubbing or 4ch microphone recording during playback. - Page 71 HISTOGRAM When you set [HISTOGRAM] to [ON], [HISTOGRAM] (a graph to display a distribution of tones in your picture) window appears on the screen (the default setting is [OFF]). This item is useful when you adjust exposure. You can adjust EXPOSURE/ IRIS while checking [HISTOGRAM] window (p.
- Page 72 Press the MENU button t select the dial. TYPE 2 Enlarges and shows images in white and black. ALLSCAN MODE When you set [ALLSCAN MODE] to [ON], you can check the area surrounding the picture frame, which you cannot check on a TV screen (the default setting is [OFF]).
- Page 73 Standard brightness. BRIGHT Brightens the LCD screen. b Notes • When you connect your camcorder to outside power sources, [LCD BL LEVEL] is automatically set to [BRIGHT]. • When you select [BRIGHT], the recordable time with the battery is slightly reduced.
-
Page 74: Disp Output
Press the MENU button t select the dial. B OFF Data code is not displayed. DATE Displays the date and time. CAMERA DATA Displays camera setting data. HDV1080 F1 .7 6 dB AUTO A SteadyShot off B Exposure is displayed when shooting with automatic adjustment of iris/gain/ shutter speed, and when shooting with manual adjustment. - Page 75 VCR HDV/DV You can select the playback signal. Normally select [AUTO]. When your camcorder is connected to another device using an i.LINK cable, select the signal to input/output from the HDV/DV interface (i.LINK). The selected signal is recorded or played back.
- Page 76 16:9. You cannot record in 4:3 size. (IN/OUT REC) by turning the SEL/PUSH EXEC EXT REC CTRL You can connect your camcorder to an HDV/DVCAM/DV compatible device (digital HD video camera recorder, digital video camera recorder, hard disc recorder, etc.) with an i.LINK cable, and record...
- Page 77 480i Select when connecting your camcorder to a TV with the component input jack. B 1080i/480i Select when connecting your camcorder to a TV that has the component input jack and is capable of displaying the 1080i signal. i.LINK CONV...
- Page 78 Time code value advances only while recording. Select this when making the time code continuous at backspace editing. FREE RUN Time code value advances freely regardless of the camcorder’s current operation mode. Select this when adjusting the discrepancy between time code value and real time.
- Page 79 SEL/PUSH EXEC dial. 6 A message “Synchronize TC with connected device?” is displayed. Select [YES] to synchronize the time code of the sub camcorder to the time code of the main camcorder. Remove the i.LINK cable when synchronization is completed.
- Page 80 Playback: Image size is fixed to [ HDV format, [ 0.2M] in DVCAM (DV) format (16:9) and [VGA (0.3M)] in DVCAM (DV) format (4:3). Duo” made by Sony Corporation. The number of recordable pictures varies depending on the recording environment. 1.2M 0.9M ALL ERASE FOLDER].
- Page 81 Notes • You cannot delete the created folders using your camcorder. You will have to format the “Memory Stick Duo” (p. 81), or delete them using your computer. • The number of recordable pictures on a “Memory Stick Duo”...
- Page 82 (OTHERS) menu Settings while recording on a tape or other basic settings (USB SELECT/QUICK REC/ BEEP, etc.) The default settings are marked with B.
-
Page 83: World Time
PHOTO button on the Remote Commander. CLOCK SET See page 22. WORLD TIME When you use your camcorder abroad, you can adjust the clock to the local time by setting the time difference with the dial. PUSH EXEC When you set the time difference to 0, the clock returns to the original setting. -
Page 84: Hours Meter
• If [QUICK REC] is set to [ON], the interval between scenes freezes for a moment (editing on your computer is recommended). • When the camcorder is left in standby for more than about 3 minutes, your camcorder exits from standby (the drum stops rotating) to prevent tape wear and battery loss. - Page 85 When connecting your camcorder to a monaural device, connect the yellow plug of the A/V connecting cable to the video jack on the device, and connect the white (left channel) or red (right channel) plug to the audio jack on the device.
- Page 86 • Disconnect the i.LINK cable before changing these menu settings, otherwise the VCR/DVD device may not correctly identify the video signal. z Tip • This camcorder has a 4-pin i.LINK terminal. Select a cable that fits the terminal on the device to be connected.
- Page 87 • When the recorder is HVR-V1U/V1N, set [VCR HDV/DV] to [AUTO] (p. 75). • When the player and the recorder are both HDV1080i compatible devices such as HVR-V1U/V1N and connected with the i.LINK cable, after pausing or stopping and then resuming the recording, the images will be a bit choppy or rough at that point.
- Page 88 Notes • The following cannot be output via the DV interface (i.LINK): – Indicators – Titles that are recorded on other camcorder • Pictures recorded in the HDV format are not output from the HDV/DV interface (i.LINK) jack during playback pause or in any playback mode other than normal playback.
-
Page 89: Recording Pictures
Be sure to insert a cassette or a “Memory Stick Duo” for recording in your camcorder beforehand. You can connect your camcorder to a VCR device using an i.LINK cable. Connect your camcorder to the wall outlet using the supplied AC Adaptor for this operation (p. - Page 90 REC (record) buttons simultaneously. Start playing the cassette on your VCR. The picture played on the VCR appears on the LCD screen of your camcorder. Press (PAUSE) again at the point you want to start recording. Press x (STOP) to stop recording.
- Page 91 “Memory Stick Duo” are recorded. On your camcorder, the date and time at which the picture was recorded on the tape are displayed. Camera setting data recorded on the tape cannot be stored on the “Memory Stick Duo.”...
-
Page 92: Memory Stick Duo
Deleting recorded pictures from the “Memory Stick Duo” Set the POWER switch to VCR. Playback a picture you want to delete (p. 30). Press the MEMORY/DELETE button. [Delete this image?] will be displayed. Select [YES] by turning the SEL/ PUSH EXEC dial, then press the dial. -
Page 93: Compliant Printer
You can print out pictures using a PictBridge compliant printer without connecting the camcorder to a computer. Connect the AC Adaptor to your camcorder to obtain power from the wall outlet. Insert the “Memory Stick Duo”, containing still images into your camcorder and turn on the printer. - Page 94 – Operate the POWER switch. – Disconnect the USB cable from the printer. – Remove the “Memory Stick Duo” from your camcorder. • If the printer stops working, disconnect the USB cable, turn the printer off and on again and restart the operation from the beginning.
-
Page 95: Using A Computer
Notes on connecting to a computer • When you are using a USB cable or an i.LINK cable to connect your camcorder to a computer, make sure to connect the connector in the correct direction. If you insert the connector forcibly, it may be damaged, and cause a malfunction of your camcorder. - Page 96 • Do not connect your camcorder to the computer at this point. • The computer may not recognize the camcorder if you connect them with the USB cable before turning on your camcorder. • See page 98 for the recommended connection.
- Page 97 A Folder containing image files recorded by other camcorders without the folder creation function (for playback only). B Folder containing image files recorded by your camcorder when no new folders have been created, only [101MSDCF] is displayed. C Folder containing movie data recorded...
-
Page 98: Copying Movies On A Tape To A Computer
Observe the following points when connecting to ensure the camcorder operates correctly. • Connect the camcorder to a computer via the USB cable. Make sure no other USB devices are connected to the computer. • If your computer has a USB keyboard and a... - Page 99 (p. 16). 1 Prepare editing software (not provided). 2 Turn on your computer. 3 Insert a tape into your camcorder and set the POWER switch to VCR. 4 Set the menu of your camcorder. The menu settings vary depending on the copying image.
- Page 100 HDV movies onto tape. For details, contact the software manufacturer. When copying the movie in the DVCAM (DV) format from the computer to your camcorder Set [VCR HDV/DV] to [DV] (p. 75).
-
Page 101: Troubleshooting
The CHARGE lamp flashes while the battery pack is being charged. • Attach the battery pack to the camcorder correctly (p. 16). If the problem persists, disconnect the AC Adaptor from the wall outlet and contact your Sony dealer. The battery pack may be damaged. - Page 102 The Cassette Memory indicator or title display does not appear while using a cassette with Cassette Memory. • This camcorder does not support Cassette Memory, so the indicator does not appear. The remaining tape indicator is not displayed. • Set [...
- Page 103 • The “Memory Stick Duo” is full. Delete unnecessary pictures recorded on the “Memory Stick Duo” (p. 92). • Format the “Memory Stick Duo” on your camcorder (p. 81) or insert another “Memory Stick Duo” (p. 24). • You cannot record still images on the “Memory Stick Duo” with: –...
- Page 104 Troubleshooting (Continued) The shutter sound is not heard when you record a still image. • Set [BEEP] to [ON] (p. 84). • There is no shutter sound while during movie shooting. End search does not work. • Do not eject the cassette after recording (p. 45). •...
- Page 105 Shutter speed, gain, white balance or iris cannot be adjusted manually. • Set the AUTO LOCK switch to the center position to release the auto lock mode. Tiny spots in white, red, blue, or green appear on the screen. • This phenomenon appears when using a slow shutter speed (p. 36). This is not a malfunction. The subjects passing by the frame very fast appear crooked.
- Page 106 • The data code on a tape with a scratch or noise cannot be read. Noises appear and • The tape was recorded in a TV color system other than that of your camcorder (NTSC). This is not a malfunction.
- Page 107 • Be sure to record more than 2 minutes after the date changed. If one day’s recording is too short, your camcorder may not accurately find the point where the recording date changes. • There is a blank section between recorded sections of the tape. This is not a malfunction.
- Page 108 Troubleshooting (Continued) • DVCAM (DV) format pictures input to the camcorder via i.LINK cable (p. 89) cannot be output. • This occurs if you record on a tape in both HDV and DVCAM (DV) formats. Disconnect and connect the HDMI cable, or slide the POWER switch to turn on your camcorder again.
- Page 109 • Insert a “Memory Stick Duo” in the correct direction, then push it all the way in. • You cannot use an i.LINK cable. Connect the camcorder and the computer using the USB cable. • Slide the POWER switch to turn on the VCR and set [USB SELECT] to [ (p.
-
Page 110: Warning Indicators And Messages
If indicators appear on the LCD screen or in the viewfinder, check the following. Some symptoms you can fix by yourself. If the problem persists even after you have tried a couple of times, contact your Sony dealer or local authorized Sony service facility. C:(or E:) ss:ss (Self-diagnosis... -
Page 111: Moisture Condensation
Cannot record due to copyright protection. (p. 114) x “Memory Stick Duo” Incompatible type of Memory Stick. • A type of “Memory Stick Duo” incompatible with your camcorder is inserted (p. 118). Protected file. Cannot delete. • Cancel file protection using your computer. -
Page 112: Pictbridge Compliant Printer
Change format. • Stop playback or signal input, or change [VCR HDV/DV] setting (p. 75). Dirty video head. Use a cleaning cassette. (p. 124) Could not synchronize TC. • Make sure that a tape is in the connected camcorder (p. 79). -
Page 113: Additional Information
Additional Information Using your camcorder abroad Power supply You can use your camcorder in any country/region using the AC Adaptor supplied with your camcorder within the AC 100 V to 240 V, 50/60 Hz range. Use a commercially available AC plug adaptor [a], if necessary, depending on the design of the wall outlet [b]. -
Page 114: Hdv Format And Recording/Playback
BS (broadcast satellite) digital, terrestrial digital HDTV broadcastings, in Blu-ray Disc recorders, etc. Playback • Your camcorder can play back pictures in both the DVCAM (DV) format and HDV1080i specification. • Your camcorder can play back pictures recorded... - Page 115 If the gold-plated connector on the cassette is dirty or dusty, the remaining tape indicator may not show correctly. Gold-plated connector On Sony HDV1080i compliant TVs An HDV format compatible TV with the component input jack is required to view playback pictures recorded in the HDV format.
-
Page 116: Compatibility Of The Dvcam/Dv Formats
Recorder’s format DVCAM 10 µm b Notes • This camcorder complies with the DVCAM 12 bit:32 kHz format.Though mini DV cassettes can be used 16 bit:48 kHz for recording, we recommend you use mini 44.1 kHz DVCAM cassettes to get the most out of the 48 kHz high reliability of the DVCAM format. - Page 117 Compatibility on editing using DV jacks When this camcorder is connected to other digital video equipment using an i.LINK cable, the recording format of edited tapes is defined according to the source tape and the recorder’s format as described below.
-
Page 118: About The "Memory Stick
• If you eject the “Memory Stick Duo,” turn the power off on your camcorder, or remove the battery pack for replacement while your camcorder is reading or writing image files on the “Memory Stick Duo”... - Page 119 JEITA (Japan Electronics and Information Technology Industries Association). • On your camcorder, you cannot play back still images recorded on other devices (DCR- TRV900 or DSC-D700/D770) that do not conform to the universal standard (these models are not sold in some regions).
-
Page 120: About The "Infolithium" Battery Pack
• After charging is complete, disconnect the cable from the DC IN jack on your camcorder or remove the battery pack. To use the battery pack effectively • Battery pack performance decreases when the mark. -
Page 121: About I.link
• i.LINK is a more familiar term for the IEEE 1394 data transport bus proposed by Sony, and is a trademark approved by many corporations. • IEEE 1394 is an international standard standardized by the Institute of Electrical and Electronics Engineers. - Page 122 About the required i.LINK cable Use the Sony i.LINK 4-pin-to-4-pin cable (during HDV/DVCAM (DV) dubbing).
-
Page 123: Maintenance And Precautions
• If any solid object or liquid gets inside the casing, unplug your camcorder and have it checked by a Sony dealer before operating it any further. • Avoid rough handling, disassembling, modifying, physical shock, or impact such as hammering, dropping or stepping on the product. - Page 124 Such a freezing point cannot be recovered if it was created while recording. To prevent such a problem, use the Sony mini DV cassette. • If the following problem occurs, clean the video heads for 10 seconds with the Sony DVM- 12CLD cleaning cassette (optional).
- Page 125 • The video heads will be worn after long use. If you cannot obtain a clear image even after using a cleaning cassette (optional), the video heads may be worn out. Please contact your Sony dealer or local authorized Sony service facility to have the video heads replaced.
- Page 126 Removing dust from inside the viewfinder Remove the viewfinder. While sliding the viewfinder release lever to the left 1, remove the viewfinder 2. Remove dust from inside the viewfinder and the part shown below with a blower. Attach the viewfinder following the reverse procedure of step 1.
-
Page 127: Specifications
Specifications System Video recording system (HDV) 2 rotary heads, Helical scanning system Video recording system (DVCAM (DV)) 2 rotary heads, Helical scanning system Still image recording system Exif Ver. 2.2* Audio recording system (HDV) Rotary heads, MPEG-1 Audio Layer-2, Quantization: 16 bits Fs48kHz (stereo) transfer rate: 384 kbps Audio recording system (DVCAM (DV)) - Page 128 Still image resolution is obtained by the unique pixel array of Sony’s ClearVid CMOS Sensor and image processing system (new Enhanced Imaging Processor). The focal length figures are actual figures resulting from wide angle pixel read out.
- Page 129 Mass (approx.) 1.5 kg (3 lb 6 oz) main unit only 1.9 kg (4 lb 2 oz) including the NP- F570 rechargeable battery pack, cassette (PHDVM-63DM), and lens hood with lens cover, microphone Supplied accessories See page 13. * When using the supplied microphone AC Adaptor AC-L15A Power requirements AC 100 - 240 V, 50/60 Hz...
- Page 130 • Macintosh and Mac OS are trademarks of Apple Computer, Inc in the U.S. and other countries. • HDV and the HDV logo are trademarks of Sony Corporation and Victor Company of Japan, Ltd. • HDMI, HDMI logo, and High-Definition Multimedia Interface are trademarks or registered trademarks of HDMI Licensing LLC.
-
Page 131: Quick Reference
Quick Reference Identifying parts and controls The numbers in ( ) are reference pages. A Zoom lever (31) B Viewfinder (20) C Viewfinder lens adjustment lever (20) D Viewfinder release lever (126) E Handle zoom lever (31) F Remote sensor (back) (136) G Rec lamp (back) (26) The rec lamp flashes if the remaining tape or battery is low. - Page 132 N STATUS CHECK button (48) O PICTURE PROFILE button (38) (headphones) jack When you use headphones, the speaker on your camcorder is silent. Q Tripod receptacle Make sure that the length of the tripod screw is less than 5.5 mm (7/32 inch).
- Page 133 A BATT RELEASE (battery release) button (17) B Hook for the shoulder strap (133) OPEN/EJECT lever (24) D Grip belt (19) E INPUT2 jack (14) F INPUT1 jack (14) G Lens (8) H Lens hood with lens cover (15) To attach the shoulder strap Attach the shoulder strap (optional) to the hooks for the shoulder strap.
- Page 134 A LCD screen (20) B Video control buttons (REW, PLAY*, FF, PAUSE, STOP, SLOW, REC) (29) C ZEBRA switch (35) D ASSIGN 6, MEMORY/DELETE button (43, 92) E ASSIGN 5, MEMORY/INDEX button(29, 43) F ASSIGN 4, MEMORY/PLAY button (29, 43) G DISPLAY/BATT INFO button (48, 49) H VOLUME/MEMORY button* (30) I RESET button...
- Page 135 A Remote sensor (front) (136) B Rec lamp (front) The rec lamp flashes if the remaining tape or battery is low. C REC CH SELECT switch (14) D CH1 AUTO/MAN switch (42) E CH1 +48V switch (42) F CH2 AUTO/MAN switch (42) G CH2 +48V switch (42) H CH2 AUDIO LEVEL dial (42) I CH1 AUDIO LEVEL dial (42)
-
Page 136: Remote Commander
Remote Commander may shorten, or the Remote Commander may not function properly. In this case, replace the battery with a Sony CR2025 lithium battery. Use of another battery may present a risk of fire or explosion. -
Page 137: Indicators For The Lcd Screen And Viewfinder
Indicators for the LCD screen and viewfinder The numbers in ( ) are reference pages. The indicators will not be recorded on the tape during recording. Recording movies 00:04:50:04 HDV1080i A Recording format ( ) (75) B Remaining battery (approx.) C Recording status ([STBY] (standby) or [REC] (recording)) D During recording:... -
Page 138: Viewing Movies
Indicators for the LCD screen and viewfinder (Continued) Viewing movies HDV1080i K Tape transport indicator Recording mode (DVCAM or DV SP) appears when a tape recorded in the DVCAM or DV SP format is played back.DV. Viewing still images 00:04:50:04 L Data file name M Picture number/Total number of recorded pictures in the current... - Page 139 Indicators when you made changes Upper left 00:00:00:00 Bottom Upper left Indicator Meaning Recording format (75) DV WIDE REC (76)* QUICK REC (83)** DV FRAME REC (67)* ND filter (35) INTERVAL REC (66) EXT REC CTRL (76) Upper right Indicator Meaning Still Image quality (80) INDEX MARK (44)
-
Page 140: Index
Index Numeric 1080i/480i...76 16:9 (wide) or 4:3 TV...52 480i...76 +48V switch ...14, 42, 135 AC Adaptor ...16 Access lamp...25 AE RESPONSE...64 AE SHIFT...34, 64, 104 AF ASSIST...64 AGC LIMIT ...64 ALL ERASE...80 ALL FILES...80 ALLSCAN MODE...72, 104 ASPECT ...71 ASSIGN BTN...83 ASSIGN buttons...43 AT IRIS LMT...64 ATW SENS ...65... - Page 141 D.EXTENDER (Digital Extender) ...67, 104 EDGE CROP ...77 End search...45 END TRIGGER...62 Expanded focus...33 EXPOSURE...33 EXPOSURE1...33 EXPOSURE2...34 EXPOSURE/IRIS ...33, 62 EXPOSURE/IRIS button...33 EXPOSURE/IRIS dial ...33 EXP.FOCUS TYPE...71 EXT REC CTRL ...76 FADER ...68 FILE NO. (File number) ...81 FINE ...80 FLCKR REDUCE ...65 Focus...32 FOCUS button ...32...
- Page 142 Index (Continued) MEMORY SET menu ...80 Memory Stick ...6, 83, 118 Memory Stick Duo ...24, 118 Insert/Eject ...24 Number of recordable pictures ...80 Write-protect tab ...118 Memory Stick Duo adaptor ...119 “Memory Stick Duo” slot...25 “Memory Stick PRO Duo” ...119 MEMORY/DELETE button ...92 MEMORY/INDEX button ...29...
- Page 143 U-BIT ... 79 USB cable ... 93, 95 USB jack ... 93, 95 USB SELECT ... 83 Using the menu items... 57 Using your camcorder abroad ... 113 VCR HDV/DV ... 75 VF B.LIGHT ... 73 VF COLOR ... 73 VF POWER MODE...
- Page 144 Printed on 70% or more recycled paper using VOC (Volatile Organic Compound) -free vegetable oil based ink. Printed in Japan...