Seiko Cal. 7T32 Instructions Manual
Analogue quartz watch
Hide thumbs
Also See for Cal. 7T32:
- User manual ,
- Instructions manual (23 pages) ,
- Instruction (21 pages)

Related Manuals for Seiko Cal. 7T32


Summary of Contents for Seiko Cal. 7T32
- Page 1 Cal. 7T32 INSTRUCTIONS INSTRUCTIONS (P. 24) INSTRUCCIONES (P. 45) BEDIENUNGSANLEITUNG (S. 66) ISTRUZIONI (P. 87) INSTRUÇÕES (P. 109) (130...
- Page 2 You are now the proud owner of a SEIKO Analogue Quartz Watch Cal. 7T32. For best results, please read the instructions in this booklet carefully before using your SEIKO Analogue Quartz Watch. Please keep this manual handy for ready reference.
-
Page 3: Table Of Contents
CONTENTS Page FEATURES ........................DISPLAY AND CROWNS/BUTTONS ................DATE SETTING ......................TIME SETTING ......................ALARM ........................STOPWATCH ......................TACHYMETER ......................ADJUSTING THE HAND POSITION ................RESETTING THE BUILT-IN IC ..................BATTERY LIFE INDICATOR ..................BATTERY CHANGE ..................... TO PRESERVE THE QUALITY OF YOUR WATCH ............SPECIFICATIONS ...................... -
Page 4: Features
SEIKO ANALOGUE QUARTZ Cal. 7T32 FEATURES TIME/CALENDAR STOPWATCH Hour & minute hands with small Measures up to 30 minutes in 1/5 second hand second increments. Date displayed in numerals Can measure repeatedly up to 6 hours. TACHYMETER ALARM For models with tachymeter scale Can be set on a 12-hour basis with small alarm hands. -
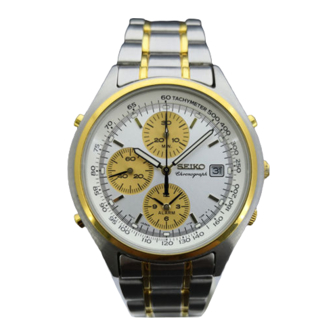
Page 5: Display And Crowns/Buttons
DISPLAY AND CROWNS/BUTTONS There are three buttons and two crowns. STOPWATCH minute hand STOPWATCH 1/5 second hand Minute hand (MAIN TIME) Hour hand a b c (MAIN TIME) CROWN 1 Second hand (MAIN TIME) A L A R M Date ALARM hour hand ALARM minute hand a: Normal position... -
Page 6: Date Setting
DATE SETTING Date CROWN 1 Pull out to first click . Turn clockwise until the date for the previous day appears. CROWN 1 Pull out to second click and turn until the desired date appears. Push back in to normal position . NOTES Do not set the date between 9:00 p.m. -
Page 7: Time Setting
TIME SETTING CROWN 1 Minute hand Hour hand Pull out to second click when Second hand is at the 12 o’clock position. Turn to set Hour and Minute hands. Push back in to normal position in accordance with a time signal. CROWN 1 Second hand NOTES... -
Page 8: Alarm
ALARM Alarm time is set on a 12-hour basis. ALARM hands move independently of MAIN TIME hands. ALARM SETTING 1 Adjustment of ALARM hands • After the main time is adjusted, follow the procedure below, and then set the alarm. * The following procedure is necessary only after the main time is adjusted. -
Page 9: Alarm Time Setting
Alarm time setting * Once ALARM hands are adjusted to the main time, alarm time setting can be made only by following the procedure below. CROWN 2 Pull out to first click . Press to set ALARM hands to the desired alarm time. Push back in to normal posi- CROWN 2 A L A R M... - Page 10 ALARM ENGAGEMENT/DISENGAGEMENT • Alarm engagement • Alarm disengagement Push back in to normal CROWN 2 CROWN 2 Pull out to first click . position . A L A R M A L A R M Designated Current time alarm time [Alarm engaged] [Alarm disengaged] NOTES...
-
Page 11: Stopwatch
STOPWATCH Stopwatch measures up to 30 minutes in 1/5 second increments. After 30 minutes, it will start counting again from “0” repeatedly up to 6 hours. STOPWATCH OPERATION STOPWATCH minute hand • Before using the stopwatch: • Check that CROWNS 1 and 2 MIN. - Page 12 1 Standard measurement START STOP RESET 2 Accumulated elapsed time measurement ○ ○ ○ STOP START STOP RESTART RESET * Restart and stop of stopwatch can be repeated by pressing Button A. 3 Split time measurement ○ ○ ○ SPLIT STOP RESET START...
- Page 13 4 Measurement of two competitors START FINISH TIME FINISH TIME RESET OF 1ST COMPETITOR OF 2ND COMPETITOR FINISHES COMPETITOR NOTES If CROWN 1 is pulled out to second click, STOPWATCH hands are reset to “0” position. If CROWN 2 is pulled out to first or second click, STOPWATCH hands are reset to “0”...
-
Page 14: Tachymeter
TACHYMETER (for models with tachymeter scale on the dial) To measure the hourly average speed of a vehicle Use the stopwatch to determine Ex. 1 Ex. 1 how many seconds it takes to go STOPWATCH 1 km or 1 mile. second hand: MIN. - Page 15 To measure the hourly rate of operation Ex. 1 Ex. 1 Use the stopwatch to measure the time required to complete 1 STOPWATCH job. second hand: 20 seconds MIN. Tachymeter scale indicated by STOPWATCH second hand gives the average number of jobs ac- Tachymeter scale: “180”...
-
Page 16: Adjusting The Hand Position
ADJUSTING THE HAND POSITION If STOPWATCH hands will not return to the 12 o’clock position when the stopwatch is reset or when the battery is replaced with a new one, follow the procedure below. CROWN 1 Pull out to second click . CROWN 1 Press repeatedly to reset STOPWATCH minute hand to... -
Page 17: Resetting The Built-In Ic
RESETTING THE BUILT-IN IC In case any of the hands should move improperly, follow the procedure below to adjust the hand movement. CROWN 1 Pull out to second click . CROWN 1 Press simultaneously. MIN. Push back in to normal posi- CROWN 1 tion . -
Page 18: Battery Life Indicator
For battery replacement, we recommend that you contact an AUTHORIZED SEIKO DEALER and request SEIKO SR927W battery. CAUTION Do not remove the battery from the watch. If it is necessary to take out the battery, keep it out of the reach of children. -
Page 19: To Preserve The Quality Of Your Watch
TO PRESERVE THE QUALITY OF YOUR WATCH WATER RESISTANCE Condition Taking a bath Scuba of use Accidental Swimming, and shallow diving** contact with yachting and Indication on diving water such taking a case back saturation Degree as rain and shower diving of water splashes... - Page 20 Non-water resistant * Pressure in bar is a test • If the watch becomes wet, have it pressure and should not be checked by an AUTHORIZED SEIKO considered as corresponding DEALER or SERVICE CENTER. to actual diving depth since swimming movement tends...
- Page 21 2 to 3 years. Have your watch Years to drop your watch or hit it checked by an AUTHORIZED against hard surfaces, as this SEIKO DEALER or SERVICE CENTER to may cause damage. ensure that the case, crowns, buttons, gasket and crystal seal remain intact.
- Page 22 CHEMICALS Be careful not to expose the watch to solvents (e.g., alcohol and gasoline), mercury (i.e., from a broken thermometer), cosmetic spray, detergents, adhesives or paints. Otherwise, the case, bracelet, etc. may become discolored, deteriorated or damaged. PRECAUTION REGARDING CASE BACK PROTECTIVE FILM If your watch has a protective film and/or a sticker on the case back, be sure to peel them off...
-
Page 23: Specifications
1/5 seconds. Alarm ..........Small hour and minute hands The alarm is set on a 12-hour basis. Battery ............ SEIKO SR927W, 1 piece IC (Integrated Circuit) ......C-MOS-LSI * The specifications are subject to change without prior notice for product improvement. - Page 24 SEIKO-ANALOG-QUARZUHR Kal. 7T32 INHALT MERKMALE Seite MERKMALE ........................ UHRZEIT/KALENDER STOPPUHR ANZEIGE UND KRONEN/TASTEN ................EINSTELLEN DER DATUMS ..................● Stunden- und Minutenzeiger ● Mißt bis zu 30 Minuten in Schritten EINSTELLEN DES UHRZEIT ..................sowie kleiner Sekundenzeiger von 1/5 Sekunde ALARM ........................
-
Page 25: Anzeige Und Kronen/Tasten
ANZEIGE UND KRONEN/TASTEN EINSTELLEN DES DATUMS KRONE 1 Die Uhr verfügt über drei Tasten und zwei Kronen. Datum STOPPUHR-Minutenzeiger STOPPUHR-1/5-Sekundenzeiger ➠ Zur 1. Einrastposition heraus- ziehen. Minutenzeiger Im Uhrzeigersinn drehen, bis das KRONE 1 Datum des Vortags erscheint. Zur 2. Einrastposition heraus- Stundenzeiger ➠... -
Page 26: Einstellen Des Uhrzeit
EINSTELLEN DER UHRZEIT ALARM ● Die Alarmzeit kann bis zu 12 Stunden im Voraus eingestellt werden. KRONE 1 ● Die Alarmzeiger laufen unabhängig von den Uhrzeitzeigern. Stundenzeiger Minutenzeiger Zur 2. Einrastposition heraus- ziehen, wenn der Sekundenzeiger ALARM-EINSTELLUNG ➠ sich an der 12-Uhr-Position be- Einstellen der Alarmzeiger findet. - Page 27 Einstellen der Alarmzeit AKTIVIEREN/DEAKTIVIEREN DES ALARMS * Nach der Einstellung der Alarmzeiger auf die Uhrzeit läßt sich die Alarmzeit einfach mit der • Aktivieren des Alarms • Deaktivieren des Alarms nachstehenden Bedienung einstellen. KRONE 2 Zur 1. Einrastposition KRONE 2 Zurück in die Normal- herausziehen.
-
Page 28: Stoppuhr
STOPPUHR 1 Normale Messung ● Die Stoppuhr mißt bis zu 30 Minuten in Schritten von 1/5 Sekunde. ● Nach 30 Minuten fängt sie wieder bei “0” an zu messen, dies wird bis zu 6 Stunden wiederholt. START STOPP RÜCKSTELLUNG BEDIENUNG DER STOPPUHR 2 Aufaddierende Zeitmessung STOPPUHR- •... -
Page 29: Geschwindigkeitsmesser
GESCHWINDIGKEITSMESSER 4 Messung von zwei Wettbewerbern (für Modelle mit Geschwindigkeitsmesserskala auf dem Ziffernblatt) START RÜCK- ENDZEIT DES ZIELDURCH- ENDZEIT DES Messen der stündlichen Durchschnittsgeschwindigkeit eines Fahrzeugs 1. WETT- GANG DES 2. WETT- STELLUNG 2. WETT- BEWERBERS BEWERBERS Messen Sie mit der Stoppuhr, Bsp. -
Page 30: Einstellen Der Zeigerposition
EINSTELLEN DER ZEIGERPOSITION “90” (Wert auf Geschwindigkeitsmesserskala) x 2 (km oder Meile) = 180 km/h oder Meilen/h ● Sollten die Stoppuhrzeiger nicht zur 12-Uhr-Position zurückkehren, wenn die Stoppuhr “90” (Wert auf Geschwindigkeitsmesserskala) x 0,5 (km oder Meile) = 45 km/h oder Meilen/h zurückgestellt oder die Batterie ausgewechselt wird, führen Sie die nachstehende Bedienung aus. -
Page 31: Rückstellen Der Eingebauten Ic
Fehlfunktionen zu vermeiden. Wir empfehlen, daß Sie sich für den Batteriewechsel an einen AUTORISIERTEN SEIKO-HÄNDLER wenden und die Batterie SEIKO SR927W verlangen. HINWEIS Vor der erneuten Verwendung der Uhr müssen die Position der Stoppuhrzeiger sowie ZUR BEACHTUNG die Uhrzeit und der Alarm eingestellt werden. -
Page 32: Erhaltung Der Qualität Der Uhr
* Der Druck in Bar ist ein • Sollte die Uhr naß werden, empfehlen wir, die Prüfdruck und darf nicht ■ WASSERDICHTIGKEIT Uhr von einem AUTORISIERTEN SEIKO- a l s A n g a b e d e r HÄNDLER oder einer KUNDENDIENSTSTELLE t a t s ä... - Page 33 Kronen, Tasten, und Uhrglas von einem die Uhr tragen. Sonst kann Schweiß der Batterielebensdauer bewirken. AUTORISIERTEN SEIKO-HÄNDLER oder darunter gelangen und zu einem Rosten ■ PFLEGE VON GEHÄUSE UND Die Uhr sollte nicht über längere Zeit sehr e i n e r K U N D E N D I E N S T S T E L L E der Gehäuserückseite führen.
-
Page 34: Technische Daten
Sekunden messen. Alarm ..........kleiner Stunden- und Minutenzeiger Der Alarm kann bis zu 12 Stunden im Voraus eingestellt werden. Batterie ........... 1 SEIKO SR927W IC (integrierte Schaltung) ......C-MOS-LSI * Technische Änderungen zum Zweck der Produktverbesserung ohne vorherige Bekanntmachung vorbehalten. - Page 35 MONTRE SEIKO QUARTZ ANALOGIQUE Cal. 7T32 SOMMAIRE CARACTERISTIQUES Page CARACTERISTIQUES ....................HEURE/CALENDRIER CHRONOGRAPHE AFFICHAGE ET REMONTOIRS/BOUTONS ..............REGLAGE DE LA DATE ....................● Aiguilles des heures et minutes ● Mesure jusqu’à 30 minutes en REGLAGE DE L’HEURE ....................et petite trotteuse.
-
Page 36: Affichage Et Remontoirs/Boutons
AFFICHAGE ET REMONTOIRS/BOUTONS REGLAGE DE LA DATE Trois boutons et deux remontoirs sont prévus. REMONTOIR 1 Date Aiguille des minutes CHRONO Aiguille 1/5 seconde CHRONO ➠ Retirez jusqu’au premier déclic . Aiguille des minutes (HEURE PRINCIPALE) Tournez dans le sens horaire jusqu’à... -
Page 37: Reglage De L'heure
REGLAGE DE L’HEURE SONNERIE ● L’heure de la sonnerie se règle en cycle de 12 heures. REMONTOIR 1 ● Les aiguilles de la SONNERIE tournent indépendamment de celles de l’HEURE Aiguille des heures Aiguille des minutes PRINCIPALE. Retirez au second déclic quand la trotteuse indique la position 12 REGLAGE DE LA SONNERIE ➠... - Page 38 Programmation de l’heure de sonnerie MISE EN/HORS SERVICE DE LA SONNERIE * Une fois que les aiguilles de SONNERIE sont ajustées à l’heure principale, la programmation de • Mise hors service • Mise en service l’heure de sonnerie s’accomplit simplement par les démarches ci-après. REMONTOIR 2 Retirez au premier REMONTOIR 2...
- Page 39 CHRONOGRAPHE 1 Chronométrage standard ● Le chronographe mesure jusqu’à 30 minutes en unités de 1/5e de seconde. ● Après 30 minutes, la mesure recommence à “0” jusqu’à concurrence de 6 heures maximum. MARCHE ARRET R.A.Z. UTILISATION DU CHRONOGRAPHE 2 Mesure par accumulation du temps écoulé Aiguille des minutes du CHRONO •...
-
Page 40: Tachymetre
TACHYMETRE 4 Mesure de deux concurrents (pour les modèles munis d’une échelle de tachymètre sur le cadran) Pour mesurer la vitesse horaire moyenne d’un véhicule TEMPS ARRIVEE 2e MARCHE R.A.Z. TEMPS D’ARRIVEE 1er CONCURRENT D’ARRIVEE 2e CONCURRENT CONCURRENT Utilisez le chronographe pour Ex. -
Page 41: Reglage De La Position Des Aiguilles
REGLAGE DE LA POSITION DES AIGUILLES Pour mesurer la cadence horaire d’une tâche ● Si les aiguilles du CHRONO ne reviennent pas à la position 12 heures quand le chronographe est réinitialisé ou quand la pile est remplacée par une neuve, effectuez Ex. -
Page 42: Reinitialisation Du Ci Incorpore
à la durée spécifiée. Quand la pile est épuisée, faites-la remplacer le plus vite possible pour éviter des erreurs. Pour remplacer la pile, nous conseillons de s’adresser à un CONCESSIONNAIRE SEIKO AGREE et de demander l’emploi d’une pile SEIKO SR927W. REMARQUE Avant d’utiliser à... -
Page 43: Pour Preserver La Qualite De La Montre
é r i f i e r p a r u n doit pas être considérée CONCESSIONNAIRE ou un CENTRE DE comme correspondant à la SERVICE SEIKO AUTORISE. Condition p r o f o n d e u r r é e l l e d e Contact d’emploi... - Page 44 C O N C E S S I O N N A I R E o u u n Toutefois, on veillera à ne pas pourrait s’y inflitrer risquerait de provoquer CENTRE DE SERVICE SEIKO AUTORISE pour la laisser tomber et à ne pas la une oxydation du dos du boîtier.
-
Page 45: Specifications
Sonnerie ........... Petites aiguilles des heures et minutes. La sonnerie est programmable en cycle de 12 heures. Pile ............SEIKO SR927W, 1 pièce Circuit intégré ......... Circuit C-MOS à haute intégration * Spécifications sous réserve de changement sans préavis en raison d’améliorations éventuelles. - Page 46 INDICE Pag. CARATTERISTICHE ....................INDICAZIONI DEL QUADRANTE, CORONE E TASTI ..........PREDISPOSIZIONE DELLA DATA ................PREDISPOSIZIONE DELL’ORA .................. SUONERIA ........................CRONOMETRO ......................TACHIMETRO ......................REGOLAZIONE DELLA POSIZIONE DELLE LANCETTE ..........RIPRISTINO DEL CIRCUITO INTEGRATO INCORPORATO ........INDICAZIONE DELLA DURATA DELLA BATTERIA ............ SOSTITUZIONE DELLA BATTERIA ................
-
Page 47: Indicazioni Del Quadrante, Corone E Tasti
INDICAZIONI DEL QUADRANTE, CORONE E TASTI OROLOGIO ANALOGICO SEIKO AL QUARZO L’orologio dispone di tre tasti e di due corone, come indicato in figura. Cal. 7T32 Lancetta dei quinti di secondo Lancetta dei minuti del del CRONOMETRO CRONOMETRO Lancetta dei minuti... -
Page 48: Predisposizione Della Data
PREDISPOSIZIONE DELLA DATA PREDISPOSIZIONE DELL’ORA CORONA 1 CORONA 1 Data Lancetta delle ore Lancetta dei minuti Estrarla sino al secondo scatto ➠ Estrarla sino al primo scatto . quando la lancetta dei secondi si ➠ trova in corrispondenza delle ore Ruotarla in senso orario sino a quando compare la data del CORONA 1... - Page 49 Predisposizione dell’ora della suoneria SUONERIA ● La suoneria viene predisposta in modo da entrare in funzione ogni 12 ore. * Una volta regolate le lancette della SUONERIA in corrispondenza dell’ora principale, la predisposizione dell’ora per la suoneria può essere effettuata solamente secondo la procedura ●...
- Page 50 INSERIMENTO E DISINSERIMENTO DELLA SUONERIA * In tal caso, riportare di nuovo le lancette della SUONERIA in corrispondenza dell’ORA PRINCIPALE, premere la CORONA 2 in dentro nella sua posizione normale, estrarla di • Inserimento della suoneria • Disinserimento della suoneria nuovo sino al primo scatto e predisporre nuovamente l’ora desiderata per l’entrata in funzione della suoneria.
- Page 51 CRONOMETRO 1 Misurazione normale del tempo ● Il cronometro può misurare sino a 30 minuti, in unità di quinti di secondo. ● Trascorsi i primi 30 minuti, la misurazione ricomincia di nuovo da “0”, e così di seguito per sino ad un massimo di 6 ore. AVVIO ARRESTO AZZERAMENTO...
- Page 52 TACHIMETRO 4 Misurazione dei tempi di due concorrenti (per i modelli dotati di quadrante con scala tachimetrica) Misurazione della velocità media oraria di un veicolo AVVIO AZZERA- TEMPO FINALE IL 2 CONCOR- TEMPO FINALE DEL 1 RENTE TAGLIA DEL 2 MENTO Usare il cronometro per determi- Es.
-
Page 53: Regolazione Della Posizione Delle Lancette
REGOLAZIONE DELLA POSIZIONE DELLE LANCETTE Misurazione della frequenza oraria di una certa operazione ● Dopo ogni sostituzione della batteria, e nel caso in cui le lancette del CRONOMETRO non ritornino alla posizione corrispondente alle ore 12 quando si riazzera il cronometro, Es. -
Page 54: Indicazione Della Durata Della Batteria
Quando la batteria si esaurisce, è necessario sostituirla al più presto possibile per prevenire possibili disfunzioni dell’orologio. Per la sostituzione si consiglia di rivolgersi ad un RIVENDITORE AUTORIZZATO SEIKO, chiedendo di utilizzare solamente batterie del tipo SEIKO SR927W. NOTA Per poter usare di nuovo l’orologio, è... -
Page 55: Per Mantenere La Qualità Dell'orologio
* L ’ i n d i c a z i o n e d e l l a • Se l’orologio è bagnato, si consiglia di farlo pressione in bar deve ■ IMPERMEABILITÀ controllare da un RIVENDITORE SEIKO essere considerata AUTORIZZATO o da un CENTRO DI n o m i n a l e n o n ASSISTENZA. - Page 56 SEIKO o da un CENTRO DI ASSISTENZA, u n ’ e t i c h e t t a , r i c o r d a r s i d i abbreviarne la durata.
-
Page 57: Dati Tecnici
Suoneria ........... Piccole lancette per le ore ed i minuti La suoneria entra in funzione ogni 12 ore. Batteria ........... Una batteria SEIKO SR927W Circuito integrato (IC) ......Un circuito integrato del tipo C-MOS-LSI. * I dati tecnici possono subire modifiche senza preavviso, per un continuo miglioramento del prodotto. - Page 58 Gebruiksaanwijzing Analoog quarts horloge met alarm, chronograaf en timer (voor Cal. 7T42)/SDW, SDX (Cal 7T32, 7T42 en Sports 150 Cal. 7T32, 7T42) Daniël Pichotstraat 17-33 - 3115 JB Schiedam Postbus 330 - 3100 AH Schiedam...
- Page 60 1. De “herhaal”-functie van de timer. Als de timer eenmaal is ingesteld, wordt de ingestelde tijd in het geheugen opgeslagen en kan deze steeds opnieuw worden ingesteld. h STOPWATCH De stopwatch kan tijdmetingen verrichten in 1/5 seconden tot maximaal 30 minuten. h VERKLIKKER LEVENSDUUR BATTERIJ Het kleine secondenwijzertje beweegt met tussenpozen van twee seconden als de batterij aan vevanging toe is.
- Page 74 (2) HET METEN VAN DE VERRICHTINGSSNELHEID PER UUR De tachymeter is van zeer veel nut bij het berekenen van de doelmatigheid van de bedrijfsvoering in een fabriek of de produktiesnelheid van een machine. Voorbeeld 1) Gebruik de stopwatch om de tijd op te nemen die het kost om één taak uit te voeren.