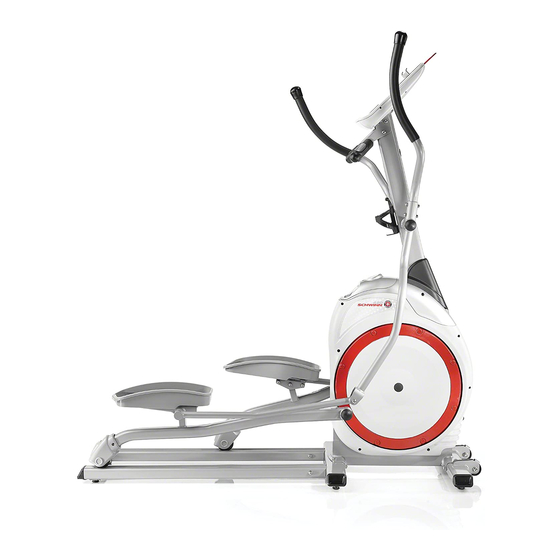
Schwinn 420 Assembly Manual
Schwinn fitness elliptical trainer assembly manual
Hide thumbs
Also See for 420:
- Owner's manual (24 pages) ,
- Assembly manual (40 pages) ,
- Owner's manual (44 pages)
Summary of Contents for Schwinn 420
-
Page 1: Elliptical Trainer
420 Elliptical Trainer Assembly Manual Nautilus Bowflex Schwinn Fitness StairMaster Universal Nautilus Institute ® ® ® ® ® ® 001-7231-051608A... -
Page 2: Table Of Contents
Table of Contents Safety Warnings ...3 Exploded View ...4 Parts List ...5 Hardware Guide ...6 Before You Start ...7 Assembly ...8 Contacts...40 Assembly Manual... -
Page 3: Safety Warnings
This icon means a potentially hazardous situation which, if not avoided, could result in death or serious injury. Before using this equipment, obey the following warnings: Read and understand the complete Owner’s Manual. Read and understand all Warnings on this machine. •... -
Page 4: Parts List
Exploded View Assembly Manual... -
Page 5: Parts List
Item Description Main Frame Left Foot Right Foot Water Bottle Holder Rear Stabilizer Console Mast Arm Pivot Rod Lower Left Handlebar Upper Left Handlebar Upper Right Handlebar Lower Right Handlebar Right Leg Left Leg Foot Mount Plate AC Power Adapter Front Stabilizer Running Rail Transport Handle... -
Page 6: Hardware Guide
Item Description M8 Flat Washers M8 Lock Washers M5 0.8x25 Phillips Head Screws M8 Lock Washers - Black M8 Wide Flat Washers M8 1.25x15 Hex Screws M8 1.25x20 Hex Screws M8 1.25x20 Hex Head Bolts 45mm Round Cover Arm Mount Cotter Pin M8 1.25x20 Hex Screws - Nylock M8 1.25x25 Hex Screws - Nylock Tools Required... -
Page 7: Before You Start
3. When attaching two pieces, lightly lift and look through the bolt holes to help guide bolts through the holes. 4. Two people are necessary to assemble this machine. NOTE: Some axles contain oil. Use caution to avoid staining clothes or carpet. Before You Start 420 Elliptical Trainer. We recommend you install it on a ® Assembly Manual... -
Page 8: Assembly
Step 1: Install Rear Stabilizer and Transport Handle Parts • #5 - Rear Stabilizer (Qty. 1) • #17 - Running Rail (Qty. 2) • #18 - Transport Handle (Qty. 1) • #22 - Threaded Foot Pad (Qty. 2) • #23 - Foot Adjust Nut (Qty. 2) Hardware •... - Page 9 Step 2: Install Front Stabilizer Parts • Rear Stabilizer assembly (from Step 1) • #1 - Main Frame (Qty. 1) • #16 - Front Stabilizer (Qty. 1) Hardware • #24 - M8 Flat Washer (Qty. 8) • #25 - M8 Lock Washer (Qty. 8) •...
- Page 10 Step 3: Install Console Mast and Water Bottle Holder Parts • Main Unit (from Step 2) • #4 - Water Bottle Holder (Two parts: (4a) outer ring, (4b) - base) • #6 - Console Mast (Qty. 1) • #21 - Mast Boot (Qty. 1) Hardware •...
- Page 11 Step 4: Install Static Handlebar and Console Parts • Main Unit (from Step 3) • #19 - Console (Qty. 1) • #20 - Static Handlebar (Qty. 1) Hardware • #24 - M8 Flat Washer (Qty. 4) • #25 - M8 Lock Washer (Qty. 4) •...
- Page 12 Step 5: Install Legs Parts • Main Unit (from Step 4) • #12 - Right Leg (Qty. 1) • #13 - Left Leg (Qty. 1) Hardware • #27 - M8 Lock Washer - Black (Qty. 2) • #28 - M8 Wide Flat Washer (Qty. 2) •...
- Page 13 Step 6: Install Lower Arms Parts • Main Unit (from Step 5) • #7 - Arm Pivot Rod (Qty. 1) • #8 - Lower Left Arm (Qty. 1) • #11 - Lower Right Arm (Qty. 1) Hardware • #25 - M8 Lock Washer (Qty. 2) •...
- Page 14 Step 7: Install Feet Parts • Main Unit (from Step 6) • #2 - Left Foot (Qty. 1) • #3 - Right Foot (Qty. 1) • #14 - Foot Mount Plate (Qty. 1) Hardware • #24 - M8 Flat Washer (Qty. 8) •...
- Page 15 Step 8: Install Moving Handlebars Parts • Main Unit (from Step 7) • #9 - Upper Left Handlebar (Qty. 1) • #10 - Upper Right Handlebar (Qty. 1) Hardware • #24 - M8 Flat Washer (Qty. 8) • #25 - M8 Lock Washer (Qty. 8) •...
- Page 16 Step 9: Connect Power Cable Parts • Main Unit (from Step 8) • #15 - AC Power Adapter (Qty. 1) Assembly 9-1 Find the power connector on the front of the machine above the Front Stabilizer. 9-2 Connect the AC Power Adapter to the power connector on the front of the machine.
- Page 17 Step 10: Final Check Failure to visually check and test assembly before use can cause damage to the equipment. It can also cause serious injury to users and bystanders. Assembly 10-1 Tighten all hardware. 10-2 Make sure that the machine is level. If necessary, adjust the Feet again as described in Step 2.
- Page 18 Assembly Assembly Manual...
-
Page 19: Contacts
UNITED STATES OFFICES E-mail: customerservice@nautilus.com TECHNICAL/CUSTOMER SERVICE Phone: 800-NAUTILUS (800-628-8458) Fax: (877) 686-6466 E-mail: cstech@nautilus.com CORPORATE HEADQUARTERS Nautilus, Inc. World Headquarters 16400 SE Nautilus Drive Vancouver, Washington, USA 98683 Phone: (800) NAUTILUS (800) 628-8458 Contacts INTERNATIONAL OFFICES For technical assistance and a list of distributors in your area, please call or fax one of the following numbers. - Page 20 ©2008. Nautilus, Inc. All rights reserved. Nautilus, the Nautilus Logo, Universal, Bowflex, StairMaster and Nautilus Institute are either registered trademarks or trademarks of Nautilus, Inc. Schwinn is a registered trademark. All other trademarks are owned by their respective companies. Nautilus, Inc., World Headquarters, 16400 SE Nautilus Drive, Vancouver, WA 98683 1-800-NAUTILUS www.nautilus.com...


