Table of Contents
Advertisement
Available languages
Available languages
Advertisement
Chapters
Table of Contents

Related Manuals for Schumacher 00-99-000886


Summary of Contents for Schumacher 00-99-000886
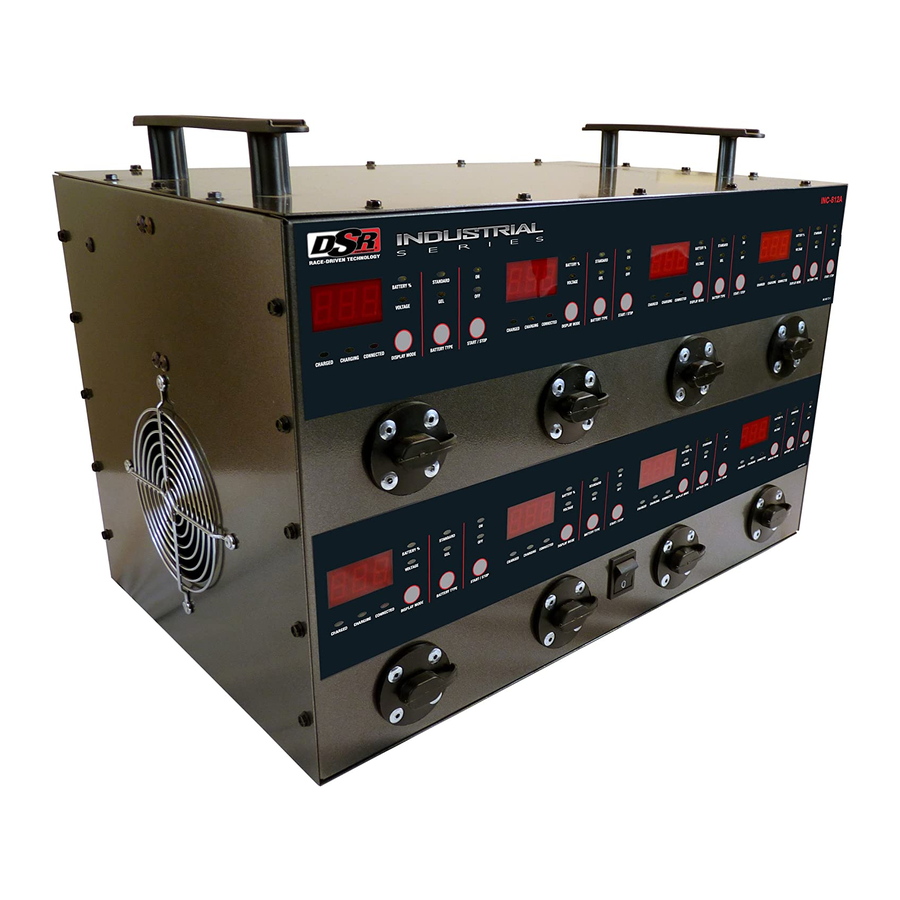
- Page 1 Model INC-812 Automatic Battery Charger Fully Automatic Microprocessor Controlled Battery Charging Station READ ENTIRE MANUAL BEFORE USING THIS PRODUCT CAUTION: Read all Safety Rules and Operating Instructions, and follow them with each use of this product. 00-99-000886/1208...
-
Page 3: Table Of Contents
SECTION IMPORTANT SAFETY INSTRUCTIONS PERSONAL PRECAUTIONS PREPARING TO CHARGE CHARGER LOCATION DC CONNECTION PRECAUTIONS FOLLOW THESE STEPS WHEN BATTERY IS INSTALLED INVEHICLE. FOLLOW THESE STEPS WHEN BATTERY IS OUTSIDE VEHICLE. BATTERY CHARGING - AC CONNECTIONS ASSEMBLY INSTRUCTIONS CONTROL PANEL OPERATING INSTRUCTIONS USING THE VOLT METER TO TEST BATTERY STATE OF CHARGE BATTERY PERCENT AND CHARGE TIME... -
Page 4: Important Safety Instructions
Do not expose charger to rain or snow. Use of an attachment not recommended or sold by Schumacher® Electric Corporation may result in a risk of fire, electric shock or injury to persons or damage to property. -
Page 5: Personal Precautions
Use this charger for charging a LEAD-ACID battery only. It is not intended to supply power to a low voltage electrical system other than in a starter- motor application. Do not use this battery charger for charging dry-cell batteries that are commonly used with home appliances. These batteries may burst and cause injury to persons and damage to property. -
Page 6: Charger Location
Clean the battery terminals before charging the battery. During cleaning, keep airborne corrosion from coming into contact with your eyes, nose and mouth. Use baking soda and water to neutralize the battery acid and help eliminate airborne corrosion. Do not touch your eyes, nose or mouth. Add distilled water to each cell until the battery acid reaches the level specified by the battery manufacturer. -
Page 7: Follow These Steps When Battery Is Outside Vehicle
6.5. If the positive post is grounded to the chassis, see step 6.6. For a negative-grounded vehicle, connect the POSITIVE (RED) clip from the battery charger to the POSITIVE (POS, P, +) ungrounded post of the battery. Connect the NEGATIVE (BLACK) clip to the vehicle chassis or engine block away from the battery. -
Page 8: Assembly Instructions
DANGER – Never alter AC cord or plug provided – if it does not fit the outlet, have proper outlet installed by a qualified electrician. Improper connection can result in a risk of an electric shock or fire. Recommended minimum AWG size for extension cords for battery chargers AC input rating, amperes... -
Page 9: Control Panel
CONTROL PANEL CHARGED CHARGING 10.1 DIGITAL DISPLAy BUTTON Use this button to set the function of the digital display to one of the follow- ing: • BATTERy %: The digital display shows an estimate of the percent of charge of the battery connected to the charger battery clamps. •... -
Page 10: Operating Instructions
Gel Batteries are best used in VERY DEEP cycle application and may last a bit longer in hot weather applica- tions. If the incorrect battery charger is used on a Gel Cell battery, poor performance and premature failure is certain. -
Page 11: Using The Volt Meter To Test Battery State Of Charge
12.2 TESTING SEQUENCE: battery state of charge: Connect the battery charger’s clips to the battery. Be sure to follow all of the precautions listed under sections 6 and 7. If a battery is left discharged for an extended Charge completion is indicated by the... -
Page 12: Battery Percent And Charge Time
Connect the charger’s power cord to a 120 VAC outlet. Again, be sure to follow all of the precautions listed under sections 6 and 7. Read the voltage on the digital meter or press the DISPLAY MODE button to set the tester to BATTERY % and read the battery percent- age. -
Page 13: Maintenance Instructions
MAINTENANCE INSTRUCTIONS 14.1 Before performing maintenance, unplug and disconnect battery charger (see sections 6.7 and 7.6). 14.2 After use, use a dry cloth to wipe all battery corrosion and other dirt or oil from terminals, cords, and the charger case. -
Page 14: Troubleshooting
The indicator lights are lit in an erratic manner, not explained in “Using Your Battery Charger” section. “bAd bAt” in Display; CON- NECTED LED lit. See Aborted Charge in the “Operating Instructions”... -
Page 15: Limited Warranty
Manufacturer does not provide any warranty for any accessories used with this product that are not manufactured by Schumacher Electric Corporation and approved for use with this product. This Limited Warranty is void if the... - Page 17 Modelo INC-812 Cargador De Batería Automático Totalmente Automático Controlado por Microprocesador con Estación Cargadora de Baterías LEA TODO EL MANUAL ANTES DE USAR ESTE PRODUCTO. PRECAUCION: Lea todas las Normas de Seguridad e Instrucciones de Operación, y sígalas cada vez que use el producto.
- Page 19 SECCIÓN INSTRUCCIONES DE SEGURIDAD IMPORTANTES PRECAUCIONES PERSONALES PREPARACIóN DE LA CARGA UBICACIóN DEL CARGADOR PRECAUCIONES DE LA CONEXIóN CC SIGA ESTOS PASOS AL INSTALAR UNA BATERÍA EN EL VEHÍCULO. SIGA ESTOS PASOS CUANDO LA BATERÍA ESTé AFUERA DEL VEHÍCULO. BATERIA CARGANDO - CONEXIONES AC INSTRUCCIONES DE ENSAMBLAJE PANEL DE CONTROL INSTRUCCIONES DE FUNCIONAMIENTO...
-
Page 20: Instrucciones De Seguridad Importantes
IMPORTANTE: LEA y CONSERvE ESTE MANUAL DE INSTRUCCIONES y SEGURIDAD. INSTRUCCIONES DE SEGURIDAD IMPORTANTES CONSERVE ESTAS INSTRUCCIONES – Este manual contiene instruc- ciones operativas y de seguridad importantes para el cargador de baterías Modelo INC-812A. PRECAUCION : De acuerdo a la Proposición 65 del California, este produc- to contiene químicos que de acuerdo al Estado de California son causantes de cáncer, defectos de nacimiento u otro daño reproductor. -
Page 21: Precauciones Personales
PARA REDUCIR EL RIESGO DE EXPLOSIÓN DE LA BATERÍA, SIGA ESTAS INSTRUCCIONES ADEMÁS DE LAS PUBLICADAS POR EL FABRICANTE DE CUALQUIER EQUIPO QUE QUIERA USAR CERCA DE LA BATERÍA. REvISE LAS MARCAS DE PRECAUCIÓN DE ESTOS PRODUCTOS y DEL MOTOR. PRECAUCIONES PERSONALES Considere tener a alguien que lo acompañe para asistirlo cuando trabaje cerca de una batería de plomo y ácido. -
Page 22: Ubicación Del Cargador
Limpie los terminales de la batería antes de cargarla.Durante la limpieza, evite que la corrosión transportada por el aire entre en contacto con sus ojos, nariz o boca. Use bicarbonato de sodio y agua para neutralizar los ácidos de la batería y eliminar la corrosión transportada por el aire. No se toque los ojos, nariz o boca. -
Page 23: Siga Estos Pasos Cuando La Batería Esté Afuera Del Vehículo
Manténgase alejado de paletas de ventiladores, cinturones, poleas y demás partes que puedan causar una lesión a las personas. Revise la polaridad de los terminales de la batería. El terminal de la bat- ería de polaridad POSITIVA (POS, P, +) por lo general tiene un diámetro mayor que el terminal de polaridad NEGATIVA (NEG, N,–). -
Page 24: Bateria Cargando - Conexiones Ac
No se acerque a la batería cuando realice la conexión final. Cuando desconecte el cargador, hágalo siempre en la secuencia inversa al procedimiento de conexión y primero interrumpa la conexión mientras esté tan lejos de la batería como sea posible. Una batería marítimo (de barco) se debe retirar y cargar en tierra. -
Page 25: Instrucciones De Ensamblaje
Métodos a tierra Este cargador debe conectarse a tierra correctamente. Asegúrese que la salida del tomacorriente CA donde se enchufe este correctamente conectado a tierra y de acuerdo a los códigos y reglamentos locales. Si no lo está, haga que un técnico calificado lo instale. No quite ni abra el perno que pone a tierra o en el receptáculo. - Page 26 • Deep-Cycle – Fije el botón en STANDARD . Las baterías de ciclo pro- fundo normalmente vienen marcadas “Deep Cycle” o “Marine” y por lo general son más grandes que los demás tipos. Este tipo de batería tiene menos energía instante pero una entrega de larga duración algo mayor •...
-
Page 27: Instrucciones De Funcionamiento
INSTRUCCIONES DE FUNCIONAMIENTO 11.1 ASPECTOS GENERALES Para utilizar el cargador de baterías, primero seleccione un toma eléctrico que no esté en uso de los ocho disponibles y conecte la batería a la corri- ente CA, de ser necesario, tomando las precauciones enumeradas en las secciones 6 y 7. -
Page 28: Cómo Utilizar El Voltímetro Para Evaluar El Estado De La Carga De La Batería
11.8 NOTAS GENERALES RELACIONADAS CON LA CARGA: El ventilador se pone en funcionamiento siempre que se esté cargando una o más baterías. Si el modo de carga se cambia luego de que ha comenzado la carga (pre- sionando el botón TIPO DE BATERÍA), el proceso de carga se detiene. El voltaje que se muestra durante la carga es el voltaje de carga y por lo general es más elevado que el voltaje en reposo de la batería. -
Page 29: Porcentaje De Batería Y Tiempo De Carga
12.4 PRUEBA LUEGO DE LA CARGA unidad de tester a cargador (presionando el botón COMENZAR/DETEN- ER), el dispositivo sigue funcionando como cargador siempre que esté conectado a una batería. Vuelva a presionar el botón Comenzar/Detener para cambiar al modo tester. PORCENTAJE DE BATERÍA y TIEMPO DE CARGA Este cargador ajusta el tiempo de carga a fin de cargar la batería por completo, en forma eficiente y segura. -
Page 30: Instrucciones De Mantenimiento
13.8 Cuanto más se descarga una batería, más rápido ésta absorbe la carga proveniente del cargador. Esto significa que el porcentaje de batería au- menta en forma más rápida al comienzo del proceso de carga que al final de éste. En otras palabras, lleva más tiempo que una batería acepte los últimos pocos porcentajes de carga que los primeros. - Page 31 PROBLEMA En la pantalla aparece “Bat- ería Defectuosa”; el LED CONECTADO se ilumina. Ver Carga interrumpida en la sección “Instrucciones de funcionamiento”. El cargador hace un ruido de chasquido fuerte.. La corriente medida es mucho menos que la que seleccioné. Se desenchufó...
-
Page 32: Garantía Limitada
MOMENTO DE LA VENTA DE ESTE PRODUCTO. ESTA GARANTÍA LIMITADA NO ES TRANSFERIBLE. Schumacher Electric Corporation garantiza este cargador de baterías du- rante un año desde la fecha de su venta minorista en cuanto a materiales y mano de obra defectuosos. Si esto ocurriera, se reparará o reemplazará...