
Related Manuals for Schumacher SpeedCharge SC-1200A


Summary of Contents for Schumacher SpeedCharge SC-1200A
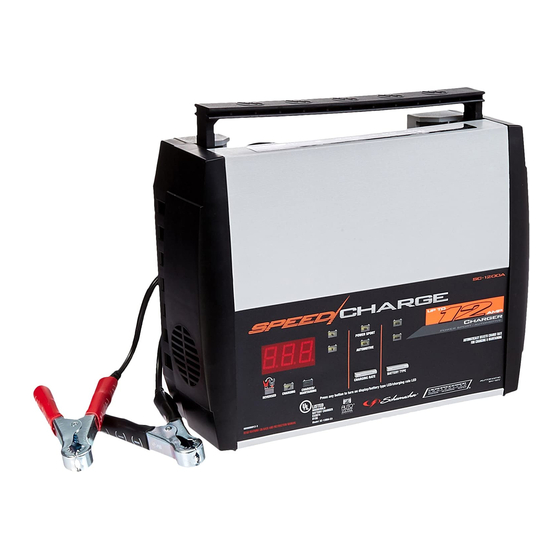
- Page 1 ® Models SC-600A, SC-1000A, SC-1200A, SSC-1000A, SSC-1500A SC-1000A SC-600A SC-1200A SSC-1000A SSC-1500A Owner’s Manual READ ENTIRE MANUAL BEFORE USING THIS PRODUCT 00-99-000909/0109...
-
Page 3: Table Of Contents
SECTION IMPORTANT SAFETY INSTRUCTIONS PERSONAL PRECAUTIONS PREPARING TO CHARGE CHARGER LOCATION DC CONNECTION PRECAUTIONS FOLLOW THESE STEPS WHEN BATTERY IS INSTALLED IN VEHICLE. FOLLOW THESE STEPS WHEN BATTERY IS OUTSIDE VEHICLE. BATTERY CHARGING - AC CONNECTIONS CONTROL PANEL ASSEMBLY INSTRUCTIONS OPERATING INSTRUCTIONS CALCULATING CHARGE TIME MAINTENANCE INSTRUCTIONS... -
Page 4: Important Safety Instructions
Do not expose charger to rain or snow. Use only recommended attachments. Use of an attachment not recom- mended or sold by Schumacher® Electric Corporation may result in a risk of fire, electric shock or injury to persons. To reduce the risk of damage to electric plug or cord, pull by the plug rather than the cord when disconnecting the charger. -
Page 5: Personal Precautions
WORKING IN THE vICINITy OF A LEAD-ACID BATTERy IS DANGEROUS. BATTERIES GENERATE EXPLOSIvE GASES DURING NORMAL BATTERy OPERATION. FOR THIS REASON, IT IS OF UTMOST IMPORTANCE THAT yOU FOLLOW THE INSTRUCTIONS EACH TIME yOU USE THE CHARGER. TO REDUCE THE RISK OF BATTERy EXPLOSION, FOLLOW THESE INSTRUCTIONS AND THOSE PUBLISHED By THE BATTERy MANUFACTURER AND THE MANUFACTURER OF ANy EQUIPMENT yOU INTEND TO USE IN THE vICINITy OF THE BATTERy. -
Page 6: Preparing To Charge
PREPARING TO CHARGE If it is necessary to remove the battery from the vehicle to charge it, always remove the grounded terminal first. Make sure all of the accessories in the vehicle are off, to prevent arcing. Be sure the area around the battery is well ventilated while the battery is being charged. -
Page 7: Follow These Steps When Battery Is Installed In Vehicle
FOLLOW THESE STEPS WHEN BATTERy IS INSTALLED IN vEHICLE. A SPARK NEAR THE BATTERy MAy CAUSE A BATTERy EXPLOSION. TO REDUCE THE RISK OF A SPARK NEAR THE BATTERy: Position the AC and DC cables to reduce the risk of damage by the hood, door and moving or hot engine parts. -
Page 8: Battery Charging - Ac Connections
Do not face the battery when making the final connection. When disconnecting the charger, always do so in the reverse order of the connecting procedure and break the first connection while as far away from the battery as practical. A marine (boat) battery must be removed and charged on shore. To charge it onboard requires equipment specially designed for marine use. -
Page 9: Control Panel
Grounding Methods CONTROL PANEL SC-600A • •... - Page 10 SC-1000A SC-1200A SSC-1000A • •...
- Page 11 DIGITAL DISPLAy The Digital Display gives a digital indication of % of charge or voltage, depending on the Display Mode chosen. DISPLAy MODE BUTTON Use this button to set the function of the Digital Display to one of the following: •...
-
Page 12: Assembly Instructions
• Regular (Standard) and motorcycles. These batteries have vent caps and are often marked “Low Maintenance” or “Maintenance-free”. This type of battery is de- signed to deliver quick bursts of energy (such as starting engines) and have a greater plate count. The plates will also be thinner and have somewhat different material composition. - Page 13 – If a battery has only been slightly discharged, it can be charged in less than a few hours. The same battery could take up to 10 hours if very weak. With Models SC-1200A, SSC-1000A and SSC-1500A the battery state can be estimated by using the built-in voltage tester.
- Page 14 BATTERY TYPE selected. 11.9 USING THE BATTERy vOLTAGE TESTER (MODELS SC-1200A, SSC-1000A AND SSC-1500A ONLy) Overview This battery charger has a built-in voltmeter to test your battery’s state of charge. The charger does not have a built in load tester. As such, a recently charged battery could have a temporarily high voltage due to what is known as “surface charge”.
- Page 15 1. With the charger unplugged from the AC outlet, connect the charger to the battery following the instructions given in Sections 6 and 7. 2. Plug the charger AC power cord into the AC outlet. 3. If necessary, press the BATTERY TYPE button until the correct type is indicated.
-
Page 16: Calculating Charge Time
• If your vehicle won’t start battery to start a vehicle. If operating the vehicle continuously for an extended period of time (such as a long drive) the vehicle’s charging system should charge the battery during that period. If the vehicle will only be operating for a short period of time (short drive) the battery might need to recharge before starting the vehicle again. - Page 17 • •...
-
Page 18: Maintenance Instructions
MAINTENANCE INSTRUCTIONS 13.1 Before performing maintenance, unplug and disconnect battery charger (see sections 6.7 and 7.6). 13.2 After use, unplug charger and use a dry cloth to wipe all battery corrosion and other dirt or oil from terminals, cords, and the charger case. 13.3 Servicing does not require opening unit, as there are no user-serviceable parts. - Page 19 PROBLEM The CHARGED (green) light turns on a few minutes or less after connecting the battery. The measured current is much lower than what was selected. The charger is mak- ing an audible clicking sound. Charger will not turn on when properly connected.
- Page 20 BEFORE RETURNING FOR REPAIRS 15.1 When a charging problem arises, make certain that the battery is capable of accepting a normal charge. Use a good battery to double check all con- nections, AC outlet for a full 120-volts, charger clamps for correct polarity and the quality of the connections from the cables to the clamps and from the clamps to the battery system.
-
Page 21: Limited Warranty
Manufacturer does not provide any warranty for any accessories used with this product that are not manufactured by Schumacher Electric Corporation and approved for use with this product. This Limited Warranty is void if the product is misused, subjected to careless handling, repaired, or modified by anyone other than Manufacturer or if this unit is resold through an unauthorized retailer. -
Page 23: Manual Del Usuario
® Modelos: SC-600A, SC-1000A, SC-1200A, SSC-1000A, SSC-1500A SC-1000A SC-600A SC-1200A SSC-1000A SSC-1500A Manual Del usuariO LEA TODO EL MANUAL ANTES DE USAR ESTE PRODUCTO. - Page 25 SECCIÓN INSTRUCCIONES DE SEGURIDAD IMPORTANTES PRECAUCIONES PERSONALES PREPARACIóN DE LA CARGA UBICACIóN DEL CARGADOR PRECAUCIONES DE LA CONEXIóN CC SIGA ESTOS PASOS AL INSTALAR UNA BATERÍA EN EL VEHÍCULO. SIGA ESTOS PASOS CUANDO LA BATERÍA ESTé AFUERA DEL VEHÍCULO. CARGA DE BATERIA - CONEXIONES AC CONTROLES DEL SPEEDCHARGE INSTRUCCIONES PARA ENSAMBLE INSTRUCCIONES DE OPERACIóN...
-
Page 26: Instrucciones De Seguridad Importantes
IMPORTANTE: LEA y CONSERvE ESTE MANUAL DE INSTRUCCIONES y SEGURIDAD. INSTRUCCIONES DE SEGURIDAD IMPORTANTES La Serie de Cargadores de Baterías SpeedCharge ofrece una amplia gama de características adaptables a sus necesidades en el hogar o de uso comercial ligero. Este manual, le mostrará cómo usar el cargador se- gura y efectivamente. -
Page 27: Precauciones Personales
ES PELIGROSO TRABAJAR CERCA DE UNA BATERÍA DE PLOMO y ÁCIDO. LAS BATERÍAS GENERAN GASES EXPLOSIvOS DURANTE SU FUNCIONAMIENTO NORMAL. POR ESO, ES DE SUMA IMPOR- TANCIA QUE SIGA LAS INSTRUCCIONES CADA vEZ QUE UTILICE EL CARGADOR. PARA REDUCIR EL RIESGO DE EXPLOSIÓN DE LA BATERÍA, SIGA ESTAS INSTRUCCIONES ADEMÁS DE LAS PUBLICADAS POR EL FABRICANTE DE CUALQUIER EQUIPO QUE QUIERA USAR CERCA DE LA BATERÍA. -
Page 28: Preparación De La Carga
PREPARACIÓN DE LA CARGA Si es necesario quitar la batería del vehículo para cargarla, siempre retire el terminal a tierra de la batería primero. Asegúrese de que todos los ac- cesorios dentro del vehículo estén apagados para evitar causar un arco. Asegúrese de que el área que rodea la batería esté... -
Page 29: Siga Estos Pasos Al Instalar Una Batería En El Vehículo
SIGA ESTOS PASOS AL INSTALAR UNA BATERÍA EN EL vEHÍCULO. UNA CHISPA CERCA DE LA BATERÍA PODRÍA PROvOCAR UNA EX- PLOSIÓN. PARA EvITAR ESTO: Coloque los cables CA y CC para reducir el riesgo de daño provocado por el capó, la puerta o una parte móvil del motor. Manténgase alejado de paletas de ventiladores, cinturones, poleas y demás partes que puedan causar una lesión a las personas. -
Page 30: Carga De Bateria - Conexiones Ac
Añada por lo menos un cable de batería aislado calibre (AWG – calibre estadounidense de cable) 6 de 24 pulgadas al terminal de la batería con polaridad NEGATIVA (NEG, N, -). Conecte el sujetador del cargador POSITIVO (ROJO) al terminal POSI- TIVO (POS, P, +). -
Page 31: Controles Del Speedcharge
CONTROLES DEL SPEEDCHARGE SC-600A • •... - Page 32 SC-1000A SC-1200A SSC-1000A • •...
- Page 33 ABOTÓN DE CHARGE RATE Use este botón para fijar la tasa de carga en una de las tres a continu- ación: • 2A CHARGE RATE: como aquellas que se usan en los tractores de jardines, nievemóviles, y motocicletas. La tasa de 2A no se debe usar como cargador lento para las baterías más grandes.
-
Page 34: Instrucciones Para Ensamble
• AGM (Malla de fibra de vidrio absorbente) - malla de fibra de vidrio absorbente permite la suspensión del electrolito en extrema proximidad con el material activo de la placa. En teoría, esto aumenta tanto la eficiencia de la descarga como de la recarga. En verdad, las baterías AGM constituyen una variedad de las baterías Selladas VRLA (de plomo-ácido reguladas por válvula). - Page 35 • Clasificación de la batería: elevada tendrá un mayor tiempo de carga que una batería de baja clasifi- cación bajo las mismas condiciones. Las baterías se clasifican en ampe- rios- horas (AH), capacidad de reserva (RC, según sus siglas en inglés) y amperios de arranque en frío (CCA, según sus siglas en inglés). Cuanto más baja sea la clasificación, más rápida será...
- Page 36 11.5 CARGA ANULADA la misma se anulará. Cuando la carga se anula, la potencia del cargador se corta y el LED (rojo) DE CONEXIÓN titila. En ese estado, el cargador ignora todos los botones. Para reiniciar tras la anulación de una carga, desconecte la batería o desenchufe el cargador.
-
Page 37: Calculando El Tiempo De Carga
• Si su vehículo no enciende: completo para encender un vehículo. Si el vehículo funciona en forma continua por un extenso período de tiempo (tal como al realizar extenso recorrido) el sistema de carga del vehículo debe cargar la batería durante dicho período. - Page 38 • •...
-
Page 39: Instrucciones De Mantenimiento
“Para Usar Su Cargador de Baterías”. La LUZ (roja) CONECTADA des- tella. (Modelos: SC- 600A, SSC-1500A, SC-1200A) POSIBLE CAUSA La batería no está conectada correctamente. La conexión a la batería está invertida. El voltaje de la batería tiene menos de 1 voltio. - Page 40 PROBLEMA La luz CHARGED (verde) se enciende pocos minutos o menos después de conectar a la batería. El cargador está haciendo un ruido de chasquido audible. La corriente medida es mucho más baja que aquella selec- cionada. El cargador está emitiendo un sonido “clic”...
- Page 41 PROBLEMA La batería está conectada y el carga- dor encendido pero no se carga. ANTES DE DEvOLvER EL CARGADOR PARA REPARACIÓN 15.1 Cuando surge un problema en cargar, asegúrese de que la batería esté en condiciones de aceptar una carga normal. Use una batería buena para verificar todas las conexiones, un tomacorriente CA para 120 voltios completos, las pinzas del cargador para polaridad correcta y la calidad de las conexiones desde los cables hasta las pinzas y desde las pinzas al...
-
Page 42: Garantía Limitada
El Fabricante no legitima ninguna garantía por cualquier parte usada para alterar el producto, al menos que sea fabricada por Schumacher Electric Cor- poration y sea aprobada para el uso del mismo. Esta Garantía Limitada queda Anulada si el producto es alterado, sufre modificaciones, es reparado, se le da mal trato por alguien más que no sea el Fabricante o si es revendida a través...