Panasonic DP-C323, DP-C263, DP-C213 Operating Instructions Manual
Digital color imaging systems, instructions for for facsimile and internet fax
Hide thumbs
Also See for DP-C323, DP-C263, DP-C213:
- Operating instructions manual (112 pages) ,
- Operating instructions manual (60 pages) ,
- Operating instructions manual (34 pages)
Table of Contents
Advertisement
Operating Instructions
(For Facsimile and Internet Fax)
Digital Color Imaging Systems
DP-C354 / C264
Model No.
DP-C323 / C263 / C213
Model No.
Before operating this machine, please carefully read this manual,
and keep this documentation in a safe place for future reference.
English
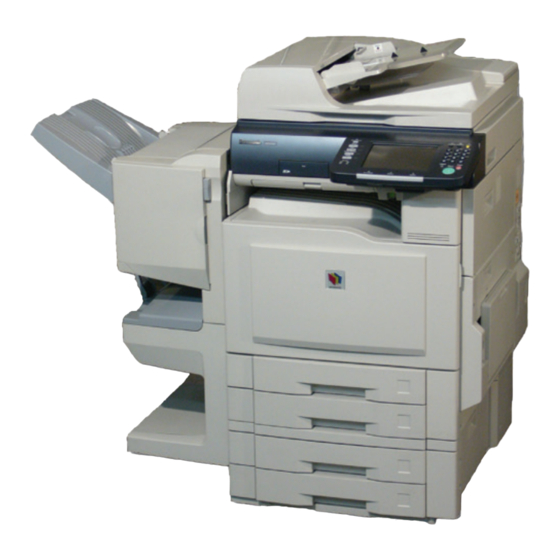
(Illustration shows optional accessories that may not be installed on your machine.)
Advertisement
Table of Contents

Related Manuals for Panasonic DP-C323, DP-C263, DP-C213


Summary of Contents for Panasonic DP-C323, DP-C263, DP-C213
-
Page 1: Operating Instructions
Operating Instructions (For Facsimile and Internet Fax) Digital Color Imaging Systems DP-C354 / C264 Model No. DP-C323 / C263 / C213 Model No. Before operating this machine, please carefully read this manual, and keep this documentation in a safe place for future reference. English (Illustration shows optional accessories that may not be installed on your machine.) - Page 2 Operating Instructions The following Operating Instruction manuals are included with this machine. Please refer to the appropriate manual and keep all manuals for future reference. If you lose the manual, contact the authorized Panasonic dealer. Accessories Operating Instructions CD Copy Function Describes how to make a Color Copy with creative features.
- Page 3 Conventions Icons The following icons are used in this manual. Icon Indicates important information that must be read in detail. Indicates reference Information. Notation The following notations are used in this manual. Notation For Keys and Buttons Hard buttons on the Control Panel are depicted as **** key, soft buttons on the Touch Panel are depicted as “xxx”.
-
Page 4: Table Of Contents
Table of Contents Chapter 1 Getting To Know Your Machine Menu Map... Chapter 2 Basic Fax Transmission Fax Transmission Procedure... Entering a Destination ... 16 Manual Dialing ... Using the Address Book... Searching for a Destination ... “Search” 20 Redialing ... “Redial” 23 Transmission with Destination Monitoring ... - Page 5 Using a Mailbox (Confidential Communication)... “Mail Box” 60 What is Confidential Communication?... 60 Confidential Transmission ... 61 Confidential Polling... 62 Storing Documents for Confidential Polling ... 63 Printing a Received Confidential Document ... 64 Deleting a Confidential Document ... 66 Sub-Address Communication ...
- Page 6 Receiving Email ... Inbound Routing... Relay Transmission... Message Delivery Notice (MDN) ... Direct Internet Fax Transmission (Using Direct SMTP) ... 100 Tips for Internet Fax ... 102 Preparing to Use Internet Fax ... 104 Program Network Parameters... 104 Sending an Email Procedure... 106 Entering an Email Address ...
- Page 7 Adding End Receiving Stations for Relayed Transmission ... 148 Relayed Transmission From Internet Fax... “Lan Relay XMT” 150 Relayed Transmission From PC... 152 Requesting a Relayed Transmission from a Computer... 153 Convenient Application Software... 154 Result of Relayed Transmission ... 156 Useful Terms to Remember...
- Page 8 Chapter 8 Reading Reports/Lists Transaction Journal ... “Journal” 188 Printing Transaction Journal ... 188 Viewing Communication Results on Touch-Panel Display ... 189 Reading Transaction Journal ... 190 Communication Journal... “Comm. Journal” 192 Address Book List... “Address Book List” 196 Printing Address Book List ... 196 Reading Address Book List ...
- Page 9 Memo...
-
Page 10: Chapter 1 Getting To Know Your Machine
Chapter 1 Menu Map The main screen, and menu for Fax features are as follows: Address Book Screen Number Pad Screen Refer to Manual Dialing (see page 16) Getting To Know Your Machine Basic Menu: See page 11. More Menus: See page 12. - Page 11 Basic Menu Screen • Quality Adj. (Setting Original Quality : See page 26) • File Type and Name (Setting a File Type and a Filename : See page 120) • Original Size (Setting the Original Size : See page 30) •...
- Page 12 More Menus > Advanced Comm. Screen • Deferred Transmit (Deferred Transmission : See page 52) Comm. Polling (Deferred Polling : See page 54) • Polling Polling (Polling : See page 56) Polled (Storing Documents to be Polled : See page 58) •...
- Page 13 More Menus > Edit File Mode Screen • File List (Displaying a Communication Reservation File List : See page 160) • Change Time/Stn (Editing Communication Reservations : See page 162) • Delete File (Deleting a Communication Reservation File : See page 164) •...
-
Page 14: Chapter 2 Basic Fax Transmission
Chapter 2 Fax Transmission Procedure The basic procedure of transmitting a fax on this machine is as follows: Place original(s). Face Up. Up to 85 sheets (20 lb / Letter). Face Down. Align with the top left corner. Close ADF. Refer to Placing Originals (Facsimile/Internet Fax) in the Operating Instructions (For Basic Operations) of provided booklet. - Page 15 Enter the fax number using the keypad, or select a destination. Refer to Entering a Destination (see page 16). Press the Start key. The original(s) are stored into memory with a file number. Then starts dialing the telephone number. For instructions on how to cancel a transmission, refer to Canceling a Communication (see page 48).
-
Page 16: Entering A Destination
Entering a Destination Stations can be entered by using the following methods, or a combination of these: Manual Dialing Using the Address Book Use a Key Name (See page 18) Search through “Favorites” (See page 18) Use Group Dialing (See page 19) Searching for a Destination Search through the Address Book (Local Search) (See page 20) Search through the LDAP Server (LDAP Search) (See page 21) - Page 17 Number Pad Screen Inserts a pause each time it is selected. The pause is represented by a “-” symbol. Used to access some features of your PBX. Select when entering a sub-address number. The sub-address is represented by an “s” symbol.
-
Page 18: Using The Address Book
Using the Address Book Use a Key Name If a destination is registered in the address book, it can be selected by using a Key Name. The fax numbers must be pre-programmed into the address book. Refer to Adding a Fax Number into the Address Book (see page 169). - Page 19 Use Group Dialing For transmission to multiple destinations using group dialing, follow the steps below: The group dialing button must be pre-programmed. Refer to Setting for Group Dialing (see page 179). Follow the step 1 and 2 on page 14. Select “Program/Group”.
-
Page 20: Searching For A Destination
Searching for a Destination Search through the Address Book (Local Search) Select “Search” to look through the address book for the desired destination by the entry name. Select “Global” to search fax numbers, or Email addresses in the LDAP Server (see page 21). Follow the step 1 and 2 on page 14. - Page 21 Search through the LDAP Server (LDAP Search) LDAP search is a feature that searches through the address book of an LDAP server on the network for fax numbers or Email Addresses. Select “Global” on the displayed screen to use the LDAP search feature. Contact your network administrator to check whether the LDAP search feature is available in your particular environment.
- Page 22 Select “Fax Number” to display a list of destinations. Choose a destination, and then select “OK”. Only one destination can be selected. You can change the entry screen by selecting “Email” or “Fax Number”. Select to scroll the search results. Select “Detail”...
-
Page 23: Redialing
Redialing To redial the most recently dialed number, follow the steps below: Follow the step 1 and 2 on page 14. Select “Redial”. Confirm that this is the fax number that you want to send to, and then select “OK”. Press the Start key. -
Page 24: Transmission With Destination Monitoring
Transmission with Destination Monitoring Select “Monitor” on the touch-panel screen to obtain a dial tone. This feature is called “on-hook dialing.” To monitor the status of a remote station, follow the steps below: Place Original(s). If the platen is used, only one page can be transmitted at a time. -
Page 25: Talking To The Remote Party Before Transmission
Talking to the Remote Party Before Transmission If an external telephone is connected to your machine, you can send a fax after talking to the remote party on the phone. Follow the steps below: Place Original(s). If the platen is used, only one page can be transmitted at a time. -
Page 26: Setting Original Quality
Setting Original Quality Original Type Original type can be specified to suit your needs, you can select from, text-only original, photo-only original or original in which text and photos are mixed. Select “Text/Photo” when text and photos are mixed on a single page or are mixed on multiple pages to be sent. - Page 27 Place Original(s). Refer to Placing Originals (Facsimile/Internet Fax) in the Operating Instructions (For Basic Operations) of provided booklet. Press the Fax key. Select “Basic Menu”. Select “Quality Adj.”. Adjust the original quality, and then select “OK”. Original Type Select for text-only originals.
- Page 28 Resolution Select for ordinary originals. Select for originals containing small characters or graphics. Select for fine originals containing detailed drawings or text. The finer a original to be scanned, the more information needs to be transmitted, thus, requiring a longer communication time. If “S-Fine”...
- Page 29 Memo...
-
Page 30: Setting The Original Size
Setting the Original Size The Original Size is usually detected automatically when an original is placed on the platen. If the size is not detected automatically, or you would like to change the detected size, you can set the original size manually by following the procedure below. Icon of the original is not displayed. - Page 31 Choose the original size, and then select “OK”. LEDGER LEGAL LETTER LETTER-R INVOICE INVOICE-R Set “Quality Adj.” as required. Refer to Setting Original Quality (see page 26). Select “Address Book”, and then select a destination. Refer to Entering a Destination (see page 16).
-
Page 32: Transmitting 2-Sided Originals
Transmitting 2-Sided Originals 2-sided originals loaded in the ADF are scanned automatically with a specified binding edge position, and transmitted. Two binding edge selections are available: •Long Edge: 2-sided scanning is aligned to the long edge of the original. •Short Edge: 2-sided scanning is aligned to the short edge of the original. Long Edge This feature works only when originals are loaded in the ADF. - Page 33 Select a binding position, and then select “OK”. Select when the binding position is on the long side of the original. Select when the binding position is on the short side of the original. Set “Quality Adj.” as required. Refer to Setting Original Quality (see page 26).
-
Page 34: Verification Stamp
Verification Stamp This function confirms successful transmission, or storage into the memory by stamping at the bottom of each successfully transmitted original(s) with a small “x” mark. The standard setting of the verification is “Off”. The stamp setting can be changed with “04 Stamp (HOME)” in Function Parameters (Fax/Email Settings>... - Page 35 Memo...
-
Page 36: Transmitting A Document Stored In Memory
Transmitting a Document Stored in Memory Documents can be quickly scanned, and stored in the memory before transmission. This feature allows you to send the documents to multiple destinations without having to scan the same documents over again. It also allows you to retrieve your original(s) immediately without having to wait for the fax transmission to complete. - Page 37 To send documents using memory transmission, follow the steps below. (This is an example when the direct transmission is set as default in the Function Parameters.) Place Original(s). Refer to Placing Originals (Facsimile/Internet Fax) in the Operating Instructions (For Basic Operations) of provided booklet.
-
Page 38: Job Build And Sadf
Job Build and SADF Job Build and SADF setting enables to scan sets of originals that exceed the maximum capacity of ADF. Special originals (like thin paper, etc.) can be fed from the ADF for Memory Transmission. This function is available when “Job Build and SADF” is selected in the “Basic Menu”. The standard setting of “133 Job Build and SADF Mode”... - Page 39 Select “Address Book”, and then select a destination. Refer to Entering a Destination (see page Press the Start key. The original(s) are stored in to memory with a file number. For instructions on how to cancel a transmission, refer to Canceling a Communication (see page 48) If you have another original(s), place the next original(s) within 5 seconds...
-
Page 40: Direct Transmission
Direct Transmission Documents can be transmitted immediately on scanning without storing into memory. Direct transmission is more convenient in situations as shown below: When you want to send the documents right away. When you want to send a large amount of documents. Original(s) Direct transmission cannot be used to send documents to multiple destinations. - Page 41 Select “Address Book”, and then select a destination. Refer to Entering a Destination (see page 16). Press the Start key. Transmission starts immediately upon scanning. For instructions on how to cancel a transmission, refer to Canceling a Communication (see page 48).
-
Page 42: Verifying Communication Status
Verifying Communication Status To verify the communication status, follow the steps below: Press the Fax key. Select “Basic Menu”. Select “Comm. Status” while the call session is in progress. Verify the communication status. When the verification is completed, select “OK”. -
Page 43: Rotated Transmission
Rotated Transmission If an A4/Letter-sized document is loaded in a portrait position, it could be interpreted as an A3/Ledger size on the receiving station. To avoid this misinterpretation, the machine is configured to support rotated transmission. Set “78 Rotation XMT” to “Valid” in Function Parameters (Fax/Email Settings> Fax Parameters). This allows an A4/Letter-size document to be rotated by 90 degrees automatically when they are loaded in a portrait position, so that it is transmitted in the same orientation as it would have been loaded in a landscape position. -
Page 44: Batch Transmission
Batch Transmission The batch transmission feature is useful in controlling the reduction of transmission time and telephone costs. In a batch transmission job, the machine sorts documents bound for the same destination(s), and collectively handles them as one reserved document (file) to be transmitted in a single call. There are two types of batch transmissions available: •... -
Page 45: Getting An Outside Line Using Pin Code Access
Getting an Outside Line Using PIN Code Access If your PBX requires a PIN (Personal Identification Number) Code to access an external line, your machine can be set to prompt the user to enter the PIN Code before dialing. This function is available when “39 PIN Code Access” in Fax/Email Settings> Fax Parameters is set to “Suffix”... -
Page 46: Using Program Keys
Using Program Keys If frequently used communication tasks are pre-programmed onto a respective program dialing button, the programmed operating sequence can be recalled by simply selecting the assigned button. Program dialing does not only simplify repetitive, or complex operational sequences but also prevent operator errors. - Page 47 Memo...
-
Page 48: Canceling A Communication
Canceling a Communication To cancel a communication, follow the steps below: To cancel Memory Transmission: Press the Fax key. Press the Stop key while the communication is in progress. Select “Yes” to stop a communication. Select “Yes” to print a communication journal, or “No”... -
Page 49: To Cancel Direct Transmission
To cancel Direct Transmission: Press the Stop key while the communication is in progress. Select “Yes” to stop a communication. Remove the document. -
Page 50: Dial Prefix
Dial Prefix Your machine has the following functions to utilize your existing Fax Phone Numbers database. • LDAP database search for fax phone numbers (Directory Search) • Import an existing fax phone number list in CSV file format (Network Address Book Editor software) Since the phone numbers in such database are usually 10-digit numbers that are not in the format of numbers that are actually dialed through your PBX. - Page 51 Press the Function key to open the Function Parameters screen. Select “Fax/Email Settings”. Select “04 Key Operator Mode”. Enter the key operator mode Password, and then select “OK”. If you make a mistake, press Clear key or “Back Space” to delete. Select “01 Fax Parameters”.
-
Page 52: Chapter 3 Convenient Fax Features
Chapter 3 Time Controlled Communication (Deferred) Deferred Transmission The time must be pre-programmed in advance to send document(s) to one, or multiple destinations at a deferred time within the next 24 hours. The document is scanned, and stored in memory as a reserved document until the pre-programmed time lapses. - Page 53 Set the deferred time, and then select “OK”. Set the time in a 24-hour format. Ex: 21: 00 If you make a mistake, select “Clear” to delete entries one digit at a time. Set “Quality Adj.” as required. Refer to Setting Original Quality (see page 26).
-
Page 54: Deferred Polling
Deferred Polling If Polling is requested with a deferred time, it will start Polling at the pre-programmed time. Up to 50 built-in timers can be set for deferred communication. For instructions on how to use polling without a pre-programmed time, refer to Polling (see page 56). Press the Fax key. - Page 55 If a password is required, enter the password, and then select “OK”. If you have set the polling password in “26 Polling Password” in Function Parameters (Fax/Email Settings> Fax Parameters), the password will appear on the display. You can still change the password temporarily by overwriting it with a new one.
-
Page 56: Polling
Polling Polling Polling is a process of calling the other station(s) for document(s) retrieval. The other station must know in advance that you will be calling, and must prepare document(s) by storing them into the memory. To ensure security, establish a polling password that is shared by the other station ahead of time. - Page 57 Select a destination. Refer to Entering a Destination (see page 16). Press the Start key. Polling starts.
-
Page 58: Storing Documents To Be Polled
Storing Documents to be Polled Polled is the process of automatically transmitting document(s) upon receiving the polling request from the receiving station. First, you must prepare your machine by storing document(s) into memory ahead of time. To ensure security, set the polling password that is shared with the receiving station. The receiving station initiates the call, therefore, it pays for the communication charges. - Page 59 After being polled, the documents stored in the memory will be erased automatically. To retain the documents in memory so that they can be polled repeatedly change by setting “27 Polled File Save” to “Valid” in Function Parameters (Fax/Email settings> Fax Parameters).
-
Page 60: Using A Mailbox (Confidential Communication)
Using a Mailbox (Confidential Communication) What is Confidential Communication? The confidential mailbox allows communication with other compatible models using a 4-digit confidential code. The Confidential Mailbox feature receives document(s) with a confidential code in the memory. These documents can only be printed by the person who has the correct confidential code. -
Page 61: Confidential Transmission
Confidential Transmission To transmit a confidential document, follow the steps below: You must have a mailbox password (4-digit) setup, and shared with the receiving machine. Place Original(s). Refer to Placing Originals (Facsimile/Internet Fax) in the Operating Instructions (For Basic Operations) of provided booklet. Press the Fax key. -
Page 62: Confidential Polling
Confidential Polling Press the Fax key. Select “More Menus”. Select “Mail Box”. Select “Polling”. Enter the mailbox password (4-digit), and then select “OK”. If you make a mistake, select “Clear” to delete entries one digit at a time. Select a destination. Refer to Entering a Destination (see page 16). -
Page 63: Storing Documents For Confidential Polling
Storing Documents for Confidential Polling Place Original(s). Refer to Placing Originals (Facsimile/ Internet Fax) in the Operating Instructions (For Basic Operations) of provided booklet. Press the Fax key. Select “More Menus”. Select “Mail Box”. Select “Polled”. Enter the mailbox password (4-digit), and then select “OK”. -
Page 64: Printing A Received Confidential Document
Character ID Numeric ID Pages Time Received MMM-dd 15:00 -PANASONIC - ***** - Explanation The date and time at which the confidential reception report is printed. The number automatically assigned to a confidential document in the order of its reception (001 to 999). - Page 65 Printing a Received Confidential Document To print a received confidential document, follow the steps below: After a received confidential document is printed, it is deleted from the mailbox. Press the Fax key. Select “More Menus”. Select “Mail Box”. Select “Print File”. Enter the mailbox password (4-digit), and then select “OK”.
-
Page 66: Deleting A Confidential Document
Deleting a Confidential Document To delete a confidential document in a mailbox, follow the steps below: Press the Fax key. Select “More Menus”. Select “Mail Box”. Select “Delete File”. Enter the mailbox (4-digit) password, and then select “OK”. Documents in the mailbox are deleted. If you make a mistake, select “Clear”... - Page 67 Memo...
-
Page 68: Sub-Addressing Communication
• A center machine supporting a memory feature is required on the fax network to implement sub- addressed communications. For more details, contact your local authorized Panasonic dealer. • In a sub-addressed communication, the sub-addressing information must be checked between the sender, and the receiver beforehand (sub-address is limited up to 20 digits). -
Page 69: Sub-Addressed Transmission Using Address Book
Sub-Addressed Transmission using Address Book To transmit a document by sub-addressing, follow the steps below: This feature cannot be used when dialing from the external telephone. Refer to Talking to the Remote Party Before Transmission (see page 25). Place Original(s). Refer to Placing Originals (Facsimile/Internet Fax) in the Operating Instructions (For Basic Operations) of provided booklet. - Page 70 Select a destination. Refer to Entering a Destination (see page 16). Choose an address, except the address registered for Relayed Transmission. Press the Start key. Sub-Addressed transmission starts.
-
Page 71: Sub-Addressed Transmission Using Manual Dialing
Sub-Addressed Transmission using Manual Dialing To enter a sub-address directly from the keypad, follow the steps below: This feature does not work when dialing from the external telephone. Refer to Talking to the Remote Party Before Transmission (see page 25). If you use sub-addressed transmission frequently, the sub-address can be pre-programmed into the address book to facilitate future communications. -
Page 72: Password Communication
To use Password Transmission, you must set a 4-digit transmission password in advance. The password must be shared with the other compatible Panasonic machine(s). If the transmission password in your machine does not match the Transmission password in other compatible Panasonic machine(s), the transmission will fail. -
Page 73: Password Transmission
Password Transmission To utilize the password-protected transmission feature, follow the steps below: You must set the password (4-digit) in the “43 Password-Transmit” setting in advance, in Function Parameters (Fax/Email Settings> Fax Parameters). Place Original(s). Refer to Placing Originals (Facsimile/Internet Fax) in the Operating Instructions (For Basic Operations) of provided booklet. -
Page 74: Setting Password-Protected Transmission
Setting Password-Protected Transmission To always utilize password-protected transmissions, follow the steps below: You must program a password (4-digit) in advance. Press the Function key to open the Function Parameters screen. Select “Fax/Email Settings”. Select “04 Key Operator Mode”. Enter the key operator mode Password, and then select “OK”. - Page 75 Select “On” or “Off”, and select “OK”. Press Reset key to return the machine to the initial screen of the current active mode. You can change the setting temporarily by using the “Password XMT” in the “More Menus” for each transmission (see page 73).
-
Page 76: Printing Communication Journal
Probably you have used for this facility in your organisation. Yours sincerely, P.J. CROSS Group Leader - facsimile Research End = MMM-dd 15:00 Pages Duration 001/001 00:01:30 001/001 00:01:25 000/001 00:01:45 000/001 00:00:00 - PANASONIC - - ****** - 201 555 1212 - ******* 18th January, 1972. - Page 77 Place Original(s). Refer to Placing Originals (Facsimile/Internet Fax) in the Operating Instructions (For Basic Operations) of provided booklet. Press the Fax key. Select “More Menus”. Select “Select Mode” Select “Comm. Journal”. Select “On”, “Off”, or “Inc Only”, and then select “OK”. Select to print a Communication Journal after each transmission.
-
Page 78: Transmitting A Document With A Cover Sheet
(Fax/Email Settings > Fax Parameters). To modify the standard setting, refer to Fax/Email Settings in the Operating Instructions (For Function Parameters) on the provided CD-ROM. ***** Facsimile Cover Sheet ***** MMM-dd-yyyy 15:00 Message To: SALES DEPT. Message From: PANASONIC 201 555 1212 Page(s) Following This Cover Page Text Area 60 characters for 1 line... - Page 79 Place Original(s). Refer to Placing Originals (Facsimile/Internet Fax) in the Operating Instructions (For Basic Operations) of provided booklet. Press the Fax key. Select “More Menus”. Select “Select Mode”. Select “Cover Sheet”. Select “On”, and then select “OK”. Select to attach a cover sheet.
-
Page 80: Chapter 4 Fax Reception
Chapter 4 Receiving Documents There are two ways to receive fax calls on this machine. Automatic Reception The machine receives documents automatically. The machine answers all incoming calls (including voice calls). Manual Reception When your telephone rings, lift the handset of the external telephone. If you hear a beep from the phone, it means someone wants to initiate a fax call. -
Page 81: Manual Reception
Manual Reception When your machine is set to this mode, it will not receive documents automatically. After you answered the call, you can receive a fax. • Set “17 Receive Mode” to “Manual” in Function Parameters (Fax/Email Settings > Fax Parameters). •... -
Page 82: Print Reduction And Duplex Recording
Print Reduction and Duplex Recording Print Reduction This machine can use Letter, Legal, A4, B4 or A3 size plain paper for recording. Sometimes, oversized documents sent to you by the other parties cannot be printed within a single page. If this happens, the document will be divided into separate pages. -
Page 83: Duplex Recording
When Print Reduction is Set to “Fixed” With “24 Print Reduction” set to “Fixed” in Function Parameters (Fax/Email Settings> Fax Parameters), the machine prints all incoming documents reduced at the reduction ratio pre- programmed in the “25 Reduction Ratio” in Function Parameters (Fax/Email Settings> Fax Parameters). -
Page 84: Substitute Memory Reception
Substitute Memory Reception When your machine cannot print an incoming document for some reasons, such as when it runs out of paper/toner, or paper has jammed, the received document is saved in memory automatically. This feature is called “substitute memory reception”. When a received document is saved in memory as substitute memory reception, the message “Message in Memory”... - Page 85 Memo...
-
Page 86: Convenient Reception Features
Convenient Reception Features This machine supports certain convenient-to-use reception features. Program these features as required. Selective Reception Your machine has a special feature, Selective Reception, which can prevent receiving of unnecessary documents, (i.e. junk fax, direct mail, etc.). Before receiving the document, the last 4 digits of the ID Number received from the sending machine will be compared with the last 4 digits of the telephone number programmed in each Address Book station. -
Page 87: Fax Forwarding
Fax Forwarding This feature allows all incoming faxes to be forwarded to the station registered in the address book. It is convenient when you want to receive fax calls at a location away from your office (such as your home) at night, or during holidays. -
Page 88: Password-Reception
To use Password Reception, you must set a 4-digit receiving password in advance. The password must be shared with the other compatible Panasonic machine(s). If the password in your machine does not match the receiving password in the other compatible Panasonic machine(s), the reception will fail. - Page 89 Memo...
-
Page 90: Receive To Memory
Receive to Memory What is Memory Reception? Memory reception allows all incoming documents to be stored in memory, instead of printing them onto the output tray. If the memory reception feature has been set to “On” in Function Parameters, the message Receive to Memory appears on the touch-panel display. -
Page 91: Programming Memory Reception
Programming Memory Reception To enable memory reception, follow the steps below: Press the Fax key. Select “More Menus”. Select “Select Mode”. Select “Receive to Memory”. Select “On”, and then “OK”. Memory reception is programmed. Select to enable memory reception. Select to cancel memory reception. -
Page 92: Printing A Document Received In Memory
Printing a Document Received in Memory When a document is received in memory, a message is displayed. To print a document received in memory, follow the steps below: Press the Fax key. Select “More Menus”. Select “Select Mode”. Select “Receive to Memory”. Select “Print”, and then “OK”. - Page 93 If a password is pre-programmed, enter the password (4-digit), and then select “OK”. This screen appears when the password is set in “37 Receive to Memory” in Function Parameters (Fax/Email Settings> Fax Parameters). If you make a mistake, select “Clear” to delete entries one digit at a time.
-
Page 94: Chapter 5 Internet Fax
Chapter 5 What is Internet Fax? What is Internet Fax? It is a feature whereby scanned documents are transmitted to Internet Fax or to computers as Email. Internet Fax communicates via an Intranet, or the Internet without using the telephone line. This machine can be connected to 10Base-T/100Base-TX Ethernet LAN (local area network). -
Page 95: Using The Internet Fax Feature
Routing You can forward fax documents, or Email to an Internet Fax, or networked computers. Refer to Inbound Routing (see page 97). Transmitting to a Fax via a Relay Station (Relay Transmission) Email can be transmitted as normal fax documents via a relay station. Email may also be broadcasted. -
Page 96: What Internet Fax Can Do
What Internet Fax Can Do This section introduces the functions of the Internet Fax feature. The Internet Fax features does not only offer sending, and receiving Email but forwarding fax documents via a telephone line, or broadcasting them via a relay station. Sending Email A scanned document can be transmitted to an Internet Fax, or to a remote computer as an Email file attachment. -
Page 97: Receiving Email
Receiving Email When this machine receives Email from an Internet Fax or from a computer, it starts printing the Email automatically. If the Email has an attached file in a format that is not supported by the machine, an error message is printed to alert you that the machine cannot print the Email. Internet FAX For instructions on how to receive Email, refer to Receiving an Email (see page 128). -
Page 98: Relay Transmission
PC using your current email application through a Relay Station. To convert applications, such as spread sheet, into a TIFF-F format file, however, requires you to first download the software (TIFF Converter) from the web site listed below. http://panasonic.co.jp/pcc/en/ Ex. Internet Relay Transmission Internet Fax Server When requesting Relay Transmission from a computer, it is necessary to transmit the file in the TIFF-F format. -
Page 99: Message Delivery Notice (Mdn)
Message Delivery Notice (MDN) If the sender (Internet Fax) desires a processing confirmation, it must request a Message Delivery Notice when sending the message itself to a device supporting this notification function. Several Email applications such as Eudora, and Outlook Express support and are able to respond to the delivery confirmation notification sent from the Internet Fax. -
Page 100: Direct Internet Fax Transmission (Using Direct Smtp)
Direct Internet Fax Transmission (Using Direct SMTP) Email is normally distributed by an SMTP mail server using Simple Mail Transfer Protocol (SMTP). In common cases only Email, and web service from the Internet are permitted into the corporate intranet, and corporate network administrators are extremely unwilling to open the firewall for other incoming services, since each opened path represents additional potential security threats. - Page 101 Memo...
-
Page 102: Tips For Internet Fax
Tips for Internet Fax Your machine uses the same communication protocols as Email: the Simple Mail Transfer Protocol (SMTP). The differences from a standard G3 fax communication using the Public Switched Telephone Network (PSTN) are as follows. Differences between Internet Fax and Fax Stations on the Telephone Line Fax stations connected to the telephone line transmit data over a telephone line at their own expenses. -
Page 103: Dual Port Communication
Image data in TIFF-F format has been attached to this email. You can download the TIFF-F Image Viewer from the following URL addresses. http://panasonic.co.jp/pcc/en/ If the document(s) being sent in the PDF format, the following message is shown instead. “Image data in PDF format has been attached to this email.”... -
Page 104: Preparing To Use Internet Fax
The email address format can be same as your regular email address. If your email address is popuser001@panasonic.com, your machine’s email address can be Internet_Fax@panasonic.com. By default the machine requires the IP Address of the DNS Server and prompts you to enter the SMTP Server Name. - Page 105 Sending Email (This machine Other Internet Fax machine or PC) This machine Other Internet Fax machine or PC Internet FAX SMTP Server POP Server Internet FAX...
-
Page 106: Sending An Email Procedure
Sending an Email Procedure The basic operation to send an Email is as follows: Email Addresses and Fax Stations can be mixed while entering the destinations. Email would be transmitted to an Email Address destination, while normal fax documents would be transmitted to a fax destination. - Page 107 Select “Email”. Enter an Email Address by selecting “Keyboard”, or select a pre- programmed Email Address. Refer to Entering an Email Address (see page 108). Refer to Using Cc, Bcc and From (see page 116). Press the Start key. The original(s) are stored into memory with a file number.
-
Page 108: Entering An Email Address
Entering an Email Address Email Addresses can be entered by any of the following methods: Using the Onscreen Keyboard Using the Address Book Use a Key Name (See page 110) Search through “Favorites” (See page 110) Use Group Dialing (See page 111) Searching for Destinations Search through the Address Book (Local Search) (See page 112) (Search by the first letter of a Station Name) -
Page 109: Using The Onscreen Keyboard
The default domain is automatically added to the Email Address when the Email is sent. Input characters: abc Sending Email Address: abc@panasonic.com Use the Domain List When you enter an Email Address, you can use the Domain List if you pre-programmed the domain name you wish to enter. -
Page 110: Using The Address Book
Using the Address Book Use a Key Name If an Email Address is pre-programmed in the address book, it can be selected by using a Key Name. To use the address book, it is necessary to have Email Addresses added to the address book in Function Parameters. - Page 111 Use Group Dialing For transmission to multiple destinations with group dialing, follow the steps below. To use a Group button, group dialing needs to be programmed in Function Parameters. Refer to Setting for Group Dialing (see page 179). Follow the step 1 and 2 on page 106. Select “Program/Group”.
-
Page 112: Searching For Destinations
Searching for Destinations Search through the Address Book (Local Search) of a remote station programmed in the address book can be searched by its Email Address entry name Follow the step 1 and 2 on page 106. Select “Search”. Enter the character string you want to search for. - Page 113 Search through the LDAP server (LDAP Search) LDAP search is a feature that searches through the address book on an LDAP Server on a network, for Fax Numbers, or Email Addresses. To find out whether the LDAP search feature works in your particular environment, contact your network administrator.
- Page 114 Choose a destination, and then select “OK”. Only one Email Address can be selected at a time. You can switch between the Email Addresses, and Fax Numbers list by selecting “Email” or “Fax Number” button on the screen. Select to scroll through the search results.
- Page 115 Memo...
-
Page 116: Using Cc, Bcc And From
Using Cc, Bcc and From When creating an Email, you have the option of setting Cc and Bcc as its destinations, and entering a subject. If the use of From has been enabled in Function Parameters, the machine can transmit an Email with Email Addresses entered in From other than its own Email Address. -
Page 117: Setting Cc And Bcc
Setting Cc and Bcc To set Cc and Bcc as Email destinations, follow the steps below: On the Email screen, select “Cc” or “Bcc”. (See page 107, and 116) Select an Email Address, and then select “Close”. For instructions on how to set an Email Address, refer to Entering an Email Address (see page 108). -
Page 118: Setting From Field
Setting From field The From field is preset in the Machine, you can change the From field by selecting “From” on the Email screen. To set From field, follow the steps below: If “145 Sender Selection” is set to “Valid”, you can preset up to 25 sender names. You can select from the sender list when sending an Email. -
Page 119: Setting Subject
Setting Subject Every time you send an Email, you can enter its subject manually. To enter a subject, follow the steps below: The Default Subject is preset if “21 Default Subject” has been set in Function Parameters (Fax/Email Settings> User Parameters). For programming instructions, refer to Fax/Email Settings in the Operating Instructions (For Function Parameters) on the provided CD-ROM. -
Page 120: Setting A File Type And A Filename
Setting a File Type and a Filename Documents can be scanned into a PDF, or TIFF format, and renamed as well. Internet Fax does not support the PDF format. If a document is transmitted to an Internet Fax with the PDF format, the Internet Fax at the receiving station would be unable to print the images, resulting in an error. - Page 121 Enter a filename, and then select “OK”. The filename can be up to 20 characters long. For instructions on using the onscreen keyboard, refer to Before Starting in the Operating Instructions (For Function Parameters) on the provided CD-ROM. If you make a mistake, select “Back Space” to delete one character at a time, or move the cursor to the beginning of the field, and then select Clear key to delete the entire...
-
Page 122: Emailing A Ledger-Sized Document
Emailing a Ledger-Sized Document Receiving stations may not receive large documents, it depends on their recording capability (paper size). If you want to transmit a document larger than A4/Letter, such as a Ledger size, by using the Internet Fax feature, check the paper size capability of the receiving station before transmission. If the receiving station is capable of receiving a Ledger-sized document, you can send the document without reducing its size. - Page 123 Select “Ledger Email XMT”. Select “On”, and then select “OK”. The document is transmitted at the same ratio scale as it has been scanned. The document is transmitted, reduced in size according to the setting of “141 LAN XMT Reduce” pre- programmed in Function Parameters (Fax/Email Settings>...
-
Page 124: Setting Message Delivery Notice (Mdn)
Setting Message Delivery Notice (MDN) To enable Message Delivery Notice feature, follow the procedures below. Standard setting of “173 Delivery Notice” can be changed in Function Parameters (Fax/Email Settings> Fax Parameters). For instructions on how to change the standard setting, refer to Fax/Email Settings in the Operating Instructions (For Function Parameters) on the provided CD-ROM. - Page 125 Set an Email Address. Refer to Entering an Email Address (see page 108). Press the Start key. The original(s) are stored into memory with a file number. Then starts email transmission. When the Email is opened at the receiving station, a delivery notice will be Emailed automatically.
-
Page 126: When E-Mail Transmission Fails
When E-mail Transmission Fails If the Email fails to reach its destination, an error mail is returned from the mail server, and is printed on the machine. The error mail includes an error message, and the image of the first page of the transmitted document to alert the sender the conditions of the failure. -
Page 127: Using A Completion Notice
The Completion Notice feature notifies your computer when the sending Email, or Fax Transmission is completed. Before using this function, install the Panasonic Document Management System and PCL Printer Driver, and then set up each software. Refer to Completion Notice in the Operating Instructions (For Setting Up) of provided booklet. -
Page 128: Receiving An Email
Receiving an Email If the machine connects to a network as a POP Client, it can receive Email either automatically or manually. The Email reception method from a POP Server varies depending on the POP settings programmed in Function Parameters. Configure to Receive Email Program the following parameters in Function Parameters (Fax/Email Settings>... - Page 129 Receiving Email Manually With “147 Auto POP Receive” set to “Invalid” in Function Parameters (Fax/Email Settings> Fax Parameters), Email is received manually. With POP acquisition interval set between 1 and 60 minutes, queries are transmitted to the POP Server periodically to check for new mail, and the number of the incoming Email messages on the server appears on the display.
-
Page 130: Receiving Email With The Program Key
Receiving Email with the Program Key This function allows others to share your machine to retrieve their Emails from the POP Server by pre- programming their POP User Names, and POP Passwords into the Program Keys. They will be able to retrieve their Emails by simply pressing the associated Program Key. - Page 131 Memo...
-
Page 132: Receiving Email Manually
Receiving an Email on a Computer This section explains how to receive Emails transmitted from the machine to a computer, and also explains the Emails forwarded from the machine to a computer. Receiving Email on Your Computer A sample screen shot of a mailer that has received Email from an Internet Fax is shown below. For your reference, the above example is from Outlook Express Inbox running under Microsoft Windows. -
Page 133: Opening Email
You can download the TIFF-F Image Viewer into your PC from the following URL address; http://panasonic.co.jp/pcc/en/ License agreement of Panasonic’s TIFF-F Image Viewer application You must carefully read the license agreement before installing the TIFF-F Viewer application on your PC. If you do not agree to all the terms of this agreement, do not use the software and destroy all of the copies thereof. -
Page 134: Inbound Routing
G3 Fax machine(s) over the telephone line. For more details on the types of fax that work with routing, contact your local authorized Panasonic dealer. If no sub-address is specified, your machine tries to match the originating fax machine’s Numeric ID (TSI) with the TSI routing within its auto dialer, and will route the documents to the corresponding stations Email Address(s) and/or telephone number(s). -
Page 135: Routing Setup Flow
Routing Setup Flow Before the inbound routing feature can be used, the Function Parameters and Address Book programming is required. Configure your machine for Internet Fax (see page 104) Set required parameters to “Valid” in Function Parameters To use sub-addressing...Set “152 Sub-Addr Routing” to “Valid” in Function To use a numeric ID ...Set “153 TSI Routing”... -
Page 136: Settings For Inbound Routing
Settings for Inbound Routing To use the inbound routing feature, program the following parameters to meet the type of routing in Function Parameters (Fax/Email Settings>Fax Parameters): Routing type Routing by sub- addressing Routing by the numeric ID of a sending fax station To set the From field To program printout of received documents... -
Page 137: Programming The Address Book For Inbound Routing
Programming the Address Book for Inbound Routing To use the inbound routing feature, program the transferring destination in the address book. For instructions on how to register the address book, refer to Address Book (see page 168). Press the Function key. Select “Fax/Email Settings”. - Page 138 Enter a Key Name, and then select “OK”. Key Names are used to select the destinations on the touch-panel display. For instructions on using the onscreen keyboard, refer to Before Starting in the Operating Instructions (For Function Parameters) on the provided CD-ROM. Select “IFax”, and then select “OK”.
- Page 139 To enable routing by a numeric ID, enter a numeric ID, and then select “OK”. This screen appears when “153 TSI Routing” has been set to “Valid” in Function Parameters (Fax/Email Settings>Fax Parameters). Press Reset key to return the machine to the initial screen of the current active mode.
-
Page 140: Using The Relay Feature
Using the Relay Feature What is the Relay Feature? From your PC or your machine, you can send documents to the End Receiving Station(s) via an Internet Relay Station. After the Relay Station completes its transmission to the End Receiving Station, your PC or your machine receives a COMM. -
Page 141: Relay Station
Relay Station • Sends Email received from the initial sending station to an end receiving station (a fax station connected to the telephone line: Ex: Stockholm/Berlin/Rome) as a fax document. If multiple end receiving stations are specified, the Email is broadcasted to them. •... -
Page 142: Setting Up A Relayed Transmission Network
• Add Relay Station and End Receiving Station to Address Book by referring Sample Entries in Address Book (see page 144, and 145) and Adding End Receiving Stations for Relayed Transmission (see page 148, and 149). To set up relayed transmission network properly, consult authorized Panasonic dealer. -
Page 143: Example Of A Relayed Transmission Network
• A single relayed transmission request made from the initial sending station (New York) allows a document to be transmitted to the end receiving stations (Stockholm, Rome, Tokyo, Hong Kong, Sydney and others) via the relay stations (London, Singapore). New York Email Address: ifax@newyork.panasonic.com Host Name: newyork Relay XMT Password: usa-rly New York London Email Address: ifax@london.panasonic.co.uk... -
Page 144: Sample Entries In Address Book
Station Name New York Stockholm Singapore Tokyo Singapore Relay Rome Hong Kong Sydney London Relay 212 111 1234 ifax@newyork.panasonic.com newyork usa-rly Email Address/Telephone Number ifax@london.panasonic.co.uk 46 8 111 1234 ifax@singapore.panasonic.co.sg 81 33 111 1234 uk-rly@london.panasonic.co.uk sg-rly@singapore.panasonic.co.sg 39 6 111 1234... - Page 145 Table 3: Relay Station (Singapore) Telephone number 65 111 1234 Email Address (SMTP) ifax@singapore.panasonic.co.sg Host name singapore Relay XMT password sg-rly Station Name London ifax@london.panasonic.co.uk Stockholm 46 8 111 1234 New York ifax@newyork.panasonic.com Tokyo 81 33 111 1234 London Relay uk-rly@london.panasonic.co.uk...
-
Page 146: Function Parameters For Relay Stations
Register up to 10 Domain Names (up to 30 characters) that your machine will accept Relayed Transmission. Requests to relay a message to another G3 fax machine via PSTN. Ex: Registered Domain Names (01): panasonic.co.jp (02): abc.iFax.com (03): panasonic.com To increase network security by protecting from third party access to the relay station. -
Page 147: Settings For Initial Sending Station
Item Required function Parameters User Parameters “ 37 Manager’s Email Addr For more Function Parameters details, refer to Fax/Email Settings in the Operating Instructions (For Function Parameters) on the provided CD-ROM. Settings for Initial Sending Station To use the machine as an initial sending station, program the following parameters in Function Parameters: Item Required function Parameters... -
Page 148: Adding End Receiving Stations For Relayed Transmission
Adding End Receiving Stations for Relayed Transmission You can add end receiving stations to the Address Book by the following procedure. If broadcasting to multiple end receiving stations is required, use group dialing. (See page 179) “140 LAN RLY XMT Request” must have been set to “Valid” in Function Parameters (Fax/Email Settings> Fax Parameters) to have a LAN relayed transmission request pre-programmed in the address book. - Page 149 Before you select a relay station, you must pre-program an Email address with Relay XMT Password as the user name. As follows; “Relay XMT Password “@” the host and domain names registered with the DNS server” Ex: sg-rly@singapore.panasonic.co.sg...
- Page 150 Relayed Transmission From Internet Fax Documents can be transmitted to fax stations on the telephone line via Internet Fax relay stations. Internet Fax Mail Server Place Original(s). Refer to Placing Originals (Facsimile/Internet Fax) in the Operating Instructions (For Basic Operations) of provided booklet. Press the Fax key.
- Page 151 Select an end receiving station to which the relay station relays. For instructions on how to enter destinations, refer to Entering a Destination (see page 16). Multiple stations can be programmed as end receiving stations. Press the Start key. Email is sent to the relay station, together with the fax number of the end receiving station.
-
Page 152: Relayed Transmission From Pc
Relayed Transmission From PC Using your Email application, you can send any document(s) from your PC as a TIFF-F attachment to one or multiple G3 Fax machines automatically through the Internet Relay Station. Mail Server The Internet Relay Station (your machine) must be properly setup with all the required parameters. Internet Relay Station Internet... -
Page 153: Requesting A Relayed Transmission From A Computer
Requesting a Relayed Transmission from a Computer Requesting a relayed transmission, fill the field in your mailer that corresponds to the destination (To) in the following manner: Sample entry: sg-rly#8133111234@singapore.panasonic.co.sg Entry example sg-rly Enter the Relay XMT Password. (It must match the Relay XMT Password pre- programmed in the relay station.) -
Page 154: Convenient Application Software
Internet Fax-ready TIFF format using the TIFF converter. Normally, select 200 dpi as a resolution for the conversion. When you are sending a detailed graphic documents to a Panasonic Internet Fax, you can specify 600dpi resolution for better clarity. TIFF Converter Mail Linking Program A TIFF Converter Mail Linking Program is an add-in program for the TIFF Converter that links the Email client for MAPI to the TIFF converter for the Internet FAX. - Page 155 Memo...
-
Page 156: Result Of Relayed Transmission
Recorded name in the Address Book, direct dialing number, or Email Address. End=MMM-dd 15:00 (10) Pages Duration 001/001 00:00:15 001/001 00:00:15 - PANASONIC - - ****** - 201 555 1212 - ********** Explanation... - Page 157 Item Number of pages transmitted or received (10) Duration of Communication Fax Relay Log Email Each time a relay station completes a transmission, it Emails a Fax Relay Log to the administrator computer that is pre-programmed in “37 Manager’s Email Addr”. Email address of the sender’s Internet Fax or PC.
-
Page 158: Useful Terms To Remember
If you wish to enable the Direct Internet Fax Transmission on your Internet Fax, a static (reserved by a Network Administrator) IP address and configurations must be used instead of the DHCP operation, contact Authorized Panasonic dealer. (See page 100) SMTP Authentication Since the Internet debuted as an electronic infrastructure of global dimensions, the communications equipment market has been growing at a phenomenal rate. - Page 159 Memo...
-
Page 160: Displaying A Communication Reservation File List
Chapter 6 Editing a Communication Reservation File Your machine has a document image memory which enables you to reserve memory transmission, memory deferred transmission, memory polling and so on. After reserving the communications in memory, you may need to change the settings of the communication(s) while it is still in memory. -
Page 161: Reading The Reservation Report
[pana03 10:30 [pana01 ] [pana03 [pana_Lanrelay ] - PANASONIC - ***** - 201 555 1212 - ************** Explanation If the file is now being executed, an “*” is indicated on the left of the file number. Communication type (for example, polled transmission, polling reception and memory transmission). - Page 162 Editing Communication Reservations To change the start time and/or stations in a communication file, follow the steps below. Communication reservations for the documents being transmitted cannot be modified. Press the Fax key. Select “More Menus”. Select “Edit File Mode”. Select “Change Time/Stn”. Select to display a communication reservation file to be...
- Page 163 Edit the destination. To delete a destination(s), select “Delete”, and then go to step 9. To add destination(s), select “Add”, and then go to step 8. Select the destination, and then select “OK”. When the change completes, select “OK”. To return to standby, press the Reset key.
- Page 164 Deleting a Communication Reservation File To delete a file in memory, follow the steps below. Your machine cannot delete the file while it is being sent. Press the Fax key. Select “More Menus”. Select “Edit File Mode”. Select “Delete File”. Select to display a communication reservation file to be...
- Page 165 Printing a Communication Reservation File Communication reservation files stored in memory can be printed. Your machine cannot print the document while it is being sent. Press the Fax key. Select “More Menus”. Select “Edit File Mode”. Select “Print File”. Select to display the communication reservation file you want to print.
- Page 166 Adding Documents to a Communication Reservation File Documents can be added to a communication reservation file stored in memory. Your machine cannot add the document into the file while it is being sent, waiting to redial, or trying to send the incomplete file.
- Page 167 Resending an Incomplete Document With “31 Incomplete File Save” set to “Valid” in Function Parameters (Fax/Email Settings> Fax Parameters), documents that could not be transmitted due to a communication error (such as the remote station busy or not responding) can be stored in memory as incomplete files. This section explains how to resend incomplete files stored in memory.
-
Page 168: Address Book
Chapter 7 Address Book What is Address Book? With the Fax Numbers, or Email Addresses of remote stations programmed in the address book, the stations can be selected with a single operation on their button appearing on the touch-panel display. Name tab Remote Station button... - Page 169 Adding a Fax Number into the Address Book To add a fax number to the address book, follow the steps below: For instructions on how to edit the station in the address book, refer to Editing Address Book (see page 173). For instructions on how to delete the station from the address book, refer to Deleting a Destination from Address Book (see page 174).
- Page 170 Enter Key Name, and then select “OK”. Key Names are used to select destinations on the touch-panel display. (Up to 15 characters.) For instructions on using the onscreen keyboard, refer to Before Starting in the Operating Instructions (For Function Parameters) on the provided CD-ROM. Select whether to add the station to “Favorites”.
-
Page 171: Adding An Email Address To Address Book
Adding an Email Address to Address Book To add an Email Address to the address book, follow the steps below: For instructions on how to edit the station in the address book, refer to Editing Address Book (see page 173). For instructions on how to delete the station from the address book, refer to Deleting a Destination from Address Book (see page 174). - Page 172 Enter a Key Name, and then select “OK”. Key Names are used to select destinations on the touch-panel display. For instructions on using the onscreen keyboard, refer to Before Starting in the Operating Instructions (For Function Parameters) on the provided CD-ROM. Select “IFax”, and then select “OK”.
-
Page 173: Editing Address Book
Editing Address Book To edit the station in the address book, follow the steps below: Press the Function key. Select “Fax/Email Settings”. Select “00 Address Book”. Select “03 Modify Station”. Select the station you want to edit, and then select “OK”. Select the same button again to cancel a choice. - Page 174 Deleting a Destination from Address Book To delete a remote station from the address book, follow the steps below: Press the Function key. Select “Fax/Email Settings”. Select “00 Address Book”. Select “04 Delete Station”. Select the station you want to delete from the address book, and then select “OK”.
-
Page 175: Printing The Address Book List
Printing the Address Book List To print the address book list, follow the steps below: The address book list can also be printed by selecting “Print Out” in “More Menus” (see page 196). For more details about items in the address book list, refer to Reading Address Book List (see page 197). Press the Function key. -
Page 176: Program Keys
Program Keys What is Program Keys? There are three ways to use the program key, as follows: Using for Program Dialing You can set communication sequences, or destinations which you often use. Using for Group Dialing Multiple destinations can be selected from the address book, and pre-programmed on a single program key for group dialing. - Page 177 Setting for Program Dialing To program a communication feature on program key, follow the steps below: For instructions on how to edit pre-programmed station, refer to Editing Address Book (see page 173). For instructions on how to delete pre-programmed station, refer to Deleting a Destination from Address Book (see page 174).
- Page 178 Program each desired feature. Deferred Communication Transmit (See page 52) Polling (See page 54) Polling (See page 56) Advanced Communication MailBox (See page 60) Sub Address Transmit (See page 68) Lan Relay XMT (See page 150) Press the Start key. The program dial is programmed.
-
Page 179: Setting For Group Dialing
Setting for Group Dialing To program multiple destinations on program key, follow the steps below: For instructions on how to edit pre-programmed station, refer to Editing Address Book (see page 173). For instructions on how to delete pre-programmed station, refer to Deleting a Destination from Address Book (see page 174). - Page 180 Select the destinations to be programmed, and then select “OK”. The group dialing is programmed. Press Reset key to return the machine to the initial screen of the current active mode.
- Page 181 Editing a Group Dialing To edit a group dialing, follow the steps below: Press the Function key. Select “Fax/Email Settings”. Select “01 Program Keys”. Select “03 Modify Group Dial”. Select the Group Dial button you want to edit, and then select “OK”. Select the same button again to cancel a choice.
- Page 182 Select the destination to be programmed, and then select “OK”. Press Reset key to return the machine to the initial screen of the current active mode.
- Page 183 Deleting the Program Key setting To delete a program dialing, or group dialing destination, follow the steps below: Press the Function key. Select “Fax/Email Settings”. Select “01 Program Keys”. Select “04 Delete Program/GRP”. Select a program Key, and then select “OK”.
-
Page 184: Printing The Program List
Printing the Program List To print the program list, follow the steps below: The program list can also be printed by selecting “Print Out” in “More Menus” (see page 198). For more details about the items in the program list, refer to Reading Program List (see page 199). To program multiple destinations, each destination must be programmed in advance. - Page 185 Programming Email Manual Reception on Program Keys When this machine is connected to a POP Server, POP Account name and passw machine’s one can be programmed for a program key to receive Emails. To enter an Email Address and a password, follow the steps below: If you leave a password blank in Step 8, a password prompt window will appear upon POP reception.
- Page 186 Enter a key name (program button name), and then select “OK”. Enter the password, and then select “OK”. Select “Invalid” or “Valid”, and then select “OK”. Invalid Select to leave Email on the POP Server after it has been received. Valid Select to delete Email from the POP Server...
- Page 187 Memo...
-
Page 188: Chapter 8 Reading Reports/Lists
Chapter 8 Transaction Journal The “Journal” is a record of the last 200 transactions (a transaction is recorded each time you send or receive a document). It is printed automatically after every 200 transactions, or you can print or view it manually by using the following procedure. -
Page 189: Viewing Communication Results On Touch-Panel Display
Viewing Communication Results on Touch-Panel Display To view the communication results on the touch-panel display, follow the steps below: Press the Fax key. Select “More Menus”. Select “Print Out”. Select “Journal”. Select “XMT Only (View)” or “All (View)”. Communication results will be displayed. XMT Only (View) Select to view only the transmission result. -
Page 190: Reading Transaction Journal
00:02:14 00:00:07 TEL XMT 00:00:16 TEL XMT << Continue >> (13) -PANASONIC - ***** - (15) The date and time at which the Transaction Journal printed. Printout time. Journal number. “OK” indicates that the communication was successful. “Busy” indicates that the communication has failed because of busy line. - Page 191 Item Pages Number of pages transmitted or received. The 3-digit number is the number of pages successfully transmitted or received. When the documents are stored into the memory, two 3-digit numbers will appear. The first 3-digit number represents the number of pages successfully transmitted.
-
Page 192: Communication Journal
Communication Journal This is a report that is printed at the end of each transaction to keep a record of the communication result. • A communication journal is printed when the “12 Comm. Journal (HOME)” has been set to “Always” or “Inc Only”... - Page 193 001 to 999 (When the communication is stored into the memory, a file number is assigned for each communication.) Sequential number of the Stations. ** Time 15:00 ******** End = MMM-dd 15:00 (10) Pages Duration 001/001 00:01:30 001/001 00:01:25 000/001 00:01:45 000/001 00:00:00 - PANASONIC -...
- Page 194 Item Communication result Key name or Recorded name in the Address Book, direct dialing number, or Email Address Number of pages transmitted or received (10) Duration of Communication “OK” indicates that the communication was successful. “Busy” indicates that the communication has failed because of busy line.
- Page 195 Memo...
-
Page 196: Printing Address Book List
Address Book List This section explains how to print, and read the address book list. Printing Address Book List To print an address book list, follow the steps below: The address book list can also be printed by programming “Fax/Email Settings> Fax Parameters” in Function Parameters. -
Page 197: Reading Address Book List
Routing TSI Jonesb@abcdefg.com 201 555 1212 201 555 3156 +1 201 123 4567 201 555 3156 212 555 1234 Panafax1@Panasonic.com.co.jp +81 03 5251 1234 Panafax2@Panasonic.com.co.jp +81 0467 5251 1234 -PANASONIC - ***** - Explanation The first letter of station name recorded in your machine. -
Page 198: Printing Program List
Program List This section explains how to print, and read the program list. Printing Program List To print the program list, follow the steps below: The program list can also be printed by programming “Fax/Email Settings> Fax Parameters” in the Function Parameters. -
Page 199: Reading Program List
Delete Email ----- Delete Email Group ----- [PANAFAX -PANASONIC - ***** - Explanation Key name. Up to 15 characters “Group” indicates that the Program key is programmed as a group key. “POP” indicates that the Program key is programmed as an Email Manual Reception key. -
Page 200: Printing Fax Parameter List
Fax Parameter List This section explains how to print, and read the fax parameter list. Printing Fax Parameter List To print the fax parameter list, follow the steps below: Press the Fax key. Select “More Menus”. Select “Print Out”. Select “Fax Parameter List”. The fax parameter list will be printed. -
Page 201: Reading Fax Parameter List
Description Selection Current setting Standard setting Changed setting Selection (STD Fine S-Fine) -PANASONIC - ***** - Explanation Parameter number. “(HOME)” means home position setting. Selection. “----” indicates the code or password is not set. When the code or password is set, it is shown by asterisk(*). -
Page 202: Printing Individual Xmt Journal
Individual XMT Journal This section explains how to print, and read the individual XMT journal. The individual XMT journal is useful when saving send jobs, or checking the detailed information of the communication. Printing Individual XMT Journal To print the individual XMT journal, follow the steps below: Press the Fax key. -
Page 203: Reading Individual Xmt Journal
001/001 = 09:00:01 = 053 = Memory Transmission 0123456789 = 0001 = Std - PANASONIC Explanation The date and time when the individual XMT journal is printed. Journal number. “OK” indicates that the communication was successful. “Busy” indicates that the communication has failed because of busy line. - Page 204 Item Duration File No. Mode Destination Received ID (10) Resolution Explanation Duration of the communication. File number. Communication mode. Email address or fax number of the remote station. Received ID of the fax. Resolution that the fax was transmitted.
- Page 205 Memo...
-
Page 206: Chapter 9 Solving Problems
Chapter 9 Tips for Solving Problems If you encounter the problems, please check following items. Problem Symptom While A document does not feed, or sending multiple pages are fed at the same time. Does not stamp. The verification stamp image appears too light. - Page 207 Problem Symptom While Paper out receiving Paper jam Paper does not feed. Paper is not exited at the end of a print job. The automatic print reduction feature does not work. Communicat- No dial tone heard The machine won’t receive automatically Cannot send or receive Operation...
-
Page 208: Information Codes
Information Codes In the event of communication failures, Information Codes appear in the transmission result, or in the transaction journal. When an Information Code is displayed, take necessary action as recommended in the table below. For definitions of the Information Code not found here, refer to the User (U)/Jam (J)/Machine (E) Error Codes in the Operating Instructions (For Basic Operations) of provided booklet. - Page 209 Info. code Problem No confirmation from the receiving station for the previous page sent. 408/409 Remote side confirmation of previous page is illegible. Communication aborted by the transmitting side. Polling password does not match. No data from the transmitting side. Polling password does not match.
- Page 210 Info. code Problem Telephone line disconnected. 501/502/503/ Communication error occurred using the internal V.34 Modem. 540/541/542/ Communication error occurred 543/544 while transmitting. Telephone line disconnected. 552/553/554/ Communication error occurred while receiving. Sub-address transmission to a unit that has no Subaddress function.
- Page 211 Info. code Problem Cannot logon to the designated SMTP Server. Incomplete SMTP Protocol transmission. SMTP Server’s hard disk may be full. Page Memory Overflow occurred while receiving printing data. The paper size selected within your application to print is larger than the paper size loaded in the cassette(s).
- Page 212 Info. code Problem 800/814/816/ Unit was requested to relay a document or Confidential Communication but has no capability. Mailbox is full. The received sub-address is not pre-programmed in the address book. Memory overflow occurred while storing documents into memory for transmission. Action Check with the other party.
- Page 213 Memo...
-
Page 214: Power Failure
Power Failure Power Failure The fax display remains off for the duration of a power failure, and you cannot send or receive documents. Problem When a power failure occurs While a power failure persists When power recovers If a power failure occurs while scanning a document, the scan is canceled. Rescan the document when power recovers. -
Page 215: Checking The Telephone Line
Checking the Telephone Line If you do not hear a dial tone when the “Monitor” is selected after pressing Fax key, or the incoming call does not ring on your machine (No automatic receive), please check the telephone line by following the procedures below. -
Page 216: Chapter 10 Appendix
Chapter 10 Replacing the Verification Stamp To replace the verification stamp, follow the steps below: DZHT000027 (for USA and Canada) DZHT000004 (for other countries) Open the ADF Cover. Open the Inner Cover while holding the green-labeled tab. Lift up the ADF Tray. Open the Exit Guide while holding the green-labeled tab. - Page 217 Reinstall the Stamp Assembly.
-
Page 218: Index
Index Numerics 2-Sided Originals ... 32 Address Book ... 10, 18, 69, 110, 137, 144, 168 Address Book List ... 196 Automatic Reception ... 80 Basic Menu ... 11 Batch Transmission ... 44 Bcc ... 116, 117 Cc ... 116, 117 Communication Journal ... - Page 219 Search ...10, 20, 112 Selective Reception ...86 SMTP Authentication ...158 Sub-Address ...17, 68, 69, 71 Subject ...119 TIFF Converter ...154 TIFF Converter Mail Linking Program ...154 Transaction Journal ...188 Verification Stamp ...34, 216...
- Page 220 MACHINE, INCLUDING BUT NOT LIMITED TO, ANY IMPLIED WARRANTY OF MERCHANTABILITY OR FITNESS FOR A PARTICULAR PURPOSE. PANASONIC DIGITAL DOCUMENT COMPANY ASSUMES NO RISK AND SHALL NOT BE SUBJECT TO LIABILITY FOR ANY DAMAGE, INCLUDING, BUT NOT LIMITED TO DIRECT, INDIRECT, SPECIAL, INCIDENTAL OR CONSEQUENTIAL DAMAGES OR LOSS OF PROFITS SUSTAINED BY THE CUSTOMER IN CONNECTION WITH THE USE OR APPLICATION OF THIS PANASONIC MACHINE.