
Related Manuals for Hunter 44033-01 44272


Summary of Contents for Hunter 44033-01 44272
- Page 1 Owner’s Manual 5 MINUTE I N S T A L L A T I O N 5-1-1Programmable Weekdays-Saturday-Sunday Models 44272 44277 Form# 44033-01 20100511 ©2010 Hunter Fan Co.
-
Page 2: Table Of Contents
Additional Features . . . . . . . . . . . . . . . . . . . . . . . . . . . . . . . . . . . . . . . . . . . . . . . . . . . . . . . 3 2 Thermostat Assistance Troubleshooting and Support . -
Page 3: At A Glance
There is no need to program the thermosat at the wall where it is mounted to! Remove the thermostat from the backplate by gripping the sides firmly and pulling it straight off. This allows you to program the thermostat in comfort. - Page 4 3. Confirms completion of an action or returns you to the Home screen. 4. Allows access to the advanced features of the thermostat. 5. Moves you forward or backward while setting up features or schedules. 6. Adjusts time and temperature settings as well as moving up or down menu lists.
- Page 5 At A Glance Know Your Thermostat Schedule Save Away Done/ Back Next Home Menu ©2010 Hunter Fan Company...
- Page 6 2. HE/HG Switch - allows you to set your furnace to Gas/Oil or Electric, based on the type of system you have. 3. Allows your thermostat to operate your HVAC system* properly by indicating the system type that you have.
- Page 7 At A Glance Know Your Thermostat ©2010 Hunter Fan Company...
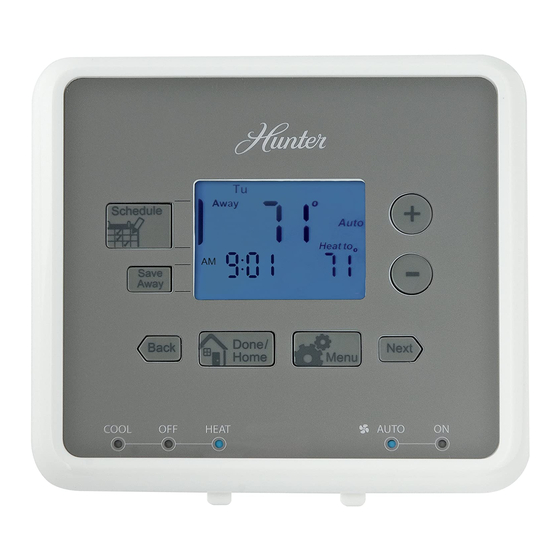
- Page 8 7. On when the current schedule period is running. 8. Indicates the current active schedule period. 9. Low battery warning, replace the batteries in the thermostat. 10. Indicates the fan is running when displayed. 11. Shows the current mode of the fan, Auto or On.
- Page 9 At A Glance Know Your Thermostat Filter Auto At Home Heat to 10:05 ©2010 Hunter Fan Company...
-
Page 10: Setup
Setup Setting Day and Time Once you install the batteries, the thermostat will prompt you to set the current day and time. 1. You will notice that “Mon” will be flashing at the top left of your screen. Use the... - Page 11 Schedule 12:00 Save Away Done/ Back Home Menu COOL HEAT ©2010 Hunter Fan Company Setting Day and Time Schedule Save Away Updated! Back Next COOL AUTO Setup Done/ Next Home Menu HEAT AUTO...
-
Page 12: Scheduling
Heat and Cool programs. • The scheduled temperature can be set in increments of 1°F (1°C). • After 15 minutes without a key press, the thermostat will return to the home display screen and save any changes you have made. -
Page 13: Default Schedule
Heat Temp: Cool Temp: Start Time: End Time: Heat Temp: Cool Temp: Start Time: End Time: Heat Temp: Cool Temp: ©2010 Hunter Fan Company Scheduling Home Heat Temp: F (21 Cool Temp: F (23 Heat Temp: F (21 Cool Temp:... - Page 14 “On” and then Scheduling. Note: If you do not wish to use the scheduling option on your thermostat, refer to page 20, step 2. 3. Monday thru Friday will be flashing on the screen. To proceed scheduling your weekdays, press .
-
Page 15: Setting Your Schedule
Menu COOL HEAT Mon Tu Th Fri Sa Su Schedule Save Away Done/ Back Home Menu COOL HEAT ©2010 Hunter Fan Company Setting Your Schedule Schedule Save Away Next Back AUTO COOL Mon Tu Schedule Away Asleep At Home Save... - Page 16 Set this temperature with your and hit Next 7. The thermostat will start this process again for “Asleep”. Repeat steps 1-5 to schedule the time and set the temperature for your sleep period. When finished pressed to get to “At Home”.
- Page 17 Th Fri Away Schedule Asleep At Home 8:00 4:30 Save Away Done/ Back Menu Home COOL HEAT AUTO ©2010 Hunter Fan Company Setting Your Schedule Mon Tu Schedule Away Asleep At Home 8:00 Save Away Done/ Next Next Back Home COOL...
-
Page 18: Temporary Temperature Change
Done/ Home Note: Temporary Temperature Change is not a permanent setting. Your thermostat will only run the new temperature until the next scheduled period change. After your thermostat changes to a new schedule set, your thermostat will forget the temporary setting and resume your existing schedule. - Page 19 Schedule At Home Heat to 10:05 Save Away Done/ Done/ Back Home Home Menu COOL HEAT AUTO ©2010 Hunter Fan Company Temporary Schedule Change Schedule At Home 10:05 Save Away Next Back COOL Next Scheduling Heat to Done/ Next Home...
-
Page 20: Turning Off Scheduling
Scheduling Turning Off Scheduling To turn off your schedule and have the thermostat permanently set to one temperature: 1. Press the button once. Schedule 2. Use the button to switch to Off and select 3. The screen will show “Updated!” and return you to the home screen. -
Page 21: Turning Off Scheduling
Back Home Menu COOL HEAT AUTO Schedule Save Away Updated! Done/ Back Home Menu COOL HEAT AUTO ©2010 Hunter Fan Company Turning Off Scheduling Schedule Save Away Done/ Done/ Next Back Home Home COOL HEAT Schedule 7:50 Save Away Done/... -
Page 22: Save Away
Scheduling Save Away The Save Away feature allows you to set a lower or higher temperature for time you will be away from your home outside of your normal Away schedule. This can include days you will be away for vacation, or a few hours away from your home. - Page 23 Home Menu COOL HEAT AUTO Schedule Save Away Updated! Done/ Done/ Back Home Home Menu COOL HEAT AUTO ©2010 Hunter Fan Company Save Away Schedule Save Away Done/ Next Back Home COOL HEAT Schedule Save Away Done/ Done/ Next Back...
-
Page 24: Features
Features Alerts This chapter will outline the various alerts the thermostat will report to you and how to respond to them. 1. Low Battery: This icon will appear when your batteries are starting to run low on power and should be changed to avoid system interruptions, (Figure 1) Change the batteries by gripping the sides of the thermostat firmly and pulling straight back, (Figure 1a). -
Page 25: Alerts
Save Away Done/ Back Home Menu COOL HEAT Schedule Save Away Done/ Back Home Menu COOL HEAT ©2010 Hunter Fan Company Next AUTO Schedule At Home Save Away Next Back AUTO COOL Features Alerts Filter Auto Heat to 7:15 Done/... - Page 26 Features Alerts 3. Auxiliary Heat: On multi-stage heat pumps this alert indicates your second stage heat is running. 4. Check System: Some heat pump systems are equipped with the ability to check system performance, indicated by the presence of an “L” wire attached to the backplate. This icon will flash on screen to alert the user that the heat pump is reporting a problem with the system.
- Page 27 Schedule Auto At Home Heat to Save Away Done/ Back Home Menu COOL HEAT AUTO ©2010 Hunter Fan Company Schedule At Home 7:15 Save Away Done/ Next Back Home COOL HEAT Features Alerts Auto Heat to Next Menu AUTO...
-
Page 28: Menu Options
Features Menu Options Under your Menu options you have the ability to reset your filter counter, change your day/time settings, and change first and second stage spans. To change each setting, you will need to hit the each feature. To access these options: 1. -
Page 29: Menu Options
Back Home Menu Menu COOL HEAT AUTO Schedule 12:00 Save Away Done/ Back Home Menu COOL HEAT AUTO ©2010 Hunter Fan Company Menu Options Schedule Save Away Done/ Done/ Next Back Home Home COOL HEAT Next Next Features Filter Next... - Page 30 Features Menu Options 4. The next Menu option is to set your thermostat’s primary span. Use buttons to adjust between 1, 2, or, 3 degrees. Press after this has been changed or if no changes are necessary. The span setting regulates when and how long your system will run. The span has been set at the factory to 1 which will allow the system to turn on.5...
- Page 31 Menu COOL HEAT AUTO Schedule temp Save Away Done/ Done/ Back Home Home Menu COOL HEAT AUTO ©2010 Hunter Fan Company Menu Options Schedule spa n 2 Save Away Done/ Next Next Back Home COOL HEAT Next Next Features Next...
-
Page 32: Additional Features
Additional Features Armchair Programming There is no need to stand at the wall where the thermostat is mounted while programming or changing settings. Simply remove the thermostat from the wall and make the necessary changes in the comfort of a chair. -
Page 33: Thermostat Assistance
Solution: 1. Check the time in all programs for proper am/pm time. 2. Ensure thermostat is not in “Save Away” mode. 3. Make sure the thermostat is set to the proper day. Problem: Auto / Fan does not turn on. - Page 34 Thermostat Assistance Troubleshooting and Support Problem: Fan runs continuously. Solution: 1. Check fan setting to see if it is set to on. 2. Move HG/HE switch to opposite position. Problem: Heating or cooling does not turn on or off. Solution: 1.
-
Page 35: Technical Support
Troubleshooting and Support Technical Support If you need any assistance with installation or setup of your new Hunter thermostat, please call us. Our technical support staff is ready to help! USA: 1-888-830-1326 Canada: 1-866-268-1936 Hours of operation are from 7:00 am to 7:00 pm Monday - Friday and 8:00 am to 5:00 pm on Saturday, Central Time. -
Page 36: Warranty
Thermostats LIMITED WARRANTY The Hunter Fan Company warrants your Hunter Thermostat to be free from defects in material or workmanship for a period of one year from the date of sale to the original user or consumer purchaser. If your Hunter Thermostat malfunctions or fails within the warranty period because of a defect in material or workmanship, we will replace it. - Page 37 This warranty neither applies to batteries nor to deterioration of, nor damage to the product caused by the use of faulty batteries. Return your product, along with proof of purchase to Hunter Fan Company Service Department, 7130 Goodlett Farms Pkwy Suite 400, Memphis, TN 38016.