Table of Contents
Advertisement
Advertisement
Table of Contents

Related Manuals for DXG DXG-506V


Summary of Contents for DXG DXG-506V
- Page 1 DXG-506V User’s Manual...
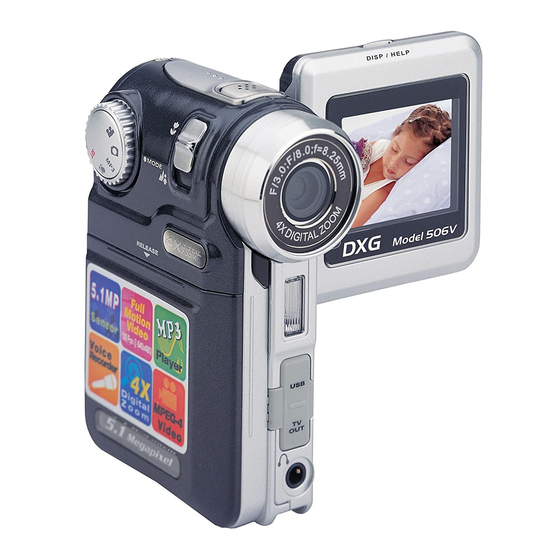
- Page 2 Whether you want to send snapshots or short video clips via email, create exciting photo albums, see your friends and family over the Internet, or play MP3 files, the DXG-506V provides you with all of the tools you’ll need.
-
Page 3: Table Of Contents
1. Attention ... 4 Safety Issues ... 4 Before You Start... 4 Operational Procedures... 4 Package Contents ... 5 2. Getting to Know Your Digital Video Camera Digital Video Camera Overview ... 6 Top View... 6 Front View ... 7 Back View... - Page 4 MP3 Mode... 26 MP3 Mode Screen Icon Description ... 27 Play MP3 ... 28 Repeat Play ... 28 Select a File... 28 Screen Display(MP3)... 29 Deleting Music ... 29 Protecting Music ... 30 How to place MP3 songs onto your Digital Video Camera... 31 Audio Mode ...
-
Page 5: Attention
1. Attention Please read this manual carefully before using the camera. Follow the instructions in this manual to avoid damaging the camera. Safety Issues To reduce the risk of fire, do not store this product under direct sunlight. This product is a precision electronic device. Do not attempt to service this DV camera yourself, as opening or removing covers may expose you to dangerous voltage points or other risks. -
Page 6: Package Contents
In sealed vehicles, in direct sunlight, or in any areas with extremely high temperatures. Turbulent or high-vibration environments. Areas with smoke, oil fumes or steam. Locations subject to strong magnetic fields. Rainy or snowy environments. ●Do not open the battery cover when the power is on. ●If water enters the camera, turn the power OFF and remove the batteries immediately. -
Page 7: Getting To Know Your Digital Video Camera
2 Getting to Know Your Digital Video Camera Digital Video Camera Overview Top View: 1. Microphone 2. Speaker... -
Page 8: Front View
Front View: Lens Self-timer LED Flash USB Port – You can connect the camera to a computer via the USB port. You can then transfer photos, video or audio from the camera to the computer or use the camera as a PC camera. TV OUT port –... -
Page 9: Back View
Back View: 1. 4-Way Multi-function Button-In all modes, this selects directions such as Up, Down, Left, Right and other special functions. 2. Shutter Button- Press to take pictures in Capture mode, and to start & stop recording videos or voices in Video or Voice mode. 3. -
Page 10: Right View
Right View: 1. 1. Macro Switch-This is used for “Normal” and “Macro” (close-up) modes. The appear on the LCD panel if the Macro mode is selected. 2. Mode Dial- You can select the following modes by rotating this dial: -Video mode -Photo mode 3. -
Page 11: Bottom View
Bottom View: 1. Color LCD monitor 2. SD card slot Battery status display: Battery Full Battery Half Full Battery Low Battery Out... -
Page 12: How To Use Your Digital Video Camera
3. How to Use Your Digital Video Camera Preparation ●Step 1 Insert four "AAA" batteries into the battery compartment . 1. Push down the battery cover 2. Slide the cover towards the direction shown below. 3. Install batteries correctly 4. Close the battery cover To avoid damage, do not force the battery cover open or closed. -
Page 13: Using The Built-In Memory
When inserting an optional SD/MMC memory card, follow the icon shown in the compartment to orient the card. Push the memory card all the way into the memory card slot to insert. Pushing the card in again gently, will cause it to pop-out. -
Page 14: Rotating The Lcd Screen
Rotating the LCD Screen Open Outward extension From bottom to top 180 degree turn Upward 90 degree turn To avoid damaging the LCD screen, do not turn the screen in the wrong direction or over-rotate. -
Page 15: Using The Digital Video Camera
4. Using the Digital Video Camera Power Slide down and quickly release the power button to turn on the camera. To turn off the camera, slide it down and quickly release it again. This video camera is equipped with power saving function. When idle for 2 minutes (default setting), it automatically shuts off. -
Page 16: Camera Settings
Camera Settings Switch the Mode switch to the SET position and you will see all available options in the chosen mode. You can adjust to functions like Date and Time, Audio, Format, Default setting, Memory, Language, Video Out, Automatic shut off, etc. For detailed operation guide, please refer to following diagrams. - Page 17 Formatting erases all data in the memory (card and/or built-in) and it cannot be recovered. Please ensure that backup has been performed on important data prior to use. Depending on your location, you must change the visual output to NTSC or PAL to play video footage on television (USA uses NTSC).
-
Page 18: Video Mode
Switch the Mode switch to Video Mode [Movie]. Video Mode Screen Icon Description Movie mode Image resolution Image quality Numbers of image per second Memory status Memory card Memory card is half full Memory card exhausted Memory card (full) Memory card is protected Video Mode Internal memory Internal memory is half full... -
Page 19: Recording A Video
Recording a Video Press the shutter button to start recording, press it again to stop recording. ☆ The length of the video is limited by the size of the memory. ☆ Furthermore, the size and quality of the image will also affect the length of the video. ☆... -
Page 20: Deleting Videos
Deleting Videos 1. Press the Play button 1. Press the LEFT or RIGHT button on the 4-way button to select the correct video. 1. Once the video to be deleted is selected, press the UP button on the 4-way button to enter the delete screen. -
Page 21: Cancel Protection For All
Cancel Protection for All a. Press the Play button , to enter the Video Play mode. Press the Menu Button to enter the “Unlock All” option Press the UP or DOWN button on the Scroll Button to select the “Unlock All” option. -
Page 22: Photo Mode
Switch the Mode switch to Photo Mode [ Camera ] Photo Mode Screen Icon Description Record mode Image resolution Image quality Digital zoom Digital zoom ratio Memory status Memory card Memory card is half full Memory card exhausted Memory card (full) Memory card is protected Internal memory Taking Still Photos... -
Page 23: Taking Still Image
While in the Photo mode, press the shutter button to take still photos in JPEG format. Tap once Locking exposure: Pressing the shutter button in halfway and holding it will “lock” the exposure setting even if the camera is refocused elsewhere. This alllows you to lighten or darken exposure settings quickly. -
Page 24: Deleting Photos
2. Select a File 3. Thumbnail Display While playing back the photos you can PUSH IN the Scroll Button and then use it to zoom in or zoom out LEFT/RIGHT functions of the 4-way button to scroll around the enlarged picture. 4.Auto Play Under the Photo Play mode using the Scroll Button. -
Page 25: Protecting Photos
Return to the original screen 2. Delete All Photos: Press the DOWN button to enter the “Delete All” option. Select “OK” to delete all files. If you choose “Cancel” and press the Scroll Button, you will return to the Photo Play options screen ★... -
Page 26: Dpof (Digital Print Order Format)
Removing Protection From All Photos: Press the DOWN button to enter the “Unlock All” option. Select “OK” to unprotect all files. If you choose “Cancel” and press the Scroll Button, you will return to the Photo Play options screen DPOF (Digital Print Order Format): DPOF allows you to store directions for printing photos onto the SD card so that these photos can be printed directly to a printer that supports DPOF. -
Page 27: Mp3 Mode
MP3 Mode Getting MP3 Files Onto Your 506V: The DXG-506V has the ability to play MP3 files. Only song files in the MP3 file format can be played in the MP3 function. Files on CDs are usually in the Windows Media format (.wma) or wav format and cannot be played in their native format;... -
Page 28: Mp3 Mode Screen Icon Description
Switch the Mode switch to the MP3 Mode [ MP3 ] MP3 Mode Screen Icon Description... -
Page 29: Play Mp3
Play MP3: Under MP3 mode, use the LEFT/RIGHT button on the 4-way multifunction button to select the song. Press the shutter button to play. Volume Adjustment: Under Play Mode, press the UP/DOWN button on the Scroll Button to adjust the Repeat Play By pressing in the Scroll Button BEFORE you begin playing a song, you can choose to repeat a single song or the entire music library. -
Page 30: Screen Display(Mp3)
Screen Display Use the DISP/HELP button to change the screen display mode. This can only be used when the songs are not playing. Standard display Deleting Music: 1. Delete Current Music a. Press the LEFT/RIGHT button on the 4-way Multifunction Button to select the single song to be deleted. -
Page 31: Protecting Music
Protecting Music 1. Protect Current Music a. Befoe playing a song, press the DOWN button on the 4-way Multifunction Button to protect the selected file. The c. Press the DOWN button again will return to no protection. 2. Unprotect All Music Under the MP3 mode, press the MENU button to enter the MP3 options screen. -
Page 32: How To Place Mp3 Songs Onto Your Digital Video Camera
How to place MP3 songs onto your Digital Video Camera ● Step 1 SPace Connect the camera to your PC USB terminal with accessory cable. ● Step 2 Select “mass storage” on the menu screen. Refer to the attached pictures. Indicate that you push in the Jog Button to select. ●... -
Page 33: Audio Mode
Switch the Mode switch to shutter button to start recording. Press the shutter button again to stop recording. Audio Mode Screen Icon Description Audio Mode Audio Mode(Moving Picture) Memory status Memory card Memory card is half full Memory card exhausted Memory card (full) Memory card is protected Internal memory... -
Page 34: Record Audio
Record Audio Start recording: The animation on left started to play, and the total recorded time is displayed at lower r ht Screen Display You can use the DISP/HELP button to change the screen’s display mode when not recording or playing back files. Standard display Button icons... -
Page 35: Play Audio
Play Audio 1. In Audio Mode, press the Play button to enter the Play mode 2. In Play mode, press the LEFT/RIGHT button on the 4-way Multifunction Button to select the correct audio file. 3. After selecting the audio file, press the shutter button to start playing, press the shutter button again to stop playing Volume adjustment: In Play Mode you can adjust the volume by adjusting the Screen Display... -
Page 36: Protecting A File
Return to the original screen Delete All Files In Audio Play Option screen, press the Menu button to enter the “Delete All” and “Unlock All” options. Select the Delete All option and “OK” to delete all files. If you select “Cancel” and press the Menu button, you will return to the Audio Play options screen. - Page 37 2. Cancel All Protection Press the Playback button to enter the playback screen. Press the Menu button to enter the “Delete All” and “Unlock All” Menu. a. Press the UP/DOWN button on the Scroll Button to select the“Unlock All” option and press the Scroll Button in to select.
-
Page 38: Connecting To A Computer
5. Connecting to a Computer Web Camera/Storage Device The DV camera can also act as a web camera/storage device. It operates as below: 1. Make sure that the camera has well-chraged batteries installed. 2. Insert the smaller plug of the USB cable into the camera’s USB port. NOTE: Please ensure that the USB cable is connected correctly to avoid damage. -
Page 39: System Requirements
TV user’s manual. System Requirements: Listed below are the minimum system requirements for the DXG-506V digital video camera. We recommend that you use a computer system that exceeds the minimum requirements in order to utilize the video camera to its fullest capacity. The minimum system... - Page 40 4. “DMA” and press OK. ★ Note: When the PC is playing the video, ensure that DirectX8.0 or higher and that a supporting sound card is installed.
-
Page 41: Driver Installation
6. Driver Installation 6.1 Drivers You will only need to install a driver for the camera if your operating system is Windows 98SE or Windows ME. Windows 2000 and Windows XP are plug-and-play operating systems and do not require a driver to be manually loaded. To load a driver: 1. -
Page 42: Presto! Mr. Photo 3
instructions. More information about Presto! Video Works 6 can be found in the help files when the application is started. 6.3 Presto! Mr. Photo 3 Presto! Mr. Photo 3 is an advanced photo editing software application. To install Presto! Mr. Photo 3: 1. - Page 43 4. Click "I accept the agreement" to accept the conditions of Software License Agreement and click "Next" to continue. 5. Click "Browse" to select the folder location and click "Next" to continue. 6. Click "Browse" if you want to select a different program folder or click "Next" to continue.
- Page 44 7. Enter the additional tasks setup screen and press "Next" to continue. 8. Enter the main program setup screen and press "Install" to start the installation. 9. During the installation, press "Cancel" if you want to stop setup.
- Page 45 10. The following screen will appear after the installation is completed. Click "Finish" to complete the installation.
-
Page 46: Digital Video Camera Specifications
7. Digital Video Camera Specifications Specifications: ●Lens: f=8.25 mm ●Image Sensor: 5.1 mega pixel CMOS sensor ●Aperture: F 3.0/8.0 ●Speed: ISO 100 ●White Balance Settings: Auto, Florescent, Cloudy, Sunny, Tungsten ●Shutter: Mechanical Shutter ●Shutter Speed: 1/2 Sec. ~ 1/500 Sec. ●Storage Media: Build-in 32MB, Flash Memory SD card (and similar MMC) slot (supports up to 2GB) ●File Formats: Still Images: JPEG ●Image Resolution: 4000 x 3000 (Firmware Interpolation) -
Page 47: Troubleshooting
8. Trouble shooting If the camera freezes during operation and cannot be used, please check to ensure that the batteries and in good contact and restart the camera. If you cannot restart the Freeze camera, check to see if the camera has been damaged due to improper usage. Do not disassemble the camera yourself, please call the manufacturer. -
Page 48: Appendix A
Appendix A: SD card capacities Photos: Photos(pcs) Quailty fine normal fine normal fine normal fine 12MP normal Video Times(Min) Quailty 320x240 fine (30 fps) normal 640x480 fine (30 fps) normal Card Size 64MB 128MB Card Size 64MB 128MB 256MB 14Mins56Sec. 27Mins45Sec. 57Mins50Sec. 84Mins39Sec. 14Mins31Sec. - Page 49 ★Note: 1. The number of pictures you can take varies depending on the visual complexity of the scene being photographed. 2. The minutes of music that your card can hold depends on the rate at which your songs were recorded. The standard bit rate for MP3 recordings is 128 Kbps. The bit rate (Kbps) is determined by the encoder software used to create your audio file.
-
Page 50: Appendix B
Appendix B: PictBridge errors Type Value Paper Hardware 1024 1025 File 1026 Description Paper related error (default) Paper is empty Load Error – paper not loaded correctly Eject Error – paper not ejected correctly Media Error – paper not detected, paper skewed, roll paper cannot cut or turn off Paper jam Paper nearly empty...