Table of Contents
Advertisement
Advertisement
Table of Contents

Related Manuals for Draytek VIGORFLY 200


Summary of Contents for Draytek VIGORFLY 200
- Page 2 VigorFly 200 Wi-Fi Router User’s Guide Version: 1.0 Date: 01/02/2010 VigorFly 200 Series User’s Guide...
-
Page 3: Copyright Information
Web registration is preferred. You can register your Vigor router via Owner http://www.draytek.com. Firmware & Tools Due to the continuous evolution of DrayTek technology, all routers will be regularly Updates upgraded. Please consult the DrayTek web site for more information on newest firmware, tools and documents. -
Page 4: European Community Declarations
Product: VigorFly 200 Series Router DrayTek Corp. declares that VigorFly 200 is in compliance with the following essential requirements and other relevant provisions of R&TTE Directive 1999/5/EEC. The product conforms to the requirements of Electro-Magnetic Compatibility (EMC) Directive 2004/108/EC by complying with the requirements set forth in EN55022/Class B and EN55024/Class B. -
Page 5: Table Of Contents
3.4 Applications ... 44 3.4.1 Dynamic DNS ... 44 3.5 Wireless LAN ... 44 3.5.1 Basic Concepts... 44 3.5.2 General Setup... 46 3.5.3 Security ... 48 3.5.4 Universal Repeater ... 58 3.5.5 Station List ... 60 VigorFly 200 Series User’s Guide... - Page 6 4.6.8 AP Discovery ... 112 4.6.9 WMM Configuration ... 113 4.6.10 Station List ... 114 4.7 System Maintenance...115 4.7.1 System Status... 115 4.7.2 Administration Password ... 116 4.7.3 User Password ... 116 4.7.4 Configuration Backup ... 117 VigorFly 200 Series User’s Guide...
- Page 7 5.4 Checking If the ISP Settings are OK or Not ... 131 5.5 Forcing Vigor Router into TFTP Mode for Performing the Firmware Upgrade ... 133 5.6 Backing to Factory Default Setting If Necessary ... 136 5.7 Contacting Your Dealer ... 136 VigorFly 200 Series User’s Guide...
-
Page 9: Preface
If you are out of coverage of fixed line, you can directly plug 3.5G USB modem to USB port on VigorFly 200. Or, you can use WiMAX USB modem with VigorFly 200. The sharing 3.5G / WiMAX connection accommodates adequate downstream/upstream capacity for residential needs. -
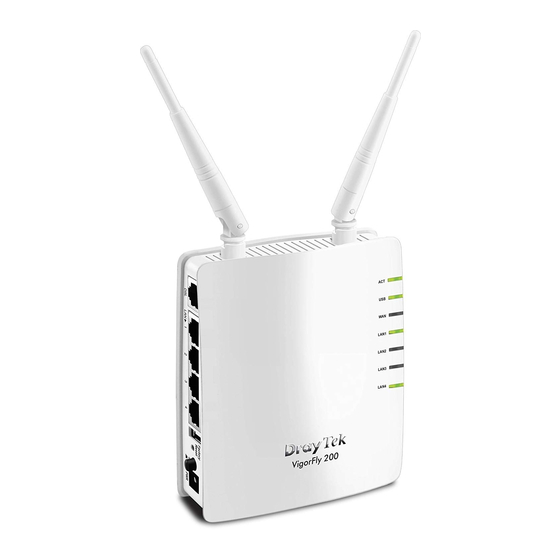
Page 10: Led Indicators And Connectors
Blink when wireless traffic goes through. The WPS is off. Blink with 1 second cycle for 2 minutes - - WPS is enabled and waiting for wireless client to connect with it. Blink when wireless traffic goes through. VigorFly 200 Series User’s Guide... -
Page 11: Hardware Installation
Connect one end of the power adapter to the Power port of this device. Connect the other end to the wall outlet of electricity. Power on the router. Check the ACT, WAN and LAN LEDs to assure network connections. (For the detailed information of LED status, please refer to section 1.1.) VigorFly 200 Series User’s Guide... -
Page 12: Printer Installation
You can install a printer onto the router for sharing printing. All the PCs connected this router can print documents via the router. The example provided here is made based on Windows XP/2000. For Windows 98/SE/Vista, please visit www.draytek.com. Before using it, please follow the steps below to configure settings for connected computers (or wireless clients). - Page 13 Click Local printer attached to this computer and click Next. In this dialog, choose Create a new port Type of port and use the drop down list to select Standard TCP/IP Port. Click Next. VigorFly 200 Series User’s Guide...
- Page 14 In the following dialog, type 192.168.1.1 (router’s LAN IP) in the field of Printer Name or IP Address and type IP_192.168.1.1 as the port name. Then, click Next. Click Standard and choose Generic Network Card. Then, in the following dialog, click Finish. VigorFly 200 Series User’s Guide...
- Page 15 11. Select "LPR" on Protocol, type p1 (number 1) as Queue Name. Then click OK. Next please refer to the red rectangle for choosing the correct protocol and UPR name. VigorFly 200 Series User’s Guide...
- Page 16 If you do not know whether your printer is supported or not, please visit www.draytek.com to find out the printer list. Open Support >FAQ; find out the link of Printer Server and click it; then click the What types of printers are compatible with Vigor router? link.
-
Page 17: Configuring Basic Settings
The web page can be logged out according to the chosen condition. The default setting is Auto Logout, which means the web configuration system will logout after 5 minutes without any operation. Change the setting for your necessity. VigorFly 200 Series User’s Guide... -
Page 18: Changing Password
Login on the window. Main screen for admin mode operation (full configuration) Main screen for user mode operation (simple configuration) Note: The home page will change slightly in accordance with the type of the router you have. VigorFly 200 Series User’s Guide... - Page 19 Type new user name in the field of Account and new password in the field of Password. Then click OK to continue. Now, the password has been changed. Next time, use the new username / password to access the Web Configurator of this router. VigorFly 200 Series User’s Guide...
-
Page 20: Quick Start Wizard
The first screen of Quick Start Wizard is welcome page, please click Next. The first screen of Quick Start Wizard is entering login account and password. After typing a new password, please click Next. VigorFly 200 Series User’s Guide... -
Page 21: Setting Up The Time And Date
On the next page as shown below, please select the appropriate connection type according to the information from your ISP. There are five types offered in this page. Each connection type will bring out different web page. VigorFly 200 Series User’s Guide... - Page 22 MAC Address. Besides, if you want to change the MAC address for WAN interface, simply click Enable and type the MAC address in this field manually. After finishing the settings here, please click Next. VigorFly 200 Series User’s Guide...
- Page 23 PPPoE is used for most of DSL modem users. All local users can share one PPPoE connection for accessing the Internet. Your service provider will provide you information about user name, password, and authentication mode. VigorFly 200 Series User’s Guide Router Name – Default setting is VigorFly200. The router will detect the MAC address automatically. Or, check the box to enable MAC address cloning.
- Page 24 And the result will be displayed in the field of MAC Address. Besides, if you want to change the MAC address for WAN interface, simply click Enable and type the MAC address in this field manually. After finishing the settings here, please click Next. VigorFly 200 Series User’s Guide...
- Page 25 IP Address Subnet Mask Redial Policy MAC Address Clone VigorFly 200 Series User’s Guide Specify the IP address of the PPTP/L2TP server. Assign a specific valid user name provided by the ISP. Assign a valid password provided by the ISP.
- Page 26 ISPs. Such value is used to dial through USB mode. Please use the default value. If you have any question, please contact to your ISP. Type the PPP username (optional). Type the PPP password (optional). VigorFly 200 Series User’s Guide...
-
Page 27: Setting Up The Wireless Connection
It means the identification of the wireless LAN. SSID can be any text numbers or various special characters. The default SSID is "DrayTek". We suggest you to change it. Choose the wireless mode for this router. Each encryption mode will bring out different web page and... - Page 28 ASCII characters or 10 hexadecimal values in 64-bit encryption level, or restricted to 13 ASCII characters or 26 hexadecimal values in 128-bit encryption level. The allowed content is the ASCII characters from 33(!) to 126(~) except '#' and ','. VigorFly 200 Series User’s Guide...
- Page 29 Key) entered manually in this field below or automatically negotiated via 802.1x authentication. WPA Algorithm Pass Phrase Key Renewal Interval VigorFly 200 Series User’s Guide Choose the WPA algorithm, TKIP, AES or TKIP/AES. Either 8~63 ASCII characters, such as 012345678..(or 64 Hexadecimal digits leading by 0x, such as "0x321253abcde...").
- Page 30 Set to zero to perform another authentication immediately after the first authentication has successfully completed. (The unit is second.) Set the maximum time that a wireless device may remain idle. (The unit is second.) VigorFly 200 Series User’s Guide...
- Page 31 Port Shared Secret Session Timeout Idle Timeout VigorFly 200 Series User’s Guide Select TKIP, AES or TKIP/AES as the algorithm for WPA. WPA uses shared key for authentication to the network. However, normal network operations use a different encryption key that is randomly generated. This randomly generated key that is periodically replaced.
- Page 32 Enter the IP address of RADIUS server. The UDP port number that the RADIUS server is using. The default value is 1812, based on RFC 2138. The RADIUS server and client share a secret that is used to VigorFly 200 Series User’s Guide...
- Page 33 Key Renewal Interval IP Address Port Shared Secret VigorFly 200 Series User’s Guide authenticate the messages sent between them. Both sides must be configured to use the same shared secret. Set the maximum time of service provided before re-authentication. Set to zero to perform another authentication immediately after the first authentication has successfully completed.
-
Page 34: Saving The Wizard Configuration
Set to zero to perform another authentication immediately after the first authentication has successfully completed. (The unit is second.) Set the maximum time that a wireless device may remain idle. (The unit is second.) VigorFly 200 Series User’s Guide... -
Page 35: Saving Configuration
Ready indicates the system is ready for you to input settings. Settings Saved means your settings are saved once you click Finish or OK button. VigorFly 200 Series User’s Guide Displays the IP address of the LAN interface. Displays the total transmitted packets at the LAN interface. - Page 36 This page is left blank. VigorFly 200 Series User’s Guide...
-
Page 37: User Mode Operation
These are known as private IP addresses, and are listed in the following ranges: From 10.0.0.0 to 10.255.255.255 From 172.16.0.0 to 172.31.255.255 From 192.168.0.0 to 192.168.255.255 VigorFly 200 Series User’s Guide... - Page 38 Besides, 3G USB Modem also can be used as backup device. Therefore, when WAN is not available, the router will use 3.5G for supporting automatically. The supported 3G USB Modem will be listed on DrayTek web site. Please visit www.draytek.com for more detailed information.
-
Page 39: Internet Access
To use Static as the accessing protocol of the internet, please choose Static IP mode from Connection Type drop down menu. The following web page will be shown. IP Address Subnet Mask VigorFly 200 Series User’s Guide Type the IP address. Type the subnet mask. - Page 40 DNS Server IP address. MAC Address Clone is available when the box of Enable is checked. The router will detect the MAC address automatically. The result will be displayed in the field of MAC Address. VigorFly 200 Series User’s Guide...
- Page 41 To choose PPPoE as the accessing protocol of the internet, please select PPPoE from the Internet Access menu. The following web page will be shown. VigorFly 200 Series User’s Guide Type in a name for the router. It must be the same as the name used in Syslog.
- Page 42 Connect on Demand, you have to type value here. MAC Address Clone is available when the box of Enable is checked. The router will detect the MAC address automatically. The result will be displayed in the field of MAC Address. VigorFly 200 Series User’s Guide...
- Page 43 Default Gateway Redial Policy MAC Address Clone VigorFly 200 Series User’s Guide Type in the IP address of the PPTP/L2TP server. Type in the username provided by ISP in this field. Type in the password provided by ISP in this field.
- Page 44 Type the PPP password (optional). MAC Address Clone is available when the box of Enable is checked. The router will detect the MAC address automatically. The result will be displayed in the field of MAC Address. VigorFly 200 Series User’s Guide...
-
Page 45: Backup
PPP Password After finishing all the settings here, please click OK to activate them. VigorFly 200 Series User’s Guide Check this box to enable the 3G backup feature. Type PIN code of the SIM card that will be used to access Internet. -
Page 46: Lan
IP address. As a part of the public subnet, the Vigor router will serve for IP routing to help hosts in the public subnet to communicate with other public hosts or servers outside. Therefore, the router should be set as the gateway for public hosts. VigorFly 200 Series User’s Guide... -
Page 47: General Setup
Below shows the LAN menu: This page provides you the general settings for LAN. Click LAN to open the LAN settings page and choose General Setup. IP Address VigorFly 200 Series User’s Guide Type in private IP address for connecting to a local private... - Page 48 DNS Server IP address: 194.109.6.66 to this field. You can specify secondary DNS server IP address here because your ISP often provides you more than one DNS Server. If your ISP does not provide it, the router will VigorFly 200 Series User’s Guide...
-
Page 49: Nat
WinMX, eMule and others), Internet Camera etc. Ensure that you keep the application involved up-to-date to avoid falling victim to any security exploits. VigorFly 200 Series User’s Guide automatically apply default secondary DNS Server IP address: 194.98.0.1 to this field. -
Page 50: Dmz Host
When you finish the above settings, simply click this button to save it and display on the field of Current Virtual Servers in system. Click this button to clear current configuration. Click this button to remove the selected virtual server configuration. VigorFly 200 Series User’s Guide... - Page 51 Click DMZ Host to open the following page: DMZ Settings DMZ IP Address Cancel VigorFly 200 Series User’s Guide Check this box to enable the DMZ Host function. Enter the private IP address of the DMZ host. Click this button to save such profile.
-
Page 52: Applications
Type in the login name that you set for applying domain. Type in one domain name that you applied previously. Use the drop down list to choose the desired domain. VigorFly 200 Series User’s Guide... - Page 53 WPA (Wi-Fi Protected Access), the most dominating security mechanism in industry, is separated into two categories: WPA-personal or called WPA Pre-Share Key (WPA/PSK), and WPA-Enterprise or called WPA/802.1x. VigorFly 200 Series User’s Guide...
-
Page 54: General Setup
Enable Wireless LAN Mode Check the box to enable wireless function. At present, the router can connect to Mixed (11b+11g), 11g Only, 11b Only, 11n Only and Mixed (11b+11g+11n) stations simultaneously. Simply choose Mix (11b+11g+11n) mode. VigorFly 200 Series User’s Guide... - Page 55 SSID Isolate Member Channel Packet-OVERDRIVE VigorFly 200 Series User’s Guide Check it to prevent from wireless sniffing and make it harder for unauthorized clients or STAs to join your wireless LAN. Depending on the wireless utility, the user may only see the information except SSID or just cannot see any thing about Vigor wireless router while site surveying.
-
Page 56: Security
Check this box to enable the function. Besides, it will be displayed on the Wireless LAN for you to access for detailed configuration. Open Wireless LAN>>Universal Repeater. Please refer to the corresponding section for detailed information. VigorFly 200 Series User’s Guide... - Page 57 Mode There are several modes provided for you to choose. Disable The encryption mechanism is turned off. Accepts only WEP clients and the encryption key should be entered in WEP Key. VigorFly 200 Series User’s Guide...
- Page 58 ASCII characters or 10 hexadecimal values in 64-bit encryption level, or restricted to 13 ASCII characters or 26 hexadecimal values in 128-bit encryption level. The allowed content is the ASCII characters from 33(!) to 126(~) except '#' and ','. VigorFly 200 Series User’s Guide...
- Page 59 PSK (Pre-Shared Key) entered manually in this field below or automatically negotiated via 802.1x authentication. Select WPA, WPA2 or Auto as WPA mode. VigorFly 200 Series User’s Guide Select TKIP, AES or TKIP/AES as the algorithm for WPA. Either 8~63 ASCII characters, such as 012345678..(or 64 Hexadecimal digits leading by 0x, such as "0x321253abcde...").
- Page 60 Set the maximum time of service provided before re-authentication. Set to zero to perform another authentication immediately after the first authentication has successfully completed. (The unit is second.) Idle Timeout Set the maximum time that a wireless device may remain VigorFly 200 Series User’s Guide...
- Page 61 Key Renewal Interval Click the link of RADIUS Server to access into the following page for more settings. VigorFly 200 Series User’s Guide idle. (The unit is second.) Select TKIP, AES or TKIP/AES as the algorithm for WPA. WPA uses shared key for authentication to the network.
- Page 62 Set to zero to perform another authentication immediately after the first authentication has successfully completed. (The unit is second.) Idle Timeout Set the maximum time that a wireless device may remain idle. (The unit is second.) VigorFly 200 Series User’s Guide...
- Page 63 Pre-Authentication Click the link of RADIUS Server to access into the following page for more settings. VigorFly 200 Series User’s Guide Select TKIP, AES or TKIP/AES as the algorithm for WPA. WPA uses shared key for authentication to the network.
- Page 64 (The unit is second.) Mixed (WPA+WPA2)/802.1x The WPA encrypts each frame transmitted from the radio using the key, which either PSK (Pre-Shared Key) entered manually in this field below or automatically negotiated via 802.1x authentication. VigorFly 200 Series User’s Guide...
- Page 65 Click the link of RADIUS Server to access into the following page for more settings. IP Address Port Shared Secret VigorFly 200 Series User’s Guide Select TKIP, AES or TKIP/AES as the algorithm for WPA. WPA uses shared key for authentication to the network. However, normal network operations use a different encryption key that is randomly generated.
-
Page 66: Universal Repeater
This menu is available only when it is enabled in Wireless LAN>>General Setup. It allows you to specify which AP that remote client can connect to. VigorFly 200 can act as a wireless repeater; it can be Station and AP at the same time. It can use Station function to connect to a Root AP and use AP function to serve all wireless stations within its coverage. - Page 67 WPA/PSK Mode and WPA2/PSK Mode Encryption Type Pass Phrase VigorFly 200 Series User’s Guide Choose None to disable the WEP Encryption. Data sent to the AP will not be encrypted. To enable WEP encryption for data transmission, please choose WEP.
-
Page 68: Station List
Display the MAC Address for the connecting client. Display the SSID of the connecting client. Display the authentication mode of the connecting client. Display the encryption method of the connecting client. Click this button to refresh current page. VigorFly 200 Series User’s Guide... -
Page 69: System Maintenance
Memory left MAC Address IP Address IP Mask VigorFly 200 Series User’s Guide Display the model name of the router. Display the firmware version of the router. Display the date and time of the current firmware build. Display current time and date for the system server. -
Page 70: User Password
Type in new password in this filed. Click Inquire Time to get the current time. Select the time zone where the router is located. Type a new NTP server. Select a time interval for updating from the NTP server. VigorFly 200 Series User’s Guide... -
Page 71: Firmware Upgrade
Note that this example is running over Windows OS (Operating System). Download the newest firmware from DrayTek's web site or FTP site. The DrayTek web site is www.draytek.com (or local DrayTek's web site) and FTP site is ftp.draytek.com. -
Page 72: Diagnostics
Display the IP address assigned by this router for specified Display the MAC address for the specified PC that DHCP assigned IP address for it. Display the leased time of the specified PC. VigorFly 200 Series User’s Guide... -
Page 73: Support Area
Refresh When you click the menu item under Support Area, you will be guided to visit www.draytek.com and open the corresponding pages directly. Click Support Area>>Application Note, the following web page will be displayed. Click Support Area>>FAQ, the following web page will be displayed. - Page 74 Click Support Area>>Product Registration, the following web page will be displayed. VigorFly 200 Series User’s Guide...
-
Page 75: Admin Mode Operation
These are known as private IP addresses, and are listed in the following ranges: From 10.0.0.0 to 10.255.255.255 From 172.16.0.0 to 172.31.255.255 From 192.168.0.0 to 192.168.255.255 VigorFly 200 Series User’s Guide... - Page 76 Besides, 3G USB Modem also can be used as backup device. Therefore, when WAN is not available, the router will use 3.5G for supporting automatically. The supported 3G USB Modem will be listed on DrayTek web site. Please visit www.draytek.com for more detailed information.
-
Page 77: Internet Access
To use Static IP as the accessing protocol of the internet, please choose Static mode from Connection Type drop down menu. The following web page will be shown. IP Address Subnet Mask Default Gateway VigorFly 200 Series User’s Guide Type the IP address. Type the subnet mask. Type the gateway IP address. - Page 78 Syslog. MAC Address Clone is available when the box of Enable is checked. The router will detect the MAC address automatically. The result will be displayed in the field of MAC Address. VigorFly 200 Series User’s Guide...
- Page 79 To use PPTP/L2TP as the accessing protocol of the internet, please choose PPTP/L2TP from Connection Type drop down menu. The following web page will be shown. VigorFly 200 Series User’s Guide Type in the username provided by ISP in this field.
- Page 80 Connect on Demand, you have to type value here. MAC Address Clone is available when the box of Enable is checked. The router will detect the MAC address automatically. The result will be displayed in the field of MAC Address. VigorFly 200 Series User’s Guide...
- Page 81 PPP Password MAC Address Clone After finishing all the settings here, please click OK to activate them. VigorFly 200 Series User’s Guide Type PIN code of the SIM card that will be used to access Internet. Such value is used to initialize USB modem. Please use the default value.
-
Page 82: Backup
ISPs. Such value is used to dial through USB mode. Please use the default value. If you have any question, please contact to your ISP. Type the PPP username (optional). Type the PPP password (optional). VigorFly 200 Series User’s Guide... -
Page 83: Lan
IP address. As a part of the public subnet, the Vigor router will serve for IP routing to help hosts in the public subnet to communicate with other public hosts or servers outside. Therefore, the router should be set as the gateway for public hosts. VigorFly 200 Series User’s Guide... -
Page 84: General Setup
RIP. This page provides you the general settings for LAN. Click LAN to open the LAN settings page and choose General Setup. VigorFly 200 Series User’s Guide... - Page 85 Lease Time DNS Manual Setting Primary DNS Address Secondary DNS Address VigorFly 200 Series User’s Guide Type in private IP address for connecting to a local private network (Default: 192.168.1.1). Type in an address code that determines the size of the network.
-
Page 86: Static Route
Choose WAN or LAN as the interface for such route. Type words as notification for such routing. Click this button to save current configuration and display on the routing table below. Click this button to clear current configuration. VigorFly 200 Series User’s Guide... -
Page 87: Nat
192.168.1.0/24 subnet for the router. As stated before, the NAT facility can map one or more IP addresses and/or service ports into different specified services. In other words, the NAT function can be achieved by using port mapping methods. Below shows the menu items for NAT. VigorFly 200 Series User’s Guide... -
Page 88: Open Ports
When you finish the above settings, simply click this button to save it and display on the field of Current Virtual Servers in system. Click this button to clear current configuration. Click this button to remove the selected virtual server configuration. VigorFly 200 Series User’s Guide... -
Page 89: Dmz Host
Click DMZ Host to open the following page: DMZ Settings DMZ IP Address Cancel VigorFly 200 Series User’s Guide Check this box to enable the DMZ Host function. Enter the private IP address of the DMZ host. Click this button to save such profile. -
Page 90: Session Limit
Also the Vigor router monitors the traffic. Any abnormal traffic flow violating the pre-defined parameter, such as the number of thresholds, is identified as an attack and the Vigor router will activate its defense mechanism to mitigate in a real-time manner. Below shows the menu items for Firewall. VigorFly 200 Series User’s Guide... -
Page 91: Dos Defense
Enable Ping of Death Defense VigorFly 200 Series User’s Guide Check the box to activate the DoS Defense Functionality. Check the box to activate the SYN flood defense function. Once detecting the Threshold of the TCP SYN packets from... -
Page 92: Mac/Ip/Port Filtering
Type the destination IP address for applying such rule. Type the source IP address for applying such rule. Specify the protocol(s) which this filter rule will apply to. Determine the port range for the destination. VigorFly 200 Series User’s Guide... -
Page 93: System Security
VigorFly 200 Series User’s Guide Determine the port range for the source. Accept – the packets that match with such rule will be accepted. - Page 94 URL – type the URL of the web site in the field of URL and click Add. The new link with the URL you specified will be shown on this page. The system will filter and block the web pages according to the item you specified here. VigorFly 200 Series User’s Guide...
-
Page 95: Applications
Basically, Vigor routers are compatible with the DDNS services supplied by most popular DDNS service providers such as www.dyndns.org, www.no-ip.com, VigorFly 200 Series User’s Guide To delete the URL setting, simply click that one and click Delete to remove it. -
Page 96: Spanning Tree
Type in the login name that you set for applying domain. Type in the password that you set for applying domain. Click it to save and apply such setting. Click it to save and apply such setting. VigorFly 200 Series User’s Guide... -
Page 97: Igmp
The NAT Traversal of UPnP enables the multimedia features of your applications to operate. This has to manually set up port mappings or use other similar methods. The screenshots below show examples of this facility. VigorFly 200 Series User’s Guide... - Page 98 Some Microsoft operating systems have found out the UPnP weaknesses and hence you need to ensure that you have applied the latest service packs and patches. Non-privileged users can control some router functions, including removing and adding port mappings. VigorFly 200 Series User’s Guide...
-
Page 99: Wireless Lan
SSID as identification, located channel etc. Real-time Hardware Encryption: Vigor Router is equipped with a hardware AES encryption engine so it can apply the highest protection to your data without influencing user experience. VigorFly 200 Series User’s Guide... -
Page 100: General Setup
Below shows the menu items for Wireless LAN. By clicking the General Setup, a new web page will appear so that you could configure the SSID and the wireless channel. Please refer to the following figure for more information. VigorFly 200 Series User’s Guide... - Page 101 Hide SSID SSID Isolate Member Channel VigorFly 200 Series User’s Guide Check the box to enable wireless function. At present, the router can connect to Mixed (11b+11g), 11g Only, 11b Only, Mixed (11g+11n), 11n Only and Mixed (11b+11g+11n) stations simultaneously. Simply choose Mixed (11b+11g+11n) mode.
- Page 102 Check this box to enable the function. Besides, it will be displayed on the Wireless LAN for you to access for detailed configuration. Open Wireless LAN>>Universal Repeater. Please refer to the corresponding section for detailed information. VigorFly 200 Series User’s Guide...
-
Page 103: Security
By clicking the Security Settings, a new web page will appear so that you could configure the settings. Mode Disable The encryption mechanism is turned off. Accepts only WEP clients and the encryption key should be entered in WEP Key. VigorFly 200 Series User’s Guide There are several modes provided for you to choose. - Page 104 ASCII characters or 10 hexadecimal values in 64-bit encryption level, or restricted to 13 ASCII characters or 26 hexadecimal values in 128-bit encryption level. The allowed content is the ASCII characters from 33(!) to 126(~) except '#' and ','. VigorFly 200 Series User’s Guide...
- Page 105 PSK (Pre-Shared Key) entered manually in this field below or automatically negotiated via 802.1x authentication. Select WPA, WPA2 or Auto as WPA mode. VigorFly 200 Series User’s Guide Select TKIP, AES or TKIP/AES as the algorithm for WPA. Either 8~63 ASCII characters, such as 012345678..(or 64 Hexadecimal digits leading by 0x, such as "0x321253abcde...").
- Page 106 Set the maximum time of service provided before re-authentication. Set to zero to perform another authentication immediately after the first authentication has successfully completed. (The unit is second.) Idle Timeout Set the maximum time that a wireless device may remain VigorFly 200 Series User’s Guide...
- Page 107 Key Renewal Interval Click the link of RADIUS Server to access into the following page for more settings. VigorFly 200 Series User’s Guide idle. (The unit is second.) Select TKIP, AES or TKIP/AES as the algorithm for WPA. WPA uses shared key for authentication to the network.
- Page 108 Set to zero to perform another authentication immediately after the first authentication has successfully completed. (The unit is second.) Idle Timeout Set the maximum time that a wireless device may remain idle. (The unit is second.) VigorFly 200 Series User’s Guide...
- Page 109 Pre-Authentication Click the link of RADIUS Server to access into the following page for more settings. VigorFly 200 Series User’s Guide Select TKIP, AES or TKIP/AES as the algorithm for WPA. WPA uses shared key for authentication to the network.
- Page 110 (The unit is second.) Mixed (WPA+WPA2)/802.1x The WPA encrypts each frame transmitted from the radio using the key, which either PSK (Pre-Shared Key) entered manually in this field below or automatically negotiated via 802.1x authentication. VigorFly 200 Series User’s Guide...
- Page 111 Click the link of RADIUS Server to access into the following page for more settings. IP Address Port Shared Secret VigorFly 200 Series User’s Guide Select TKIP, AES or TKIP/AES as the algorithm for WPA. WPA uses shared key for authentication to the network. However, normal network operations use a different encryption key that is randomly generated.
-
Page 112: Access Control
Manually enter the MAC address of wireless client. Add a new MAC address into the list. Delete the selected MAC address in the list. Edit the selected MAC address in the list. Give up the access control set up. VigorFly 200 Series User’s Guide... -
Page 113: Wps
Start PBC button or using PIN Code. On the side of VigorFly 200 series which served as an AP, press WPS button once on the front panel of the router or click Start PBC on web configuration interface. On the side of a station with network card installed, press Start PBC button of network card. - Page 114 Click Start PBC to invoke Push-Button style WPS setup procedure. The router will wait for WPS requests from wireless clients about two minutes. The WPS LED on the router will blink fast when WPS is in progress. It will return VigorFly 200 Series User’s Guide...
-
Page 115: Wds
Bridge, the other is Repeater. Below shows the function of WDS-bridge interface: The application for the WDS-Repeater mode is depicted as below: VigorFly 200 Series User’s Guide to normal condition after two minutes. (You need to setup WPS within two minutes) Type the PIN code specified in wireless client you wish to connect, and click Start PIN button. - Page 116 Bridge 2 through WDS links. However, hosts connected to Bridge 1 CANNOT communicate with hosts connected to Bridge 3 through Bridge 2. Click WDS from Wireless LAN menu. The following page will be shown. VigorFly 200 Series User’s Guide...
- Page 117 Security Peer Mac Address Phy Mode VigorFly 200 Series User’s Guide Choose the mode for WDS setting. Disable mode will not invoke any WDS setting. Bridge Mode is designed to fulfill the first type of application. Repeater Mode is for the second one.
-
Page 118: Universal Repeater
Type the MAC address of the Access Point that VigorFly 200 wants to connect to. There are several modes provided for you to choose. Each mode will bring up different parameters (e.g., WEP keys, Pass Phrase) for you to configure. VigorFly 200 Series User’s Guide... - Page 119 WPA/PSK Mode and WPA2/PSK Mode Encryption Type Pass Phrase VigorFly 200 Series User’s Guide Choose None to disable the WEP Encryption. Data sent to the AP will not be encrypted. To enable WEP encryption for data transmission, please choose WEP.
-
Page 120: Ap Discovery
SSID of the AP. Click Bridge or Repeater for the specified AP. Next, click Add. Later, the MAC address of the AP will be added and be shown on WDS settings page. VigorFly 200 Series User’s Guide... -
Page 121: Wmm Configuration
APSD Capable Aifsn CWMin/CWMax Txop VigorFly 200 Series User’s Guide To apply WMM parameters for wireless data transmission, please click the Enable radio button. The default setting is Disable. Click Enable to enable the function of automatic power-save delivery (APSD). -
Page 122: Station List
LAN MAC address of client. Only the valid MAC address that has been configured can access the wireless LAN interface. Click this button to add current typed MAC address into Access Control. VigorFly 200 Series User’s Guide... -
Page 123: System Maintenance
System Uptime Operation Mode Memory total Memory left VigorFly 200 Series User’s Guide Display the model name of the router. Display the firmware version of the router. Display the date and time of the current firmware build. Display current time and date for the system server. -
Page 124: Administration Password
Display the specified primary DNS setting. Display the specified secondary DNS setting. Type in the name for login. Type in new password in this filed. Type in the name for login. Type in new password in this filed. VigorFly 200 Series User’s Guide... -
Page 125: Configuration Backup
Click Backup button to get into the following dialog. Click Save button to open another dialog for saving configuration as a file. In Save As dialog, the default filename is config.cfg. You could give it another name by yourself. VigorFly 200 Series User’s Guide... - Page 126 Click Restore button and wait for few seconds, the following picture will tell you that the restoration procedure is successful. Note: If the file you want to restore has been encrypted, you will be asked to type the encrypted key before clicking Restore. VigorFly 200 Series User’s Guide...
-
Page 127: Syslog/Mail Alert
Enable E-mail Alert Click OK to save these settings. For viewing the Syslog, please do the following: VigorFly 200 Series User’s Guide Check Enable to activate function of syslog. The IP address of the Syslog server. Assign a port for the Syslog protocol. -
Page 128: Time And Date
NTP Server NTP synchronization Click Inquire Time to get the current time. Select the time zone where the router is located. Type a new NTP server. Select a time interval for updating from the NTP server. VigorFly 200 Series User’s Guide... -
Page 129: Management
Click Reboot System from System Maintenance to open the following page. Click Yes. The router will take 5 seconds to reboot the system. VigorFly 200 Series User’s Guide Enable the checkbox to allow system administrators to login from the Internet. There are several servers provided by the system to allow you managing the router from Internet. -
Page 130: Firmware Upgrade
Note that this example is running over Windows OS (Operating System). Download the newest firmware from DrayTek's web site or FTP site. The DrayTek web site is www.draytek.com (or local DrayTek's web site) and FTP site is ftp.draytek.com. -
Page 131: Diagnostics
Diagnostic Tools provide a useful way to view or diagnose the status of your Vigor router. Below shows the menu items for Diagnostics. Click Diagnostics and click System Log to open the web page. Clear Refresh VigorFly 200 Series User’s Guide Click it to clear this page. Click it to reload the page. -
Page 132: Dhcp Table
Refresh When you click the menu item under Support Area, you will be guided to visit www.draytek.com and open the corresponding pages directly. Click Support Area>>Application Note, the following web page will be displayed. Display the name of the computer accepted the assigned IP address by this router. - Page 133 Click Support Area>>FAQ, the following web page will be displayed. Click Support Area>>Product Registration, the following web page will be displayed. VigorFly 200 Series User’s Guide...
- Page 134 This page is left blank. VigorFly 200 Series User’s Guide...
-
Page 135: Trouble Shooting
Turn on the router. Make sure the ACT LED blink once per second and the correspondent LAN LED is bright. If not, it means that there is something wrong with the hardware status. Simply back to “1.3 Hardware Installation” to execute the hardware installation again. And then, try again. VigorFly 200 Series User’s Guide... - Page 136 Go to Control Panel and then double-click on Network Connections. Right-click on Local Area Connection and click on Properties. Select Internet Protocol (TCP/IP) and then click Properties. VigorFly 200 Series User’s Guide...
- Page 137 Select Obtain an IP address automatically and Obtain DNS server address automatically. Double click on the current used MacOs on the desktop. Open the Application folder and get into Network. On the Network screen, select Using DHCP from the drop down list of Configure IPv4. VigorFly 200 Series User’s Guide...
-
Page 138: Pinging The Router From Your Computer
Open the Application folder and get into Utilities. Double click Terminal. The Terminal window will appear. Type ping 192.168.1.1 and press [Enter]. If the link is OK, the line of “64 bytes from 192.168.1.1: icmp_seq=0 ttl=255 time=xxxx ms” will appear. VigorFly 200 Series User’s Guide... -
Page 139: Checking If The Isp Settings Are Ok Or Not
Open WAN>>Internet Access page and then check whether the ISP settings are set correctly. Use the Connection Type drop down list to choose Static IP/DHCP/PPPoE/PPTP/L2TP for reviewing the settings that you configured previously. VigorFly 200 Series User’s Guide... - Page 140 Check if IP Address, IP Mask and IP Router are set correctly (must identify with the values from your ISP). Choose PPPoE as the connection type. Check if Username and Password are set correctly (must identify with the values from your ISP). VigorFly 200 Series User’s Guide...
-
Page 141: Forcing Vigor Router Into Tftp Mode For Performing The Firmware Upgrade
Note: There are two firmware types. The .rst firmware format will make the configurations be back to default settings after upgrading firmware. The .all firmware format will remain the former configurations after upgrading firmware. 10. Input the Password if you have set one, then click Send. VigorFly 200 Series User’s Guide... - Page 142 11. There is a bar showing the upgrading process. 12. When the firmware upgrade is successful, the following window will pop up. VigorFly 200 Series User’s Guide...
- Page 143 Transfer Abort ! appears, please check if the firmware you download is correct for your Vigor router. Note: Please turn off the Firewall protection while upgrading the firmware with Windows Vista. The Firewall function can be turned off via Control Panel >> Security Center >> Firewall. VigorFly 200 Series User’s Guide...
-
Page 144: Backing To Factory Default Setting If Necessary
If the router still cannot work correctly after trying many efforts, please contact your dealer for further help right away. For any questions, please feel free to send e-mail to support@draytek.com. VigorFly 200 Series User’s Guide...