Table of Contents
Advertisement
Quick Links
Advertisement
Table of Contents

Related Manuals for Bushnell Syncfocus 118326


Summary of Contents for Bushnell Syncfocus 118326
- Page 1 Digital Camera binoCular User Manual Model#: 118326 Lit. #: 98-0917/09-09...
-
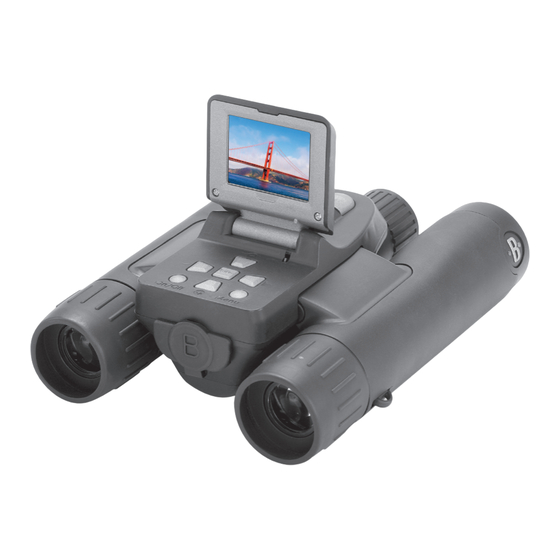
Page 2: Camera And Binocular Parts Guide
Camera and Binocular Parts Guide (A) LCD Display (E) Reticle Focus (D) 5-way Keypad w/ “Enter”, Left/Right, Plus/Minus (F) Diopter Adjustment (B) ON/OFF (C) MENU Button Button (I) USB (H) Remote Jack Port (J) Card Slot (G) Battery Compartment (L) SNAP Button (K) Binocular Focus... - Page 3 QUICK START GUIDE: BUSHNELL SYNCFOCUS™ INSTANT REPLAY 1) The SyncFocus is powered by two AAA batteries (not included). Insert batteries into the compartment (G), using the polarity marks inside for reference. A power meter in the lower left corner of the display indicates battery condition.
- Page 4 QUICK START GUIDE: BUSHNELL SYNCFOCUS™ INSTANT REPLAY To stop recording the video, press the SNAP button again. By default, videos are recorded as a 15 second loop (“instant replay”). To change this, press MENU-the first item is “Resolution”. Press Enter, then select “Video Size”. Use the Plus/Minus keys to select a different video resolution and frame rate combination (which determines loop length-8, 15, 30 or 60 seconds).
-
Page 5: Basic Setup
BASIC SETUP Loading Batteries Turn the SyncFocus over, slide open the battery cover as indicated by the arrow, remove and set aside. Insert 2 AAA Alkaline or Lithium batteries into the compartment in the direction indicated inside, then replace the cover, sliding it back into place until it clicks. -
Page 6: Enter Button
BASIC SETUP Setting the Date and Time/Date Stamp Feature You may want to go into the main options menu and set the correct date and time before beginning to take photos (or turn off the date stamp feature, as the default setting is “on”). To set date and time: Raise the LCD display and press the MENU . - Page 7 Before you begin taking photos, a few simple, one-time adjustments should be made to ensure that you can get sharp photos of any subject by just using the main focus knob on the binoculars. This process will compensate for any variations in the eyesight or vision of the individual user: Leave the rubber eyecups in their “up”...
- Page 8 SYNCFOCUS SETUP (Reticle & Diopter) Once set, note the number on the left and right binocular tubes that the index mark on each eyecup is lined up with. With the reticle focus and diopter adjustment set to these positions, you should be able to get sharp photos/videos of a subject at any distance by simply adjusting the center focus knob while you look through the binocular optics.
-
Page 9: Taking Still Photos
TAKING STILL PHOTOS After completing the basic and Syncfocus setups as described in the previous pages, you are ready to take a photo: Raise the LCD display and briefly press and release the ON/OFF button-the startup screen will appear, followed by the live image from the camera lens. The display also shows the battery condition, number of photos remaining, and the current setting of various options. - Page 10 TAKING STILL PHOTOS The “remaining photos” 4-digit counter in the lower left corner of the display above the battery indicator will drop by one number after each photo (or two, depending on your subject and settings) is taken. Once it reaches “0000”, and the display indicates “Memory Full !” when SNAP is pressed, you are out of memory (storage space) and will need to download the photos you have taken so they can be deleted to make room in the memory for new photos, or you may remove the filled up card and install another SD card if you are on a trip away from your computer.
- Page 11 SHOOTING VIDEOS (SETTING/USING VIDEO MODE) To switch from still photo to video mode, press the Right arrow key 3 times, until the red movie camera icon is displayed at the top right area of the LCD (see “LCD Preview Display Icons”, #10). You are now in Video Mode. Press SNAP to start recording a new video clip, and press it again to stop recording and store the video in memory.
- Page 12 LCD Preview Display Icons Icon Battery Indicator (full battery shown) # of Photos Remaining (based on unused internal or card memory) Internal or Card Memory White Balance Setting (Auto White Balance shown) Exposure Meter Pattern setting Photo Resolution setting (Pixels) Photo Quality setting (File Compression) Self Timer (10 sec delay) Rapid Sequence (3 shot burst)
-
Page 13: Option Settings
Using the Main Menu-Options and Settings As mentioned earlier in this manual, your SyncFocus is already set for high resolution and quality right out of the box. Exposure, white balance, and other variables are set automatically. This means that you will get good results for most subjects and lighting without the need to go into the menu to change any settings. - Page 14 Using the Main Menu-Options and Settings OPTION SETTINGS Resolution 640x480 30F Loop, 640x480 (Video Size) 30F Norm, 640x480 15F Loop, 640x480 15F Norm, 320x240 30F Loop, 320x240 30F Norm, 320x240 15F Loop, 320x240 15F Norm Image Best, Better ,Standard Quality -2.0 ~ +2.0 (Default= 0 EV) DESCRIPTION “640x480”...
- Page 15 Using the Main Menu-Options and Settings OPTION SETTINGS White Auto, Daylight, Cloudy, Balance Fluorescent, Tungsten Meter Weight, Center, Average English, Spanish, Italian, Language French, German Auto Off 60 S (1 min), 120 S (2 min), Cancel Clock Set Sets: YEAR/MONTH/DATE/ HOUR/MINUTE DESCRIPTION Sets the reference for neutral white, so that colors are...
- Page 16 Using the Main Menu-Options and Settings OPTION SETTINGS Date Stamp MM/DD/YY, YY/MM/DD, OFF Default OK, Cancel Setup Exit Using the Review Menu-Options and Settings Press Enter to enter Review mode. Use the Left arrow key to go back through the stored photos/videos. Once you are in review mode, pressing the MENU button will enter the review menu.
- Page 17 OPTION SETTINGS OK, Cancel Delete One OK, Cancel Format Lock, Unlock Protect The Review Menu Options after “Protect” (Language, Auto Off, etc.) are the same as those after “Meter” in the Main Menu, and perform the same functions as previously described in “Using the Main Menu”.
-
Page 18: Transferring The Photos & Videos To Your Pc
TRANSFERRING THE PHOTOS & VIDEOS TO YOUR PC 1. Turn on the SyncFocus (press ON/OFF). Connect the supplied cable to the USB port below the SD card slot on the SyncFocus (pull down the rubber cover flap-please refer to the “Camera and Binocular Parts Guide” page), then connect the other end directly to a main USB port on your computer-do not use front panel/keyboard USB ports or unpowered “hubs”. - Page 19 5. After the photos are transferred to your computer, you can disconnect the SyncFocus. Windows 2000 may produce a screen warning that you have disconnected a USB device without stopping or ejecting the “disk” first (your photo files will not be harmed). If so, check the box that adds an icon to your system tray or taskbar. Then next time you finish transferring photos, you can click that icon first, and “Stop the USB Mass Storage Device”...
- Page 20 This warranty does not cover damages caused by misuse, improper handling, installation, or maintenance provided by someone other than a Bushnell Authorized Service Department. Any return made under this warranty must be accompanied by the items listed below: 1) A check/money order in the amount of $10.00 to cover the cost of postage and handling...
- Page 21 INNOVATION THAT THRIVES OUTSIDE For further questions or additional information please contact: Bushnell Outdoor Products 9200 Cody, Overland Park, Kansas 66214 (800) 423-3537 • www.bushnell.com ©2009 Bushnell Outdoor Products...