
Related Manuals for Garmin GPSMAP 62STC


Summary of Contents for Garmin GPSMAP 62STC
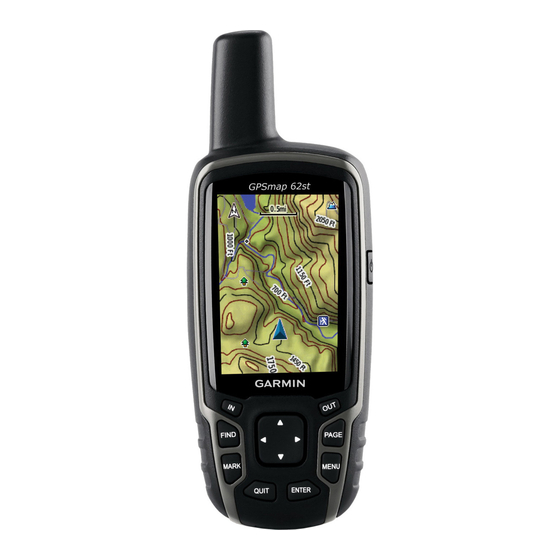
- Page 1 GPSMAP 62 series ® owner’s manual For use with the GPSMAP 62, 62s, 62st, 62sc, and 62stc...
- Page 2 Visit the Garmin Web site (www.garmin.com) for current updates and supplemental information concerning the use and operation of this and other Garmin products. Garmin (Europe) Ltd. Liberty House,...
-
Page 3: Table Of Contents
Table of Contents Getting Started ... Manual Conventions ... Device Overview... Battery Information ... Installing the Batteries ... Turning the Device On or Off ... Acquiring Satellite Signals ... Buttons ... Navigating with Waypoints and Routes ... Waypoints ... Routes ... Additional Maps ... - Page 4 Fitness ... Profiles... Appendix ... Registering Your Device ... Updating the Software ... Viewing Important Device Information ... Contacting Garmin Product Support ... Using the Backlight ... Specifications ... Maximizing Battery Life ... About the Batteries ... Buying Optional Accessories ...
-
Page 5: Getting Started
Getting Started WARNING See the Important Safety and Product Information guide in the product box for product warnings and other important information. When using your device the first time, you should complete the following tasks to set up the device and get to know the basic features. -
Page 6: Device Overview
Buttons (page mini-USB port (under weather cap) Camera lens. Available only on the GPSMAP 62sc and GPSMAP 62stc. MCX connector for GPS antenna (under weather cap). Available only on the GPSMAP 62s and the GPSMAP 62st. microSD card slot (under ™... -
Page 7: Battery Information
Battery Information The device operates on two AA batteries. Use alkaline, NiMH, or lithium batteries. Use precharged NiMH or lithium batteries for best results (page 42). Installing the Batteries 1. Remove the battery cover by turning the D-ring 1/4 turn counter- clockwise and pulling up. -
Page 8: Buttons
A question mark flashes while the device determines your location. 4. Quickly press to open the backlight status page. The GPS bars indicate satellite strength. When the bars are green, the device has acquired satellite signals. Buttons FIND Press FIND to open the search menu. -
Page 9: Navigating With Waypoints And Routes
Navigating with Waypoints and Routes Waypoints Waypoints are locations you record and store in the device. Creating Waypoints 1. From any page, press MARK. 2. Select Done. Navigating to a Waypoint Using the Search Menu You can use the search menu to quickly find waypoints, tracks, routes, and coordinates that you have saved. -
Page 10: Routes
Routes A route is a sequence of waypoints that leads you to your final destination. Creating a Route 1. From the main menu, select Route Planner > Create Route > Select First Point. 2. Select a category. 3. Select the first point in the route. 4. -
Page 11: Viewing The Active Route
• Insert—adds an additional point on the route. The additional point is inserted before the point you are editing. • Remove—removes the point from the route. Viewing a Route on the Map 1. From the main menu, select Route Planner. 2. -
Page 12: Additional Maps
Additional Maps To purchase preloaded detailed map data cards, go to http://buy.garmin.com or contact your Garmin dealer. Finding an Address with City Navigator ® You can use optional City Navigator maps to search for addresses, cities, and other locations. The detailed maps... -
Page 13: Tracks
Tracks About Tracks Your Garmin device records a track log while you are moving. You can save these tracks and navigate to them later. You can view archived or loaded tracks by selecting Track Manager from the main menu. Managing Track Log Recording 1. -
Page 14: Navigating A Saved Track
Viewing the Current Track The track being recorded is called the current track. 1. From the main menu, select Track Manager > Current Track. 2. Select an option: • View Map—shows the current track on the map. • Elevation Plot—shows the elevation plot (page current track. -
Page 15: Using The Main Pages
Using the Main Pages The information needed to operate this device is found on the following pages: map, compass, main menu, and trip computer. Customizing the Data Fields You can customize the data fields that appear on the main pages. For data field descriptions, see page 1. -
Page 16: Measuring Distance
Measuring Distance You can move the cursor around the map to measure distance from the current location. 1. From the map, press MENu. 2. Select Measure Distance. The device automatically begins measuring from your current location. 3. Move the cursor to a point you want to measure to. -
Page 17: Compass
NOTE: The three-axis compass is available only with the GPSMAP 62s, GPSMAP 62st, GPSMAP 62sc, and GPSMAP 62stc. You should calibrate the compass after moving long distances, experiencing temperature changes, or changing the batteries. -
Page 18: Using The Compass
Using Sight ‘N Go NOTE: Sight ‘N Go is available only with the GPSMAP 62s, GPSMAP 62st, GPSMAP 62sc, and GPSMAP 62stc. You can point the device at an object in the distance, such as a lighthouse, lock in the direction, and then navigate to the object. -
Page 19: Elevation Plot
Elevation Plot NOTE: The elevation plot page is available only with the GPSMAP 62s, GPSMAP 62st, GPSMAP 62sc, and GPSMAP 62stc. Calibrating the Barometric Altimeter You can manually calibrate the barometric altimeter if you know the correct elevation or the correct pressure. -
Page 20: Opening The Main Menu
Elevation Plot Setup Options From the elevation plot, press MENu. • Change Plot Type—sets the type of data shown on the elevation plot: ◦ Elevation/Time—records elevation changes over a period of time. ◦ Elevation/Distance—records elevation changes over a distance. ◦ Barometric Pressure—records barometric pressure over a period of time. -
Page 21: Trip Computer
Trip Computer The trip computer displays your current speed, average speed, maximum speed, trip odometer, and other helpful statistics. Trip Computer Setup Options From the trip computer, press MENu. • Reset—resets all the trip computer values to zero. For accurate information, reset the trip information before beginning a trip. -
Page 22: Main Menu Features And Settings
GPSMAP 62stc. Your device can send or receive data when connected to another compatible device. You must be within 10 feet (3 m) of the compatible Garmin device. Sending and Receiving Data 1. From the main menu, select Share Wirelessly. -
Page 23: Proximity Alarms
Proximity Alarms Proximity alarms alert you when you are approaching a predetermined area. Setting a Proximity Alarm 1. From the main menu, select Proximity Alarms. 2. Select Create New. 3. Select a category. 4. Select a point. 5. Select use. 6. -
Page 24: Satellite
• AutoLocate Position—calculates ® your GPS position using the Garmin AutoLocate feature. Additional Main Menu Tools • Calendar—displays a calendar. • Calculator—displays a calculator. • Sun and Moon—displays sunrise and sunset times along with the moon phase. - Page 25 • Alarm Clock—sets an audible alarm. If you are not currently using the device, you can set the device to turn on at a specific time. • Hunt and Fish—displays the predicted best dates and times for hunting and fishing at your current location.
-
Page 26: Camera And Photos
Camera and Photos You can take photos with the GPSMAP 62sc and GPSMAP 62stc. When you take a photo, the geographic location is automatically saved in the photo information. You can navigate to the location like a waypoint. Taking a Photo 1. -
Page 27: Deleting A Photo
1. From the main menu, select Photo Viewer. 2. Use the rocker to scroll through all the photos. 3. Select a photo to see a larger view of it. Press IN or OuT to zoom in or zoom out on the photo you are viewing. - Page 28 Uploading and Downloading Photos from Garmin Connect 1. Connect your device to a computer (page 45). 2. Go to http://my.garmin.com. 3. If necessary, create an account. 4. Sign in. 5. Follow the on-screen directions to upload or download photos. GPSMAP 62 Series Owner’s Manual...
-
Page 29: Customizing Your Device
2. Select Change Data Fields. 3. Select a data field. 4. Follow the on-screen instructions. Data Field Options ** Available only with the GPSMAP 62s, GPSMAP 62st, GPSMAP 62sc, and GPSMAP 62stc. Data Field Description Accuracy of The margin of error for your exact location. - Page 30 Data Field Description Course The direction from your starting location to a destination. Depth The depth of the water. Requires a connection to a NMEA 0183 depth- capable device to acquire data (page **Descent - The average vertical Average distance of descent. **Descent - The maximum Maximum...
- Page 31 Glide Ratio To The glide ratio Dest. required to descend from your current position and elevation to the destination elevation. GPS Signal The strength of the Strength GPS signal. Heading The direction you are moving. **Heart Rate Your heart rate in...
- Page 32 Speed - Overall Your average speed Avg. since last reset. Sunrise The time of sunrise based on your GPS position. Sunset The time of sunset based on your GPS position. Temperature - The temperature of Water the water.
- Page 33 Data Field Description Trip Time - A running tally of Moving time since the last reset. Trip Time - The time spent not Stopped moving since the last reset. Trip Time - Total A running tally of distance traveled since the last reset. Turn The angle of difference (in...
-
Page 34: System Settings
• Battery Type—allows you to select the type of battery you are using. • Interface—sets the format of the serial interface: ◦ Garmin Serial—Garmin proprietary format used to provide PVT protocol data. ◦ NMEA In/Out—provides standard NMEA 0183 output and input. -
Page 35: Display Settings
• Screen Capture—allows you to take screen captures on the device. Setting Up Tones Your Garmin device allows you to customize the key tones and message beeps, or to turn off tones. From the main menu, select Setup > Tones. -
Page 36: Setting Up Marine Alarms
• Spot Soundings—allows you to turn spot soundings on and set dangerous depths. • Light Sectors—displays the sector in which a navigational light is visible. You can select On to show light sectors at all times, or you can select Auto to allow the device to automatically filter out light sectors depending on the zoom level. -
Page 37: Resetting Data
Setting the Deep Water or Shallow Water Alarm 1. From the main menu, select Setup > Marine > Marine Alarm Setup. 2. Select Shallow Water > On to set an alarm to sound when the depth is less than the specified value. 3. -
Page 38: Customizing The Unit Settings
• Time Zone—allows you to select the time zone for the device. You can select Automatic to set the time zone automatically based on your GPS position. Position Format Settings NOTE: Do not change the position format or the map datum coordinate... -
Page 39: Altimeter Settings
• Position Format—sets the position format in which a given location reading appears. • Map Datum—sets the coordinate system on which the map is structured. • Map Spheroid—shows the coordinate system the device is using. The default coordinate system is WGS 84. Altimeter Settings From the main menu, select Setup >... -
Page 40: Geocache Settings
◦ Ambient Pressure—records ambient pressure changes over a period of time. Geocache Settings From the main menu, select Setup > Geocaches. • Geocache List—allows you to show the geocache list by names or codes. • Found Geocaches—allows you to enter the number of geocaches found. -
Page 41: Fitness
◦ Distance—routes you to the next point on the route when you are within a specified distance of your current point. • Avoidance Setup (requires routable maps)—allows you to select the road type you want to avoid. Fitness For more information on optional fitness accessories, see Profiles Profiles are a collection of settings that... -
Page 42: Appendix
• In the USA, go to www.garmin .com/support, or contact Garmin USA by phone at (913) 397.8200 or (800) 800.1020. • In the UK, contact Garmin (Europe) Ltd. by phone at 0808 2380000. GPSMAP 62 Series Owner’s Manual... -
Page 43: Using The Backlight
• In Europe, go to www.garmin.com and click Contact /support Support for in-country support information, or contact Garmin (Europe) Ltd. by phone at +44 (0) 870.8501241. Using the Backlight The backlight is activated any time you press a button. Alerts and messages also activate the backlight. - Page 44 2.4 GHz/ frequency/ ANT+ wireless protocol communications protocol • < 33 ft. (10 m) accuracy 95% typical use • GPS is subject to accuracy degradation to 100 m 2DRMS under the U.S. DoD imposed Selective Availability (SA) Program when activated.
-
Page 45: Maximizing Battery Life
Altimeter Accuracy: ± 10 ft. (± 3 m)* Resolution: 1 ft. (.3 m) Range: from -2,000 ft. to 30,000 (from -610 to 9144 *Subject to proper user calibration. Compass Accuracy: ± 2 degrees (± 5 degrees in extreme Northern and Southern latitudes)* Resolution: 1 degree. -
Page 46: About The Batteries
Stored data is not lost when batteries are removed. Buying Optional Accessories Go to http://buy.garmin.com, or contact your Garmin dealer for information about optional accessories, preloaded map data cards, fitness accessories, and replacement parts. Using Optional Fitness... - Page 47 Garmin device automatically recognizes the ANT+ accessory each time it is activated. This process occurs automatically when you turn on the Garmin device and only takes a few seconds when the accessories are activated and functioning correctly. • When paired, your Garmin device...
-
Page 48: Data Management
You can purchase microSD memory cards from an electronics supplier, or purchase preloaded detailed map data cards from your Garmin dealer. In addition to map and data storage, the memory cards can be used to store files such as images, cartridges, geocaches, OS 10.3... -
Page 49: Connecting The Usb Cable
microSD card 4. Push in and slide down the metal cover. 5. Replace the batteries and the battery cover. Removing a microSD Card 1. Slide up and pull out the metal cover. 2. Remove the card from the slot. 3. Push in and slide down the metal cover. -
Page 50: Disconnecting The Usb Cable
1. Browse your computer for the file. 2. Select the file. 3. Select Edit > Copy. 4. Open the “Garmin” or memory card drive/volume. 5. Select Edit > Paste. Deleting Files notice... -
Page 51: Attaching The Wrist Strap
Attaching the Wrist Strap 1. Place the loop of the wrist strap through the slot opening at the bottom of the device. 2. Route the strap through the loop, and pull it tight. GPSMAP 62 Series Owner’s Manual Attaching the Carabiner Clip 1. -
Page 52: Troubleshooting
Cleaning the Device 1. Use a cloth dampened with a mild detergent solution. 2. Wipe it dry. Cleaning the Screen 1. Use a soft, clean, lint-free cloth. 2. If necessary, use water, isopropyl alcohol, or eyeglass lens cleaner. 3. Apply the liquid to the cloth, and gently wipe the screen with the cloth. Troubleshooting Problem The screen or buttons... - Page 53 If you have several network drives mapped on your computer, Windows may have trouble assigning drive letters to your Garmin drives. See the Help file for your operating system to learn how to assign drive letters. Go to http://buy.garmin.com, or contact your Garmin dealer.
-
Page 54: Index
Index accessories 42, 49 fitness microSD card acquiring satellite signals active route alarms marine proximity time altimeter calibrating plot type settings ANT+ accessories area calculation AutoLocate backlight 39, 41 BaseCamp batteries 25, 30, 40 about information installing maximizing life selecting the type storage warnings beeps... - Page 55 10, 15 barometric altimeter reset setup ENTER button FIND button 4, 5, 7, 8, 10 fitness options GPSMAP 62 Series Owner’s Manual Garmin Product Support geocaches 18, 36 downloading navigating settings GPS signals 3, 20, 25, 27, 40, 48 system settings...
- Page 56 GPSMAP 62 Series Owner’s Manual satellite signals 3, 20, 25, 27, 40, 48 AutoLocate system settings turning off GPS saving tracks search menu 4, 5 Sight ‘N Go software updating version specifications stopwatch...
- Page 57 sunrise and sunset 20, 28 zone times hunting and fishing tones tracks about clearing current deleting navigating recording saving viewing transferring files using USB wirelessly trip computer troubleshooting unit ID updating software USB cable GPSMAP 62 Series Owner’s Manual connecting disconnecting waypoints averaging...
- Page 60 For the latest free software updates (excluding map data) throughout the life of your Garmin products, visit the Garmin Web site at www.garmin.com. © 2010–2011 Garmin Ltd. or its subsidiaries Garmin International, Inc. 1200 East 151 Street, Olathe, Kansas 66062, USA Garmin (Europe) Ltd.