Garmin GPSMAP 536 Owner's Manual
Garmin gpsmap 536: user guide
Hide thumbs
Also See for GPSMAP 536:
- Owner's manual (88 pages) ,
- User manual (28 pages) ,
- Installation instructions manual (12 pages)
Table of Contents
Advertisement
Quick Links
Advertisement
Table of Contents

Related Manuals for Garmin GPSMAP 536


Summary of Contents for Garmin GPSMAP 536
- Page 1 GPSMAP 400/500 series ® owner’s manual...
- Page 2 All rights reserved. Except as expressly provided herein, no part of this manual may be reproduced, copied, transmitted, disseminated, downloaded or stored in any storage medium, for any purpose without the express prior written consent of Garmin. Garmin hereby grants permission to download a single copy of this manual onto a hard drive...
-
Page 3: Tips And Shortcuts
Introduction This manual includes information for the following products: GPSMAP 431/431s GPSMAP 441/441s ® GPSMAP 531/531s GPSMAP 536/536s GPSMAP 541/541s GPSMAP 546/546s Tips and Shortcuts • Press HOME from any screen to return to the Home screen. • Press MENU from any of the main screens to access advanced settings. -
Page 4: Table Of Contents
Navigating to a Destination ... Creating and Using Waypoints... Creating and Using Routes ... Using Tracks ... Using BlueChart g2 Vision ... Navigating with a Garmin Autopilot ... Viewing Information ...36 Viewing a Compass ... Viewing Numbers ... Viewing Trip Information ... - Page 5 Viewing Celestial Information ... Viewing User Data ... Viewing Other Vessels ... Configuring the Chartplotter ...48 Configuring System Settings ... Configuring Units of Measure ... Changing the System Language ... Configuring Navigation Preferences ... Configuring Communications Settings ... Setting Alarms ... Setting the Total Fuel Onboard Alarm ...
-
Page 6: Declaration Of Conformity (Doc)
Contact Garmin Product Support if you have any questions while using your unit. In the USA, go to www.garmin.com/support, or contact Garmin USA by phone at (913) 397.8200 or (800) 800.1020. In the UK, contact Garmin (Europe) Ltd. by phone at 0808 2380000. In Europe, go to www.garmin.com/support... -
Page 7: Getting Started
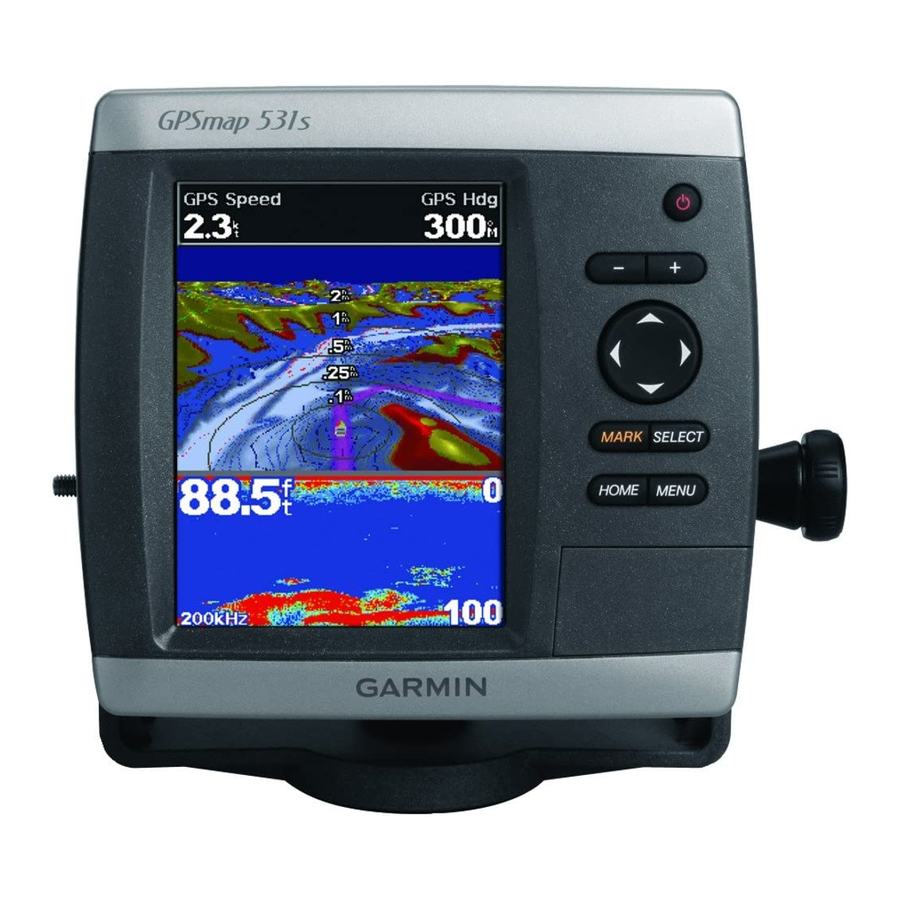
Unit Overview NMEA 2000 Power/Data External GPS antenna GPSMAP 400/500 Series Owner’s Manual Getting Started GPSMAP 536/546 GPSMAP 531 POWER/ BACKLIGHT RANGE (-/+) ROCKER MARK SELECT MENU HOME SD card slot GPSMAP 546... -
Page 8: Turning The Unit On Or Off
NOTE: The first time you turn on your unit, you must configure the initial settings. See “Initializing Unit Settings” To turn off the unit, press and hold the NMEA 2000 ® External GPS antenna Power/Data Power key. When the (page Power key. -
Page 9: Initializing Unit Settings
Initializing Unit Settings The first time you turn on your unit, configure the initial settings. NOTE: You can change these settings later using the Configure screen (page Language—select the language to display on the screen. welcome—select OK. Store demonstration—select NO. (This option is only available the first time the unit is turned on.) NMEa 0183 devices—if you have NMEA 0183 devices connected to a serial port, specify which ports are connected. -
Page 10: Adjusting The Backlight
To allow the unit to automatically adjust the backlight based on auto backlight ambient light, select (automatic backlight is available only on the GPSMAP 536 and GPSMAP 546). To switch between Day mode and night mode: 1. Press and release the Power key. -
Page 11: Using The Keypad
MENU green bars disappear HOME question mark. For more information about GPS, visit the Garmin Web site at www.garmin.com/aboutGPS. Using Simulator Mode Simulator mode turns the GPS receiver off for use indoors or for practice. The unit does not track satellites in simulator mode. -
Page 12: Viewing System Information
BlueChart imagery and aerial reference photos of ports, harbors, marinas and other points of interest. Use SD cards to transfer data such as waypoints, routes, and tracks to another compatible Garmin unit or a computer corner of the unit. Radio ®... -
Page 13: Understanding The Home Screen
® ™ MapSource or HomePort by clicking Help > Check for Software Updates, or check the Garmin Web site at www.garmin.com. Understanding the Home Screen Use the Home screen to access all other screens. Press any screen to return to the Home screen. -
Page 14: Using Charts
Using Charts Your chartplotter has a worldwide map and a built-in detailed map of US inland lakes, or BlueChart g2 cartography for the USA and Bahamas shoreline. • Navigation Chart—displays all relevant navigation data available on your preloaded maps, including buoys, lights, cables, depth soundings, marinas, and tide stations, in an overhead view. -
Page 15: Navigation Chart Menu
Data bars • Cruising—turn the GPS Speed, GPS Heading, Depth, and GPS Position data bar on or off. Select data bar Setup the position of the data on the screen. •... -
Page 16: Understanding Chart Data
• fishing—turn the Depth, Water Temperature, and Water Speed data bar on or off (available when using an “s” series unit with a transducer attached, or a “non-s” series unit with a Garmin Intelliducer attached). ™ • fuel—(available only when your chartplotter is connected to a... -
Page 17: Navigating To A Point On The Chart
navigating to a Point on the Chart 1. From the Home screen, select Charts. 2. Select navigation Chart, Fishing Chart, or Chart. 3. Use the rocker to select the point on the chart to which you want to go. 4. Press SELECT. 5. -
Page 18: Changing The Navigation Chart Settings
Accessing Additional Object Information Use the map pointer ( ) to view information about on-screen map items, waypoints, and charts. To access additional object information: 1. On the Navigation chart, highlight an item with the map pointer, and press SELECT. Selected item 2. -
Page 19: Changing The Chart Appearance
weather—sets up and displays various weather parameters, including precipitation (NEXRAD), cloud cover, visibility, WX buoys, and the weather legend. Sea temperature and fish species can be displayed on the Fishing chart (page 19). The weather feature is only available if the chartplotter is connected to a weather module and you have an XM subscription. - Page 20 Heading Line—draws an extension line from the bow of the boat in the direction of travel. • Off—turns the heading line off. • distance—sets the distance to the end of the heading line. • Time—sets the amount of time until you reach the end of the heading line.
-
Page 21: Using The Split Navigation Chart
Using the Split navigation Chart Use the Split Navigation chart to view two different zoom levels of the Navigation chart at the same time. Split navigation Chart (with a BlueChart g2 Vision card) The top half of the screen is zoomed in 10 times closer than the bottom half of the screen. -
Page 22: Using Mariner's Eye 3D
• waypoints—view, sort, or filter existing waypoints, or create new ones. • New waypoint—create and edit a new waypoint. active Tracks—manage tracks • (page • Saved Tracks—view a list of tracks that have been saved. Other Vessels—view information about other vessels. To view information about other vessels, your unit must be connected to an external AIS (Automatic Identification System) or DSC (Digital Selective Calling) device... - Page 23 Press the range (+) key to move the view closer to your boat and lower to the water. Press the range (-) away from the boat. The scale ( the bottom of the screen. To view details about navaids such as beacons, lights, and obstructions: 1.
-
Page 24: Using Fish Eye 3D
Range Rings—toggles the range rings on or off to provide distance measurement. Safe depth—adjusts the depth at which red indicates dangerous depths. Lane width—adjusts the width of the course line drawn when navigating. This setting also affects routes (Route To), but does not affect Auto Guidance (guide To). -
Page 25: Using Fishing Charts
Using Fishing Charts Use the Fishing chart for a detailed, unobstructed view of the bottom contours on the chart. The Fishing chart uses detailed bathymetric data, and is best for offshore deep-sea fishing. From the Home screen, select Charts > fishing To access additional settings from the Fishing chart, press MEnU. -
Page 26: Viewing Aerial Photos
NOTE: When enabled, the high-resolution satellite images are only present at closer zoom levels. If you cannot see the high-resolution images in your BlueChart g2 Vision region, either zoom in further Range (+) key, or set the detail level higher using the Photo Overlay Off Land Only Photo Overlay... -
Page 27: Animated Tide And Current Indicators
To access aerial photos from the navigation chart: Use the rocker to highlight a camera icon with the pointer, and select Aerial Photo review > Aerial Animated Tide and Current Indicators You can view indicators for animated tide station and current direction on the Navigation chart or the Fishing chart. -
Page 28: Using Automatic Guidance
instructions on searching for, and navigating to, these POIs, see the “Where To?” section beginning on page Using Automatic Guidance Auto Guidance automatically creates and suggests routes based on available BlueChart g2 Vision chart information. See instructions on setting up Auto Guidance for your boat. If Auto Guidance must calculate a route close to potentially dangerous points, those points are outlined in red, and a message appears informing you that there are potentially unsafe areas along... -
Page 29: Ais Targeting Symbols
AIS information. The information reported for each vessel includes the Maritime Mobile Service Identity (MMSI), the location, the GPS speed, the GPS heading, the time that has elapsed since the last position of the vessel was reported, the nearest approach, and the time to the nearest approach. - Page 30 The location of this symbol indicates the closest point of approach to a dangerous target, and the numbers near the symbol indicate the time to the closest point of approach to that target. Dangerous target is lost. A red X indicates that the AIS transmission from the vessel is lost, and the chartplotter displays a message banner asking whether the vessel should continue to be tracked.
-
Page 31: Activating A Target For An Ais Vessel
Projected course Activated target MMSI Target with Course over Ground and Heading Showing AIS Vessels on a Chart or on a 3D Chart View AIS requires the use of an external AIS device and active transponder signals from other vessels. You can configure how other vessels appear on a chart or on a 3D chart view. -
Page 32: Viewing Information About A Targeted Ais Vessel
Viewing Information about a Targeted AIS Vessel You can view the AIS signal status, MMSI, GPS speed, GPS heading, and other information that is reported about a targeted AIS vessel. 1. From the Home screen, select Charts. 2. Select navigation... - Page 33 Viewing a List of AIS Targets NOTE: Mariner’s Eye 3D charts and Fish Eye 3D charts are available only if you use a BlueChart g2 Vision SD card. The AIS target list shows information about all of the boats your unit is monitoring.
-
Page 34: Where To
Where To? Use the where To? option on the Home screen to search for, and navigate to, waypoints, routes, tracks, and services such as nearby fuel, repairs, and ramps. NOTE: You must create waypoints and routes before you can navigate to them. You can navigate to a destination using one of three methods: go To, Route To, or guide To. - Page 35 3. Select a destination. nOTE: Press the right or left arrow on the additional information or to display the location on a chart. 4. Select navigate 5. Select Go To route Guide To Select when using a preprogrammed BlueChart g2 Vision card to use Auto Guidance.
-
Page 36: Creating And Using Waypoints
Creating and Using Waypoints You can store up to 3,000 waypoints with a user-defined name, symbol, depth, water temperature, location, and comment for each waypoint. 1. From the Home screen, select Charts MEnU > Waypoints & Tracks > From the Home screen, select Information Waypoints Options... -
Page 37: Creating And Using Routes
5. Press SELECT to save the new location, or press cancel the move. To view waypoint information on the navigation chart: 1. From the Navigation chart, use the map pointer ( the waypoint on the Navigation chart and press SELECT. 2. - Page 38 3. Use the map pointer ( ) to select the location at which you want to make the last turn toward your destination. 4. Press SELECT. Repeat this step to add additional turns. 5. Press MEnU to cancel, to undo the last turn, or to begin navigating the route.
-
Page 39: Using Tracks
3. Select Edit route. You can edit the route name or use the chart or turn list to edit the route turns. To delete a route: 1. From the Home screen, select Information routes. 2. Select the route to delete. 3. -
Page 40: Using Bluechart G2 Vision
To retrace the active track: 1. From the Navigation or Perspective 3D chart, select Waypoints & Tracks > Active Tracks 2. Select either the time the current track began or 3. Follow the colored line on the screen. To edit or delete a saved track: 1. -
Page 41: Navigating With A Garmin Autopilot
Garmin Autopilot When you start any type of navigation (go To, Route To, guide To, or follow Track), if you are connected to a compatible Garmin autopilot, you are prompted to engage the autopilot. NOTE: Autopilot can be used only with NMEA 2000 compatible chartplotters (GPSMAP 441/441s, GPSMAP 536/536s, GPSMAP 541/541s, and GPSMAP 546/546s). -
Page 42: Viewing Information
From the Home screen, select Compass. Viewing numbers You can view and customize numerical data including depth, GPS information, and navigation information. You can customize the number of fields shown and the type of information shown in each field. You can view up to six fields of numerical information. -
Page 43: Viewing Trip Information
To customize the numbers screen: 1. From the Home screen, select Information numbers. 2. Press MEnU and select Configure. 3. Select the number of fields to show (3, 4, 5, or 6). 4. Select information to show in each field. Select a field to view additional information that can be shown or select and press the range... - Page 44 From the Home screen, select Information Engine. Fuel gauge Fuel flow Cycling Through Engine Gauge Screens 1. From the Home screen, select Information Engine. 2. Select the left and right arrows on the gauge screen to the next. Customizing Engine Gauge Limits >...
- Page 45 5. Select the gauge limit. 6. Repeat steps 4 and 5 to set additional gauge limits. Activating Status Alarms for Engine Gauges If you have activated gauge status alarms, when the engine sends a warning status message over the NMEA 2000 network, a gauge status alarm message appears.
-
Page 46: Viewing And Synchronizing Fuel Gauges
Configuring Engine Gauges The amount of fuel on board can be represented by either the total fuel level (numeric) or by individual tank level (graphic). From the Home screen, select Information Engine > MEnU > Gauge Setup > Fuel • Use Total Fuel Level—select to display a numeric value for the total fuel level. -
Page 47: Viewing And Customizing Wind Gauges
GPS antenna. A wind sensor, a water- speed sensor, a heading sensor, and a GPS antenna; or a wind sensor and a GPS antenna; or a wind sensor, a water-speed sensor, and a heading sensor. Information >... -
Page 48: Viewing Tide-Station Information
You can specify the source of the heading displayed on the wind gauge. Magnetic heading is the heading data received from a heading (or magnetic) sensor, and GPS heading data is calculated by your chartplotter GPS. From the Home screen, select... -
Page 49: Viewing Current Information
Viewing Current Information Use the Current Prediction screen to view information for currents. 1. Select Information > Tides & Currents 2. Select a current station. Current-station information is shown. Select Change Date > Manual to view current-station information for a different date. Select Show report to view the Current Prediction Report for... -
Page 50: Viewing User Data
2. Check your MapSource version on the computer by clicking Help > About MapSource. If the version is older than 6.12.2, update to the most-current version by clicking Help > Check for Software Updates, or check the Garmin Web site at www.garmin.com. >... - Page 51 To copy or merge HomePort data to your chartplotter: 1. Insert an SD card into an SD card reader that is attached to the computer. 2. From within HomePort, click the folders or items you want to transfer. 3. Click File > Export. •...
- Page 52 Information > User Data to create a new file. Enter the file name Explorer, open the Garmin\UserData folder on ® GPSMAP 400/500 Series Owner’s Manual > Data Save To...
-
Page 53: Viewing Other Vessels
To restore backup data to your chartplotter: 1. Copy the appropriate .ADM file from the computer to an SD card in the Garmin\UserData folder. 2. Insert the SD card into your chartplotter. 3. From the Home screen on your chartplotter, select User Data >... -
Page 54: Configuring The Chartplotter
The Save to Card button is provided as a troubleshooting 5) on or off. Select Setup tool. A Garmin Product Support representative may ask you to use this feature to retrieve data about your chartplotter. Event Log—displays a list of system events. Select an event to view additional information. -
Page 55: Changing The System Language
Speed Sources—specify the sensor used for wind numbers and fuel economy. Select wind fuel Economy (from a water-speed sensor) and GPS (from the calculated GPS speed). auto guidance—set the Auto Guidance parameters: (page to toggle between water... - Page 56 • Safe depth—set the minimum depth (chart depth datum) to allow when calculating an Auto Guidance path. A safe depth of less than one meter is not allowed when using Auto Guidance. Safe Height—set the minimum height (chart height datum) of a •...
-
Page 57: Configuring Communications Settings
NMEA devices, a computer, or other Garmin devices. NMEa 0183 Setup—enable or disable NMEA 0183 output sentences for sounder, route, system, and Garmin NMEA settings. To enable or disable nMEA 0183 output sentences: 1. From the Home screen, select nMEA 0183 2. -
Page 58: Setting Alarms
• device List—lists the NMEA 2000 devices on your network. If a NMEA 2000 device has configuration options or settings, select the device for a list of options. • Label devices—allows you to name your engines and tanks so that you can better identify their location on the boat. To label engines as numbers: From the Home screen, select Configure... - Page 59 To set a system alarm from the Home screen, select Alarms Clock—set an alarm using the system (GPS) clock. The unit must be on for the clock alarm to work. battery—set an alarm to sound when the battery reaches a specified low voltage.
-
Page 60: Setting The Total Fuel Onboard Alarm
NOTE: To receive fuel-level information, your unit must be connected to an external fuel sensor, such as the Garmin GFS 10. To enable the Total Fuel Onboard alarm and set the fuel alarm level: 1. -
Page 61: Setting The Water Temperature Offset
Temp Offset—set the temperature offset for the temperature sensor of your transducer. Setting the Water Temperature Offset You must have a NMEA 0183 water-temperature sensor, a Garmin Intelliducer, or a temperature-capable transducer to measure water temperature. GPSMAP 400/500 Series Owner’s Manual The temperature offset compensates for the temperature reading from a temperature sensor. -
Page 62: Configuring Other Vessels
If the wheel turns freely, check the cable connections. If you continue to get the message, contact Garmin Product Support. fuel Capacity—enter the combined fuel capacity of all the engines on your boat. -
Page 63: Using Sonar
Using Sonar When connected to a transducer, the following chartplotters can be used as fishfinders: GPSMAP 431s GPSMAP 441s GPSMAP 531s GPSMAP 536s GPSMAP 541s GPSMAP 546s Understanding the Full Screen Select the Full Screen option to view a full-screen graph of the transducer’s sonar readings. -
Page 64: Understanding The Split Frequency Screen
Understanding the Split Frequency Screen Use the Split Frequency screen (dual-frequency transducer only) to view both the 50 kHz and the 200 kHz frequencies on the same screen. A 50 kHz frequency graph appears on the left. A 200 kHz frequency graph appears on the right. -
Page 65: Understanding The Depth Log Screen
Understanding the Depth Log Screen The Depth Log screen keeps a graphic log of depth readings over time. The present depth is shown in the top-left corner. From the Home screen, select Sonar MENU Press to set the duration and the scale for the log. Depth Time elapsed... -
Page 66: Setting Up Sonar
The temperature appears along the right side, and the time elapsed appears along the bottom. The graph scrolls to the left as information is received. Setting Up Sonar Use the Sonar Setup screen to define and adjust settings universal to all sonar screens. -
Page 67: Advanced Sonar Settings
• whiteline—highlights the strongest signal from the bottom to help identify its hardness or softness. Off (default)—turns off whiteline. ◦ High—the most sensitive setting. Almost all strong returns ◦ are highlighted in white. ◦ Medium—many strong returns are highlighted in white. ◦... - Page 68 Using Sonar • Split Zoom—displays the Split Zoom screen (page 58). Noise Reject (available only when gain is set to Manual)—reduces on-screen visual clutter (usually from electrical sources) on the screen. Select the top slider bar to manually adjust the value of noise rejection.
-
Page 69: Using Digital Selective Calling (Dsc)
The chartplotter can track the positions of vessels sending position reports. Quickly set up and send individual routine call details to your Garmin VHF radio. When you initiate a man-overboard distress call from your radio, the chartplotter displays the man- overboard screen and prompts you to navigate to the man-overboard point. -
Page 70: Adding A Dsc Contact
2. Complete one of the following: • Select with the radio to call the vessel in distress option is only available if you are using a Garmin NMEA 2000 compatible VHF radio. • Select your radio is tracking the position of the vessel, select show or hide the trail line for the vessel, and select to change the line color. -
Page 71: Man-Overboard Distress Calls Initiated From A Vhf Radio
2. Select from the following options: • Select Call with radio the radio to call the vessel that sent the position report. This option is only available if you are using a Garmin NMEA 2000 compatible VHF radio. • Select Edit to edit the vessel name and the vessel symbol, and add a comment. -
Page 72: Placing An Individual Routine Call
Select Trail Line Hours, all Placing an Individual routine Call When you connect your Garmin chartplotter to a Garmin VHF NMEA 2000 compatible radio, you can use the chartplotter interface > > to set up an individual routine call. When setting up an individual routine call from your chartplotter, you can select one of the following channels on which you want to communicate. -
Page 73: Calling An Ais Target
GPSMAP 400/500 Series Owner’s Manual Calling an AIS Target When you connect your Garmin chartplotter to a Garmin VHF NMEA 2000 compatible radio, you can use the chartplotter interface to set up an individual routine call to an AIS target. For more... -
Page 74: Using Xm Wx Weather And Audio
Using XM WX Weather and Audio In order to use XM weather and audio, you must have a compatible Garmin XM WX receiver, such as a GXM 51, and an activated XM subscription. Visit http://www8.garmin.com/xm/ information. To connect the XM antenna and receiver and for subscription instructions, refer to the manual for your XM equipment. -
Page 75: Viewing Nexrad Precipitation Information
If Weather is set to Off, none of the weather parameters will be visible on the chart. To view weather information on a Perspective 3D chart or a Mariner’s Eye 3D chart: Press MEnU > Weather radar > On. Viewing nEXrAD Precipitation Information Information From the Home screen, select Precipitation. - Page 76 To view weather options, press MENU. • Change weather—displays other weather options. Select weather Subscription to view your subscription information. • Cloud Cover—shows or hides the display of cloud cover. • NEXRad Loop—displays NEXRAD information as an animated loop of the latest updates. •...
- Page 77 Understanding Hurricane Information The Hurricanes feature shows the current position of a hurricane, tropical storm, or tropical depression, as well as its projected path (indicated by a red line). The darkened dots on the red line display the projected locations received from the National Hurricane Center. The center provides four forecasts at 12-hour intervals (12 Hrs, 24 Hrs, 36 Hrs, and 48 Hrs), as well as the current conditions (Now).
-
Page 78: Viewing Forecast Information
Tornado Warning Severe Thunderstorm Warning Flood Warning Flash Flood Warning Viewing Forecast Information Forecasts show the weather conditions including fronts and precipitation. information From the Home screen, select To view the forecast for another time period: 1. From the Home screen, select Information Forecast. -
Page 79: Viewing Fishing Information
Understanding City Forecasts City forecasts appear as standard weather symbols. The forecast is viewed in 12-hour increments for the next 48 hours. Viewing Fishing Information The Fishing view contains current water temperature, surface pressure conditions, and fishing forecasts. information From the Home screen, select GPSMAP 400/500 Series Owner’s Manual Understanding Surface Pressure This feature shows pressure isobars and pressure centers. -
Page 80: Viewing Sea Conditions
Understanding Water Temperature Data The Water Temperature feature indicates the water’s surface temperature, as indicated by the legend on the left of the screen. The temperature breaks are indicated by isotherm lines. Viewing Fish Forecasting This feature shows areas that contain optimal weather conditions for specific species of fish. -
Page 81: Viewing Visibility Information
Understanding Wave Period The Wave Period feature provides the time (in seconds) between successive waves. Understanding Wave Direction The Wave Direction feature shows the direction in which a wave is moving, as indicated by the direction of the red arrow. GPSMAP 400/500 Series Owner’s Manual Viewing Visibility Information Visibility is the forecast maximum horizontal distance that can be... -
Page 82: Using Xm Audio
Using XM Audio When a Garmin XM receiver is connected to the audio input of your boat, you can listen to XM audio channels. To display the XM audio interface while navigating: From the any chart except a split screen chart, press Data Bars >... -
Page 83: Appendix
320 × 240 pixels. GPSMAP 531/541: 5.0 in. diagonal (12.7 cm), QVGA display with adjustable brightness, 320 × 234 pixels. GPSMAP 536/546: 5.0 in. diagonal (12.7 cm), full VGA display with adjustable brightness, 640 × 480 pixels, capable of 4,096 colors. - Page 84 GPSMAP 441/441s GPSMAP 531/531s GPSMAP 541/541s Warm:* Approximately 1 second Cold:** Approximately 38 seconds GPSMAP 536/536s GPSMAP 546/546s Warm:* Approximately 15 seconds Cold:** Approximately 38 seconds *warm: your unit is at or near the last location where you recently acquired satellites.
-
Page 85: Alarms And Messages
MENU Can’t Read User Card—error reading card; remove and reinsert. Contact your dealer or Garmin Product Support if the problem persists. Can’t Read Voltages That High, Limited To Top Of Range—the voltage value in the Battery Alarm setup is higher than the unit can read. - Page 86 Position Report Received from—shows the MMSI or name associated with an MMSI. database Error—internal problem with the unit. Contact your dealer or Garmin Product Support to have the unit serviced. deep water alarm—the Deep Water Alarm depth has been reached.
- Page 87 Sonar Timeout—there is an internal problem with the unit. Contact your dealer or Garmin Product Support to have the unit serviced. Sonar Service Lost—the external sonar device you were connected to has either been disconnected or the unit has lost communication with the sonar device for some other reason.
-
Page 88: Capturing Screenshots
1. Remove the SD card from the chartplotter and insert it into an SD card reader that is attached to a computer. 2. From Windows Explorer, open the Garmin\scrn folder on the SD card. 3. Copy the appropriate .bmp file on the card and paste it to any location on the computer. -
Page 89: Weather Data Warranty
You assume the entire risk related to your use of the Services. XM and Garmin assume no responsibility for accidents resulting from or associated with use of the Services. -
Page 90: Software License Agreement
SOFTWARE LICENSE AGREEMENT. PLEASE READ THIS AGREEMENT CAREFULLY. Garmin Ltd. and its subsidiaries (“Garmin”) grant you a limited license to use the software embedded in this device (the “Software”) in binary executable form in the normal operation of the product. Title, ownership rights, and intellectual property rights in and to the Software remain in Garmin and/or its third-party providers. -
Page 91: Index
GPSMAP 400/500 Series Owner’s Manual Clear User Data close hauled wind gauge collision alarm colors, hazard Color Scheme Communications Compass compass rose contact information, Garmin coordinates, grid creating waypoints using 34–38 course up Cruising current stations customizing chart settings dashboard... - Page 92 Full Screen Map fuse Label Devices Lane Width 16, gain Language Garmin Data Transfer lightning information go to Light Sectors GPS 5, 48, low-pressure center GPS heading Grid (North) grid coordinates magnetic heading...
- Page 93 scroll speed SD cards radio inserting Range removing AIS Alarm sea conditions sonar SELECT key Range keys Serial Port setup Range Rings 16, Service Points registering your product settings restoring factory settings alarms Rocker key chart Roses collision alarm routes communications creating fish eye 3D...
- Page 94 Weather Radar 16, Where To Vehicle Icon Whiteline version (software) wind barbs VHF radio wind gauges viewing viewing currents World Map other boats wind gauges tide stations customizing user data visibility information XM Audio XM weather WAAS warnings county zoom water temperature 74, offset wave direction...
- Page 96 For the latest free software updates (excluding map data) throughout the life of your Garmin products, visit the Garmin Web site at www.garmin.com. © 2010 Garmin Ltd. or its subsidiaries Garmin International, Inc. 1200 East 151 Street, Olathe, Kansas 66062, USA Garmin (Europe) Ltd.