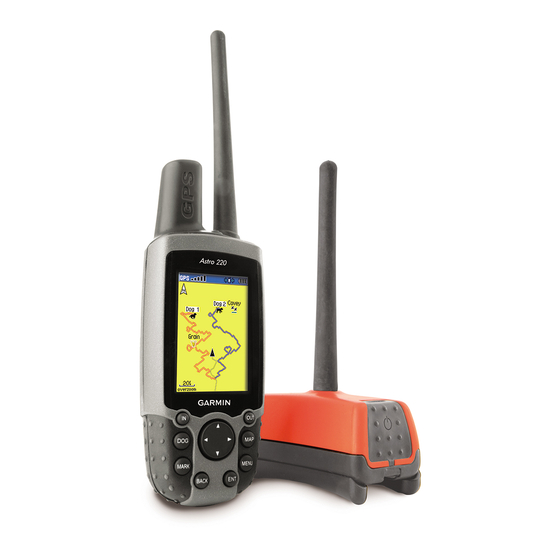
Garmin Astro 220 Owner's Manual
Gps-enabled dog tracking system
Hide thumbs
Also See for Astro 220:
- Owner's manual & reference (92 pages) ,
- Owner's manual (77 pages) ,
- Setup manual (6 pages)
Table of Contents
Advertisement
Advertisement
Table of Contents

Related Manuals for Garmin Astro 220


Summary of Contents for Garmin Astro 220
- Page 1 Owner’s Manual Astro ™ GPS-enabled dog tracking system...
- Page 2 Information in this document is subject to change without notice. Garmin reserves the right to change or improve its products and to make changes in the content without obligation to notify any person or organization of such changes or improvements.
- Page 3 MENU key twice or press the BACK key repeatedly. • To extend battery life, turn off the GPS when not using the Astro 220 for navigation or dog tracking. Also, decrease the level of the display’s backlight, by quickly pressing and releasing the POWER key.
-
Page 4: Table Of Contents
... Getting Started ...1 Unit Overview ... Installing the Batteries ... Using the Astro 220 Keypad Functions ... Turning on the Astro 220 ... Charging the DC 20 ... Initializing the GPS Receivers ... Calibrating the Astro 220 Compass ... - Page 5 Finding an Interstate Exit ... Finding an Address ... Intersections ... Searching for a Point of Interest ... GPS Applications ...30 Trip Computer Page ... Compass Page ... Altimeter Page ... Using Tracks ... Routes ...45 Navigating a Route ...
-
Page 6: Introduction
Astro Dog Tracking System Owner’s Manual www.garmin.com/prop65... -
Page 7: Dc 20 Battery Warnings
• Only replace with a Garmin lithium-ion battery pack. Using another battery presents a risk of fire or explosion. To purchase a replacement battery, see your Garmin dealer or the Garmin Web site. • Do not leave the DC 20 where a dog may attempt to chew on it. -
Page 8: Mygarmin
Check your state and local laws and ordinances for similar restrictions. Other Garmin dashboard or friction mounting options should be used. Garmin does not take any responsibility for any fines, penalties, or damages that may be incurred as a result of disregarding this notice or as a result of any other state or local law or ordinance relating to use of the unit. -
Page 9: Getting Started
Unit Overview screen Astro Dog Tracking System Owner’s Manual ettInG tarted antenna Power key Lanyard attachment slot Belt clip button attachment location Keypad ettInG tarted antenna USB connector port (under weather cap) Battery compartment locking D-Ring Battery compartment cover and access to the microSD card tray... -
Page 10: Installing The Batteries
2. Insert the batteries, observing the proper polarity. A polarity diagram is molded into the battery compartment. 3. Reinstall the battery cover. Remove the batteries from your Astro 220 when you do not expect to use the unit for several months. Data is not lost when batteries are removed. To install the lanyard: 1. Place the loop of the lanyard through the slot at the upper left side on the back of the unit. -
Page 11: Using The Astro 220 Keypad Functions
Using the Astro 220 Keypad Functions POWER Key Press and hold to turn the unit on or off. Press and release to adjust the backlighting. IN/OUT Zoom Keys Press to zoom in or out on the Map page. Press to scroll up or down a list on any other page. -
Page 12: Turning On The Astro 220
Turning on the Astro 220 The first time you turn on the Astro 220, a message appears followed by a prompt. Thereafter, when the Astro 220 is turned on, the Introduction page appears, followed by the Dog Tracker page. -
Page 13: Charging The Dc 20
Battery charging slot Initializing the GPS Receivers The first time you turn on your Astro 220 and DC 20, each GPS receiver must collect overhead satellite signal data to establish its current location. To ensure proper initialization, the Astro 220 and DC 20 are shipped from... -
Page 14: Calibrating The Astro 220 Compass
Calibrating the Astro 220 Compass It is recommended that the Astro 220 compass be calibrated the first time you use it, after periods of storage, after you install new batteries, or when exposed to temperature changes of greater that 20 Calibrate the electronic compass outdoors. -
Page 15: Operating The Astro 220
Operating the Astro 220 This section explains how to enter and select information with the Astro 220. Understanding Terms The following terms are used throughout this manual: Select—move the highlighted area on the screen up, down, left, or right with the ROCKER to select individual fields. -
Page 16: Using The Status Bar
ettInG tarted To exit or return to a previous setting or page: Press the BACK key to move backward through your steps. Press BACK repeatedly to return to the Main Menu. Using the Status Bar At the top of each page, the status bar provides status information for several unit features. Status Bar • Power to the unit is provided by either batteries or from an auxiliary source (vehicle power cable or USB cable). -
Page 17: Dog Tracking
Dog List. Communicating with the DC 20 After the Astro 220 and the DC 20 have been turned on and both have a GPS location fix, you can then ensure the DC 20 is communicating with the Astro 220. If you... -
Page 18: Screen Buttons
20 GPS signal strength. Naming the dog Dog name By default the Astro 220 assigns the name Dog (Dog 1, field Dog 2, etc.) to every Dog Unit (DC 20) linked to it. When you use the ROCKER, to select the Name Field on the... -
Page 19: Tracking A Dog
(5, 10, or 30 seconds). • Transfer Dog Unit Track—initiates transfer of detailed tracks from the DC 20 via the Astro 220 to a computer. See page 70 for details and procedures. • Delete Dog Unit Track—resets the DC 20 internal track log. -
Page 20: Dog Tracker Page Options Menu
GPS uncertainty and compass inaccuracy can contribute to several degrees of error on the dog pointer. Hold the Astro 220 level for accuracy. Observe the dog’s name, an icon showing its status, and the distance from your current location. (An unknown status symbol [?], indicates that the Astro 220 cannot determine the dog’s location.) Use the pointer to locate... -
Page 21: Adding Dogs To Dog List
Adding dogs to the Dog List If you purchased your Astro 220 as a kit, the DC 20 provided in the kit was linked to the Astro 220 at the factory. If you have additional DC 20 units, you can link... -
Page 22: Tips For Successful Tracking
Conflicting dog signals Each dog you are tracking has its own ID number. If two dogs within range of the Astro 220 have the same ID the Astro 220 warns you of a conflicting ID signal. It then opens a setup wizard to guide you through the process of ignoring the conflict. -
Page 23: Main Menu
Line-of-Sight Radio Communication BEST GOOD POOR Astro Dog Tracking System Owner’s Manual To open the Main Menu press MENU twice. Start New Hunt This option provides the ability to easily reset dog statistics, track logs, and mark the location of your vehicle. -
Page 24: Go To Marked Location
Go To Marked Location To navigate to a location you have marked: Select Go To Marked Location > select the location you want from the list. View Sunrise/Sunset The View Sunrise/Sunset page shows sunrise, sunset, moonrise, and moonset times before beginning a hunt. To view sun and moon locations for a specified time, date, and location: 1. Select View Sunrise/Sunset. -
Page 25: Advanced
Locations are landmarks you record and store in your Astro 220. When beginning a hunt, it’s a good practice to mark the location of your vehicle so you can use your Astro 220 to navigate back to it. The Start New Hunt detailed maps. ®... -
Page 26: Marking Hunting Specific Locations
ocatIon Marking Hunting Specific Locations When you press the MARK key, the Mark Location Menu appears with the New option highlighted. All of the items shown mark your current location, and some assign a special hunting related name and symbol to the marked location. -
Page 27: Averaging A Marked Location
Editing a Location You can edit a location by changing the symbol, name, note, location coordinates, elevation, and depth. To edit a location: 1. Select Advanced > Find > select Marked Locations to open the Location page. 2. Select the location you want to edit, and press ENTER. 3. Make changes by selecting each field and use the location symbol chart and alphanumeric keypad to enter new data. -
Page 28: Map Page
The position marker shows your travel on the Map page. When you press the ROCKER, the Astro 220 enters pan mode, which moves the map to keep the map pointer within the display area. You can move the map pointer about the page to highlight and identify map items. -
Page 29: Map Page Options
Map Page Options Use the Map page Options Menu to customize the Map page. With the Map page open, press MENU > select an option > press ENTER. The following options are available: • Stop (Resume) Navigation—stops navigation and is disabled when there is no active navigation. -
Page 30: Data Fields
Data Fields When navigating on the Map page, you can add and configure data fields at the top of the page that provide a variety of travel and navigational information. To show data fields on the Map page: 1. Press MENU > select Data Fields. 2. -
Page 31: Measuring Distance
Measuring Distance You can measure the distance between two map items. To measure distance between two points: 1. Press MENU > select Measure Distance >. An on- screen arrow appears on the map at your current location with REF below it. 2. Move the arrow to the point you want to measure from and press ENTER. A push pin marks the point. 3. Move the arrow to the point you want to measure to. The distance between the two points is shown in the upper-right corner of the Map page. Astro Dog Tracking System Owner’s Manual End point of measurement labeled REF Measured... -
Page 32: Find Features
Use the Find Menu to search for marked locations, cities, and exits included in the Astro 220 basemap. Additional categories appear depending on the optional MapSource compatible detailed maps or BlueChart data loaded in the unit. When you open a Find category, it contains only those items near your current location or the pointer (if active). -
Page 33: Recent Finds
Recent Finds The Recent Finds page contains a list of the last 50 items you have viewed while searching. To go to a recently found item: 1. Press MENU twice > select Advanced > Find > Recent Finds > to open the Recent Finds page. 2. Select the item you want to go to, and press ENTER to open the item’s information page. 3. Select Go To. Find Item Information Page Options Menu The options menu for each information page contains options for using a Find item as a tool for navigation. - Page 34 eatureS To find an item near another item: 1. Press MENU twice > select Advanced > Find. 2. Select a category on the Find List, and press ENTER. 3. Select an item in the list, and press ENTER to open the information page. 4. Press MENU > select Find Near Here. The Find Menu opens again with each category containing items near the item selected on the information page. 5. Select a category and press ENTER to open a Find list of items near the item. To find an item from another location on the map: 1. Press MENU twice > select Advanced >...
-
Page 35: Finding A Location
3. Select a location, and press ENTER. Finding a Geocache You can view the list of geocache locations created using your Astro 220 or downloaded from your computer. For more information about geocaching, go to my.garmin.com, login and click “Go Geocaching”. Astro Dog Tracking System Owner’s Manual To find a geocache: 1. Press MENU twice > select Advanced >... -
Page 36: Finding A City
To find an address: 1. Open the Find Menu. 2. Select Addresses to open the Addresses Search page. If your unit has a GPS fix, the <Enter Region> field is populated with your current region. You do not have to specify a city in the <Enter City> field because the database has information for the entire region. -
Page 37: Intersections
POI Loader and Custom Points of Interest You can create your own category for points of interest by using the Garmin POI Loader utility, downloadable from the Garmin Web site: www.garmin.com/poiloader/. Follow the Help instructions to use POI Loader. -
Page 38: Gps Applications
The Main Menu Advanced option contains the GPS Applications Menu. The Main Menu can be accessed by pressing the MENU key twice. Each GPS Application has an options menu, containing setup options and functions that apply to the application. To view the options menu for an application, press MENU. -
Page 39: Compass Page
To learn how to use the bearing and course pointers refer to page 34. Course Pointer TIP: Hold the compass level when navigating to ensure maximum accuracy. The compass ring moves to indicate North orientation. GpS a ppLIcatIonS Bearing Pointer... - Page 40 GpS a ppLIcatIonS Compass Page Options Use the options menu to customize the Compass page. With the Compass page open, press MENU. To select an option, highlight it, and press ENTER. The following options are available: • Sight ‘N Go—allows you to navigate to an object within your sight by pointing the unit at it.
- Page 41 Sighting Page 4. Select Set Course to open the Compass page. 5. Begin traveling to your destination on a course line using the course pointer as a guide. OR Select Project Location to open the Project Location page. 6. Enter an estimated distance from your current location to establish a projected location. Astro Dog Tracking System Owner’s Manual 7. Select Go To to open the Map page and begin navigation to the projected location. The Compass page shows a bearing pointer for guidance. Stop/Resume Navigation To stop navigation: Press MENU select Stop Navigation. GpS a ppLIcatIonS...
- Page 42 GpS a ppLIcatIonS Using the Course or Bearing Pointer The bearing pointer and course pointer work independently of each other. The bearing pointer indicates the direction to your destination, and the course pointer indicates your relationship to a course line leading to the destination.
-
Page 43: Altimeter Page
To open the Altimeter page: Press MENU twice > select Advanced > GPS Scale Applications > Altimeter. Range grid... - Page 44 GpS a ppLIcatIonS The Status field at the bottom of the page shows the current elevation and your current rate of ascent or descent when moving. It can also show the ambient pressure and time of measurement. You can configure the profile field in the center of the page to show either elevation or ambient pressure plots as selected from the Altimeter page Options Menu.
-
Page 45: Zoom Ranges
ROCKER. Ranges for View Pressure Plot pressure values are shown when you press up or down on the ROCKER. Values for time are shown in the same manner as for elevation plots. GpS a ppLIcatIonS... -
Page 46: View Points On Map
GpS a ppLIcatIonS To adjust zoom ranges: 1. Select the type of plot you want to view, and use the ROCKER to select Zoom Ranges on the Options Menu. 2. Press ENTER to open the Zoom Ranges page. Press up or down on the ROCKER to adjust the vertical distance or pressure, and press left or right to adjust either the time or distance. Pressing up or down on the ROCKER while a plot is displayed, switches the screen to the Zoom Range mode. 3. Press ENTER to return to the Plot page. View Points You can scroll through a recorded elevation or pressure profile to view data for any point along the profile. When... -
Page 47: Calibrating The Altimeter
5. To reset all categories shown on the page, select Select All. Calibrating the Altimeter The Astro 220 relies on the barometric pressure to determine elevation. Since the pressure at any given elevation can fluctuate, you can calibrate the altimeter to increase its accuracy if you know the elevation or pressure at your current location. -
Page 48: Using Tracks
Tracks Page Track Log Setup To clear the track log: 1. Press MENU twice > select Advanced > GPS Applications > select Tracks. 3. Select Clear > select Yes to clear the track log. To setup a track log: 1. Press MENU twice > Advanced > GPS Applications > select Tracks. 2. Select Setup to open the Track Log Setup page. • Wrap When Full—sets the track log to record over the oldest data with new data when full. • Record Method—Distance records track points after a specified distance is traveled. - Page 49 To save the entire track log: 1. Press MENU twice > select Advanced > GPS Applications > select Tracks. 2 Select Save. A message asks if you want to save the entire track. 3. Select Yes to save the track. A Saving Track message shows followed by the Saved Track page. Use the Saved Track page to rename the track, view the track distance, calculated area, and color for the track on the Map page.
-
Page 50: Track Profiles
GpS a ppLIcatIonS Saved track on the map To calculate the area of a track: 1. With the Track page open and the Track Log on, press MENU to open the Options Menu. 2. Select Area Calculation to open the Area Calculation page. 3. Press ENTER to start the area calculation. As you begin to move and define the area’s boundaries, a Stop button appears at the bottom of the page. 4. When finished defining the area, press ENTER to open the page with a Save button. -
Page 51: Navigating A Saved Track
When these types of maps are available, a Use Map Data - Use Track Data option menu appears when you select Profile. Refer to the Garmin Web site, www.garmin.com/cartography/ontheTrail/, information about MapSource U.S. Topo maps. - Page 52 GpS a ppLIcatIonS 4. Move in the direction of the first turn. When you reach the first turn, directions to the next turn are shown, and so on, until you reach a destination. 5. To exit, press MENU > select Stop Navigation. To create a user location on a saved track: 1. With a saved track shown on the map, use the...
-
Page 53: Routes
Routes Route navigation allows you to create a path to a destination with turn-by-turn directions. The Astro 220 lets you store 50 routes with up to 250 points each. To create a route: 1. Press MENU twice > Advanced > GPS Applications > select Routes to open the Routes page. - Page 54 GpS a ppLIcatIonS To navigate a saved route: 1. Press MENU twice > Advanced > GPS Applications > select Routes to open the Routes page. 2. Select a saved route, and press ENTER to open the Route page. 3. Select Navigate. 4. To stop navigating, press MENU > select Stop Navigation. Using the Follow Roads option on the Routing Setup page increases the number of turns and shows an Active Route page with a list of turns.
-
Page 55: Editing A Route
Profile from the Options Menu (only if using MapSource US topo maps.) To view all of the turns for an active route: 1. With an active route on the Map page, press BACK repeatedly to reach the Main Menu > Advanced > GPS Applications > Active Route. 2. Select any turn on the list and press ENTER to view the Turn Preview page for that turn. Editing a Route After you create a route, use the Route page to edit, change the route name, and review route points. -
Page 56: Using The Route Page Options
GpS a ppLIcatIonS To select the off-road transition for a route: 1. From the Advanced Menu select GPS Applications. 2. Select Routes to open the Routes page. 3. Press MENU to open the Options Menu. 4. Select Off Road Transition to open the Off Route Transition page. 5. Select Route Leg Transition to view the list of options. 6. Select the method to use (Auto, Manual, or Distance) when advancing to the next point. Select Distance to enter a radius so that when you are within the entered distance, you are led to the next point on your route. -
Page 57: Proximity Locations
• Change the data fields • Restore defaults to factory settings Proximity Locations Use the Proximity Locations page to define an alarm circle around a stored location. To add a proximity location 1. Access GPS Applications > select Proximity to open the Proximity Location page. GpS a ppLIcatIonS... -
Page 58: Satellite Page
Satellite Page Using the Satellite Page Options Menu Press MENU to open the Options Menu. • Use With GPS Off/On —enables you to turn the GPS receiver on or off. Astro Dog Tracking System Owner’s Manual Location Heading bug... - Page 59 • New Location—use if you have moved the unit more than 600 miles and you are having trouble locking onto satellite signals. • GPS Elevation—your GPS-determined elevation. Astro Dog Tracking System Owner’s Manual GpS a ppLIcatIonS...
-
Page 60: Accessories
Points to display the options. 6. To view other calendar formats, Sunrise/Sunset or the Hunting Almanac extended data for a specific date and location, press the MENU key, and use the ROCKER to make your choice. Calculator Your Astro 220 has both a standard and scientific calculator. To use the calculator: 1. Select Calculator. 2. Use the ROCKER and the ENTER key to operate. Astro Dog Tracking System Owner’s Manual... -
Page 61: Stopwatch
Stopwatch Use the Astro 220 as a stopwatch, which includes a lap timer. You can also have the unit record the lap time based on distance To access the Stopwatch: Select Stopwatch. To time a lap by distance: Press MENU to open the Options Menu. Choose Lap by Distance. To return to the Lap by Button, repeat these same steps. -
Page 62: Settings
Customize the operation of your Astro 220. To access the Settings Menu: Press MENU twice > select Advanced > Settings. System Setup Controls settings for GPS, WAAS, battery type, language, external power, and proximity alarms. • GPS—sets the unit to operate in Normal mode, Battery Saver mode, GPS Off, or Demo Mode. -
Page 63: Dog Alerts Setup
GPS Lost Alert—the dog’s DC 20 has lost GPS satellite signals. • Lost Communication Alert—the Astro 220 is not receiving the DC 20 (out of range, lost power, etc.). Display Setup Use Display Settings to select a screen display color scheme for day and night viewing. -
Page 64: Main Menu Setup
ettInGS Main Menu Setup The Main Menu can be reordered to list the menu items as you desire or remove any items you do not wish to use. Map Page Setup Use the Setup Map option to adjust how items are shown on the Map page. - Page 65 • Lock On Road—locks the current position pointer to show on the nearest road, compensating for variances in map position accuracy. Map Setup – Tracks Page The Map Setup – Tracks page contains settings for Saved Tracks, Track Log, Track Points, and the Go To Line. •...
- Page 66 Spot Soundings—toggles spot soundings on or off on the Map page. (Periodic depth measurements shown on the map.) • Light Sectors—select Off, Auto, or ON. (navigational light locations) • Symbol Set—select the symbol set to use (Auto, GARMIN, NOAA, International). Astro Dog Tracking System Owner’s Manual...
-
Page 67: Routing Setup
Routing Setup Use the Routing Setup page to customize the manner in which routing functions behave. To access the Routing Setup page: 1. From the Main Menu select Advanced > Settings > Routing. • Guidance Method—allows the unit to calculate routes using the preferences below: Prompted—prompts you to select a preference before the route is calculated. Follow Road—creates a route that overlays the roads shown on the map. Off Road—creates a direct line from your current location to your destination. This is useful when traveling outside of the detailed map coverage area or where no roads exist. -
Page 68: Geocache Setup
Geocache Setup Use the Geocache Setup page to find and record items hidden at geographic locations. Go my.garmin.com, login and click Go Geocaching for details and how to download geocache locations from the Internet. NOTE: Before setting up and placing physical... -
Page 69: Marine Alarms Setup
Marine Alarms Setup To access the Marine Setup page: From the Main Menu select Advanced > Settings > Marine Alarms. • Anchor Drag Alarm—sets an alarm when you exceed a specified drift distance. • Off Course Alarm—sets an alarm to sound when you are off your chosen course. Time Setup To access the Time Setup page: From the Main Menu, select Advanced > Settings > Time. • Time Format—sets 12 or 24 hour format. -
Page 70: Heading Setup
ettInGS • Depth—select the unit of measurement (Feet, Fathoms, or Meters). • Pressure—sets the unit of measurement (Inches, Millibars, or Hectopascals) to show pressure. Heading Setup Use the Heading Setup page to specify the type of heading display and the type of North reference used to calculate your heading. NOTE: Unless you have a working knowledge of headings and North referencing, it is recommended that you use the default values. -
Page 71: Altimeter Setup
To set up the altimeter: 1. On the Settings Menu, select Altimeter. 2. Select the Auto Calibration field > ENTER to select from On or Off. When On, elevation is corrected by the GPS receiver. 3. Select the Barometer Mode field > to select Variable Elevation (used when moving) or Fixed Elevation (used when stationary, allowing the altimeter to function as a standard barometer). Trip data is not recorded when in Fixed Elevation mode. -
Page 72: Appendix
Weight: Astro 220 -6.5 ounces (185 g) w/o batteries installed. DC 20 - 6.0 ounces (170g) w/battery pack- w/o collar attachment plate Display: Astro 220 - 1.5" W x 2.2" H, 256-color, high resolution, transreflective (160 x 240 pixels) with backlighting. Case: Rugged, fully gasketed, water resistant, IEC-529, IPX7... -
Page 73: Optional Accessories
Battery Life: Astro 220 - Up to 24 hours (typical use)* DC 20 - Up to 17 hours Recharge 3 to 4 hours *Alkaline batteries lose a significant amount of their capacity as the temperature decreases. Use Lithium batteries when operating in below-freezing conditions. -
Page 74: Information About Usb Drivers
MapSource Trip and Waypoint Manager software that came with your Astro 220. When you initially connect the Astro 220 to a USB port, your computer might prompt you to locate the destination of the drivers for the device. You only need to install the drivers once. - Page 75 Map data transfer requires installation of Trip and Waypoint Manager and the USB Interface Cable to transfer MapSource data from a computer to the microSD card in the Astro 220. To transfer other data to the microSD card, use the USB Mass Storage feature explained on...
- Page 76 Start > Settings > Control Panel > Administrative Tools > Computer Management > Storage > Disk Management and remap a drive letter for the Astro 220 removable storage device. 4. Select Edit > Paste. The file appears in the list of files on the Astro 220 microSD card.
- Page 77 Downloads. 4. Follow instructions for using WebUpdater or click download from Unit Software from the Web site and follow instructions. NOTE: Do not turn off the Astro 220 or DC 20 during data transfer to avoid data corruption. Astro Dog Tracking System Owner’s Manual Upgrading DC 20 software The DC 20 uses your Astro 220 as a wireless transfer device when transferring software updates and detailed dog tracks.
- Page 78 Transferring tracks from the Astro 220 to MapSource on your computer Tracks saved on your Astro 220 (both your own and your dog’s) can be saved and viewed in Garmin MapSource. To transfer tracks: 1. Be certain Garmin MapSource Trip and Waypoint Manager is installed on your computer and open. 2. Select the Tracks tab on the left side of the MapSource screen.
-
Page 79: Caring For The Astro System
Fully charge the battery again after storage before using the DC 20. Water Immersion The Astro 220 and DC 20 are waterproof to IEC Standard 60529 IPX7. They can withstand immersion in 1 meter of water for 30 minutes. Prolonged submersion can cause damage to the units. -
Page 80: Software License Agreement
Use this area to record the serial number (8-digit number located on the back of the Astro 220 and bottom of the DC 20) in case your system needs service. Keep the original sales receipt, or a photocopy, in a safe place. -
Page 81: Fcc Compliance
Consult the dealer or an experienced radio/TV technician for help. This product does not contain any user-serviceable parts. Repairs should only be made by an authorized Garmin service center. Unauthorized repairs or modifications could result in permanent damage to the equipment, and void your warranty and your authority to operate this device under Part 15 regulations. - Page 82 ppendIx scientists, engineers, and physicians from universities, government health agencies, and industry reviewed the available body of research to develop the ANSI Standard (C95.1). The design of your adio complies with the FCC guidelines (and those standards). For body-worn and face-held operation, this radio demonstrates compliance and meets the FCC RF exposure guidelines for uncontrolled exposure (general population) when used with approved accessories supplied with or designed for this product.
-
Page 83: Limited Warranty
Astro Dog Tracking System Owner’s Manual Limited Warranty This Garmin product is warranted to be free from defects in materials or workmanship for one year from the date of purchase. Within this period, Garmin will, at its sole option, repair or replace any components that fail in normal use. - Page 84 Garmin warranty service station. Online Auction Purchases: Products sold through online auctions are not eligible for rebates or other special offers from Garmin. Online auction confirmations are not accepted for warranty verification. To obtain warranty service, an original or copy of the sales receipt from the original retailer is required.
-
Page 85: Index
Sight N Go to navi- gate use the View Points op- tion IN/OUT Zoom keys initializing the GPS receivers installing the belt clip installing the lanyard locations averaging a location marking moving... - Page 86 ndex marking a location using the map routes page copying marking hunting specific loca- creating tions deleting marking your current location navigating MARK key route page options MENU key turn previews 46, routing setup naming the dog north up/track up satellite page selecting options Sight ‘N Go...
- Page 88 For the latest free software updates (excluding map data) throughout the life of your Garmin products, visit the Garmin Web site at www.garmin.com. © 2007 Garmin Ltd. or its subsidiaries Garmin International, Inc. 1200 East 151 Street, Olathe, Kansas 66062, USA Garmin (Europe) Ltd.