
Related Manuals for Capresso 454


Summary of Contents for Capresso 454
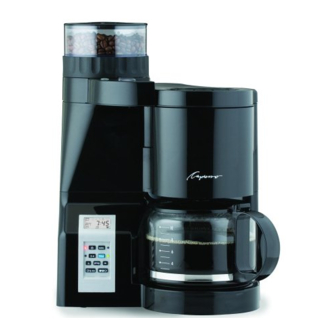
- Page 1 Model #454 CoffeeTEAM ™ 10-cup, 50 oz. Digital Coffee Maker / Burr Grinder Combination • Operating Instructions • Warranty • Mail-in or Fax-in Product Registration...
-
Page 2: Important Safeguards
IMPORTANT SAFEGUARDS When using electrical appliances, basic safety precautions should always be followed, including the following: 1. Read all instructions. 2. Do not touch hot surfaces. Use handles or knobs. 3. To protect against fire, electric shock and injury to persons, do not immerse cord, plugs, or body of machine in water or other liquid. -
Page 3: Table Of Contents
We hope you will enjoy your new CAPRESSO product and will recommend it to your friends. Page... -
Page 4: 1A. Welcome And Thank You
• FAX us at 1-201-767-9684 • E-MAIL at contact@capresso.com • WRITE to Capresso Inc., Customer Service, P. O. Box 775, Closter, NJ 07624 2. Important information about coffee beans and the built-in burr grinder 2a. -
Page 5: 2E. Stones And Beans
• Do not add any liquid flavorings or syrups to the beans. • If you like flavored beans we recommend buying liquid flavor- ings at your local coffee store. Add a few drops into the carafe before or after brewing. 2e. -
Page 6: User Components, Fig.1 And Fig. 2
USER COMPONENTS Bean Container Lid Bean Container Fineness Selector Dots (not shown) Screw for Feeder Channel Cover Feeder Channel Cover with window Feeder Channel Operating Panel and Display Grind Amount Indicator Clock/Timer Strength Indicator On/Off Button with red light 2–4 cup brew cycle selector with green light “Auto”... -
Page 7: Equipment
4. Equipment The CoffeeTEAM S (#454) comes with: a. this instruction book (includes warranty and Capresso product registration) b. an order form for parts and accessories c. one measuring scoop d. one glass carafe with lid e. one GoldTone filter, size 4 f. -
Page 8: Preparing The Machine
7. Preparing the machine 7.1 Before First Use a. After unpacking clean all loose parts with warm water and make yourself familiar with the different functions. b. After reading the instructions, brew 3 cups of water to clean all internal parts and to activate the charcoal filter. - Page 9 b. Push the "prog" button (G10). The saucer blinks. The display will read "AM 12:00" and shows the number "10" in bold. c. Push and hold the”h”-button (G8) to program the hour at which you would like to make coffee later. Push and hold the “m”-button (G9) to program the minutes at which you would like to make coffee later.
-
Page 10: Filling The Beans
7.6 Flashing LCD Display • If you unplug the machine for more than 10 seconds and then plug it in again, the LCD display will flash. • If you did not unplug the machine and the LCD display flashes, it indicates that the electrical power was interrupted for more than 10 seconds. -
Page 11: Filling The Water Container
Harmful bacteria build-up may occur. Unused cartridges can be stored indefinitely. Replacement cartridges are available through your local Capresso dealer or by using the enclosed mail order form or through the website: www.capresso.com. Replacing the Cartridge / Resetting the Filter Indicator Remove the filtration container, unscrew the bottom, remove and discard the used filter. -
Page 12: Filter Holder Insert
7.9 Filling The Water Container Open the water container lid (I) and pour the desired amount of fresh, cold water through the filtra- tion container (K). Note: Using the cup graduation on the glass carafe, always pour approximately one cup of water more into the water container to compensate for water lost during the brewing process. -
Page 13: Grinding And Brewing Coffee Now
7.11 Cover Lid The cover lid (L) minimizes static coffee particles clinging to the out- side of the filter holder. • Open the water container lid (I). • Make sure that the filter holder insert and the GoldTone filter (or your filter paper) are inserted in the filter holder (O). -
Page 14: 8A. Drip Stop / Stop-And-Serve
coffee could flow upwards into the feeder channel. • Push the on/off button (G4) until the red light turns on. The grinder will start grinding and the coffee will fall into the filter. Through the window in the feeder channel cover you can actually see how the ground coffee moves forward. -
Page 15: 8B. Using Different Beans At Different Times
this case immediately replace carafe and let all the coffee flow into the carafe. (This happens when the mesh of the GoldTone filter is clogged up causing coffee grounds to over-flow. If you use filter paper, use the correct size (size 4), and check if there was a hole in the bottom of the filter paper). -
Page 16: Grinding And Brewing Coffee Later
9. Grinding and Brewing Coffee Later • Program the timer and grinder setting as described in chapter 7.5, page 8. • Fill beans into the bean container (see page 10, chapter 7.7). • Fill the desired amount of water into the machine (see page 12, chapter 7.9). - Page 17 10c. Filter Holder Insert (M)/ Drip Stop (N): Clean the filter holder insert and the drip stop under run- ning water. Check to make sure that the drip stop closes com- pletely under running water also. 10d. Bean Container (A): When the bean container is empty, use a dry cloth to wipe off any oil deposits.
- Page 18 b. With a coin, turn the screw on top of the feeder channel a quarter turn counter clockwise to the 12 o’clock position. open c. Firmly lift the feeder channel cover upwards and to the right as shown, and set aside. Note: The feeder channel cover will make a "snapping"...
-
Page 19: Decalcifying
g. Push the manual release button upwards. The filter holder will swing back to the right. Manual Release Button h. Wipe the inside of the feeder channel cover with a dry cloth (do not immerse in water). i. Replace the feeder channel cover and turn the screw a quarter turn clockwise to the 3 o’clock position. -
Page 20: Faq (Technical Questions)
12. FAQ (Technical Questions) Q1. I accidentally locked the filter holder underneath the grinder. What do I do? A. Push the Manual Release Button upwards (see page 19). Q2. There is no coffee coming out of the grinder. It seems as though the coffee is completely clogged inside the grinder. -
Page 21: Faq (Coffee Questions)
tainer (as well as you can), remove the filter holder insert and GoldTone filter, open the water container lid and turn the machine upside down over a sink. You need to reset all settings. Q12. When I unplug the machine, the display shows random symbols for about 15 seconds, then turns off. -
Page 22: Limited Warranty
CAPRESSO any other liability in connection with the sale of the machine. CAPRESSO expressly disclaims liability for incidental and con- sequential damages caused by the machine.