GE Profile JVM1790 Owner's Manual
Convection/microwave oven
Hide thumbs
Also See for Profile JVM1790:
- Owner's manual (36 pages) ,
- Installation instructions manual (48 pages) ,
- Installation instructions manual (48 pages)
Table of Contents
Advertisement
Available languages
Available languages
. . . . . . . . . . . . .2-6
Operating Instructions
Bake Features . . . . . . . . . . . . 10, 18, 20
Best Method of Cooking Chart . . . .21
Changing Power Level . . . . . . . . . . . 14
Cooking Options . . . . . . . . . . . . . . . .10
Cookware Tips . . . . . . . . . . . . . . . . . .20
Fast Bake Feature . . . . . . . . .10, 19, 20
Features of Your Oven . . . . . . . . . 8, 9
Microwave Terms . . . . . . . . . . . . . . . 14
Other Features . . . . . . . . . . . . . .23-25
™
Automatic Fan . . . . . . . . . . . . . . . .25
Auto Nite Light . . . . . . . . . . . . . . .24
Bake Temp. Adjust . . . . . . . . . . . . .24
Beeper Volume . . . . . . . . . . . . . . .24
Child Lock-Out . . . . . . . . . . . . . . .23
Clear/Off . . . . . . . . . . . . . . . . . . . .23
Clock . . . . . . . . . . . . . . . . . . . . . . . .23
Cooking Complete Reminder . . . .23
Display Language . . . . . . . . . . . . . .24
Display ON/OFF . . . . . . . . . . . . . .24
Display Speed . . . . . . . . . . . . . . . . .24
Help . . . . . . . . . . . . . . . . . . . . . . . .23
Measures . . . . . . . . . . . . . . . . . . . . .25
More Time Message . . . . . . . . . . . .25
Resume . . . . . . . . . . . . . . . . . . . . . .23
Start/Pause . . . . . . . . . . . . . . . . . . .23
Surface Light . . . . . . . . . . . . . . . . .25
Timer . . . . . . . . . . . . . . . . . . . . . . .25
Turntable On/Off . . . . . . . . . . . . .25
Vent Fan . . . . . . . . . . . . . . . . . . . . .25
Roast Features . . . . . . . . . . . . 10, 18, 20
Sensor Features . . . . . . . . . . . . . . 15-17
Time and Auto Features . . . . 9, 11-13
Warm Feature . . . . . . . . . . . . . . . . . . 22
Write the model and serial numbers here:
Model # __________________________
Serial # __________________________
You can find them on a label when the
door is open.
ge.com
Charcoal Filters . . . . . . . . . . . . . . . . . .29
Inside . . . . . . . . . . . . . . . . . . . . . . . . . .26
Outside . . . . . . . . . . . . . . . . . . . . . . .26
Replacing the Light Bulbs . . . . . . . .27
Stainless Steel . . . . . . . . . . . . . . . . . .27
Vent Filters . . . . . . . . . . . . . . . . . .28, 29
. . . . . . . . 30, 31
With Your Microwave Oven . . . . . . . 32
Consumer Support
Consumer Support . . . . . . Back Cover
Optional Kits . . . . . . . . . . . . . . . . . . . .7
Product Registration . . . . . . . . . 33, 34
Warranty . . . . . . . . . . . . . . . . . . . . . . . 35
Español
For a Spanish version of this
manual, visit our Website at ge.com.
Para consultar una version en
español de este manual de
instrucciones, visite nuestro sitio de
internet ge.com.
3828W5A4678 49-40480 01-06 JR
Owner's
Manual
JVM1790
Advertisement
Chapters
Table of Contents

Related Manuals for GE Profile JVM1790


Summary of Contents for GE Profile JVM1790
-
Page 1: Table Of Contents
Warranty ..... . . 35 Español For a Spanish version of this manual, visit our Website at ge.com. Para consultar una version en español de este manual de instrucciones, visite nuestro sitio de internet ge.com. -
Page 2: Important Safety Instructions
IMPORTANT SAFETY INSTRUCTIONS. READ ALL INSTRUCTIONS BEFORE USING. WARNING! For your safety, the information in this manual must be followed to minimize the risk of fire, explosion, electric shock, exposure to excessive microwave energy, or to prevent property damage, personal injury, or loss of life. PRECAUTIONS TO AVOID POSSIBLE EXPOSURE TO EXCESSIVE MICROWAVE ENERGY (a) Do Not Attempt to operate this oven with the door... - Page 3 SAVE THESE INSTRUCTIONS Foil not molded to food (upturned edges act like antennas). Metal, such as twist-ties, poultry pins, or gold- rimmed dishes, in the microwave. Recycled paper towels containing small metal pieces being used in the microwave. ge.com...
- Page 4 IMPORTANT SAFETY INSTRUCTIONS. READ ALL INSTRUCTIONS BEFORE USING. WARNING! FOODS Do not pop popcorn in your microwave oven unless in a special microwave popcorn accessory or unless you use popcorn labeled for use in microwave ovens. Do not boil eggs in a microwave oven. Pressure will build up inside egg yolk and will cause it to burst, possibly resulting in injury.
- Page 5 Be sure to vent plastic wrap so steam can escape. Do not use paper products when the microwave/ convection oven is operated in the BAKE, ROAST or FAST BAKE mode. Cookware may become hot because of heat transferred from the heated food. Pot holders may be needed to handle the cookware.
-
Page 6: Important Safety Information
IMPORTANT SAFETY INFORMATION. READ ALL INSTRUCTIONS BEFORE USING. WARNING! GROUNDING INSTRUCTIONS WARNING: Improper use of the grounding plug can result in a risk of electric shock. Ensure proper ground exists before use. This appliance is equipped with a power cord having a grounding wire with a grounding plug. -
Page 7: Optional Kits
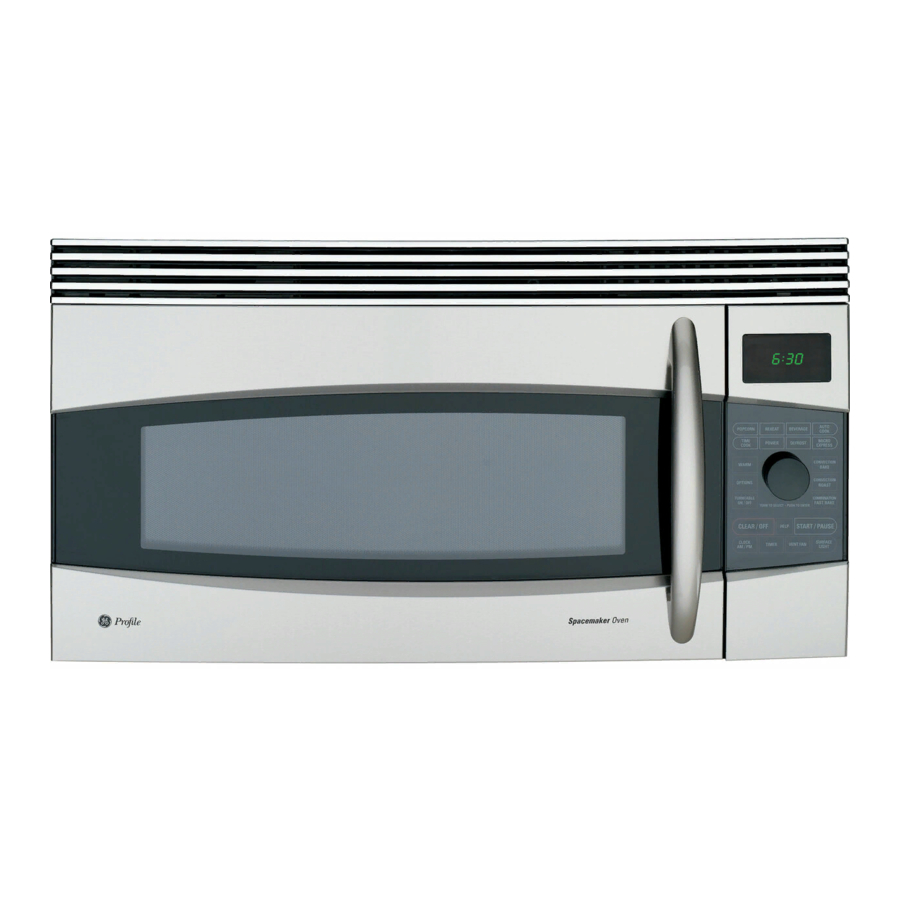
Optional kits Available at extra cost from your GE supplier. Filler Panel Kits JX40WH—White JX41—Black When replacing a 36″ range hood, filler panel kits fill in the additional width to provide a custom built-in appearance. For installation between cabinets only; not for end-of-cabinet installation. - Page 8 About the features of your oven. Throughout this manual, features and appearance may vary from your model. Features of the Oven Door Latch Release Handle. Door Latches. Window with Metal Shield. Screen allows cooking to be viewed while keeping microwaves confined in the oven. Control Panel and Selector Dial.
- Page 9 Turn and push dial to enter Oven temperature and cook time Turn and push dial to enter Oven temperature and cook time Turn and push dial to enter Oven temperature and warm time ge.com Option more/less time more/less time more/less time...
-
Page 10: Cooking Options
Available cooking options. Microwave Cooking Your oven uses microwave energy to cook by a set time or weight, or automatically by sensor. Sensor microwave works by detecting the increasing humidity released during cooking. The oven automatically adjusts the cooking time to various types and amounts of food. Cooking Method Microwave energy is distributed evenly... - Page 11 The power level can be changed as time is counting down. Press the POWER button, turn the dial and press to enter. ge.com Press the TIME COOK button. Turn the dial to set the first cook time and press the dial to enter.
-
Page 12: Time/Auto Microwave Features
About the time and auto microwave features. Fast Defrost microwave cooking.) Fast Defrost automatically sets the defrosting times and power levels to give even defrosting results for meats, poultry and fish weighing up to one pound. Remove meat from package and place on microwave-safe dish. - Page 13 6 to 12 ounces. Press once for 6–7 oz. Press twice for 8–9 oz. Press three times for 10–12 oz. ge.com Defrosting Tips Foods frozen in paper or plastic can be defrosted in the package. Closed packages should be slit, pierced or vented AFTER food has partially defrosted.
- Page 14 About changing the power level. The power level may be entered or changed immediately after entering the time for Time Cook, Time Defrost or Express Cook. The power level may also be changed during time countdown. First, follow directions for Time Cook, Time Defrost or Express Cook.
- Page 15 It is best to Time Cook them. (Do not use the shelves when microwave cooking.) ge.com...
- Page 16 About the sensor microwave features. Auto Cook microwave cooking.) Place covered food in the oven and close the door. Press the AUTO COOK button. ENTER FOOD TYPE appears in the display. Turn the dial to the desired food type. Press to enter. See the Sensor Food Type Guide below for specific foods and instructions.
- Page 17 Time Cook for additional reheating time. (Do not use the shelves when microwave (Do not use the shelves when microwave ge.com How to Adjust the Automatic Popcorn Setting to Provide a Shorter or Longer Cook Time If you find that the brand of popcorn you use underpops or overpops consistently, you can add or subtract 20–30 seconds to the automatic...
-
Page 18: Baking/Roasting Features
About the baking and roasting features. Baking or roasting uses a heating element to raise the temperature of the air inside the oven. Any oven temperature from 225°F to 450°F may be set. A fan gently circulates this heated air throughout the oven, over and around the food, producing golden brown exteriors and rich, moist interiors. - Page 19 POWER button. Turn the dial to set the oven temperature and press the dial to enter. Then, turn the dial to set microwave ge.com NOTE: You may change the cook time at any time during cooking by turning the dial.
-
Page 20: Cookware Tips
Cookware tips. Convection Bake or Roast Metal Pans are recommended for all types of baked products, but especially where browning is important. Dark or dull finish metal pans are best for breads and pies because they absorb heat and produce crisper crust. Shiny aluminum pans are better for cakes, cookies or muffins because they reflect heat and help produce a light tender crust. - Page 21 Custard and Pudding Bar Cookies Fruit Pies and Pastry Candy 60 minutes x 0.25 = 15 minutes saved So the new cook time in FAST BAKE mode will be: 60 minutes – 15 minutes = 45 minutes. ge.com Bake Roast Fast Bake...
- Page 22 About the warming feature. The WARM feature will keep hot, cooked foods at serving temperature. Always start with hot food. Use cookware and utensils that can withstand temperatures up to 230°F. For Best Results… Always use the shelf in its “low” position when warming. The shelf is required for good air circulation and Correct shelf position even warming.
-
Page 23: Other Features
CLEAR / OFF You may lock the control panel to prevent the oven from being accidentally started or used by children. ge.com either open the oven door or press the CLEAR/OFF button. RESUME COOKING will be displayed and the oven will restart immediately at 10% of the original time. -
Page 24: Auto Recipe ™ Conversion
About the other features. Auto Nite Light The Auto Nite Light can be set to come on and go off at desired times. Press the OPTIONS button and turn the dial to select AUTO NITE LIGHT. Press the dial to enter. Turn the dial to select SET TIMES. -
Page 25: Measures
NOTE: The FAN indicator will be lit while the fan is operating. ge.com More Time Message After cooking is complete, a message can be displayed giving you the option to cook the food longer at the same settings. -
Page 26: Care And Cleaning
Care and cleaning of the oven. Helpful Hints An occasional thorough wiping with a solution of baking soda and water keeps the inside fresh. Be sure the power is off before cleaning any part of this oven. How to Clean the Inside Walls, Floor, Inside Window, Metal and Plastic Parts on the Door Some spatters can be removed with a paper towel;... -
Page 27: Replacing The Light Bulbs
Replacing the light bulb. Cooktop Light/Nite Light Replace with a 120 volt, 40 watt (max.) halogen bulb. Order WB08X10051 from your GE supplier. To replace the cooktop light/nite light, first disconnect the power at the main Remove screw. fuse or circuit breaker panel, or pull the plug. -
Page 28: Vent Filters
About the exhaust feature. Charcoal filter (on some models). Vent Fan The vent fan has two metal reusable vent filters. Models that recirculate air back into the room also use a charcoal filter. Reusable vent filters (on all models). Reusable Vent Filters The metal filters trap grease released by foods on the cooktop. - Page 29 Charcoal Filter The charcoal filter cannot be cleaned. It must be replaced. Order Part No. WB02X10943 from your GE supplier. If the model is not vented to the outside, the air will be recirculated through a disposable charcoal filter that helps remove smoke and odors.
-
Page 30: Troubleshooting Tips
Before you call for service… Troubleshooting Tips Save time and money! Review the charts on the following pages first and you may not need to call for service. Problem Possible Causes Oven will not start A fuse in your home may be blown or the circuit breaker tripped. - Page 31 • Always use the rack in its “low” position. • This is normal. •This is normal. •This is normal. •Do not open door until steam is sensed and time is shown counting down on the display. •Use Time Cook to heat for more time. ge.com...
-
Page 32: Things That Are Normal With Your Microwave Oven
Before you call for service… Things That Are Normal With Your Microwave Oven Moisture on the oven door and walls while cooking. Wipe the moisture off with a paper towel or soft cloth. Moisture between the oven door panels when cooking certain foods. Moisture should dissipate shortly after cooking is finished. - Page 33 You can rest easy, knowing that all your valuable household products are protected against expensive repairs. Place your confidence in GE and call us in the U.S. toll-free at for more information. *All brands covered, up to 20 years old, in the continental U.S.
- Page 34 FAILURE TO COMPLETE AND RETURN THIS CARD DOES NOT DIMINISH YOUR WARRANTY RIGHTS. For more information about GEA’s privacy and data usage policy, go to ge.com and click on “Privacy Policy” or call 800.626.2224. Read your Owner’s Manual carefully.
- Page 35 This warranty is extended to the original purchaser and any succeeding owner for products purchased for home use within the USA. If the product is located in an area where service by a GE Authorized Servicer is not available, you may be responsible for a trip charge or you may be required to bring the product to an Authorized GE Service Location for service.
-
Page 36: Consumer Support
Caution must be exercised, since improper servicing may cause unsafe operation. Contact Us If you are not satisfied with the service you receive from GE, contact us on our Website with all the details including your phone number, or write to: General Manager, Customer Relations Register Your Appliance Register your new appliance on-line—at your convenience! Timely product registration will allow for... - Page 37 Garantía ....39 Kits opcionales ....7 3828W5A4678 49-40480 01-06 JR Manual del Propietario JVM1790...
-
Page 38: Instrucciones Importantes De Seguridad
Si el cable de corriente ha sido dañado, debe ser reemplazado por el Servicio Reparaciones de General Electric (GE Service) o un agente de reparaciones autorizado empleando un cable de corriente que General Electric tiene a su disposición. - Page 39 Hay algún metal, como cintas de cierre con metal, pinchos de pollo, o platos con decoración de oro dentro del microondas. Se está usando papel toalla reciclado que contienen pequeñas porciones de metal en el microondas. ge.com...
- Page 40 INSTRUCCIONES IMPORTANTES DE SEGURIDAD. LEA PRIMERO TODAS LAS INSTRUCCIONES. ¡PRECAUCIÓN! COMIDAS No haga rosetas o palomitas de maíz en el microondas a no ser que esté usando un accesorio especial para prepararlas o que esté empleando rosetas o palomitas de maíz que indiquen ser válidas para el uso de hornos microondas.
- Page 41 Siga estas normas: Use solamente plásticos aptos para microondas y úselos siguiendo estrictamente las recomendaciones del fabricante de los utensilios. No introduzca en el microondas recipientes vacíos. No permita que los niños usen utensilios de plástico sin completa supervisión. ge.com...
-
Page 42: De Cocina
INFORMACIÓN IMPORTANTE DE SEGURIDAD. LEA PRIMERO TODA LAS INSTRUCCIONES. ¡ADVERTENCIA! INSTRUCCIONES DE TOMA DE TIERRA ADVERTENCIA: eléctrica. Asegúrese de que existe una conexión apropiada a tierra antes del uso. Este electrodoméstico está equipado con un cable de corriente que dispone de un hilo para toma de tierra con un enchufe con toma de tierra. - Page 43 Kits opcionales. Disponibles en su distribuidor GE por un costo adicional. Kits de panel de relleno JX40WH—Blanco JX41—Negro Al cambiar la tapa de una cocina encimera de 36″ los kits de paneles de relleno ocupan el espacio adicional proveyendo un aspecto de montaje a medida.
- Page 44 Las funciones de su horno. Su modelo puede tener otras características y apariencia que las ilustradas en este manual. Funciones del horno Mango de apertura del enganche de la puerta. Enganches de puerta. Ventana con escudo metálico. La ventana permite ver como se cocinan los alimentos y evita que salgan microondas del horno.
-
Page 45: Funciones De Sensor
Temperatura de horno y tiempo de cocción Gire y apriete el dial para aceptar Temperatura de horno y tiempo de cocción Gire y apriete el dial para aceptar Temperatura del horno y tiempo de calentamiento ge.com Más/menos tiempo Más/menos tiempo Más/menos tiempo... -
Page 46: Opciones De Cocción
Opciones de cocción disponibles. Cocción por microondas Su horno usa energía de microondas para cocinar según un período de tiempo predeterminado, según el peso o de forma automática por medio de un sensor. El microondas por sensor funciona detectando el incremento de humedad liberada durante la cocción. - Page 47 Conducción de calor Aire caliente en circulación El calor se conduce (convección). desde el exterior hacia el interior de los alimentos. ge.com Beneficios Tiempo de cocción acortado por la energía microondas, además el calor de convección dora y produce crujientes exteriores.
- Page 48 Funciones de microondas por tiempo y automático. Cómo usar el dial Podrá hacer selecciones en el horno girando el dial y presionando para ingresar la selección. Time Cook (cocción por tiempo) (no utilizar los estantes cuando cocina por microondas) Time Cook I (cocción por tiempo I) Le permite usar el microondas por un período de entre 15 segundos y 95 minutos.
- Page 49 Presione el botón START/PAUSE para empezar a descongelar. De la vuelta a la comida si aparece el mensaje TURN FOOD OVER. ge.com Retire la carde descongelada o cubra las áreas calientes con pequeños recortes de papel de aluminio. Una vez descongeladas, la mayoría de carnes necesitan 5 minutos en reposo para que acaben de descongelarse.
- Page 50 Funciones de microondas por tiempo y automático. Descongelación por tiempo (no utilizar los estantes cuando cocina por microondas) Use Time Defrost para descongelar por un período de tiempo seleccionado. Presione el botón DEFROST (descongelar) una vez. Gire el dial para seleccionar el tiempo que desee.
- Page 51 Los períodos de descanso (cuando se acaba el ciclo de la energía microondas) le dan tiempo a la comida a “igualarse” o transferir el calor a su interior.
- Page 52 Terminología de microondas. Término Definición Arco eléctrico El arco eléctrico es lo que, en la terminología de los microondas, describe las chispas en el horno. El arco eléctrico se produce cuando: el estante de metal se ha instalado de forma incorrecta y está tocando las paredes del microondas. hay un metal o papel de aluminio tocando el lateral del horno.
- Page 53 Asegúrese que tanto el exterior de los recipientes como el interior del horno microondas estén secos antes de poner la comida en el horno. Las acumulaciones de humedad que se convierten en vapor pueden engañar al sensor. Seque los platos para que no engañen al sensor. ge.com...
- Page 54 Características de microondas por sensor. Auto Cook (cocinar automáticamente) Dado que la mayoría de los recipientes deben estar cubiertos durante Auto Cook, esta función trabaja mejor con comidas que quiera hacer al vapor o en las que quiera mantener la humedad. NOTA: No se recomienda el uso del estante de metal con Auto Cook.
- Page 55 Pulse para introducir la selección. Gire de nuevo, hasta que aparezcan dos signos más (“++”), para añadir otros 10 segundos, hasta un total de 30 segundos de tiempo adicional. Pulse para introducir la selección. ge.com Comentarios...
- Page 56 Características de microondas por sensor. Reheat (recalentar) (no utilizar los estantes cuando cocina por REHEAT microondas) La función de recalentar (Reheat) vuelve a NOTA: No utilice esta función calentar raciones de comidas previamente dos veces consecutivas en la misma porción de comida. cocinadas o un plato de sobras.
- Page 57 POWER. Gire el dial para fijar la temperatura del horno y presione el dial para seleccionar. Para ver el tiempo de cocción y la temperatura del horno durante el tiempo de cocinado, presione el botón BAKE (Hornear). ™ está ge.com...
- Page 58 Función de horneado rápido. Fast Bake (horneado rápido) le ofrece las mejores funciones de la energía de microondas con la cocina por convección. Las microondas cocinan la comida de forma rápida y la circulación de convección del aire caliente dora los alimentos de forma maravillosa. Puede programarse cualquier temperatura entre los 225°F y los 450°F.
- Page 59 Productos de papel Paja, mimbre y madera ❊ Usar sólo con utensilios para microondas que puedan soportar 450°F de temperatura. Horneado o Asado Microondas de convección Sí Sí Sí Sí Sí Sí Sí ge.com Horneado rápido combinado Sí ❆ Sí...
- Page 60 Seleccione el mejor método de cocción. Use la tabla siguiente para seleccionar el mejor método para cocinar. Las recetas pueden ser adaptadas usando la tabla a continuación para determinar el modo de cocción apropiado. Comidas Aperitivos Bebidas Salsas y acabados Sopas y estofados Carnes Aves...
- Page 61 Crisp (Crujiente) Medium (Medio) Moist (Húmedo) High (Alto) Moist (Húmedo) Low (Bajo) Crisp (Crujiente) Medium (Medio) Moist (Húmedo) Trucos para alimentos húmedos: Cubra los alimentos con una tapa o con papel de aluminio. No utilice contenedores ni envolturas de plástico. ge.com...
- Page 62 Las otras funciones. Help (ayuda) El botón HELP le muestra información de características y consejos prácticos. Presione HELP, gire el dial para seleccionar una función y presione el dial para seleccionar. Señal de final de cocción Para recordarle que tiene comida en el horno, aparecerá...
-
Page 63: Ajuste De La Temp. De Cocción
Gire el dial para seleccionar NO CHANGE (Sin cambios), 5, 10, 15, 20 o 25 grados y pulse para introducir la selección. ge.com Para bloquear y desbloquear los controles, apriete y mantenga el botón CLEAR/OFF durante un período de tres segundos. Con el panel de control bloqueado aparecerá... -
Page 64: Conversión Auto Recipe
Otras funciones. Selección de Conversión Auto Recipe Cuando esta función se activa, convertirá automáticamente las temperaturas de horneado regulares a temperaturas de horneado por convección. Consulte la sección Conversión Auto Recipe™ en la seccion “Acerca de las functiones de Horneado y Asado“. Presione el botón OPTIONS y gire el dial para seleccionar OFFSET. -
Page 65: Temporizador
NOTA: El indicador del extractor estará prendido mientras el extractor esté operando. ge.com Para cancelar, presione el botón TIMER. Cuando se acabe el tiempo, el horno dará una señal. Para apagar la señal del temporizador, presione TIMER. -
Page 66: Exterior
Cuidado y limpieza del horno. Consejos prácticos Para mantener el interior fresco pásele un paño con una solución de agua y bicarbonato sódico de cuando en cuando. Asegúrese de que esté apagado (en off) antes de limpiar cualquier parte de este horno. Cómo limpiar el interior Paredes, suelo, ventana interior y piezas de plástico de la puerta Algunas salpicaduras pueden limpiarse con un papel toalla, otras pueden necesitar un... - Page 67 Cambio de bombillas. Luz de encimera/luz nocturna Cámbiela por una bombilla halógena de 120 voltios, 20 watt (max). Pida WB36X10213 de su suministrador GE. Para cambiar la luz de encimera/luz Quite el tornillo. nocturna, primero desconecte la corriente del fusible principal o del panel de diferencial o estire del enchufe.
- Page 68 La función de extractor. Filtro de carbón vegetal Ventilador extractor (en algunos modelos) El ventilador extractor tiene dos filtros de metal reutilizables. Los modelos que hacen recircular el aire de nuevo a la habitación usan un filtro de carbón vegetal Filtros de extractor reutilizables (en todos los modelos).
- Page 69 Filtros de carbón vegetal El filtro de carbón vegetal no puede limpiarse. Debe cambiarse por otro. Pida el recambio No. WB02X10943 de su suministrador GE. Si el modelo no realiza la extracción al exterior, el aire recirculará a través de un filtro de carbón vegetal no reutilizable que...
-
Page 70: Resolución De Problemas
Antes de llamar al servicio de reparaciones… Resolución de Problemas ¡Ahorre tiempo y dinero! Revise las tablas en las páginas siguientes y tal vez no necesite llamar al servicio de reparación. Problema Posibles causas El horno no se pone en Puede que se haya fundido marcha un fusible de su casa o que haya... - Page 71 •Siempre use la parrilla en la posición baja. • Esto es normal. •Esto es normal. •Esto es normal. •No abra la puerta hasta que se perciba el vapor y •Utilice Time Cook (Tiempo de cocción) para calentar durante más tiempo. ge.com...
-
Page 72: Cosas Normales De Su Horno Microondas
Antes de llamar al servicio de reparaciones… Cosas normales de su horno microondas Humedad en la puerta y paredes del horno al cocinar. Frote la humedad con una toallita de papel o un paño suave. Humedad entre los paneles de las puertas del horno al cocinar determinados alimentos. - Page 73 Notas. ge.com...
- Page 74 Notas.
-
Page 75: Garantía
Estados Unidos. Si el producto está situado en un área que no dispone de servicio por parte de un proveedor de servicio autorizado de GE, podría tener que hacerse cargo de los costes de envío o bien podría solicitársele que lleve el producto a una centro de servicio de GE autorizado para realizar la reparación. - Page 76 Solicite una reparación El servicio de expertos GE está a tan sólo un paso de su puerta. ¡Entre en línea y solicite su reparación cuando le venga bien 24 horas al día cualquier día del año! O llame al 800.GE.CARES (800.432.2737) durante horas normales de oficina.