Sony Walkman NWD-E023F Operation Manual
Hide thumbs
Also See for Walkman NWD-E023F:
- Quick start manual (2 pages) ,
- Operation manual (85 pages)
Table of Contents
Advertisement
Advertisement
Table of Contents

Related Manuals for Sony Walkman NWD-E023F


Summary of Contents for Sony Walkman NWD-E023F
- Page 1 Operation Guide NWD-E023F / E025F ©2008 Sony Corporation 3-875-124-11 (1)
-
Page 2: About The Manuals
About the Manuals The following manuals are supplied with the player. Additionally, after connecting the player, you can refer to the help provided within the software. – “Quick Start Guide” explains set up, enabling you to import songs to a computer, and to transfer them to the player. - Page 3 Hints You can jump to the indicated page by clicking a page number in the table of contents, in the home menu list, or in the index. You can jump to the indicated page by clicking a page reference indication (e.g. page 4) on each page.
-
Page 4: Table Of Contents
Table of Contents HOME Menu List ... 6 Supplied Accessories ... 7 Changing the Style-Up® Panel ...8 Parts and Controls ... 9 Front ...9 Rear ...11 Display ...12 Getting Started Preparing the Player ... 13 Charging the Player ...13 Turning the Player On and Off ...14 Getting Data ... - Page 5 Useful Facts Maximizing Battery Life ... 58 What are Format and Bit Rate? ... 59 What is audio format? ...59 Storing Data Other than Audio Files ... 60 Upgrading the Player’s Firmware ... 61 Troubleshooting Troubleshooting... 62 Messages ... 70 Additional Information Precautions ...
-
Page 6: Home Menu List
HOME Menu List You can display the HOME menu by pressing and holding the player. The HOME menu is the starting point to play audio, search for songs, and change settings as follows. Selectable menu items may differ, depending on the function or settings you use. /HOME button HOME menu* 5 icons appear in the display with the... -
Page 7: Supplied Accessories
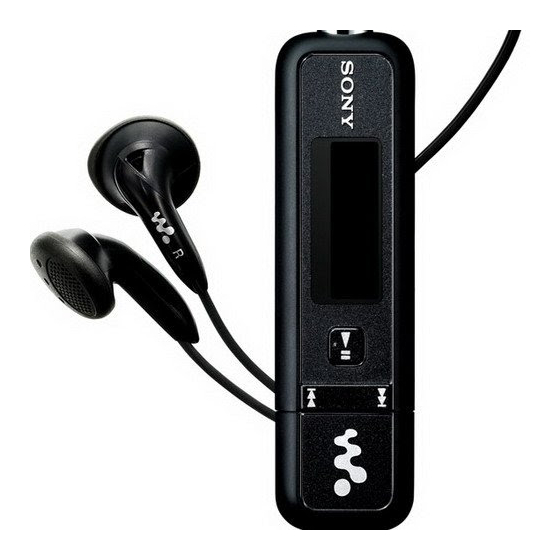
Supplied Accessories Please check the accessories in the package. Headphones (1) Style-Up® Panel (1) USB cap for Style-Up® Panel (1) Quick Start Guide (1) Operation Guide (PDF file)* “Auto Transfer” software* Operation Guide (PDF file) is stored in the built-in flash memory of the player. -
Page 8: Changing The Style-Up® Panel
Changing the Style-Up® Panel You can select from a variety of Style-Up® Panel colors and matching USB cap. Slide the HOLD switch in the direction of the arrow () to deactivate the player, and then remove the USB cap. ... -
Page 9: Parts And Controls
Parts and Controls Front Headphones PLAY MODE/SOUND* Switches the play mode ( page 22). Press and hold this button to change the sound quality setting ( page 25). /HOME* button When you press this button while playing or pausing a song, you can switch between Song control mode and Folder control mode. - Page 10 Headphones Headphone jack For connecting the headphones. Insert the jack pin until it clicks into place. If the headphones are connected improperly, the sound from the headphones may not sound right. Display See page 12. / button Selects a song, folder, or menu item.
-
Page 11: Rear
Rear HOLD switch You can protect the player against accidental operation by using the HOLD switch when carrying it. By sliding the HOLD switch to the direction of the arrow (), all operation buttons are disabled. If you press buttons while the HOLD function is activated, “HOLD”... -
Page 12: Display
Display Icon indication In Song control mode, Folder control mode, the 1st line. In either mode, appears on the 2nd line. Text/graphic information display Displays the song title, folder name, artist name, current date/time, messages and menu items. To change the display mode, proceed to the “Display Mode”... -
Page 13: Getting Started
Getting Started Preparing the Player Charging the Player The player’s battery is recharged while the player is connected to a running computer. Remove the USB cap and connect the USB connector to a USB port on your computer. When the remaining battery indication of the display shows: (charging time is approx. -
Page 14: Turning The Player On And Off
Getting Started Notes Charge the battery in an ambient temperature of between 5 to 35 ºC (41 to 95 ºF). The number of times the battery can be recharged before it is used up is approximately 500 times. This number may vary, depending on the conditions under which you use the player. -
Page 15: Getting Data
Getting Started Getting Data To enjoy audio data transferred to the player, you need to import audio data from the Internet or audio data from CDs to your computer before using the player. To import audio data from CDs, you need to use appropriate software for importing. -
Page 16: Transferring Data
Getting Started Transferring Data You can directly transfer data by dragging and dropping in Windows Explorer on your computer. Be sure to transfer data into the “MUSIC” folder. Playable data hierarchy has rules. To transfer data properly, read the following instructions. -
Page 17: Transferring Music Automatically Using The "Auto Transfer" Software
Getting Started Transferring music automatically using the “Auto Transfer” software You can transfer audio files automatically from a desired folder every time you connect the player to your computer using the “Auto Transfer” software stored on the player. When you use the “Auto Transfer” software for the first time, transfer audio files as follows. -
Page 18: To Delete Music Transferred To The Player
For customers in Europe: http://support.sony-europe.com/DNA For customers in Latin America: http://www.sony-latin.com/index.crp For customers in other countries/regions: http://www.sony-asia.com/support For customers who purchased the overseas models: http://www.sony.co.jp/overseas/support/ To delete music transferred to the player Connect the player to your computer, and then delete any unnecessary audio... -
Page 19: Playing Music (All Songs)
Playing Music Playing Music Songs transferred by the “Auto Transfer” software or Windows Explorer can be played back on the player. Press and hold the /HOME button until the HOME menu appears. Press the / button to select (All Songs), and then press the button to confirm. Playback starts from the last song you listened to. If you did not play any song, playback starts from the beginning. -
Page 20: Playing Songs In Random Order For A Specified Period Of Time (Sports Shuffle)
Playing Music Playing Songs in Random Order for a Specified Period of Time The player randomly selects songs from all transferred songs and plays them in random order for a specified duration (between 1 and 99 minutes). “10 min” (10 minutes) is set by default. Note ... -
Page 21: Searching For Songs (Search)
Playing Music Searching for Songs You can search for a song by its file name or its folder name. When you transfer audio data to the “MUSIC” folder using the “Auto Transfer” software or Windows Explorer, up to the 8th level under the “MUSIC” folder will appear on the player and can be played back. -
Page 22: Changing The Play Mode (Play Mode)
Playing Music Changing the Play Mode The player offers a variety of play modes, including random play and selected repeat play. Note This function is not available while/after using “Sports Shuffle” or FM radio. If you want to use this function after “Sports Shuffle” or FM radio, operate from the HOME menu to select (All Songs) to confirm. -
Page 23: Settings
Settings Setting the File Display Language (File Disp Language) You can select from 8 languages in which to display the transferred folder and audio file name. Notes This function is only available in pause mode. When the remaining battery is low, you cannot set this function. Charge the battery before setting. - Page 24 Settings Display language settings Setting English Español Português Русский Українська Notes After you select “OK” in step If you display audio data that is not one of the 8 setting languages, “” will be displayed instead of the audio data name. ...
-
Page 25: Setting The Sound Quality (Sound)
Settings Setting the Sound Quality You can preset 2 sound quality settings and switch between them during playback or in pause mode by pressing and holding the PLAY MODE/SOUND button. Furthermore, you can set the sound quality setting according to the music genre, etc., by selecting an “Equalizer”setting. -
Page 26: Changing The Sound Quality (Equalizer)
Settings Changing the sound quality You can set your desired sound quality for each of “Sound1” and “Sound2, ” according to the music genre, etc. Note This function is not available while/after using FM radio. If you want to use this function after FM radio, operate from the HOME menu to select Shuffle) to confirm. - Page 27 Settings List of Equalizer settings Setting item Description EQ Heavy Emphasizes high and low ranges for a powerful sound. EQ Pop Stresses the middle range audio, ideal for vocals. EQ Jazz Emphasizes high and low ranges for a lively sound. EQ Unique Emphasizes high and low ranges, so that a small sound can be listened easily.
-
Page 28: Setting The Eq Custom Values
Settings Setting the EQ Custom values You can preset the value of “Clear Bass” (bass) and 5 bands “Equalizer” as “Sound1” or “Sound2” while looking at the player’s screen. Notes If the “EQ Custom” value is set in “Equalizer” of the Setting menu, the “EQ Custom” setting is applied to the sound. - Page 29 Settings Press the / button to select “ Edit>” displayed under “EQ Custom,” and then press the button to confirm. The slider of “Clear Bass” appears highlighted. “Clear Bass” can be set to one of 4 sound levels. ...
-
Page 30: Listening With Clear Stereo Sound (Clear Stereo)
Settings Listening with Clear Stereo Sound “Clear Stereo” enables individual left and right digital processing of the sound. Note This function is not available while/after using FM radio. If you want to use this function after FM radio, operate from the HOME menu to select Shuffle) to confirm. -
Page 31: Adjusting The Volume Level (Dynamic Normalizer)
Settings Adjusting the Volume Level You can set to reduce the volume level between songs. With this setting, when listening to folder songs in the shuffle play mode, the volume level between songs is moderated to minimize differences in recorded level. Note This function is not available while/after using FM radio. -
Page 32: Changing The Display Mode (Display Mode)
Settings Changing the Display Mode You can change the display in play or pause mode. Note This function is not available while/after using FM radio. If you want to use this function after FM radio, operate from the HOME menu to select ... - Page 33 Settings List of display types “Basic”: The basic display (Default setting) “Property”: Song information Displays the current play mode, the current folder number/total folder number of the playback range, the current song number/total song number of the playback range, format), and bit rate.
-
Page 34: Setting The Volume Level (Volume Mode)
Settings Setting the Volume Level There are 2 modes to adjust the volume level. Manual Volume (Default setting): Press the VOL +/– button to adjust the volume level between 0 to 30. Preset Volume: Press the VOL +/– button to set the volume level to one of 3 preset levels: “Low, ” “Mid, ”... -
Page 35: Setting A Preset Volume (Preset Volume)
Settings Setting a Preset Volume Press and hold the Press the / button to select the button to confirm. Press the / button to select “Advanced Settings>,” and then press the button to confirm. Press the /... -
Page 36: Setting A Preset Volume Value
Settings Setting a Preset Volume value Press and hold the Press the / button to select the button to confirm. Press the / button to select “Advanced Settings>,” and then press the button to confirm. ... -
Page 37: Limiting The Volume (Avls)
Settings Limiting the Volume You can set “AVLS” (Automatic Volume Limiter System) to limit the maximum volume to prevent auditory disturbance or distraction. With “AVLS”, you can listen to music at a comfortable volume level. “AVLS OFF” is set by default. ... -
Page 38: Turning Off The Beep Sound (Beep)
Settings Turning Off the Beep Sound You can turn off the beep sounds of the player. “Beep ON” is set by default. Press and hold the Press the / button to select the button to confirm. Press the /... -
Page 39: Setting The Current Time (Set Date-Time)
Settings Setting the Current Time You can set the current time by adjusting it manually. Press and hold the Press the / button to select the button to confirm. Press the / button to select “Advanced Settings>,” and then press the ... - Page 40 Settings To return to the previous menu Press the /HOME button. To display the current time You can display the current time in either of the following ways: Set “Clock” in “Changing the Display Mode (Display Mode)” ( page 32). ...
-
Page 41: Setting The Date Format (Date Disp Type)
Settings Setting the Date Format You can select the date format displayed for the current time ( page 39) from among year/month/day, day/month/year, and month/day/year. Press and hold the Press the / button to select the button to confirm. ... -
Page 42: Setting The Time Format (Time Disp Type)
Settings Setting the Time Format You can select the time format displayed for the current time ( page 39) from either a “Time 24h” or “Time 12h” display. Press and hold the Press the / button to select the ... -
Page 43: Changing The Usb Connection Setting (Usb Bus Powered)
Settings Changing the USB Connection Setting (USB Bus Powered) Depending on how you are using the computer, if the power supply (USB Bus Power) is insufficient, incomplete data transfer may occur from the computer to the player. In this case, setting the USB connection (USB Bus Powered) to “Low-Power 100mA”... -
Page 44: Setting The Power Save Screen (Power Save Mode)
Settings Setting the Power Save Screen When you do not operate the player for a specified duration (about 15 seconds), the screen will change to the power save screen. You can change the power save screen settings. Press and hold the ... -
Page 45: Setting The Contrast Of The Display (Contrast)
Settings Setting the Contrast of the Display You can set the display contrast to one of 15 levels. “0” is set by default. Press and hold the Press the / button to select the button to confirm. ... -
Page 46: Setting The Brightness Of The Display (Brightness)
Settings Setting the Brightness of the Display You can set the display brightness level from 1 to 7. “4” is set by default. Press and hold the /HOME button until the HOME menu appears. Press the / button to select the button to confirm. Press the / button to select “Advanced Settings>,” and then press the button to confirm. Press the / button to select “Brightness>,” and then press the button to confirm. Press the / button to adjust the brightness level, and then press the button to confirm. To return to the previous menu Press the /HOME button. -
Page 47: Displaying The Player Information (Information)
Settings Displaying the Player Information Information such as model name, built-in flash memory capacity, serial number, and firmware version can be displayed. Press and hold the Press the / button to select the button to confirm. Press the /... -
Page 48: Resetting To Factory Settings (Reset All Settings)
Settings Resetting to Factory Settings You can reset the player to the default settings. Resetting the player does not delete the songs you have transferred to the player. Notes This function is only available in pause mode. This function is not available while/after using FM radio. If you want to use this function after FM radio, operate from the HOME menu to select Shuffle) to confirm. -
Page 49: Formatting Memory (Format)
Settings Formatting Memory You can format the built-in flash memory of the player. If the built-in flash memory is formatted, all audio data, the “Auto Transfer” software and Operation Guide (this manual) will be erased. Be sure to verify the data stored in the memory prior to formatting, and export any necessary data to the hard disk of your computer or other device. - Page 50 Settings To cancel the operation Select “Cancel” in step To return to the previous menu Press the /HOME button. Note Do not format the built-in flash memory of the player in Windows Explorer. When you formatted the player in Windows Explorer accidently, do it again on the player ( page 49).
-
Page 51: Listening To Fm Radio
Listening to FM Radio Listening to FM Radio You can listen to FM radio. The headphone cord works as an antenna. Use the player with the headphone cord extended. 1 Switching to the FM radio Press and hold the ... -
Page 52: Presetting Broadcast Stations Automatically (Fm Auto Preset)
Listening to FM Radio To stop the FM radio and return to the audio player Press and hold the select (All Songs) or button to play back. To turn off the volume of the FM radio briefly By pressing the button, FM radio sound is not output. The FM radio enters Sleep status after a few seconds and the display goes off. -
Page 53: Selecting Broadcast Stations
Listening to FM Radio Press the / button to select “OK,” and then press the button to confirm. The receivable broadcast stations will be preset in order from low to high frequency. “COMPLETE” appears when presetting is completed, then the first preset station is received. - Page 54 Listening to FM Radio Preset Tuning Preset number appears with Select the previous preset number Press the button briefly. Select the next preset number Note You cannot select broadcast stations if no preset stations are entered. Preset the receivable stations using “FM Auto Preset”...
-
Page 55: Presetting Broadcast Stations Manually
Listening to FM Radio Presetting Broadcast Stations Manually You can preset broadcast stations which “FM Auto Preset” cannot detect ( page 52). Select the desired frequency by the manual tuning mode ( page 53). Press and hold the button. The frequency you select in step number appears to the left of the frequency. -
Page 56: Setting The Reception (Scan Sens)
Listening to FM Radio Setting the Reception When you select stations using the “FM Auto Preset” function ( page 52) or “Manual Tuning” ( page 53), the FM receiver may receive many unwanted broadcast stations because the reception is too sensitive. In this case, set the reception to “Scan Sens Low. -
Page 57: Changing The Monaural/Stereo (Mono/Auto)
Listening to FM Radio Changing the Monaural/Stereo If noise occurs during FM reception, set the receiver to “Mono” for monaural. If you set it to “Auto, ” monaural/stereo reception is selected automatically, depending on reception conditions. “Auto” is set by default. ... -
Page 58: Useful Facts
Useful Facts Maximizing Battery Life By adjusting the settings or managing the power supply properly, it is possible to save battery power and use the player for a longer time. To enter the Sleep status If you press the button to pause playback or receiving an FM broadcast, after “POWER OFF”... -
Page 59: What Are Format And Bit Rate
Useful Facts What are Format and Bit Rate? What is audio format? Audio format refers to the method used when importing audio data from the Internet or audio CDs to a computer and saving it as an audio file. Common formats include MP3 and WMA, etc. MP3: MP3 (MPEG-1 Audio Layer3) is a common audio compression technology developed by the MPEG working group of the ISO (International Organization for Standardization). -
Page 60: Storing Data Other Than Audio Files
Useful Facts Storing Data Other than Audio Files You can store computer data into the built-in flash memory of the player by transferring the data from your computer in Windows Explorer. If the player is connected to the computer, the built-in flash memory appears in Windows Explorer as [WALKMAN] or [Removable Disk.] Notes ... -
Page 61: Upgrading The Player's Firmware
For customers in Europe: http://support.sony-europe.com/DNA For customers in Latin America: http://www.sony-latin.com/index.crp For customers in other countries/regions: http://www.sony-asia.com/support For customers who purchased the overseas models: http://www.sony.co.jp/overseas/support/ Download the update program to your computer from the web sites. ... -
Page 62: Troubleshooting
Look for information about the issue on one of the support web sites. For customers in Europe, visit: http://support.sony-europe.com/DNA For customers in Latin America, visit: http://www.sony-latin.com/index.crp For customers in other countries/regions, visit: http://www.sony-asia.com/support For customers who purchased the overseas models, visit: http://www.sony.co.jp/overseas/support/... - Page 63 Troubleshooting Operation (continued) Symptom No data is played. Transferred data is not displayed in its list. When “All Songs” is selected, songs may not appear. Cause/Remedy The battery is consumed. Charge the battery fully ( page 13). ...
- Page 64 Troubleshooting Operation (continued) Symptom Songs are played back within a limited playback range only, such as within one folder. Data cannot be deleted on the player. Noise is generated. Buttons do not work. Playback does not stop. The player does not work. The remaining battery is insufficient. Cause/Remedy ...
- Page 65 Troubleshooting Operation (continued) Symptom Transferred songs cannot be found. The volume is not loud enough. There is no sound from right channel of the headphones. Or right channel sound is heard from both sides of the headphones. Playback has stopped suddenly.
- Page 66 The efficiency of the battery will be improved by repeatedly charging and discharging it. When usable battery life becomes half the usual time, even after charging the battery fully, the battery should be replaced. Consult your nearest Sony dealer. appears. Continued ...
- Page 67 Troubleshooting Power (continued) Symptom The player cannot charge the battery. The player turns off automatically. Charging completes very quickly. Connection with the computer/“Auto Transfer” software Symptom “Auto Transfer” software does not start up. “USB CONNECT” does not appear on the player or the player is not recognized when the player is connected to the...
- Page 68 Troubleshooting Connection with the computer/“Auto Transfer” software Symptom Audio data cannot be transferred to the player from your computer. Only a small number of songs can be transferred to the player. The player becomes unstable while it is connected to the computer.
- Page 69 Troubleshooting FM Radio Symptom You cannot hear the FM broadcast well. Reception is weak and sound quality is poor. The FM broadcast is affected by interference. An FM station cannot be preset. Other Symptom There is no beep sound when the player is operated.
-
Page 70: Messages
Troubleshooting Messages Follow the instructions below if a message appears in the display. Message ACCESS AVLS (blinks) CANNOT PLAY DATA ACCESS DRM ERROR FILE ERROR FORMAT ERROR Meaning Remedy This message appears This is not an error after disconnecting the message. - Page 71 ( page 55), then preset the stations you want. There is a problem with Consult your nearest Sony the hardware. dealer. The player fails to update Follow the on-screen the firmware.
-
Page 72: Additional Information
Notice for customers: the following information is only applicable to equipment sold in countries applying EU Directives The manufacturer of this product is Sony Corporation, 1-7-1 Konan, Minato- ku, Tokyo, Japan. The Authorized Representative for EMC and product safety is Sony Deutschland GmbH, Hedelfinger Strasse 61, 70327 Stuttgart, Germany. - Page 73 Do not touch the rechargeable battery with bare hands if it is leaking. Since battery liquid may remain in the player, consult your nearest Sony dealer if the battery has leaked. If the liquid gets into your eyes, do not rub your eyes as it may lead to blindness.
- Page 74 Additional Information On installation Do not put any heavy object on top of the player or apply a strong shock to the player. It may cause a player to malfunction or damage. Never use the player where it will be subjected to extremes of light, temperature, moisture or vibration.
- Page 75 Additional Information On heat build-up Heat may build up in the player while charging if it is used for an extended period of time. On the headphones Road safety Avoid listening with your headphones in situations where hearing must not be impaired.
- Page 76 Be careful not to let water get into the player from the opening near the connector. Clean the headphone plug periodically. If you have any questions or problems concerning the player, please consult your nearest Sony dealer. Continued ...
- Page 77 In no event will SONY be liable for any financial damage, or loss of profits, including claims made by third parties, arising out of the use of the software supplied with this player.
- Page 78 The recorded song is limited to private use only. Use of the song beyond this limit requires permission of the copyright holders. Sony is not responsible for incomplete recording/downloading or damaged data due to problems of the player or computer.
-
Page 79: About Copyrights
Macintosh is a trademark of Apple Inc. Pentium is a trademark or a registered trademark of Intel Corporation. “Style-Up” is a trademark or a registered trademark of Sony Ericsson Mobile Communications AB. US and foreign patents licensed from Dolby Laboratories. -
Page 80: Specifications
Additional Information Specifications Supported file format Music File format MP3(MPEG-1 Layer3) file format, ASF file format, MP4 file format, Wave-Riff file format File extension MP3* Codec MP3* WMA* AAC-LC* Linear-PCM* File may not correspond to all encoders. Copyright protected files cannot be played back. MP4 files with video are not playable. - Page 81 Additional Information Maximum recodable number of files and folders Maximum number of files: 2,048 files Maximum number of folders: 1,024 folders Total maximum number of files and folders directly under one folder: Approx. 300 Capacity (User available capacity)* NWD-E023F: 1 GB (Approx. 968 MB = 1,015,726,080 bytes) NWD-E025F: 2 GB (Approx.
- Page 82 Additional Information Battery life (continuous playback) By setting as follows, a longer battery life can be expected. The times below are approximated when “Power Save Mode” ( page 44) is set to “Save ON Super, ” and “Sound” ( page 25), “Clear Stereo” ( page 30) and “Dynamic Normalizer”...
- Page 83 Additional Information System Requirements (for the player) Computer IBM PC/AT or compatible computer preinstalled with the following Windows operating systems: – Windows XP Home Edition (Service Pack 2 or later) – Windows XP Professional (Service Pack 2 or later) –...
-
Page 84: Index
Additional Information Index Symbols ... 12 ... 12 ... 12 1 ... 25 2 ... 25 1 (Repeat 1 Song) ... 22 (Repeat All) ... 22 (Repeat Folder) ... 22 SHUF (Repeat Shuffle All) ... 22 SHUF (Repeat Shuffle Folder) ... - Page 85 Additional Information Radio ... 51 Repeat... 22 RESET (the player) ... 62 Reset All Settings ... 48 Scan Sens ... 56 Search ... 6, 21 Serial Number ... 7, 47 Set Date-Time ... 39 Set the current time ... 39 Settings ...