
Related Manuals for Sony CMT-M333NT


Summary of Contents for Sony CMT-M333NT
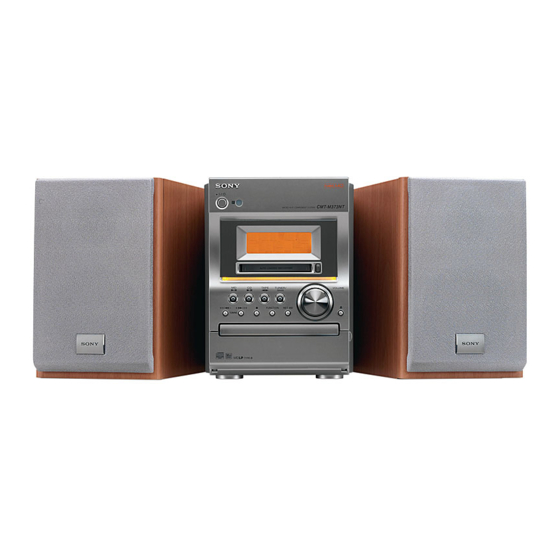
- Page 1 4-243-237-13(1) Micro Hi-Fi Component System Operating Instructions CMT-M373NT CMT-M333NT ©2003 Sony Corporation...
-
Page 2: How To Use This Manual
MDs” on page 51 before installing the software. Tips • For details on the software installation and basic operations of M-crew or SonicStage for Sony Net MDs, refer to the instruction manual of the respective software. • For details on advanced operations, refer to the online help for the respective software. -
Page 3: Table Of Contents
Table of Contents How to use this manual... 2 Getting Started Hooking up the system... 5 Setting the clock... 6 CD – Play Loading a disc ... 7 Playing a disc ... 7 — Normal Play/Shuffle Play/ Repeat Play Creating your own program ... 8 —... - Page 4 ... 48 Listening to the sound of a connected personal computer... 49 About the supplied M-crew ... 50 About the supplied SonicStage for Sony Net MDs ... 51 Optional Components Hooking up optional components ... 52 Listening to audio from a connected component ...
-
Page 5: Getting Started
Getting Started Hooking up the system Perform the following procedures 1 to 3 to hook up your system using the supplied cords and accessories. AM loop aerial Right speaker 1 Connect the speakers. Connect the right and left speaker cords to the SPEAKER terminals as shown below. -
Page 6: Setting The Clock
Jack type B AM loop aerial Extend the FM lead aerial horizontally Note Keep the aerials away from the speaker cords. 3 Connect the mains lead to mains. If the plug does not fit the wall socket, detach the supplied plug adaptor (only for models equipped with an adaptor). -
Page 7: Cd - Play
CD – Play Loading a disc Press Z CD on the unit. Place a disc with the label side up on the disc tray. When you play a 8 cm disc, place it on the inner circle of the tray. Press Z CD again to close the disc tray. -
Page 8: Repeat Play
Playing a track by entering the track number You can also select the desired track you want using the number buttons during Normal Play. To enter a track number 10 or higher, press >10 followed by the number button for the one’s digit. -
Page 9: Other Operations
Other operations Do this Cancel Program Press PLAY MODE in stop Play mode repeatedly until both “PGM” and “SHUF” disappear. Press . or > repeatedly Check the program order during Program Play. Check the total Press DISPLAY in stop mode. number of The total number of programmed programmed tracks... -
Page 10: Erasing A Disc Title
Press ENTER/YES to complete the labeling procedure. To change the character In step 3 or 4, press TCURSOR or CURSORt repeatedly until the character to be changed flashes, press CLEAR to erase the character, then repeat steps 3 and 4. To add a character After steps 1 and 2, press TCURSOR or CURSORt until the cursor comes to the point... -
Page 11: Md - Play
MD – Play Loading an MD Insert an MD. With the label side up, and the shutter on the righthand side. With the arrow pointing toward the deck. Playing an MD — Normal Play/Shuffle Play/Repeat Play This system lets you play the MD in different play modes. -
Page 12: Repeat Play
Playing a track by entering the track number You can also select the desired track using the number buttons during Normal Play. To enter a track number 10 or higher, press >10 followed by the number button for the one’s digit. -
Page 13: Playing Only The Tracks In The Desired Group
Other operations Do this Cancel Program Press PLAY MODE in stop mode Play repeatedly until both “PGM” and “SHUF” disappear. Press . or > repeatedly Check the program order during Program Play. Check the total Press DISPLAY in stop mode. number of The total number of programmed programmed... -
Page 14: Md - Recording
MD – Recording Before you start recording MDs (MiniDisc) let you digitally record and play music with high quality sound. Another feature of MDs is track marking. The track marking feature lets you quickly locate a specific point or easily edit the recorded tracks. However, depending on the source you record, the recording method and the way the track numbers are recorded differ. -
Page 15: Recording A Cd On An Md
After recording Press Z MD on the unit to remove the MD or press ?/1 (power) to turn off the system. “TOC writing” or “STANDBY” starts flashing. The TOC is updated and recording is completed. Before pulling out the mains lead MD recording is completed when the MD Table of Contents (TOC) is updated. -
Page 16: Recording A Tape On An Md
To stop recording Press x. To record using the Group Function Press GROUP repeatedly until “GROUP” appears after step 2. Press GROUP SKIP repeatedly until “New Group” or the desired group appears after step 5. Recording a CD on an MD and a tape at the same time Load a recordable tape, then select “DUAL SYNC”... -
Page 17: Recording On An Md Manually
To record using the Group Function Press GROUP repeatedly until “GROUP” appears after step 2. Press GROUP SKIP repeatedly until “New Group” or the desired group appears after step 5. Recording on an MD manually — Manual Recording You can record just the portions you like from a CD, or other connected component. -
Page 18: Starting Recording With 6 Seconds Of
To record using the Group Function Press GROUP repeatedly until “GROUP” appears after step 2. Press GROUP SKIP repeatedly until “New Group” or the desired group appears after step 4. Tips • If you want to record manually in the middle of a track loaded in this system, press CD NX before step 4 to pause the playback, then press CD NX in step 5 to start playback. -
Page 19: Marking Track Numbers
Start playing the desired source to record. Press ENTER/YES at the desired point to start recording. To stop Time Machine Recording Press x. Note The MD deck starts storing audio data when the deck stands by for recording in step 4 and you start playing the source. -
Page 20: Making A Space Between Tracks 3 Seconds Long Automatically
Press MENU/NO. To continue recording, follow the procedures described for each type of recording. Other operations Do this In step 5, press . or > Turn off the Level Synchro Recording repeatedly until “T.Mark Off” Function appears, then press ENTER/ YES. -
Page 21: Adjusting The Recording Level
Press . or > repeatedly until “Setup?” appears, then press ENTER/ YES. Press . or > repeatedly until “S.Space” appears, then press ENTER/ YES. Press . or > repeatedly until “S.Space On” appears, then press ENTER/YES. Press MENU/NO. To continue recording, follow the procedures described for each type of recording. -
Page 22: Recording Tips
Recording tips Recording for long times This system has two long time recording modes: LP2 and LP4 (MDLP recording). Press REC MODE on the unit to select the recording mode. Refer to each pages about recording (pages 15, 17 and 18). MDs recorded in MDLP Stereo mode are played back only on the system with the following marks. -
Page 23: Md - Editing
MD – Editing Editing tips Before you start editing You can edit an MD only when: • The MD is recordable. • The MD play mode is Normal Play. Check the following, before editing. Check the tab of the MD to be edited. Slide the tab to close the slot. - Page 24 Operations using the Group Function • Playing only the tracks in the desired group (page 13) • Recording a CD (page 15) • Recording a tape (page 16) • Recording on an MD manually (page 17) • Starting recording with 6 seconds of prestored audio data (page 18) •...
-
Page 25: Labeling An Md/Group/Track
Labeling an MD/group/ track — Name Function You can create titles for your recorded MDs, tracks, and groups as follows. After recording Use Name Function. You can input a total of approximately 1,700 characters for the disc title, track titles and group titles on a single MD. - Page 26 To add a character After steps 1 and 2, press TCURSOR or CURSORt until the cursor comes to the point you want to add a character, then proceed to step Note If you enter the symbol “//” between the characters in disc titles such as “abc//def”, you may be unable to use the Group Function.
-
Page 27: Creating A New Group
Creating a new group — Create Function The Create Function allows you to create a new group without registering any tracks, or to create a new group and register one or more consecutive tracks into that group. Only tracks that have not yet been registered into any group can be registered. -
Page 28: Releasing Group Registrations
Releasing group registrations — Release Function These functions allow you to release group registrations simply by specifying the group for which you want to release the registrations. In addition, you can also release the registrations of all groups on an MD at once. For details on the group management information, see “Registering tracks in groups”... -
Page 29: Erasing Recordings
Erasing recordings — Erase Function The MD deck lets you erase unwanted tracks quickly and easily. You can restore the erased contents using the Undo function immediately after the erasing (page 34). However, you cannot restore the erased contents after performing other editing. Before erasing, make sure if it is all right to erase the content. -
Page 30: Erasing A Portion Of A Track
Erasing a portion of a track — A-B Erase Function You can specify a portion within a track and erase the portion with ease. You can shift the desired portion by frame intervals. This function is convenient to erase the unnecessary parts recorded from satellite broadcast or radio programs. -
Page 31: Moving Recorded Tracks
Moving recorded tracks — Move Function You can use this function to change the order of any track on the disc. When you move tracks, the tracks are automatically renumbered. Example: Moving track 3 to position 2 Track number Original tracks After MOVE... -
Page 32: Combining Recorded Tracks
Combining recorded tracks — Combine Function You can use this function to combine 2 tracks into a single track. The total number of tracks decreases by one and all tracks following the combined ones are renumbered. Example: Combining track 3 to track 1 Track number Original tracks... -
Page 33: Dividing Recorded Tracks
Dividing recorded tracks — Divide Function You can use this function to mark track numbers after recording. You can also use this function when recording from tapes or radio programs and track numbers are not marked automatically, and want to mark tracks. The total number of tracks increases by one and all the tracks following the divided ones are renumbered. -
Page 34: Undoing The Last Edit
Undoing the last edit — Undo Function You can use this function to cancel the last edit and restore the contents of the MD to the condition before the edit. Note, however, that you cannot undo the edit if you do any of the following after the edit: •... - Page 35 While monitoring the sound, press . or > repeatedly to change the recorded level. The recording level can be changed from –12 dB to +12 dB, in 2 dB steps. Change to the optimum level while making sure that “OVER” does not appear in the display at the loudest portion.
-
Page 36: Tuner
Tuner Presetting radio stations You can preset up to 20 FM stations and 10 AM stations. You can then tune in any of those stations simply by selecting the corresponding preset number. Automatic tuning preset You can automatically tune in all of the stations that can be received in your area and then store the radio frequency of the desired stations. -
Page 37: Listening To The Radio
To change the AM tuning interval (except for European model) The AM tuning interval is factory-preset to 9 kHz (or 10 kHz for some areas). To change the AM tuning interval, tune in any AM station first, then turn off the system. While holding L, press ?/1 on the unit. -
Page 38: Manual Tuning
Listening to non-preset radio station — Manual Tuning Press TUNER BAND repeatedly to select “FM” or “AM”. Press TUNING MODE repeatedly until “AUTO” and “PRESET” disappear from the display. Press + or – repeatedly to tune in the desired station. Tips •... -
Page 39: Using The Radio Data System (Rds)
Using the Radio Data System (RDS) (European model only) What is the Radio Data System? Radio Data System (RDS) is a broadcasting service that allows radio stations to send additional information along with the regular program signal. RDS is available only on FM stations.* Note RDS may not work properly if the station you are tuned... -
Page 40: Playing A Tape
Playing a tape You can use TYPE I (normal) tape. Press FUNCTION repeatedly to switch the function to TAPE. Press DIRECTION on the unit repeatedly to select “g” to play one side of a tape, “h” to play both sides, or “j”... -
Page 41: Recording On A Tape Manually
To record CD or MD by specifying track order You can record only your favorite CD or MD tracks using Program Play. Between steps 2 and 3, perform steps 1 to 5 of “Creating your own program” (page 8) or “Programming MD tracks”... -
Page 42: Sound Adjustment
Sound Adjustment Adjusting the sound You can adjust the bass and treble to enjoy more powerful sound. Generating a more dynamic sound (Dynamic Sound Generator) Press DSG. To cancel the DSG, press DSG again. Adjusting the bass and treble You can perform this operation only using the remote. -
Page 43: Waking Up To Music
Waking up to music — Daily Timer You can wake up to music at a preset time. Make sure you have set the clock (see “Setting the clock” on page 6). You can perform this operation only using the remote. Prepare the sound source you want to play. -
Page 44: Timer Recording Radio Programs
Timer recording radio programs To timer record, you must first preset the radio station (see “Presetting radio stations” on page 36) and set the clock (see “Setting the clock” on page 6). You can perform this operation only using the remote. - Page 45 Notes • The Daily Timer setting or the Timer Recording setting overlaps with part or all of another timer setting. • If you use the Timer Recording and the Sleep Timer at the same time, the Sleep Timer has priority. •...
-
Page 46: Display
Display Turning off the display — Power Saving Mode The clock display can be turned off to minimize the amount of power consumed during standby (Power Saving Mode). Press DISPLAY repeatedly while the system is off until the clock display disappears. - Page 47 Checking the total playing time and titles (CD/MD) Press DISPLAY in stop mode. Each time you press the button, the display changes cyclically as follows: x When a CD is in stop mode Total number of tracks and the total playing time t Disc title t Clock display t BASS level t TREBLE level...
-
Page 48: Optional Personal Computer
• Even if you adjust the volume on the computer side, • When you connect the system and your computer Personal computer SonicStage for Sony Net MDs) supplied with this system. computer, a driver installation may start automatically. If a “File required” dialog box or other dialog box appears, reinstall the device driver. -
Page 49: Listening To The Sound Of A Connected Personal Computer
Listening to the sound of a connected personal computer The supplied M-crew software allows you to play back music data in your personal computer that has been registered to M-crew, tune in Internet radio stations, and perform other operations using the system remote (PC LIBRARY CONTROL). -
Page 50: About The Supplied M-Crew
Note In WEB RADIO mode, the Internet Explorer connection setup and Internet connection must be made beforehand. The system and M-crew do not have dial-up or other Internet connection and disconnect functions. These Internet connection and disconnect operations should be done on the computer side. When using an Internet service with a contract where fees are based on connection time, be sure to remember to disconnect from the... -
Page 51: About The Supplied Sonicstage For Sony Net Mds
SonicStage for Sony Net MDs, refer to the online help for SonicStage for Sony Net MDs. Note Be sure to install the SonicStage for Sony Net MDs software to your computer before connecting the system to your computer. If you are reinstalling the software, be sure to disconnect the USB cable before starting the installation. -
Page 52: Optional Components
Optional Components Hooking up optional components To enhance your system, you can connect optional components. Refer to the operating instructions provided with each component. A personal computer A DIGITAL OPTICAL IN jack Use a digital optical cord (square, not supplied) to connect an optional digital component (digital satellite receiver, etc.) to this jack. -
Page 53: Listening To Audio From A Connected Component
Listening to audio from a connected component Listening to a digital component such as a digital satellite receiver, etc. Connect the digital optical cord. See “Hooking up optional components” on page 52. Press FUNCTION repeatedly until “OPTICAL IN” appears. Start playing the connected component. Listening to an analog component such as a cassette deck... -
Page 54: Troubleshooting
If the problem persists after doing all of the above, consult your nearest Sony dealer. General “– –:– –” appears in the display. • A power interruption has occurred. Set the clock (page 6) and timer settings (pages 43 and 44) again. - Page 55 MD deck An MD cannot be inserted. • Insert the MD with the label side up and the arrow pointing toward the deck. The controls do not work. • Replace the MD with a new one. • Retry the operations after “TOC” or “STANDBY”...
-
Page 56: Tape Deck
• Locate the aerials as far away from the speaker cords as possible. • Consult your nearest Sony dealer if the supplied AM aerial has come off the plastic stand. • Try turning off surrounding electrical equipment. A stereo FM program cannot be received in stereo. -
Page 57: Self-Diagnosis Display
To solve the problem refer to the following list. If any problem persists, consult your nearest Sony dealer. C11/Protected The MD is protected against erasure. cRemove the MD and slide the tab to close the slot (page 15). -
Page 58: Messages
E0001/MEMORY NG The component has internal problem. cConsult your nearest Sony dealer. E0101/LASER NG There is a problem with the laser pickup. cThe laser pickup may be damaged. Consult your nearest Sony dealer. - Page 59 Group Full! An attempt was made to create a new group in excess of the maximum number of groups, or there are insufficient characters for updating the group management information. Impossible • You tried to make an impossible editing operation. •...
- Page 60 Optional personal computer Buffer The personal computer is preparing the amount of data needed for playback while using the WEB RADIO function. Busy NOW! You pressed NET MD during check in or check out. Wait until the operation is completed. Cannot Found •...
-
Page 61: Additional Information
• When you move the system, take out any discs. If you have any questions or problems concerning your system, please consult your nearest Sony dealer. On the speaker system This speaker system is not magnetically shielded and the picture on TV sets may become magnetically distorted. - Page 62 Notes on CDs • Before playing, clean the disc with a cleaning cloth. Wipe the disc from the center out. • Do not use solvents such as benzene, thinner, commercially available cleaners or anti-static spray intended for vinyl LPs. • Do not expose the disc to direct sunlight or heat sources such as hot air ducts, nor leave it in a car parked in direct sunlight.
-
Page 63: System Limitations Of Mds
System limitations of MDs The recording system in your MD deck has the limitations described below. Note, however, that these limitations are due to the inherent nature of the MD recording system itself, not to mechanical causes. “Disc Full!” appears before the MD has reached the maximum recording time When 255 tracks have been recorded on the MD, “Disc... -
Page 64: Specifications
Guide to the Serial Copy Management System Digital audio components, such as CDs, MDs, and DATs let you copy music easily with high quality by processing music as a digital signal. To protect the copyrighted music programs, this system uses the Serial Copy Management System that allows you to make only a single copy of a digitally recorded source through digital-to-digital connections. - Page 65 5 Hz – 20 kHz Tape deck section Recording system 4-track 2-channel stereo Frequency response 60 – 10,000 Hz (±3 dB), using Sony TYPE I cassettes Wow and flutter ±0.15% W. Peak (IEC) 0.1% W. RMS (NAB) ±0.2% W. Peak (DIN)
-
Page 66: List Of Button Locations And Reference Pages
List of button locations and reference pages How to use this page Use this page to find the location of buttons and other parts of the system that are mentioned in the text. Main unit ALPHABETICAL ORDER A – L DIRECTION qk (16, 40, 41) Disc tray 9 DISPLAY ql (9, 13, 39, 46, 47,... -
Page 67: Remote Control
Remote control ALPHABETICAL ORDER A – L BASS/TRE 9 (42) CLEAR 4 (9, 10, 13, 25, 38) CLOCK/TIMER SELECT wj (43, 44) CLOCK/TIMER SET wk (6, 43, DISPLAY wg (9, 13, 39, 46, 47, DSG 0 (42) ENTER/YES qk (6, 8, 10, 12, 19, 21, 25, 27, 28, 29, 31, 32, 33, 34, 36, 38, 43, 44, 49) FM MODE 2 (37, 38) - Page 68 Sony Corporation Printed in China...