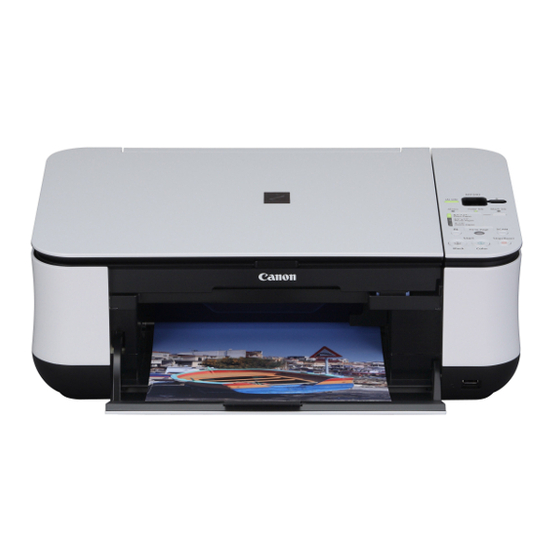
Canon PIXMA MP240 Getting Started
Canon printer user manual
Hide thumbs
Also See for PIXMA MP240:
- Getting started manual (36 pages) ,
- Getting started (29 pages) ,
- Specifications (2 pages)
Table of Contents
Advertisement
Advertisement
Table of Contents

Related Manuals for Canon PIXMA MP240


Summary of Contents for Canon PIXMA MP240
-
Page 1: Getting Started
MP260 MP240 Getting Started Démarrage Make sure to read this manual before using the machine. Please keep it in hand for future reference. Prenez soin de lire ce manuel avant d'utiliser la machine. Conservez-le ensuite à portée de main pour référence ultérieure. ENGLISH FRANÇAIS... -
Page 2: Table Of Contents
Contents Contenu Re move t he P ro te ctive M ate rial Ret rai t des élé m en ts de p r otec tio n Tu rn t he Po we r On Mi se sous t en sion I nst all th e FINE Ca r tr id ge s I nst all at io n de s ca r to uch e s FIN E (FI NE Cart rid ge s) -
Page 3: Remove The Protective Material
Remove the Protective Material Retrait des éléments de protection First, check the included items Vérifiez tout d'abord les éléments fournis • Manuals • Setup CD-ROM (containing the drivers, applications and on-screen manuals) • Warranty • Manuels • [Setup CD-ROM/CD-ROM d'installation] (contenant les pilotes, les applications et •... - Page 4 Remove the Protective Material Retrait des éléments de protection Pull the orange protective tape (D) and remove the protective material (E). Then, lift the Scanning Unit (Cover) (B) slightly and fold the Scanning Unit Support (C), then gently close the Scanning Unit (Cover) (B). Retirez la languette de protection orange (D), ainsi que l'élément de protection (E).
-
Page 5: Turn The Power On
Turn the Power On Mise sous tension Plug in the power cord on the left side of the machine and connect the other end to the wall outlet. Branchez le cordon d'alimentation sur le côté gauche de la machine et branchez l'autre extrémité à la prise murale. •... -
Page 6: Install The Fine Cartridges
Install the FINE Cartridges Installation des cartouches FINE (FINE Cartridges) • Do not handle the FINE Cartridges roughly such as applying them excessive pressure or dropping them. • Manipulez les cartouches FINE (FINE Cartridges) avec précaution, évitez de les soumettre à une pression excessive ou de les laisser tomber. - Page 7 Open the Ink Cartridge Locking Cover ( ) on the right side. Pinch (F) firmly and pull up the cover. Ouvrez le cache de verrouillage de la cartouche d'encre ( droite. Serrez (F) fermement et soulevez le cache. After removing the Black FINE Cartridge from its box, pull the orange protective tape (G) in the direction of the arrow and remove it gently.
- Page 8 Install the FINE Cartridges Installation des cartouches FINE (FINE Cartridges) Place the Black FINE Cartridge ( ) into the right slot ( Installez la cartouche FINE (FINE Cartridge) noire ( ) dans le logement de droite ( ). • Do not knock the FINE Cartridge against the sides of the holder. •...
- Page 9 Lift the Scanning Unit (Cover) (A) slightly and fold the Scanning Unit Support (D), then gently close the Scanning Unit (Cover) (A). Soulevez légèrement l' unité de numérisation (capot) (A) et repliez le support de l'unité de numérisation (D) avant de refermer délicatement l' unité de numérisation (capot) (A).
-
Page 10: Install The Software
Install the Software Installation du logiciel To use the machine by connecting it to a computer, software including the printer driver needs to be copied (installed) to the computer's hard disk. The screens below are based on Windows Vista operating system Ultimate Edition (hereafter referred to as “Windows Vista”) and Mac OS X v.10.5.x. - Page 11 Windows If the Found New Hardware or Found New Hardware Wizard screen appears: Si l'écran [Found New Hardware/Nouveau matériel détecté] ou [Found New Hardware Wizard/Assistant Ajout de nouveau matériel détecté] s'affiche : Remove the USB cable connected to your computer. The screen may close.
- Page 12 Windows Turn on the computer, then insert the Setup CD-ROM into the CD-ROM drive. The setup program should run automatically. Mettez l'ordinateur sous tension, puis insérez le [Setup CD-ROM/CD-ROM d'installation] dans le lecteur de CD-ROM. Le programme d'installation doit, en principe, démarrer automatiquement. Go to Step Windows Vista Passez à...
- Page 13 Wi ndo ws Vista User Account Control screen appears, When the Select Your Place of Residence screen click Continue . appears, select your place of residence, then click Next . If the same screen reappears in subsequent steps, click Continue . Lorsque l'écran [Select Your Place of Residence/ Sélectionnez votre lieu de résidence] s'affiche, Lorsque l'écran [User Account Control/...
- Page 14 Windows Click Install. Move the cursor over items to display explanations. Cliquez sur [Install/Installer]. Passez le curseur sur les différents éléments pour afficher des explications. If you can agree, click Yes on the License Agreement screen. Installation starts. Si vous acceptez le contrat de licence, cliquez sur [Yes/Oui] dans l'écran [License Agreement/Contrat de licence].
- Page 15 When the Printer Connection screen appears, connect one end of the USB cable to the computer, the other to the machine, then TURN THE MACHINE Lorsque l'écran [Printer Connection/Connexion de l'imprimante] s'affiche, branchez l'une des extrémités du câble USB à l'ordinateur et l'autre à la machine, puis METTEZ LA MACHINE SOUS TENSION.
- Page 16 Windows Click Next. Cliquez sur [Next/Suivant]. • If straight lines are misaligned or print quality is not satisfactory after installing the MP driver, you may need to align the Print Head. Refer to “When Printing Becomes Faint or Colors Are Incorrect” in the on-screen manual: Basic Guide.
- Page 17 Click Next . If connected to the Internet, the user registration page appears. Follow the on-screen instructions to register your product. You will need your product serial number, which is located on the inside of the machine. Cliquez sur [Next/Suivant] . Si vous êtes connecté...
- Page 18 Windows When the Extended Survey Program screen appears, confirm the message. If you can agree, click Agree. If you click Do not agree, the Extended Survey Program will not be installed. (This has no effect on the machine's functionality.) Lorsque l'écran Extended Survey Program s'affiche, validez le message.
- Page 19 Macintosh Connect one end of the USB cable to the computer and the other to the machine. Make sure the machine is turned on. Branchez une des extrémités du câble USB à l'ordinateur et l'autre à la machine. Assurez-vous que la machine est sous tension. •...
- Page 20 Macintosh Enter your administrator name and password. Click OK . If you do not know your administrator name or password, click Help , then follow the on-screen instructions. Entrez votre nom d'administrateur et votre mot de passe. Cliquez sur [OK] . Si vous ne connaissez pas votre nom d'administrateur ou votre mot de passe, cliquez sur [Help/Aide] , puis suivez les instructions qui s'affichent à...
- Page 21 Click Install . Move the cursor over items to display explanations. Cliquez sur [Install/Installer] . Passez le curseur sur les différents éléments pour afficher des explications. If you can agree, click Yes on the License Agreement screen. Installation starts. Si vous acceptez le contrat de licence, cliquez sur [Yes/Oui] dans l'écran [License Agreement/Contrat de licence] .
- Page 22 Macintosh Click Next . Cliquez sur [Next/Suivant] . • If straight lines are misaligned or print quality is not satisfactory after installing the MP driver, you may need to align the Print Head . Refer to “ When Printing Becomes Faint or Colors Are Incorrect ” in the on-screen manual: Basic Guide .
- Page 23 Click Next . If connected to the Internet, the user registration page appears. Follow the on-screen instructions to register your product. You will need your product serial number, which is located on the inside of the machine. Cliquez sur [Next/Suivant] . Si vous êtes connecté...
- Page 24 Macintosh Click Restart . Click Restart to restart the computer. After restarting the computer, remove the Setup CD-ROM and keep it in a safe place. Cliquez sur [Restart/Redémarrer] . Cliquez sur [Restart/Redémarrer] pour redémarrer l'ordinateur. Après avoir redémarré l'ordinateur, retirez le [Setup CD-ROM/CD-ROM d'installation] et rangez-le en lieu sûr.
-
Page 25: Loading Paper Chargement Du Papier
Loading Paper Chargement du papier Open the Paper Support (A) and Move the Paper Guide (B) to both edge, and load paper in pull it out. the center of the rear tray (C). Ouvrez le support papier (A) et Faites glisser le guide papier (B) contre les côtés, puis déployez-le. -
Page 26: After Installing The Machine
After Installing the Machine Après installation de la machine ■ Manuals ■ Manuels Safety Precautions Précautions de sécurité Describes how to set up and use your machine. Introduces the machine and its functions, the Safety and Environment included manuals and application software. Information For proper use, read safety precautions before using the product. - Page 27 *Les boutons affichés varient en fonction du pays ou de la région d'achat. Open various applications and on-screen manuals with a single click. You can start Solution Menu from the Canon Solution Menu icon on the desktop (Windows) or on the Dock (Macintosh).
- Page 28 After Installing the Machine Après installation de la machine ■ Using Your Machine ■ Utilisation de la machine This machine allows you to print in various ways using the MPdriver and application software installed on the computer. For example, you can scan documents/images into a computer and copy them, or print them without borders.
- Page 29 Try Copying Copie You can copy a document by simply placing it on the Platen Glass and pressing the Color button or the Black button. For various copying procedures, refer to “Copying” in the on-screen manual: Basic Guide. Vous pouvez copier un document en le plaçant simplement sur la vitre d'exposition et en appuyant sur le bouton Couleur ou sur le bouton Noir. Pour découvrir différents modes de copie, reportez-vous à...
- Page 30 Try Copying Copie Place the document face-down and align it with the Alignment Mark (B). Placez le document face vers le bas et alignez-le sur le repère d'alignement (B). • Do not place any objects weighing more than 4.4 lb / 2.0 kg on the Platen Glass. •...
- Page 31 Print Photos from a Computer Impression depuis un ordinateur Easy-PhotoPrint EX allows you to print photos easily. This section explains how to print borderless photos using 4” x 6” size Photo Paper Plus Glossy II. The screens are based on Windows Vista. Easy-PhotoPrint EX vous permet d'imprimer des photos en toute simplicité.
- Page 32 Print Photos from a Computer Impression depuis un ordinateur Load a sheet of photo paper in portrait orientation. Load paper with the printing side facing up. Chargez une feuille de papier photo en orientation portrait. Chargez le papier face imprimable vers le haut. •...
- Page 33 Maintenance Maintenance After a period of use, the inside of the machine may become stained with ink. To avoid staining your hands or clothes with ink, it is recommended that you clean the Ink Cartridge Locking Cover (A) and the inside of the tray (B) with a dry cloth as required.
-
Page 34: About This Manual
Some functions may not be available with Windows Media Center • To upgrade from Windows XP to Windows Vista, first uninstall software bundled with the Canon inkjet printer. Additional System Requirements for on-screen manuals Browser: Easy Guide Viewer Browser: Help Viewer Note: Microsoft Internet Explorer 6.0 or later... -
Page 35: Propos De Ce Manuel
Certaines fonctions peuvent ne pas être disponibles avec Windows Media Center. • Pour mettre votre système à niveau de Windows XP vers Windows Vista, commencez par désinstaller les logiciels fournis avec l'imprimante à jet d'encre Canon. Configuration système supplémentaire pour les manuels en ligne Navigateur : Easy Guide Viewer... - Page 36 The following ink cartridges are compatible with this product. Les cartouches d'encre suivantes sont compatibles avec ce produit. www.canon.ca QT5-1663-V01 XXXXXXXX ©CANON INC.2008 PRINTED IN VIETNAM IMPRIME AU VIETNAM...