Bowflex Revolution Owner's Manual
Bowflex home gym owner's manual
Hide thumbs
Also See for Revolution:
- Assembly manual (33 pages) ,
- Owner's manual (108 pages) ,
- Assembly instructions manual (32 pages)
Table of Contents
Advertisement
Quick Links
Advertisement
Table of Contents

Related Manuals for Bowflex Revolution


Summary of Contents for Bowflex Revolution
- Page 1 The Bowflex Revolution ® Owner’s Manual 000-5822.040111.E...
-
Page 2: Table Of Contents
| outside U.S. +01-360-859-5180, technics-APLA@nautilus.com | Printed in China | © 2005 Nautilus, Inc., All rights reserved. ™ and ® indicate a trademark or registered trademark. Nautilus, Inc. (www.NautilusInc.com) trademarks include NAUTILUS®, BOWFLEX®, SCHWINN® and UNIVERSAL® and respective logos. Other trademarks are the property of their respective owners. -
Page 3: Important Safety Information
Indicates a potentially hazardous situation which, if not avoided, could result in death or serious injury. Before using this equipment, obey the following warnings: Read and understand the complete Owner’s Manual. Keep Owner’s Manual for future reference. Read and understand all warnings on this machine. If at any time the Warning stickers become loose, unreadable or dislodged, contact Nautilus •... -
Page 4: Product View And Serial Number
Safety Warning Labels and Serial Number Locate and read all safety warnings on the machine before using it. Replace any warning label if it is damaged, illegible, or missing. If you need replacement labels, call a Nautilus Representative. Label 1 Label 4 Label 2 Label 2... - Page 5 Safety Warning Labels and Serial Number Label 1: General use safety label. Location: Front of the main unit above seat rail. Label 2: Keep hands away. Location: Below freearms on main unit; top of seat rail bracket; top of Leg Extension adjustment. Label 3: Check all equipment before use.
-
Page 6: Product Specifications
Dimensions (arms raised) Workout Area Assembled Unit Weight Shipping Weight SpiraFlex Resistance ® SpiraFlex Upgradability ® Maximum User Weight Product Specifications 112” L x 37.8” W x 73” H (284cm x 98cm x 185.4cm) 120” x 84” (304.8cm x 213.4cm) 336.2 lbs. -
Page 7: Getting To Know Your Bowflex Revolution ® Home Gym
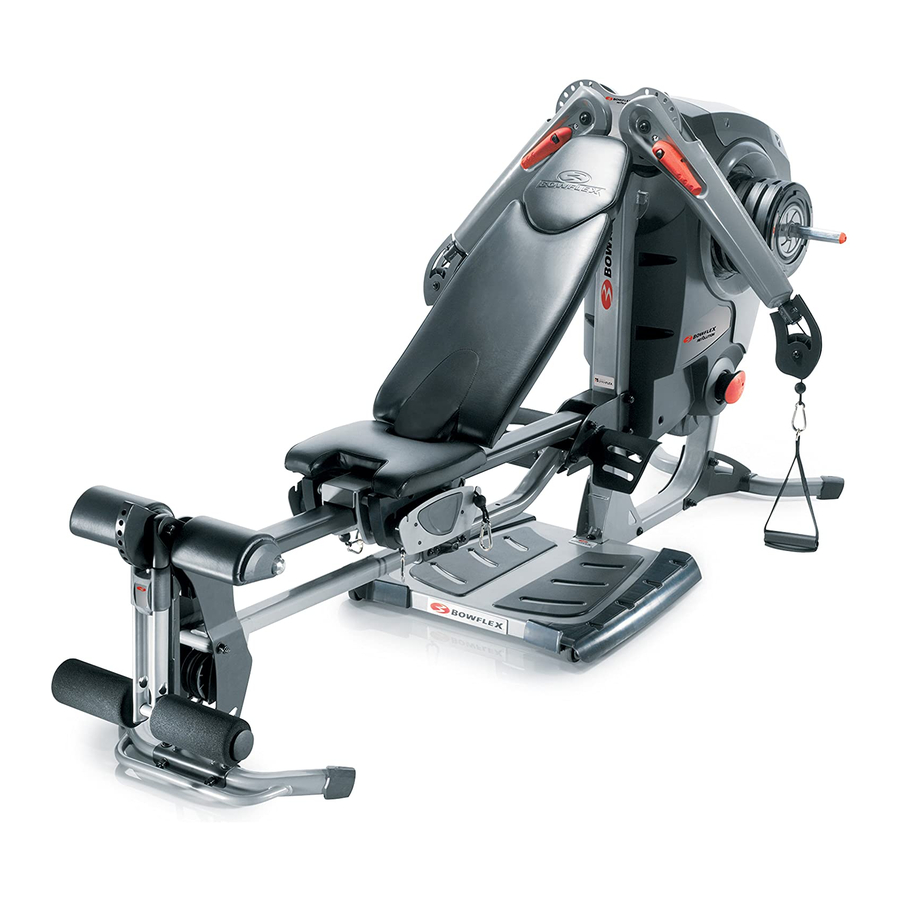
Please take your time to read through the entire manual and follow it carefully before attempting to use your Bowflex Revolution home gym. Also locate and read all warning labels that are posted on the machine. It’s ® important to understand how to properly perform each exercise before you do so using SpiraFlex The image below shows the machine set up in just one of many configurations. -
Page 8: Spiraflex ® Resistance
Using Your Bowflex Revolution SpiraFlex Resistance ® The Bowflex Revolution home gym features an ® ingenious patented technology called SpiraFlex Bowflex Revolution muscle-building resistance comes ® in the form of these cleverly designed resistance packs, each constructed with a heavy-duty elastic strap inside the pack. -
Page 9: Attaching Spiraflex ® Resistance Plates
During assembly, you attached 5-lb (2.27kg) SpiraFlex resistance packs to the machine. The 5-lb packs are permanently attached to the machine. The Bowflex Revolution home gym comes with 220 lbs (100kg) of resistance packs in 5, 10, 20, and 40-lb packs (2.27kg, 4.54kg, 9.07kg, 18.14kg). -
Page 10: Preparing For Use, Storing, And Moving
To do exercises, read the instructions in this manual or on the exercise poster included with your machine. Each exercise uses a unique set of adjustable arm positions and cable connections. Using your Bowflex Revolution home gym should be easy: •... -
Page 11: Maintenance
To store your machine, you can either leave it in the fully assembled, extended position, or you can raise the seat rail system to make a smaller footprint for storing. To raise the seat rail system, pull the pop pin on the lower seat rail at the leg extension assembly and use the handle to lift the seat rail assembly into place. -
Page 12: Adjusting Cable Tension
Pay close attention to maintenance of the cable tension. Over time and with heavy use, the cables are designed to give slightly. Located on the main engine housing is a tension control knob which allows you to increase the tension in the cables. Checking for problem cable tension is simple. -
Page 13: Cable Hookup For Leg Exercises
Cable Hookup for Leg Exercises The drawings on this page show proper cable hookup when using the leg extension attachment. Please note that the freearms should be in position 9. The included Assembly Manual also contains information on how to attach both cables and machine attachments. -
Page 14: Cable Hookup For Leg Press Exercises
Cable Hookup for Leg Press Exercises The drawings on this page show proper cable hookup for leg press exercises. Please note that the freearms should be in position 9. -
Page 15: Storing Leg Press Cables
Step 1 Step 2 Step 3 Step 4 Side View Step 1 Step 2 Step 3 Step 4... -
Page 16: Storing Leg Extension Cables
Storing Leg Extension Cables... -
Page 17: Attaching Hand Grips And Foot Harnesses
® Hand Grips You receive two hand grips with your Bowflex Revolution home gym. Hand grips contain two D-rings on each grip, allowing for a shorter hand grip or longer hand grip, depending on the exercise. -
Page 18: Attaching Accessories, Benches And Seats
Attaching Accessories, Benches, and Seats Use the instructions on the following pages to attach each of the accessories/attachments. Leg Press Seatback Use the leg press seatback when performing leg presses. Place the seatback in the opposite position to use as a back support for military presses and leg extensions. -
Page 19: Preacher Curl
Attaching Accessories, Benches, and Seats Preacher Curl Pull out the pop-pin and slide the Preacher Curl Assembly into place. When the Preacher Curl is at the desired height, release the pop- pin to lock in place. Multi-Position Bench The bench can be used in either of the following positions: •... -
Page 21: Companion Equipment
® exercises. Between workouts, this specially designed accessory rack stores the gear that makes your home gym so versatile, so your workout area stays organized and ready for your next workout. -
Page 22: Defining Your Goals
It comes into play when you jog a mile or ride a bike. It is a critical component of overall fitness and health. Any exercise program must be supplemented with cardiovascular training, such as rowing on the Bowflex Revolution™. -
Page 23: Reaching Your Goals
Reaching Your Goals To reach your goals you must follow a consistent, well designed program that provides balanced development to all parts of the body and includes both aerobic and strength exercise. Only then will you meet your goals safely and efficiently. -
Page 24: Exercising Properly
A good pre-workout mental routine is to sit and relax, so you can focus on what you are about to do and think about achieving your end goal. Warming Up We recommend that you warm up by rowing on the Bowflex Revolution home gym. ®... -
Page 25: The Workouts
20 Minute Better Body Workout Frequency: 3 Days Per Week (M-W-F) Start by performing one set of each exercise. Warm up with a light resistance exercise that you can perform easily for 5 -10 reps without fatiguing. Focus on practicing and learning your technique before increasing the resistance. Then move to a more challenging resistance you can perform for no less than 10 reps and no more than 15 reps without your form deteriorating. -
Page 26: 20 Minute Upper/Lower Body
20 Minute Upper/Lower Body Frequency: 4 Days Per Week (M-T-TH-F) This program provides you with a quick and effective workout that combines muscle conditioning with some cardiovascular benefits. Do this routine when you are limited in time or just want a variation to your normal routine. Perform this program training 2 days, resting 1 to 2. -
Page 27: Body Building
Body Building Frequency: 3 Days On, 1 Day Off Body building requires focused concentration and dedication to training, as well as proper eating habits. Train each muscle group to failure before moving on to the next exercise. Do not neglect any muscle group. If needed, include an aerobic activity to increase your caloric expenditure and help to reduce your body fat levels to achieve a defined muscular look. -
Page 28: Circuit Training - Anaerobic/Cardiovascular
Circuit Training – Anaerobic/Cardiovascular Frequency: 2-3 Times Per Week Circuit training is a great way to achieve the benefits of strength training and cardiovascular training in one quick, challenging routine. The idea is to move quickly from exercise to exercise, taking only as much rest between sets as it takes to set up the next exercise (less than 20 seconds). -
Page 29: True Aerobic Circuit Training
True Aerobic Circuit Training Frequency: 2-3 Times Per Week Circuit training is a great way to achieve the benefits of strength training and cardiovascular training in one quick, challenging routine. By returning to the aerobic rowing exercise between each set you are increasing your aerobic capacity, endurance and burning fat as energy. -
Page 30: Strength Training
Strength Training Frequency: 3 Days Per Week (M-W-F) This program is designed to emphasize overall strength development. This is an advanced routine to be used only after you have progressed from the advanced general conditioning routine and only after you have perfected your exercise techniques. Work each set to near exhaustion. -
Page 31: Exercises
A Revolutionary Way to Exercise The Bowflex Revolution home gym provides an unparalleled number of exercises, with more than 90 exercises and over 400 ® total variations. You can switch quickly between hundreds of exercises with less setup time than most gym machines. That means a shorter workout while maintaining a higher, calorie-burning heart rate. -
Page 32: Chest Exercises
Bench Press — Shoulder Horizontal Adduction (and elbow extension) Muscles worked: Pectoralis Major; Deltoids; Triceps Bench Position: 45˚ incline Accessory: Long Hand Grips Adjustable Arm Position: 7 or 8 Success Tips • Maintain a 90° angle between upper arms and torso throughout motion. •... - Page 33 Resisted Punch — Shoulder Flexion, Elbow Extension, Scapular Protraction Muscles worked: Anterior Deltoid; Triceps; Pectoralis Major Bench Position: Flat Bench Back Accessory: Long Hand Grips Adjustable Arm Position: 8 (up/center) Success Tips • Maintain an upright, erect posture as your trunk rotates with the punch. •...
-
Page 34: Decline Chest Fly
Muscles worked: Pectoralis Major; Anterior Deltoid Bench Position: 45˚ incline Accessory: Long Hand Grips Adjustable Arm Position: 5, 6, or 7 Success Tips • Maintain a 90º angle between your upper arms and your torso throughout the exercise. • Limit and control the range of motion so that your elbows do not travel behind your shoulders. - Page 35 Standing Chest Press — Shoulder Horizontal Adduction (and elbow extension) Muscles worked: Pectoralis Major; Deltoids; Triceps. Also ankles, knees, hips and core in stabiliza- tion. Bench Position: Removed Accessory: Long Hand Grips Adjustable Arm Position: 3,4 or 5 Success Tips •...
- Page 36 Incline Chest Press Muscles worked: Pectoralis Major; Deltoids; Triceps. Bench Position: 45º Accessory: Long Hand Grips Adjustable Arm Position: 7 or 8 Success Tips • Maintain a 90º angle between upper arms and torso at the start of the press, and slightly higher than 90º...
- Page 37 Standing Incline Chest Press w/ Alternating Motion — Shoulder Horizontal Adduction Muscles worked: Pectoralis Major; Deltoids; Triceps. Also ankles, knees, hips and core in stabilization. Bench Position: Removed Accessory: Long Hand Grips Adjustable Arm Position: 4 or 5 Success Tips •...
- Page 38 Standing Decline Chest Press — Shoulder Horizontal Adduction (and elbow extension) Muscles worked: Pectoralis Major; Deltoids; Triceps. Also ankles, knees, hips and core in stabilization. Bench Position: Removed Accessory: Long Hand Grips Adjustable Arm Position: 3, 4 or 5 Success Tips •...
- Page 39 Standing Chest Fly — Shoulder Horizontal Adduction (elbow stabilization) Muscles worked: Pectoralis Major; Deltoids. Also ankles, knees, hips and core in stabilization. Bench Position: Removed Accessory: Long Hand Grips Adjustable Arm Position: 4, 5 or 6 Success Tips • Stabilize body from your feet all the way up through your trunk.
- Page 40 Standing Incline Chest Fly Muscles worked: Pectoralis Major; Deltoids. Also ankles, knees, hips and core in stabilization. Bench Position: Removed Accessory: Long Hand Grips Adjustable Arm Position: 4, 5 or 6 Success Tips • Stabilize body from your feet all the way up through your trunk.
-
Page 41: Shoulder Exercises
Rear Deltoid Rows — Shoulder Horizontal Abduction (and elbow flexion) Muscles worked: Rear and Middle Deltoids; Posterior Rotator Cuff; Upper Latissimus; Teres Major; Trapezius; Rhomboids Bench Position: Flat Bench Back Accessory: Long Hand Grips Adjustable Arm Position: 6, 7, or 8 Success Tips •... - Page 42 Seated Shoulder Press — Shoulder Adduction (and elbow extension) Muscles worked: Front Deltoids; Upper Trapezius; Triceps Bench Position: Flat Bench Back Accessory: Long Hand Grips Adjustable Arm Position: 7. 8 Success Tips • Keep knees bent and feet on floor. •...
- Page 43 Shoulder Extension — (elbows stabilized) Muscles worked: Latissimus Dorsi; Teres Major; Rear Del- toid; Middle Trapezius; Rhomboids; Triceps Bench Position: Flat Bench Back Accessory: Long Hand Grips Adjustable Arm Position: 8 or 9 Success Tips • Keep knees bent and feet flat on floor.
-
Page 44: Scapular Depression
Scapular Protraction — (elbows stabilized) Muscles worked: Serratus Anterior Bench Position: 45˚ incline Accessory: Long Hand Grips Adjustable Arm Position: Success Tips • Keep knees bent and feet flat on floor. Lean head back against the bench. • Keep your spine aligned and a slight arch in your lower back. - Page 45 Lying Front Shoulder Raise — Shoulder Flexion (elbows stabilized) Muscles worked: Front and Middle Deltoids Bench Position: Flat Bench Back Accessory: Long Hand Grips Adjustable Arm Position: Success Tips • Keep knees bent and feet flat on floor. • Keep abdominals tight and maintain good spinal alignment.
-
Page 46: Scapular Retraction
Seated Lateral Shoulder Raise — Shoulder Abduction (elbows stabilized) Muscles worked: Supraspinatus; Middle Deltoids; Trapezius Bench Position: Flat Bench Forward Accessory: Hand Grips Adjustable Arm Position: Success Tips • Keep knees bent and feet flat on floor. • Keep abdominals tight and maintain good spinal alignment. - Page 47 Standing Shoulder Press — Shoulder Abduction (and elbow extension) Muscles worked: Deltoids; Triceps. Also ankles, knees, hips and core in stabilization. Bench Position: Removed Accessory: Long Hand Grips Adjustable Arm Position: 5, 6 or 7 Success Tips • Stabilize body from your feet all the way up through your trunk.
- Page 48 Standing Front Shoulder Raise — Shoulder Flexion Muscles worked: Deltoids. Also ankles, knees, hips and core in stabilization. Bench Position: Removed Accessory: Long Hand Grips Adjustable Arm Position: 7, 8 or 9 Success Tips • Stabilize body from your feet all the way up through your trunk.
- Page 49 Standing Cablecross Rear Deltoid Row — Shoulder Horizontal Abduction (and elbow flexion) Muscles worked: Rear and Middle Deltoids; Posterior Rotator Cuff; Upper Lats; Teres Major; Rhomboids; Trapezius. Also ankles, knees, hips and core in stabilization. Bench Position: Removed Accessory: Long Hand Grips Adjustable Arm Position: 2 or 3 Success Tips...
- Page 50 Shoulder Internal Rotation w/ Full Shoulder Adduction Muscles worked: Subscapularis Superior fibers; Pectoralis Major Bench Position: Flat Accessory: Long Hand Grips Adjustable Arm Position: 5 or 6 Success Tips • Control the motion during the entire exercise. Do not use momentum. •...
- Page 51 Shoulder External Rotation w/ Full Shoulder Adduction Muscles worked: Posterior Deltoid; Teres minor; Infraspina- Bench Position: Removed Accessory: Long Hand Grips Adjustable Arm Position: 5 or 6 Success Tips • Control the motion during the entire exercise. Do not use momentum. •...
-
Page 52: Back Exercises
Standing Wide Angle Lat Row – Shoulder extension (and elbow flexion) Muscles worked: Latissimus Dorsi, Rear Deltoids, Biceps Teres Major. Also Hip and core stabilizers. Bench Position: Removed Accessory: Long hand grips Adjustable Arm Position: 4 or 5 Success Tips •... -
Page 53: Lying Lat Fly
Seated Lat Rows — Shoulder Extension (and elbow flexion) Muscles worked: Latissimus Dorsi; Teres Major; Rear Deltoids; Biceps Bench Position: Flat Bench Back Accessory: Hand Grips Adjustable Arm Position: 8, 9 (low lat rows) 1, 2 (high lat rows) Success Tips •... -
Page 54: Stiff Arm Pulldown
Muscles worked: Latissimus Dorsi Bench Position: Removed Accessory: Hand Grips Adjustable Arm Position: 0, 1 Success Tips • Do not lose spinal alignment. • Keep your lats tightened throughout the entire motion. • Release your shoulder blades at the end of each rep and initiate each new rep by lowering your shoulder blades. - Page 55 Standing Lat Row Low Pulley — Shoulder Extension (and elbow flexion) Muscles worked: Latissimus Dorsi; Rear Deltoids; Biceps; Teres Major. Also hip and core stabilizer muscles. Bench Position: Removed Accessory: Long Hand Grips Adjustable Arm Position: 8, 9 Success Tips •...
- Page 56 Standing Single Arm Lat Row Low Pulley — Shoulder Extension Muscles worked: Latissimus Dorsi; Rear Deltoids; Biceps; Teres Major. Also hip and core rotator muscles. Bench Position: Removed Accessory: Long Hand Grips Adjustable Arm Position: 8, 9 Success Tips • Do not bend your neck forward or backward.
-
Page 57: Seated Low Back Extension
Muscles worked: Errector Spinae Bench Position: removed, seated on seat pad Accessory: Long hand grips Adjustable Arm Position: 8 or 9 Success Tips • Keep knees bent, feet flat on the platform and shoulder blades pinched. • Keep your spine in alignment, chest lifted, abs tight and a slight arch in your low back. -
Page 58: Lying Shoulder Pullover
Muscles worked: Latissimus Dorsi; Teres Major; Deltoids; Triceps; Chest Bench Position: Flat Accessory: Long Hand Grips Adjustable Arm Position: 8, 9 Success Tips • Release your shoulderblades at the end of each repetition and initiate each new rep by depressing your shoulderblades. •... -
Page 59: Wide Pulldowns
Wide Pulldowns Muscles worked: Latissimus Dorsi; Teres Major; Rear Deltoids; Biceps Bench Position: Flat Bench Forward Accessory: Hand Grips Adjustable Arm Position: 1, 2 Success Tips • Keep knees bent and feet flat on floor. • To determine the appropriate grip width for you, hold your arms straight out to your sides at shoulder height. -
Page 60: Arm Exercises
Muscles worked: Triceps Bench Position: Removed Accessory: Hand Grips Adjustable Arm Position: 0, 1 Success Tips • Keep your upper arms motionless and your wrists straight. • Keep your chest lifted, abs tight and maintain a slight arch in lower back. •... - Page 61 Standing French Press – Elbow extension form a shoulder flexed position Muscles worked: Triceps. Also ankles, knees, hips, shoul- ders & core in stabilization. Bench Position: Removed Accessory: Long hand grips Adjustable Arm Position: 8 or 9 Success Tips • Stabilize body from your feet all the way up through your trunk.
-
Page 62: Cross Triceps Extension
Lying 45° Triceps Extension — Elbow Extension Muscles worked: Triceps Bench Position: Flat Bench Back Accessory: Hand Grips Adjustable Arm Position: Success Tips • Keep your upper arms motionless and your wrists straight throughout the entire exercise. • Keep your chest lifted, spine aligned, and a slight arch in your lower back. - Page 63 Muscles worked: Triceps Bench Position: Removed Accessory: Long hand grips Adjustable Arm Position: 0 or 1 Success Tips • Keep knees slightly bent, feet flat on the platform. • Keep abs tight, chest lifted and a slight curve in the lower back. •...
- Page 64 Standing Biceps Curl – Elbow flexion from a shoulder extended position Muscles worked: Biceps Bench Position: Removed Accessory: Long hand grips Adjustable Arm Position: 8 or 9 Success Tips • Stand in front of the platform facing away from the engine with a staggered step for more stability, (the back foot may be on the platform).
-
Page 65: Standing Biceps Curl
Standing Biceps Curl Muscles worked: Biceps; Brachialis; Brachioradialis Bench Position: Removed Accessory: Hand Grips Adjustable Arm Position: 8, 9 Success Tips • Keep your chest lifted, abs tight and a very slight arch in your lower back. • Keep your elbows at your sides and your wrists straight. - Page 66 Preacher Curl — Elbow Flexion (in supination) Muscles worked: Biceps; Brachialis; Brachioradialis Bench Position: Seat Accessory: Preacher Curl Attachment, Curl Bar; Leg Press Seat Back (optional) Adjustable Arm Position: Success Tips • Keep wrists straight. • Keep chest lifted, abs tight and maintain a very slight arch in your lower back.
- Page 67 Muscles worked: Triceps Bench Position: Flat Back Bench Accessory: Hand Grips Adjustable Arm Position: 8 or 9 Success Tips • Maintain good spinal alignment. • Keep your arm at your side and your wrist straight throughout entire motion. • Tighten the triceps throughout the exercise and control the returning motion.
-
Page 68: Seated Wrist Extension
Lying Biceps Curl — Elbow Flexion (in supination) Muscles worked: Biceps; Brachialis; Brachioradialis Bench Position: Flat Bench Forward Accessory: Hand Grips Adjustable Arm Position: Success Tips • Keep your upper arms motionless and your wrists straight throughout the entire exercise. •... - Page 69 Standing Wrist Curls – Wrist flexion from elbow flexed position Muscles worked: Biceps, Flexor Digitorum, Flexor Carpi Radialis Bench Position: Removed Accessory: Long hand grips Adjustable Arm Position: 8 or 9 Success Tips • Stand on the platform facing the engine. •...
- Page 70 Muscles worked: Flexor Digitorum; Flexor Carpi Radialis Bench Position: Flat Bench Back Accessory: Hand Grips Adjustable Arm Position: Success Tips • Move slowly, keeping tension in the front of the forearms at all times. • Keep your chest lifted, trunk muscles tightened, and a slight arch in your lower back.
-
Page 71: Abdominal Exercises
Muscles worked: Rectus Abdominus, Obliques, Spinal Erec- tors and Serratus Anterior Bench Position: Removed Accessory: Long hand grips Adjustable Arm Position: 4 or 5 Success Tips • Keep your knees slightly bent and feet flat on the floor. • This exercise must be performed correctly, failure to do so could result in injury (use a light resistance). - Page 72 Kneeling “Wood Chop” – High to Low Trunk flexion with rotation Muscles worked: Rectus Abdominus, Obliques, and Serratus Anterior Bench Position: Removed Accessory: Long hand grips Adjustable Arm Position: 0 or 1 Success Tips • This exercise must be performed correctly, failure to do so could result in injury (use a light resistance).
-
Page 73: Trunk Rotation
Muscles worked: Rectus Abdominus; Obliques Bench Position: Flat Bench Back Accessory: None Adjustable Arm Position: None Success Tips • Keep your upper body, knees and hips stationary. Relax your neck. • Tighten your abs before you move. • Allow exhalation up and inhalation down without exaggerating breathing. - Page 74 Seated (Resisted) Abdominal Crunch — Spinal Flexion Muscles worked: Rectus Abdominus; Obliques Bench Position: 45˚ incline Accessory: Hand Grips Adjustable Arm Position: Success Tips • Do not lift your head or chin—your head should follow the rib motion rather than lead it.
-
Page 75: Leg Exercises
Muscles worked: Quadriceps Bench Position: Leg Extension Seat Accessory: Leg Extension (refer to instructions for hook- ing up the cables for leg exercises); Leg Press Seat Back (optional) Adjustable Arm Position: Success Tips • Use slow, controlled motion—do not “kick” into the extension. -
Page 76: Lying Leg Extension
Muscles worked: Quadriceps Bench Position: Flat Accessory: Foot harness Adjustable Arm Position: Success Tips • Keep your hip and upper thigh motionless throughout the exercise. • Lift your chest, keep your abs tight and maintain a very slight arch in your low back. - Page 77 Standing Leg Kickback — Hip and Knee Extension Muscles worked: Gluteus Maximus; Hamstring muscles Bench Position: Removed Accessory: Foot Harness Adjustable Arm Position: Success Tips • Keep your chest lifted, spine aligned, abs tight and a very slight arch in your lower back.
-
Page 78: Ankle Eversion
Muscles worked: Peroneals Bench Position: Flat Bench Forward Accessory: Foot Harness Adjustable Arm Position: Success Tips • Movement should occur only at the ankle—keep the rest of your body motionless. • Keep abs tight and do not lift your hips or excessively arch your back. - Page 79 Muscles worked: Gluteus Minimus; Gluteus Medius; Tensor Fasciae Latae Bench Position: Not used Accessory: Foot Harness Adjustable Arm Position: Success Tips • Keep your chest lifted, spine aligned, abs tight and a slight arch in your lower back. • Do not bend from waist or lower back.
-
Page 80: Standing Hip Flexion
Muscles worked: Iliacus, Psoas, Rectus Femoris Bench Position: Removed Accessory: Foot harness Adjustable Arm Position: Success Tips • Make sure all the motion is occurring at your hip. • Keep the torso tight throughout the motion. Muscles worked: Gracilis, Adductor Magnus Bench Position: Removed Accessory:... - Page 81 Muscles worked: Glute medius posterior fibers, Piraformis and other deep rotators Bench Position: Removed Accessory: Foot harness Adjustable Arm Position: Success Tips • Make sure all the motion is occurring at your hip. • Keep the torso tight throughout the motion.
- Page 82 Muscles worked: Quadriceps Bench Position: Removed Accessory: Sliding seat; Leg Press Plate Adjustable Arm Position: Success Tips • Keep your spine in good posture. • Straighten but do not lock your knees. • Keep your quads tightened throughout the entire motion. •...
-
Page 83: Calf Raise
Muscles worked: Gastrocnemius; Soleus Bench Position: Removed Accessory: Sliding seat; Foot Harness; Leg Press Plate Adjustable Arm Position: Success Tips • Keep your chest lifted, spine aligned, abs tight and a slight arch in your lower back. • Do not bend from waist or lower back. -
Page 84: Muscle Chart
Sternocleidomastoid Pectoralis Major Anterior Deltoid Medial Deltoid Biceps Brachialis External Obliques Brachioradialis Pronator Teres Flexor Carpi Radialis Tensor Fasciae Latae Iliopsoas Pectineus Quadriceps: • Rectus Femoris • Vastus Lateralis • Vastus Medialis Peroneus Longus Extensor Digitorum Longus Tibialis Anterior Muscle Chart Trapezius Serratus Anterior Rectus Abdominus... -
Page 85: Exercise Log
Please feel free to make copies of this chart to continue your exercise log. EXERCISE Sets Bench Press Reps Resistance Sets Reps Resistance Sets Reps Resistance Sets Reps Resistance Sets Reps Resistance Sets Reps Resistance Sets Reps Resistance Sets Reps Resistance Sets Reps... -
Page 86: Bowflex Revolution ® 100% Satisfaction Guarantee
Bowflex Revolution We want you to know that your Bowflex Revolution satisfaction is guaranteed. If, for any reason, you are not 100% satisfied with your Bowflex Revolution machine, please follow the instructions below to return your merchandise and receive ®...