Canon LASER SHOT LBP-1210 User Manual
Laser beam printer
Hide thumbs
Also See for LASER SHOT LBP-1210:
- Specifications (2 pages) ,
- Getting started manual (30 pages) ,
- Service manual (202 pages)
Table of Contents
Advertisement
Quick Links
Advertisement
Table of Contents

Related Manuals for Canon LASER SHOT LBP-1210


Summary of Contents for Canon LASER SHOT LBP-1210
- Page 1 Laser Beam Printer User's Guide...
- Page 2 LBP-1210 Laser Printer User’s Guide IMPORTANT: Read this manual carefully. Use this manual when you need quick reference help.
- Page 3 Canon. Notice Canon makes no guarantees of any kind with regard to this manual. Canon is not liable for errors contained herein or for consequential or incidental damages incurred as a result of acting on information contained in the manual.
-
Page 4: About This Guide
❏ Chapter 3: Using the Canon Advanced Printing Technology. Describes the Canon Advanced Printing Technology and how to install and use the software, as well as how to check on the status of a print job. -
Page 5: Safety Information
Safety Information FCC Notice (110–127 V model) Laser Beam Printer, Model L10721A This device complies with Part 15 of the FCC Rules. Operation is subject to the following two conditions: (1) This device may not cause harmful interference, and (2) this device must accept any interference received, including interference that may cause undesired operation. - Page 6 Their standards and logos are uniform among the participating nations. Office Equipment Program partner, Canon Inc. has determined that this product guidelines for energy efficiency. NERGY Office Equipment Program is an...
- Page 7 1:1994, and in the USA, it is classified as Class 1 under the code of Federal Regulations, §1040.10 of Title 21. The label shown below is attached to this printer. This label is attached to the laser scanner unit inside the printer. (110–127 V / 220–240 V models) This printer has been classified under EN60825-1:1994 and conforms to...
-
Page 8: Important Safety Instructions
❏ Do not install the printer where it will be exposed to smoke or steam. ❏ Be sure to connect the printer to a grounded outlet. ❏ Do not operate the printer until all packing materials (packing tape,... - Page 9 ❏ Be sure to turn off the power before unplugging or plugging in the printer power cord or interface cable. ❏ When moving the printer, be sure to turn off the power before unplugging the power cord. ❏ Be sure to unravel the power cord prior to plugging it in; otherwise it may lead to damage, overheating, short-circuit, or result in fire.
- Page 10 ❏ Keep the power cord and cables away from children. ❏ Do not handle plugs with wet hands. ❏ When the printer will not be used for a long period, turn the power off and unplug the power cord for safety.
- Page 11 ❏ Any misuse of electrical equipment is hazardous. Do not allow children to handle power cords or cables. ❏ Do not attempt to service this printer yourself, except as instructed in this guide. Opening or removing covers that are intended to be removed only by qualified service personnel may expose you to...
-
Page 12: Operating Environment
To prevent this, allow the printer to sit for an hour or more to adjust to the new temperature. -
Page 13: Carrying The Printer
• Relative Humidity: 35-85% RH with no condensation. Carrying the Printer CAUTION: Do not carry the printer by holding the front panel or by holding it at the front and rear. This could result in damage to the printer or personal injury if the printer is dropped. -
Page 14: Table Of Contents
Loading Paper into the Cassette ... 15 Loading Envelopes into the Cassette... 18 Loading Paper Manually ... 23 Chapter 3 Using the Canon Advanced Printing Technology ... 25 Installing the CAPT ... 26 Windows 95/98/Me ... 26 Plug and Play... 26 Add Printer Wizard ... - Page 15 Printer Sharing... 61 Connecting the LBP-1210 as a Network Printer ... 61 Status Display... 63 Canon LASER SHOT LBP-1210 Group... 64 Printing with the CAPT ... 65 Windows 95/98/Me Printer Properties ... 66 Windows NT 4.0/2000/XP Printer Properties and Default Document Properties* ...
- Page 16 Cleaning... 143 Appendix A Printer Specifications ... 145 Appendix B Network Adapter: AXIS 1610 ... 147 Connecting Directly From Clients... 148 Connecting Through A Print Server... 149 Protocols ... 149 Using NetPilot To Configure Your Network Adapter... 149 Installing the Network Print Monitor ... 149 Specifications...
-
Page 18: Chapter 1 Introduction
Chapter 1 Introduction Congratulations on your purchase of the Canon LBP-1210 Laser Printer. This chapter introduces you to the printer and explains its features. Your new laser printer has many advanced features, including the CAPT (Canon Advanced Printing Technology). The CAPT gives you instant access to printer information. -
Page 19: Printer Features
Quick startup The printer is ready to print in less than 8 seconds after it is turned on (start-up time), and has a first print time of less than 10 seconds. This means that you can print documents quickly and efficiently. - Page 20 Quiet operation Its quiet operation makes this printer an ideal output device, even in an open-office environment. Flexible paper handling Both the cassette and the manual feeding slot accept plain paper of various sizes—Letter, A4, B5, or Executive—as well as transparencies, labels, envelopes, postcards and other special paper.
-
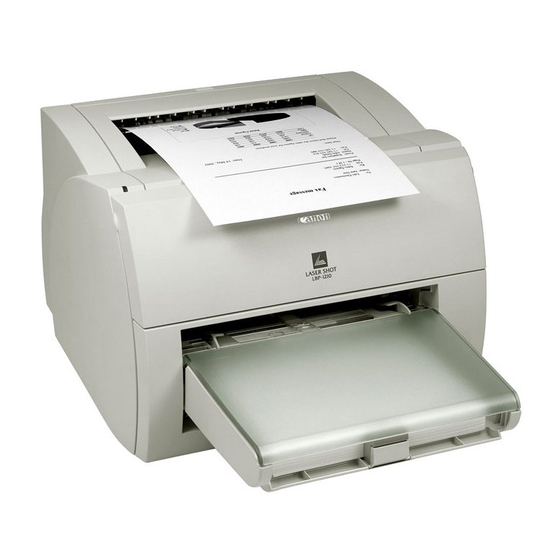
Page 21: Parts Of The Printer
Parts of the Printer Front View Face-down delivery slot Power lamp Paper guides Manual feed slot Cassette Rear View Power switch Introduction Power socket Delivery selection cover Front cover Parallel port interface connector USB port interface connector Chapter 1... -
Page 22: Inside The Printer
Inside the Printer Transfer roller Fixing assembly For more information about setting up the printer, see the Getting Started Guide. Chapter 1 Introduction... - Page 23 Introduction Chapter 1...
-
Page 24: Chapter 2 Paper Handling
Chapter 2 Paper Handling This chapter describes how to select the different types of paper you can use with your printer and how to load them. It includes the following information: ❏ Paper Requirements ❏ Storing Paper ❏ Paper Path ❏... -
Page 25: Paper Requirements
Paper Requirements Make sure that the paper you use meets the following requirements. Printing speed may vary depending on: paper size, paper type, or number of pages to be printed. This is due to protective functions working in order to prevent troubles such as breakdown caused by heating. Loading Type Cassette... -
Page 26: Plain Paper
❏ Do not use thermal or carbon paper, or paper with glue, staples, clips, or ribbons. For colored paper, use colors that are not damaged by the heat of the printer’s fixing assembly (about 190˚ C or 374˚ F). Transparencies The acceptable size is A4. The transparencies must be able to withstand the heat generated by the fixing assembly (about 190˚... -
Page 27: Envelopes
❏ Do not use labels with exposed adhesive, which may stick to the EP- 25 cartridge or the fixing roller, causing the labels to peel off and serious paper jams to occur. Envelopes Follow these guidelines when printing on envelopes: ❏... -
Page 28: Postcards
Postcards Follow these guidelines when printing on postcards: ❏ Postcards should not be greater than 0.28 mm in thickness. ❏ Postcards should be free of glue, clips, and staples. ❏ Do not use postcards that are damaged or curled, or that have special coatings or an irregular shape. -
Page 29: Paper Path
Understanding how paper travels inside the printer helps you better handle paper loading and jams. A sheet of paper enters the printer from the cassette or the manual feed slot. It travels to the image transfer area where the printer drum has been statically charged. -
Page 30: Selecting Paper Delivery
Selecting Paper Delivery Use the delivery selection cover to choose face-up or face-down delivery. When the cover is open, face-up delivery is selected. When the cover is closed, face-down delivery is selected. Face-down Delivery Printouts are stacked in order in the face-down delivery slot (which can hold up to 125 sheets of 64 g/m To select face-down delivery, close the delivery selection cover. -
Page 31: Face-Up Delivery
Opening/closing the delivery selection cover while printing could cause a paper jam. ❏ The printer is not equipped with a face-up delivery tray. The delivered paper must be removed manually. ❏ Make sure there is enough room at the front of the face-up delivery slot for the paper to exit. -
Page 32: Loading Paper Into The Cassette
Loading Paper into the Cassette The cassette can hold up to approximately 250 sheets of 64 g/m paper for high-volume printing. Acceptable paper sizes are Letter, A4, Executive, and B5. It also accepts envelopes, postcards, or special paper with a maximum height of 25 mm. Before loading paper on the cassette, first select the paper delivery. - Page 33 Remove the manual feed slot. Set the stack of paper with the printing side facing up. The top edge of the paper should be inside the printer. Slide the stack into the cassette until it stops. Do not load more than 250 sheets of 64 g/m paper higher than 25 mm.
- Page 34 Adjust the paper guides on the right, left, and front to the size of the paper. Adjust the paper guides so that there is no space between the paper guide and the edge of the stack of paper. Set the manual feed slot on the cassette. When reloading, be sure to remove any paper remaining in the cassette.
-
Page 35: Loading Envelopes Into The Cassette
Loading Envelopes into the Cassette Before Loading Envelopes Please be sure to follow these steps before loading envelopes: Place the envelopes on a flat surface and press the corners down in the direction shown to flatten the envelopes. Flex the envelope stack, including all four edges, to remove any stiffness. -
Page 36: Loading Envelopes
Loading Envelopes Set the paper with the printing side facing up so that the flap is on the left. The top edge of the envelope should be inside the printer. Slide the stack into the cassette until it stops. Chapter 2... - Page 37 Adjust the paper guides on the right, left, and front to the size of the envelope. Most applications allow you to choose which way envelopes feed into the printer. Make sure your printer settings before you print. When using C5-size envelopes, remove any stiffness by lightly flexing both edges of the envelope.
- Page 38 flap on the left. If the flap is along the short edge of the envelope, insert envelopes so that print side are facing upward with the flap toward the printer. The illustrations below show acceptable and unacceptable arrangements of the flaps of envelopes in a stack.
- Page 39 Not Acceptable If the flap of any of the envelopes overlaps the edges of other envelopes in the stack, like those in the examples below, paper jams or misfeeds will occur. Flaps overlapping the envelopes underneath Flaps overlapping Top flap overlaps the envelopes underneath Paper Handling Chapter 2...
-
Page 40: Loading Paper Manually
❏ Often applications will let you change the feeding direction of envelopes. Confirm the feeding direction of envelopes before printing. ❏ If a postcard is not fed smoothly into the printer, gently push the top of the postcard toward the manual feed slot until the roller inside the printer takes the card and feeds it into the printer. - Page 41 ❏ Do not force the paper into the printer or printing problems might result. ❏ For continuous manual feed, insert a new sheet only when the previous sheet has come out completely from the delivery slot. If a new sheet is inserted before the previous sheet has been delivered, a paper jam may occur.
-
Page 42: Chapter 3 Using The Canon Advanced Printing Technology
Chapter 3 Using the Canon Advanced Printing Technology This chapter describes the CAPT (Canon Advanced Printing Technology). It includes the following information: ❏ Installing the CAPT ❏ Printing with the CAPT ❏ Checking the Status of a Print Job Chapter 3... -
Page 43: Installing The Capt
“Connecting to the LBP-1210 Already on Your Network” on page 57. If you want to install the LBP-1210 as a network printer, follow the steps in “Connecting the LBP-1210 as a Network Printer” on page 61. - Page 44 General tab. 4.00.950 B or 4.00.950 C means you are using OSR2.1 or later. Using USB Port (USB Cable) In order to use the printer via USB, the following requirements need to be satisfied. ❏ Your computer must be equipped with a USB port and it is necessary that its operation is approved by the manufacturer.
- Page 45 Click only Specify the location then click Browse… to select the driver you want to install. For example, if your CD-ROM drive is drive D, browse to D:\English\WinMe and click OK. The installation of the USB class driver will complete. Using the Canon Advanced Printing Technology Chapter 3...
- Page 46 The Add New Hardware Wizard (Canon LASER SHOT LBP- 1210) appears. Click Next >. Select Search for the best driver for you device (Recommended) and click Next >. Click only Specify a location and Browse… to select the driver in the language that you want to install. For example, if your CD-ROM drive is drive D, browse to D:\English\Win9x and click OK.
-
Page 47: Add Printer Wizard
Following is the installation procedures for “Using Parallel Port” under Windows 98. To install the LBP-1210 printer driver to USB port, perform procedure as same as “CD-ROM Installation” or “Plug and Play”. From the Start menu, select Settings, then Printers. The Printers folder appears. - Page 48 Double-click the Add Printer icon. The Add Printer Wizard dialog box appears. Click Next >. Select Local printer and click Next >. Chapter 3 Using the Canon Advanced Printing Technology...
- Page 49 CAPT software, then click OK. For example, if you are using the CD-ROM to install the CAPT, and your CD-ROM drive is drive D:, the path name would be D:\English\Win9x. Using the Canon Advanced Printing Technology Chapter 3...
- Page 50 Select the printer, and click Next >. Select the printer’s port, and then click Next >. Chapter 3 Using the Canon Advanced Printing Technology...
- Page 51 Enter the name you wish to use, then click Finish. When the installation is complete, the following dialog box appears. To close the dialog box, click OK. Using the Canon Advanced Printing Technology Chapter 3...
-
Page 52: Windows Nt 4.0/2000/Xp
❏ Turn on the printer (For details, see the Getting Started Guide). ❏ Start up Windows 2000. Using USB Port (USB Cable) In order to use the printer via USB, the following requirements need to be satisfied. ❏ Your computer must be equipped with a USB port and it is necessary that its operation is approved by the manufacturer. - Page 53 Select Search for a suitable driver for my device (recommended) in the Found New Hardware Wizard and click Next >. “Unknown” may be displayed as the name of the device. Select only Specify a location and click Next >. Using the Canon Advanced Printing Technology Chapter 3...
- Page 54 Click Yes if the Digital Signature Not Found dialog box appears. When the installation is complete, the following dialog box appears. Click OK to close the dialog box. Click Finish on the Found New Hardware Wizard. Chapter 3 Using the Canon Advanced Printing Technology...
-
Page 55: Windows Xp Plug And Play
❏ Turn on the printer (For details, see the Getting Started Guide). ❏ Start up Windows XP. Using USB Port (USB Cable) In order to use the printer via USB, the following requirements need to be satisfied. ❏ Your computer must be equipped with a USB port and it is necessary that its operation is approved by the manufacturer. - Page 56 Select Install from a list or specific location (Advanced) and click Next >. “Unknown” may be displayed as the name of the device. Uncheck the Search removable media (floppy, CD-ROM...) check box. Chapter 3 Using the Canon Advanced Printing Technology...
- Page 57 Click Continue Anyway if the Hardware Installation dialog box appears. When the installation is complete, the following dialog box appears. Click OK to close the dialog box. Click Finish on the Found New Hardware Wizard. Using the Canon Advanced Printing Technology Chapter 3...
-
Page 58: Windows Nt 4.0 Add Printer Wizard
Double-click the Add Printer icon. The Add Printer Wizard dialog box appears. Select My Computer, then click Next >. Select the printer port you want to use, then click Next >. Chapter 3 Using the Canon Advanced Printing Technology... - Page 59 CAPT, then click OK. For example, if you are using the CD-ROM to install the CAPT, and your CD-ROM drive is drive D:, the path name would be D:\English\WinNT40. Using the Canon Advanced Printing Technology Chapter 3...
- Page 60 Select your printer model from the list of printers displayed, then click Next >. Click Next > to accept the default printer name, or enter the name you wish to use, then click Next >. Chapter 3 Using the Canon Advanced Printing Technology...
- Page 61 11. Click Yes if you want to print a test page, or No if you do not want to print a test page, then click Finish. Windows creates the Canon LASER SHOT LBP-1210 icon on the Desktop, and the Canon LASER SHOT LBP-1210 icon is added to the Printers folder. Using the Canon Advanced Printing Technology...
-
Page 62: Windows 2000 Add Printer Wizard
Following is the installation procedure for “Using Parallel Port” under Windows 2000. To install the LBP-1210 printer driver to a USB port, perform the same procedures as for “Plug and Play”. Log on as member of Administrators. The full control access right for the printer is necessary for the installation of the CAPT. - Page 63 Double-click the Add Printer icon. The Add Printer Wizard dialog box appears. Click Next >. Select Local printer, then click Next >. To check on “Automatically detect and install my Plug and Play printer” is not recommended. Using the Canon Advanced Printing Technology...
- Page 64 Select the printer port you want to use, then click Next >. Click Have Disk… in the Manufacturers/Printers dialog box. Chapter 3 Using the Canon Advanced Printing Technology...
- Page 65 For example, if you are using the CD-ROM to install the CAPT, and your CD-ROM drive is drive H:, the path name would be H:\English\Win2000. Select your printer model from the list of printers displayed, then click Next >. Using the Canon Advanced Printing Technology...
- Page 66 Click Next > to accept the default printer name, or enter the name you wish to use, then click Next >. 10. Select whether this printer is shared or not shared with other computers. Click Next >. Chapter 3 Using the Canon Advanced Printing Technology...
- Page 67 13. When the installation is complete, the following dialog box appears. Click OK to close the dialog. Windows creates the Canon LASER SHOT LBP-1210 icon on the Desktop, and the Canon LASER SHOT LBP-1210 icon is added to the Printers folder. Using the Canon Advanced Printing Technology...
-
Page 68: Windows Xp Add Printer Wizard
Following is the installation procedure for “Using Parallel Port” under Windows XP. To install the LBP-1210 printer driver to USB port, perform procedure as same as “Plug and Play”. Log on as member of Administrators. The full control access right for the printer is necessary for the installation of the CAPT. - Page 69 Double-click the Add Printer icon. The Add Printer Wizard dialog box appears. Click Next >. Select Local printer attached to this computer, then click Next >. To check on “Automatically detect and install my Plug and Play printer” is not recommended. Using the Canon Advanced Printing Technology...
- Page 70 Confirm that Use the following port is selected and select the printer port you want to use, then click Next >. Click Have Disk… in the Manufacturer/Printers dialog box. Chapter 3 Using the Canon Advanced Printing Technology...
- Page 71 For example, if you are using the CD-ROM to install the CAPT, and your CD-ROM drive is drive H:, the path name would be H:\English\WinXP. Select your printer model from the list of printers displayed, then click Next >. Using the Canon Advanced Printing Technology...
- Page 72 Click Next > to accept the default printer name, or enter the name you wish to use, then click Next >. 10. Select whether this printer is shared or not shared with other computers. Click Next >. Chapter 3 Using the Canon Advanced Printing Technology...
- Page 73 Click Continue Anyway if the Hardware Installation dialog box appears. Windows creates the Canon LASER SHOT LBP-1210 icon on the Desktop, and the Canon LASER SHOT LBP-1210 icon is added to the Printers and Faxes folder. 13. When the installation is complete, the following dialog box appears.
-
Page 74: Connecting To The Lbp-1210 Already On Your Network
If the LBP-1210 is already on your network, you can install it two different ways. The easiest way is using automatic network download. If network download is not available, you can use the Add Printer Wizard. Network Download Windows 95/98/Me and Windows NT 4.0/2000/XP clients can download the drivers for the LBP-1210 automatically. -
Page 75: Windows 95/98/Me Add Printer Wizard
Windows 95/98/Me Add Printer Wizard To install the CAPT for a network printer you can use the Windows 95/ 98/Me Add Printer Wizard. From the Start menu, select Settings, then Printers. The Printers folder appears. Double-click the Add Printer icon. The Add Printer Wizard dialog box appears. -
Page 76: Windows Nt 4.0 Add Printer Wizard
If the connection fails, you will be able to install the printer but you will not be able to use the printer until it comes back online. Follow the instructions on screen to finish the installation. Windows NT 4.0 Add Printer Wizard To install the CAPT for a network printer you can use the Windows NT 4.0 Add Printer Wizard. -
Page 77: Windows Xp Add Printer Wizard
Windows XP Add Printer Wizard To install the CAPT for a network printer you can use the Windows XP Add Printer Wizard. Log on as member of Administrators. The full control access right for the printer is necessary for the installation of the CAPT. -
Page 78: Printer Sharing
Printer Sharing Printer sharing enables printing from network clients. Printer sharing with the LBP-1210 printer requires that both the print server and the client devices are using Windows 95 or later, or Windows NT 4.0 or later. The print server and client do not need to use the same operating system, and it is possible to print from a Windows 95/98/Me client to a Windows NT 4.0/2000/XP print server, or vice versa. - Page 79 Printer Settings Share-level Access Control Open the Canon LASER SHOT LBP-1210 Properties window, then check “Shared As” in the Sharing tab. Enter the Share Name, Comments, and Password as needed. Click OK. User-level Access Control Open the Canon LASER SHOT LBP-1210 Properties window, then check “Shared As”...
-
Page 80: Status Display
Network Services box, then click OK. Click Close. Printer Sharing Settings Open the Canon LASER SHOT LBP-1210 Properties window, then check “Shared” in the Sharing tab. Enter the Share Name as needed. Click OK. The printer icon changes to indicate sharing. -
Page 81: Canon Laser Shot Lbp-1210 Group
Canon LASER SHOT LBP-1210 Group When you install the CAPT, the Canon LASER SHOT LBP-1210 icon is created in the Printer folder, and the Canon LASER SHOT LBP 1210 group folder is created on the Desktop. The Canon LASER SHOT LBP- 1210 group is also added in the Programs of the Start menu. -
Page 82: Printing With The Capt
You must use a bi-directional cable for proper operation. Every time you print, the CAPT displays the Canon LASER SHOT LBP-1210 Status Window. This window shows you the paper moving through the printer, how long it will take to print the document, and how much of the document has printed. -
Page 83: Windows 95/98/Me Printer Properties
Windows application. From the Print dialog box, usually accessed from an application’s File menu, you can select Properties to proceed to the Canon LASER SHOT LBP-1210 Properties dialog box and its printing options. ❏ You can open the Properties dialog box from the Printers folder. The number of tabs displayed in the Properties dialog box depends on how you have your system set up. - Page 84 General Tab Lets you print a test page or define separator pages. Refer to your operating system documentation for more information. Chapter 3 Using the Canon Advanced Printing Technology...
-
Page 85: Details Tab
Details Tab Specifies the printer port and time-out settings. Refer to your operating system documentation for more information. Spool Settings… The installer sets the following defaults. Using the Canon Advanced Printing Technology Chapter 3... - Page 86 Sharing Tab Specifies the printer-sharing settings. This tab is available only when file and printer sharing is turned on. Refer to your operating system documentation for more information. Chapter 3 Using the Canon Advanced Printing Technology...
-
Page 87: Page Setup Tab
Page Layout lets you select the number of pages per sheet (1, 2, 4, 8, 9). If you select more than 1, the image may be reduced to fit on the selected output size. When 2, 4, 8, or 9 pages per sheet is selected Manual Using the Canon Advanced Printing Technology Chapter 3... - Page 88 Paper, even when Special Paper 1 or Special Paper 2 is specified. Chapter 3 (Paper of 64-90g/m (Transparency) (Paper of 64g/m or heavier with A4/letter-size or larger that is easy to curl) (Paper of 91g/m or heavier with A4/letter-size or larger) Using the Canon Advanced Printing Technology...
- Page 89 Overlay on the Page Setup tab accesses the settings to specify how you want the overlay and print data printed, including the print position, size, and whether it is printed in the foreground (on top of) or background (under) the application data. Using the Canon Advanced Printing Technology Chapter 3...
- Page 90 Size lets you set the size of the overlay. Units lets you select the units of measurement (Centimeters, Inches). Restore Defaults resets Left, Top, Width and Height to their default values. Chapter 3 Using the Canon Advanced Printing Technology...
- Page 91 Add… on the Page Setup, Finishing, or Quality tab. Name lets you specify the profile name. Icon lets you select an icon to represent the new profile. View Settings >> shows or hides the profile’s settings. Using the Canon Advanced Printing Technology Chapter 3...
- Page 92 Import… lets you import profile information from a file. Export… lets you export the selected profile information to a file. ❏ If you change the name assigned to your printer, you cannot retrieve any profiles saved for that printer. To retrieve the profiles, rename the printer to its original name.
-
Page 93: Finishing Tab
If this is not checked, you’ll be asked to change paper when a paper size mismatch is detected. By default the setting for this option is unchecked. Using the Canon Advanced Printing Technology Chapter 3... -
Page 94: Quality Tab
Specifies the resolution, halftoning method, brightness, and contrast settings. For information on Profiles, see page 74. Resolution lets you specify the printer’s resolution in dots per inch (600, 300). Halftoning is the process of converting a grayscale image to black dots and white (unprinted) dots that simulate the gray shades in the original image. -
Page 95: More Options
Toner Saver prints only alternate data bits, so toner consumption is reduced. Automatic Image Refinement is a printer technology from Canon, with which the printer automatically senses and refines the jagged edges and ragged curves of characters and graphics. -
Page 96: Windows Nt 4.0/2000/Xp Printer Properties And Default Document Properties
Printer Properties To view the printer properties, select Properties from the File menu in the Printers folder, or click the right mouse button on the Canon LASER SHOT LBP-1210 icon in the Printers folder and select Properties from the pop-up menu. -
Page 97: General Tab
General Tab Specifies to print a test page and separator pages. Refer to your operating system documentation for more information. Using the Canon Advanced Printing Technology Chapter 3... -
Page 98: Ports Tab
Ports Tab Lets you specify the port to which the printer is attached. Refer to your operating system documentation for more information. Chapter 3 Using the Canon Advanced Printing Technology... -
Page 99: Scheduling Tab
Lets you define print spooling settings. Refer to your operating system documentation for more information. “Spool print documents so program finishes printing faster” and “Start printing immediately” are set automatically when you install the printer driver. Using the Canon Advanced Printing Technology Chapter 3... - Page 100 Sharing Tab Specifies the printer-sharing settings. Refer to your operating system documentation for more information. Chapter 3 Using the Canon Advanced Printing Technology...
-
Page 101: Security Tab
Security Tab Lets you specify security settings. Refer to your operating system documentation for more information. Using the Canon Advanced Printing Technology Chapter 3... -
Page 102: Select Forms Tab
Select Forms Tab This printer driver supports three custom paper sizes. Using the custom forms defined on the Forms tab in the print server’s Properties dialog box, you can add information about the custom paper sizes. Form definitions must conform to the printer’s specifications. - Page 103 If you select more than 1, the image may be reduced to fit on the selected output size. When 2, 4, 8, or 9 pages per sheet is selected Manual Scaling disappears and Page Order appears in its place. Using the Canon Advanced Printing Technology Chapter 3...
- Page 104 Paper, even when Special Paper 1 or Special Paper 2 is specified. Chapter 3 (Paper of 64-90g/m (Transparency) (Paper of 64g/m or heavier with A4/letter-size or larger that is easy to curl) (Paper of 91g/m or heavier with A4/letter-size or larger) Using the Canon Advanced Printing Technology...
- Page 105 (Background, Foreground). Position lets you specify the position of the overlay based on its distance from the paper’s left and top edges. Size lets you set the size of the overlay. Using the Canon Advanced Printing Technology Chapter 3...
- Page 106 Add… on the Page Setup, Finishing, or Quality tab. Name lets you specify the profile name. Icon lets you select an icon to represent the new profile. View Settings >> shows or hides the profile’s settings. Chapter 3 Using the Canon Advanced Printing Technology...
- Page 107 Import… lets you import profile information from a file. Export… lets you export the selected profile information to a file. ❏ If you change the name assigned to your printer, you cannot retrieve any profiles saved for that printer. To retrieve the profiles, rename the printer to its original name.
- Page 108 The second check box lets you turn EMF Spooling on. If this is not checked, EMF Spooling will be off. These settings are unchecked by default. Chapter 3 Using the Canon Advanced Printing Technology...
- Page 109 Specifies the resolution, halftoning method, brightness, and contrast settings. For information on Profiles, see page 89. Resolution lets you specify the printer’s resolution in dots per inch (600, 300). Halftoning is the process of converting a grayscale image to black dots and white (unprinted) dots that simulate the gray shades in the original image.
-
Page 110: Checking The Status Of A Print Job
Toner Saver prints only alternate data bits, so toner consumption is reduced. Automatic Image Refinement is a printer technology from Canon, with which the printer automatically senses and refines the jagged edges and ragged curves of characters and graphics. -
Page 111: Opening The Status Window
Windows was closed. You can also open the Status Window by clicking on the Status Window icon in the Windows taskbar and selecting the Canon LASER SHOT LBP-1210. If multiple LBP-1210 printers are connected, select a printer from the list. -
Page 112: Using The Lbp-1210 Status Window
Status Window and the printer. Displays the current printing status and error conditions. Displays the current status of the printer. Gives a description of situations requiring action. Using the Canon Advanced Printing Technology Menu bar Animation area Progress bar Toolbar Job information... - Page 113 Animation area Progress bar Tool bar Job information area Status bar Using the Canon Advanced Printing Technology Description Shows an animated graphic indicating the current printer status. The graphic background changes from blue (normal) to orange when user action is required, or to red when a warning is issued.
- Page 114 The Job menu includes the following options: ❏ Pause Job—This temporarily halts printing of the current document. After the current page completes printing, the printer pauses until you select Resume Job. ❏ Resume Job—This resumes printing with the next page of the document you paused.
- Page 115 ❏ Port Setting—This opens the Port Setting dialog box when the printer is connected to a local parallel port. This setting is unavailable if the printer is not connected to a local parallel port, or while printing is in progress.
- Page 116 Window opens only when an error occurs. To manually open the Status Window, click the Status Window icon in the Windows taskbar, and then click the Canon LASER SHOT LBP-1210. You can change display options even as a document prints, but the changed settings do not take effect until the next print job.
- Page 117 Desktop. Port Setting This dialog box lets you define how your computer communicates with your printer using the parallel port. The type of port you have depends on your computer. ❏ Standard—uses the parallel port as a standard parallel port.
- Page 118 Using the Help Menu You can select the Help menu from the menu bar of the LBP-1210 Status Window: ❏ Help Topics—displays the search window for help topics. ❏ About—displays Status Window version information. Chapter 3 Using the Canon Advanced Printing Technology...
-
Page 119: Using The Toolbar
Start menu, then select the Printers folder. Double-click the Canon LASER SHOT LBP-1210 icon to display the Canon LASER SHOT LBP-1210 dialog box. Select all of the jobs and delete them. When the Printed Job tab is selected, none of the buttons are displayed. - Page 120 The following types of information are displayed: ❏ Document name ❏ User name ❏ Computer name ❏ Estimated time left ❏ Estimated finish time Some of this information may not be displayed, depending on the printer status. Chapter 3 Using the Canon Advanced Printing Technology...
- Page 121 The job history displayed in the job information area can list a history of up to 100 jobs, beginning from the time the Status Window was started. The job history clears whenever you terminate the Status Window. Using the Canon Advanced Printing Technology Chapter 3...
- Page 122 Waiting Job This tab shows information related to the jobs that have not yet started. ❏ Document name ❏ Status ❏ Owner ❏ Pages ❏ Started At Chapter 3 Using the Canon Advanced Printing Technology...
-
Page 123: Network Printer Status
Network Printer Status Viewing the print status The status of a network printer can be viewed on the print server as well as the client. For job status to be displayed in the client’s Status Window, the print server’s Status Window must be running. -
Page 124: The Status Window Icon
The Status Window Icon If you minimize the Status Window, you can still see the printer status displayed as an icon on the taskbar. To open the Status Window, simply click on the taskbar button. Icons also appear in the Status Window. The table below shows the Status Window icon and the taskbar icon. -
Page 125: Closing The Status Window
Messages The CAPT gives you information about your print job and the printer itself. When a paper size is listed in the message area, such as “Change paper to Letter,”... - Page 126 Spoken message Printing complete Printing paused Printing resumed Printing started Printing stopped Chapter 3 Event Filename Last page finished CAP2DONE.WAV Pause button pressed CAP2PAUS.WAV Printing resumed CAP2RESM.WAV Printing started CAP2STRT.WAV Delete button pressed CAP2STOP.WAV Using the Canon Advanced Printing Technology...
- Page 127 Check print server Insufficient memory Cleaning Check toner cartridge Printer busy Port busy Printing failed Using the Canon Advanced Printing Technology Event Out of paper Paper is jammed Printer cover is open Printer not responding Printer error Wrong sized paper is...
-
Page 128: Chapter 4 Troubleshooting
Many printing problems are related to how your software interacts with the printer. If you can print a self test, but the printer does not print other jobs, or your printed output is not what you expected, the problem is with your computer, software, or cables. - Page 129 If you have a problem with your printer and you cannot resolve it by referring to the information in this chapter, contact a Canon authorized service representative. Before contacting Canon, make sure you have the following information: ❏ Product name (LASER SHOT LBP-1210) ❏...
-
Page 130: Paper Jams
Paper Jams Locating Paper Jams Paper jams can occur in several locations along the print path. Refer to the diagram below to help you locate paper jams. Locate the area where the paper jam has occurred and follow the instructions for removing jams in that area. -
Page 131: Before Removing Paper Jams Inside The Printer
Remove watches and any bracelets or rings when touching the inside of the printer. These items might be damaged if they come into contact with parts inside the printer. If there is the stack of paper left in the cassette or on the face-down delivery tray, remove it first, then open the front cover with both... - Page 132 CAUTION: The face-up delivery area (shaded part) becomes hot when the printer is in use. Be careful not to touch this area, because personal injury might result.
- Page 133 Be careful when removing the paper; toner on the paper might get onto your hands or clothing. If this happens, wash it off immediately with cold running water. To avoid possible damage to the printer, do not touch the pins near the left end of the transfer roller. Troubleshooting...
-
Page 134: Removing Paper Jams
Please use both hands to remove jammed paper from the printer. Paper Jam in the Paper Feed Area If only a small portion of the paper has moved into the printer Use both hands to pull the jammed paper straight up and out from the cassette, slowly and carefully. - Page 135 If the paper has moved completely into the printer Follow the steps described in “Before Removing Paper Jams Inside the Printer” on page 114 to remove the toner cartridge, then follow the procedure below. Use both hands to carefully move the paper inward, then gently pull it out.
- Page 136 ❏ Gently pull out the jammed paper. Do not pull the jammed paper upward; the toner on the paper will stain the printer and cause a permanent reduction in print quality. Replace the cartridge and close the front cover. Chapter 4...
-
Page 137: Paper Jams Near The Imaging Area
Please use both hands to remove jammed paper from the printer. Follow the steps described in “Before Removing Paper Jams Inside the Printer” on page 114 to remove the toner cartridge, then follow the procedure below. Roll the paper inwards from the rear edge, so that the printed surface is on the inside of the roll and the paper is pulled back out from the imaging area. - Page 138 Gently pull the jammed paper between the face-down delivery rollers until the leading edge emerges from the printer. Carefully pull the jammed paper through the rollers and out of the printer. ❏ Be sure to place the paper release levers back to their original position.
- Page 139 Paper Jam in the Face-up Delivery Area Please use both hands to remove jammed paper from the printer. Open the delivery selection cover and push down the green paper release levers on the right and left. While holding the printer steady, carefully pull the jammed paper straight out.
- Page 140 ❏ After you replace the cartridge and close the front cover, the printer should be ready for printing. If the printer returns to the ready state for printing, troubleshooting has been successful. If the printer does not return to the ready state for printing, confirm that the paper release levers are placed back to their original position, and check to see that paper is not left in the printer.
-
Page 141: Print Quality Problems
Cartridge” in the Getting Started Guide. When purchasing a replacement cartridge, make sure you get the right one for this printer: a Canon EP-25 cartridge. The EP-25 cartridge typically lasts for about 2,500 prints of Letter- or A4-size paper, assuming the printer is used for standard word processing documents printed at the default density, and at 4% dot ratio (equivalent to print coverage of approximately 5%). -
Page 142: Printout Has Black Specks
Increase the printing density. If this has no effect, replace the EP-25 cartridge. Printout Too Dark If there is a strong light source near the printer, the prints may be too dark. Corrective action Check whether the density adjustment is correct. If not, adjust the density. -
Page 143: Printer Problems
Check the software you are using; it might have sent a stop code or similar command to the printer. Make sure the correct printer is selected in the Printers folder. Make sure the power cord is securely plugged in to both the printer and the AC outlet. - Page 144 Printout is wrong There might be a communications problem between the printer and your computer. The wrong printer is selected in the Printers folder. You might need to modify your BIOS setup.
- Page 145 Your system setup might system be a problem. Computer Your computer is sending indicates a device data to the printer but the time-out printer is not responding. The printer might be off, offline, or not connected to the computer. Troubleshooting...
-
Page 146: Capt Problems
CAPT and install it again. For more information, see “Uninstalling the CAPT” on page 136. You must be using Adobe Type Manager (ATM) version 2.51 or later. Connect the printer driver to a different port from the LBP-1210 printer driver. Troubleshooting... - Page 147 Problem Cause CD-ROM Menu Autorun CD- does not appear ROM Menu automatically checkbox is unchecked in the CD-ROM menu. The Auto insert notification checkbox is unchecked. “File not found on The program is CD-ROM” error loaded from the when starting the hard disk drive.
- Page 148 [Device Manager] button. 4) Delete ONLY the following USB class drivers under [Universal Serial Bus controller]. For Windows 98, select [Canon LASER SHOT LBP-1210]. For Windows Me, select [Canon CAPT USB Printer], and click [Remove] button. For Windows 2000/XP,...
-
Page 149: Capt Messages
The printer is out of paper. Add paper. When you add paper, the Status Window displays “Printer Ready” automatically. The paper in the printer and the specified paper are not the same size. You have two choices: ❏ Replace the paper so that it matches the specified paper size. - Page 150 2 Open the front cover and remove the EP-25 cartridge. 3 Reinsert the cartridge properly. Use both hands to close 4 Plug in and turn on your printer. 5 If the error persists, contact your Canon authorized Chapter 4 300 dpi.
-
Page 151: Using The Trouble Shooter
The Trouble Shooter does not detect problems related to hardware, such as printer cable problems, parallel port failure, or ECP setting errors. To start the Trouble Shooter, select the Canon LASER SHOT LBP- 1210 Trouble Shooter icon in the Canon LASER SHOT LBP-1210 group. - Page 152 If the Trouble Shooter is used on a network printer client, it performs network-related checks. Windows NT 4.0/2000/XP Trouble Shooter checks whether Spooler service has started and if not, displays a dialog box and does not run. When the Trouble Shooter is done checking your files, it displays a dialog box similar to the one below.
-
Page 153: Uninstalling The Capt
Follow the on-screen instructions. Windows 95/98/Me: Click OK and your system restarts. Windows NT 4.0/2000/XP: Click OK (recommended) to restart your system. In Windows NT 4.0/2000/XP, you cannot uninstall the Canon Advanced Printing Technology unless you have administrative privileges. Troubleshooting Chapter 4... -
Page 154: Chapter 5 Maintenance
❏ After unplugging it from the AC outlet, wait until the printer has cooled off completely before covering it with a dust cover. ❏ If you are not going to use the printer for an extended period of time, unplug it from the AC outlet. -
Page 155: Cleaning The Printer
Cleaning the Printer Clean the printer cabinet regularly to keep the printer in its best condition. To clean the printer, use a soft cloth slightly moistened with water or a mild detergent solution. Avoid using any other type of solvents, such as alcohol or benzine, which might damage the surface. -
Page 156: Storage Guidelines
Chapter 5 • Store the cartridge in its protective bag. Do not open the bag until you are ready to install the cartridge in the printer. • Do not store the cartridge where it will be exposed to direct sunlight. -
Page 157: Handling Guidelines
• When transporting the printer, remove the cartridge from the printer. (Put the cartridge in its original protective bag or wrap it with thick cloth to prevent exposure to light.) Correct Handling... -
Page 158: Replacing The Ep-25 Cartridge
Replacing the EP-25 Cartridge The EP-25 cartridge typically lasts for about 2,500 prints of Letter or A4- size paper. This assumes that the printer is used for standard word processing documents printed at the default density, and at 4% dot ratio (equivalent to print coverage of approximately 5%). - Page 159 CAUTION: The shaded part of the face-up delivery area is hot when the printer is in use. Be careful not to touch this area, because personal injury might result. Remove the EP-25 cartridge. Insert a new cartridge. For details, see “Installing the EP-25 Cartridge”...
-
Page 160: Cleaning
Place letter or A4-size paper in the cassette. Click on the printer icon in the taskbar to open the Status Window. From the Options menu, click Cleaning. A cleaning sheet starts printing. When printing starts, the Status Window message area dis- plays “Cleaning”... - Page 161 Maintenance Chapter 5...
-
Page 162: Appendix A Printer Specifications
Face-up: 1 sheet (Remove printed sheets one at a time since there is no delivery tray.) Less than 8 seconds at 20˚ C (68˚ F) (Number of seconds from when the printer is plugged into an AC outlet until it is ready for printing.) Printer Specifications... - Page 163 Background noise level Declared Noise Emissions in accordance with ISO 9296 (Printer plugged into an AC outlet) Temperature: 7.5˚ C to 35˚ C (45.5˚ F to 95˚ F) Humidity: 5 to 90% RH (no condensation) (Printer unplugged from the AC outlet) Temperature: 0˚...
-
Page 164: Appendix B Network Adapter: Axis 1610
The network adapter for the LBP-1210 printer can also connect to other Canon Advanced Printing Technology printer models. It cannot be connected to printers that do not have the Canon Advanced Printing Technology. Secure the network adapter by snapping the two wire clips (located on the printer) into the network adapter. -
Page 165: Connecting Directly From Clients
You must install the Print Monitor for the network adapter on each client. When using the Add Printer Wizard, you must connect directly to the network. Since the printer port is treated as a local port, choose “AXIS CAPT Port” in the port settings dialog box. Network Adapter: AXIS 1610... -
Page 166: Connecting Through A Print Server
The Print Monitor for the network adapter needs to be installed only on the printer server. It is not necessary to install it on each of the clients. You can install the printer from the server unless you are using a Windows 95/98/Me server and a Windows NT 4.0/2000/XP client. -
Page 167: Specifications
Bi-directional parallel (ECP) External AC adapter 2 MB Flash EPROM, 1 MB Safe flash Some Canon MIBs, some printer MIBs, some TCP/IP MIBs, some host MIBs NetSpot, NetPilot Canon Advanced Printing Technology printers only Installer, Print Monitor, NetPilot Appendix B... -
Page 168: Glossary
Bi-directional communications Allows information to pass back and forth between the Canon Advanced Printing Technology software and a local printer. Bold A characteristic of a printed character that indicates wider, darker representation. - Page 169 Canon Advanced Printing Technology (CAPT) Software that extends the power of the Windows operating system to a printer to speed up and simplify printing. The Canon Advanced Printing Technology provides more printing control and bi-directional communication between the printer and a computer running a Windows application.
- Page 170 The printer driver supplies Windows with information such as descriptions of the fonts and features of the installed printer. When you print with the Canon Advanced Printing Technology, you are using its printer driver. Abbreviation for Extended Capabilities Port. A bi-directional communication mode that enables high-speed data transmission to printers and other devices.
- Page 171 Interface port The port through which the printer communicates with the computer. The LBP-1210 have a USB port and a Centronics, 8-bit, parallel interface port, located on the back of the printer. See also Parallel or USB interface. Glossary...
- Page 172 Landscape The printing of text and graphics along the length of the page. Local printer A printer that is directly connected to your computer, using a parallel cable. Megabyte (MB) A unit of measurement, representing one million bytes, used to describe printer or computer memory size.
-
Page 173: Network Adapter
(such as printers) and exchange information. Network Adapter An optional device that allows you to connect your printer directly to a network. See also Peer-to-peer connection. Orientation The printing of text either along the width (portrait) or length (landscape) of the page. - Page 174 Print job A document that a Windows application has processed and sent to the Spooler to be added to the print queue or directly to the printer. Print Monitor The Network Adapter Print Monitor is software that prints through the network adapter.
-
Page 175: Printer Driver
A program that controls how the computer and printer interact. The printer driver supplies Windows with information such as descriptions of fonts and features of the installed printer. When you print with the Canon Advanced Printing Technology, you are using its printer driver. - Page 176 Scaling Enlarging or reducing the printed image. SCoA ScoA is an original Canon print data compressor and forwarding technology, which utilizes the full potential of your computer to make CAPT high speed printing a reality. Further, as compression and forwarding are efficient, only a small amount of memory is used, and regardless of how much data you send, you do not need to increase RAM.
-
Page 177: Status Window
Settings which determine when the Printer Status Window opens and whether sounds play with messages. Status Window A window that the Canon Advanced Printing Technology uses to display messages about the current print job, as well as to graphically show the print job’s progress from computer to printer. - Page 178 Maximize and Minimize buttons. Toner A black, resin-coated powder contained in the EP-25 cartridge. The printer applies the toner to the surface of the photosensitive drum inside the printer via an electrophotographic mechanism. Toner saver Because only alternate data bits are printed, toner consumption is reduced.
-
Page 179: Virtual Memory
Universal Serial Bus (USB) interface These are new serial interface standards. This bus automatically recognizes connections (Plug and Play) to allow plugging and unplugging connectors with the power still turned on to the PC or peripheral equipment. Virtual Memory Space on the hard disk that Windows uses for temporary data storage as if it were actually random access memory (RAM). -
Page 180: Index
Canon Advanced Printing Technology (CAPT) Canon LASER SHOT LBP-1210 Help 4–5 Parts Status Window Trouble Shooter Uninstallation Canon LASER SHOT LBP-1210 group using 4, 145 Cassette 18–22 loading envelopes 15–17 loading paper CD-ROM Menu, doesn’t open 126, 152 Centronics interface Change paper to... - Page 181 Halftoning Help menu, using Humidity Icons, Status Window Image too dark too light Index cards Installing, Canon Advanced Printing Technology Insufficient Memory Interface Interface cable Interface port Job menu, using Labels loading manually Landscape 5, 9, 12, 153 151–162...
- Page 182 8, 15, 145 Letter paper Loading 19–22 envelopes 15–17 paper 26–57, 155 Local printer 137–144 Maintaining, printer Manual feed continuous 4, 12, 23 slot Megabyte Memory, Insufficient Menu bar Status Window 97–101 using 108–110, 132–133 Messages alert 109–110 with sound...
- Page 183 Profile Progress bar Progress bar, status window Protocols Quality tab Windows 95/98/Me Windows NT 4.0/2000/XP Queue Random Access Memory Removing, Canon Advanced Printing Technology Replacing, toner cartridge Resolution Resume job button 129, 158 66–78 79–93 boxes 65–93 Technology 113–123...
- Page 184 5, 116, 161 Transfer roller 9, 145 Transparencies Trouble Shooter Troubleshooting clearing paper jams print quality problems printer problems removing Canon Advanced Printing Technology (Uninstallation) USB class driver is not properly installed 64, 134–135, 161 111–136 113–123 124–125 126–128...
- Page 185 Trouble Shooter USB Port (USB Cable) Vertical white streaks Waiting job tab Warm-up time Warning icon WebNetSpot 8, 145, 162 Weight, paper Weight, printer Windows 95/98/Me details tab finishing tab general tab page setup tab 66–78 printer properties quality tab sharing tab Windows NT 4.0/2000/XP...
- Page 186 CANON INC. 30-2, Shimomaruko 3-chome, Ohta-ku, Tokyo 146-8501, Japan CANON U.S.A., INC. One Canon Plaza, Lake Success, NY 11042, U.S.A. CANON CANADA INC. 6390 Dixie Road Mississauga, Ontario L5T 1P7, Canada CANON EUROPA N.V. Bovenkerkerweg 59-61 P.O. Box 2262, 1180 EG Amstelveen, The Netherlands CANON COMMUNICATION &...